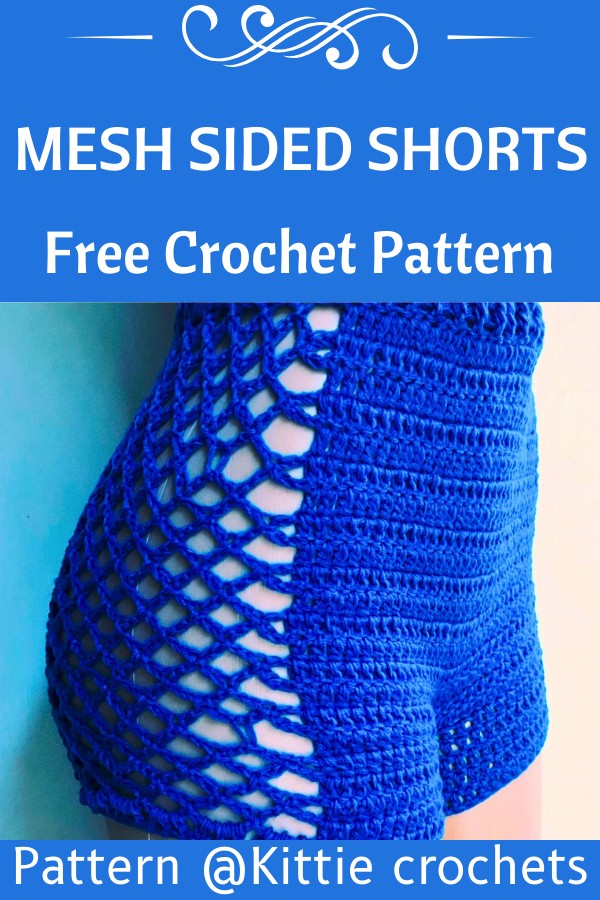
These stylish crochet shorts with mesh side panels are lightweight, breezy, and perfect for summer or lounge wear.

Crochet Mesh Sided Shorts are a fun and stylish item to make. These shorts with airy mesh sides are perfect for relaxing on warm days, hanging out at home, or showing off your crochet skills with a unique accessory. Their lightweight and breathable design makes them not only functional but a cool, creative addition to your wardrobe.
Mesh Sided Shorts Crochet Pattern
With a simple crochet technique, you can design your own fitted waistband, neat mesh sides, and comfortable leg holes. You’ll feel proud creating a crochet mesh sided shorts that’s made to suit your unique measurements, ensuring the perfect fit. You don’t need advanced crochet skills, just patience and love for crocheting something beautiful with your hands.
Credit Kittie crochets
Key Features And Construction Overview:
- Custom Fit Waistband: The pattern begins with a stretchy ribbed waistband made using front post and back post stitches for structure.
- Seamless Bottom-Up Construction: The shorts are worked in the round to shape the body.
- Mesh Side Panels: Delicate mesh stitching on the sides adds breathable, eye-catching detail.
- Defined Leg Holes: Shaped for comfort and durability, the leg holes are finished with rows of solid double crochet.
- Adjustable Drawstring: A simple chain is woven into the waistband for a custom, adjustable fit.
How These Mesh-Sided Shorts Are Made:
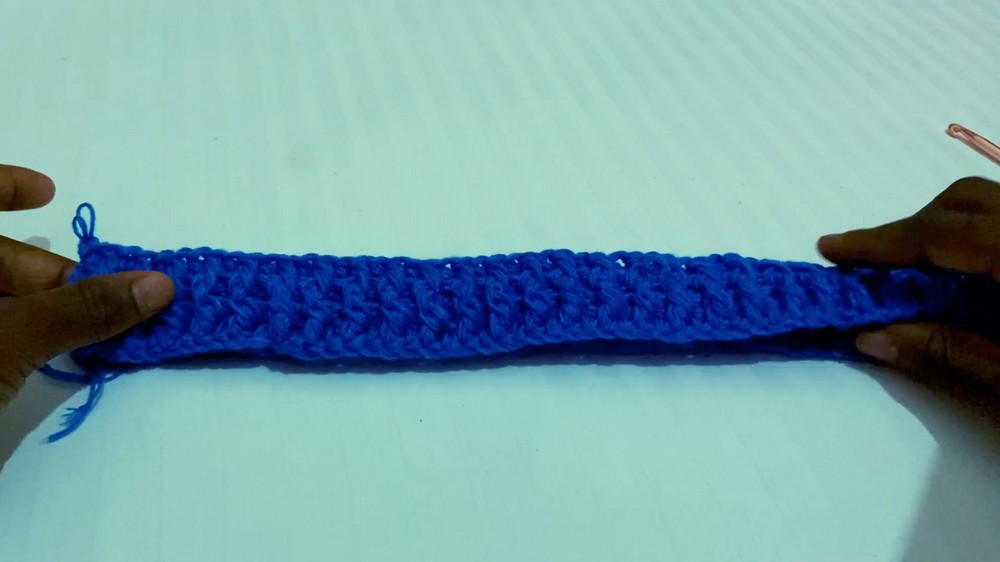
The shorts begin with a waistband that is not only functional but also adds a polished and structured finish to the pattern. Using the front post and back post double crochet technique, the ribbed texture gives the waistband a snug yet stretchy fit. Start by chaining to match the hip measurement of the intended wearer, ensuring that the foundation chain can stretch comfortably around the hips.
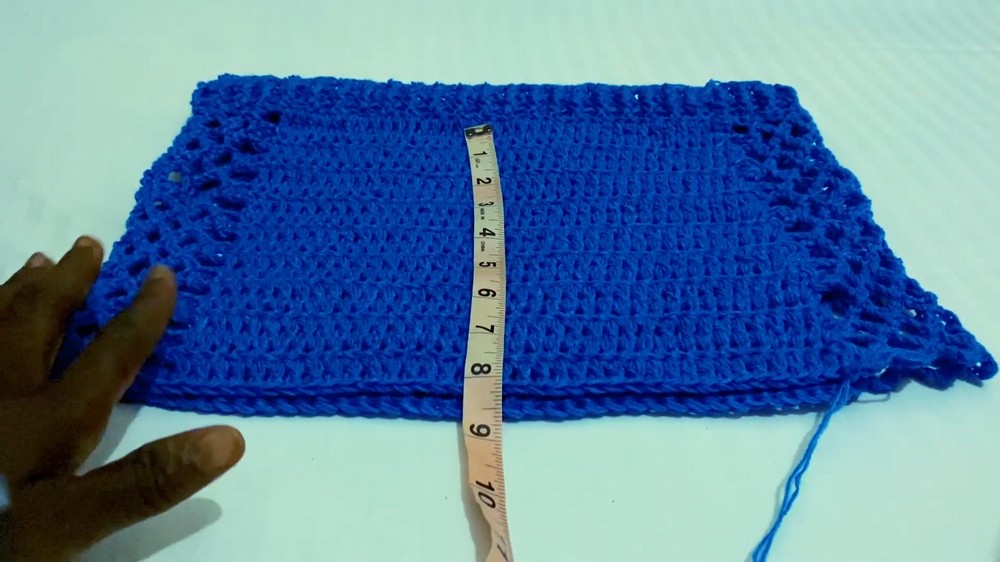
Once the waistband is complete, you’ll continue crocheting the body of the shorts in joined rounds. The main portion of the shorts is worked in double crochet, keeping the stitching simple yet elegant. This ensures the shorts hold their shape while maintaining a soft, flexible feel. To accommodate the mesh paneling on the sides, you’ll mark areas of about 4 inches on either side of the waistband, defining where the openness of the mesh will begin.
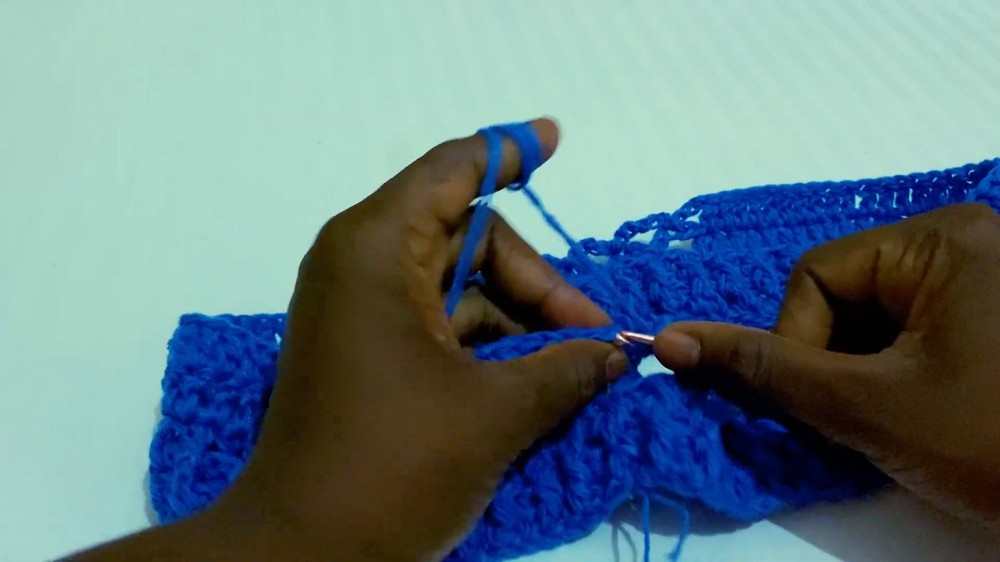
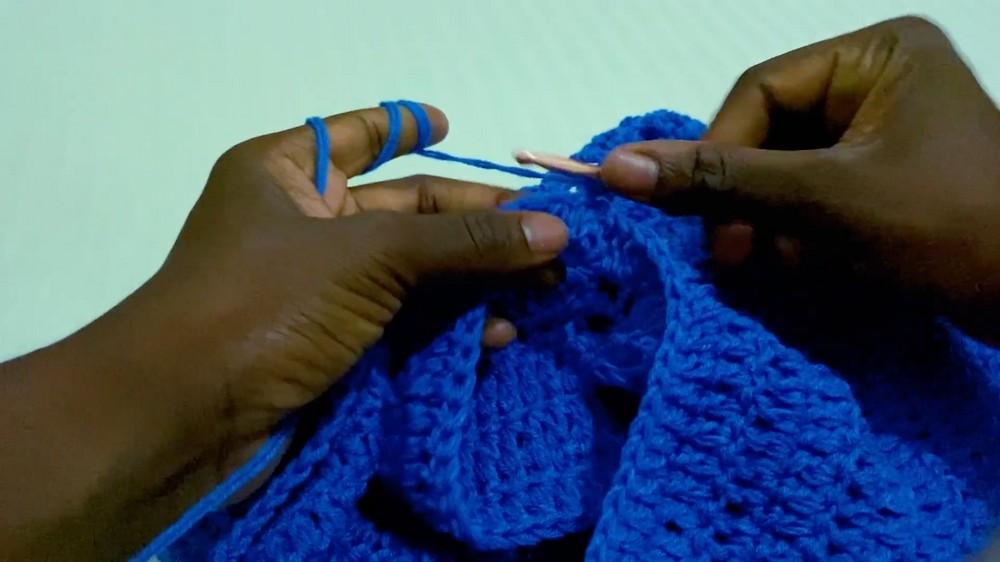
The mesh panels are created using chains and slip stitches in an alternating pattern, building a lovely lattice texture. Each row alternates between shorter chains (3 chains) and longer connections (5 chains), ensuring the mesh is evenly spaced and aligned. The mesh sections on each side are symmetrical, giving the shorts a modern, slightly sporty look.
Leg holes are shaped by splitting the rounds into two separate spaces and joining with a short chain. Each leg hole is then worked individually, with the edges defined by rows of solid double crochet to give the garment durability and clean lines. The final row of the leg holes also incorporates the mesh into the design, ensuring a cohesive overall look.
To finish, a simple long chain is crocheted to act as a drawstring. This chain is woven through the ribbed waistband, creating an adjustable tie that keeps the shorts securely fastened and offers a flattering fit for different body types.

Video Tutorial
Materials
To make these crochet mesh-sided shorts, you’ll need the following:
- Yarn: 100% acrylic yarn (recommended: Seagull in blue). Choose a color of your preference.
- Hook size: 5.5 mm crochet hook
- Other tools:
- Measuring tape
- Pair of scissors
- Stitch markers (or a small piece of yarn in a contrasting color)
Pattern Instructions
Step 1: Foundation (The Waistband)
- Begin by using your measuring tape to measure the hips of the person for whom the shorts are intended. For this tutorial, the measurement is 40 inches.
- Make a chain long enough to stretch to your hip measurement. For a 40-inch measurement, keep chaining until the chain reaches the desired length.
- Join the chain into a circle with a slip stitch, ensuring the chain does not twist.
- Chain 1 and turn your work.
Step 2: Create the Ribbed Waistband
- To form the waistband, alternate Front Post Double Crochet (fpdc) and Back Post Double Crochet (bpdc) stitches.
- For the first row, alternate between fpdc and bpdc in each stitch around.
- Join at the end of the row with a slip stitch, then chain 1 and turn.
- For the second row (and subsequent rows), continue placing fpdc where there was a fpdc in the previous row, and bpdc where there was a bpdc.
- Repeat the ribbing pattern for several rows, creating the desired height for the waistband.
Step 3: Build the Body of the Shorts
- Fold the waistband in half to locate the sides of the shorts. Use a stitch marker or contrasting yarn to mark 4 inches from the center of each side. These will be your mesh sections.
- Work double crochets (dc) around in every stitch, skipping the marked mesh areas.Step 4: Create the Mesh Sides
- Start at a marked point. In the first stitch, place a double crochet.
- Chain 5 and skip 2 stitches. Slip stitch into the third stitch.
- Repeat the following pattern:
- Chain 5, skip 2 stitches, slip stitch into the third stitch.
- Continue the mesh section until you reach the other marked point. Finish with a double crochet.
Step 5: Build the Mesh Rows
- Turn your work and chain 3 (for rows starting with chain 5 in the previous row, begin with chain 3 instead).
- Continue placing mesh rows, alternating between starting with chain 3 and chain 5, as follows:
- Chain 3 rows: Begin and end with a chain 3 at the mesh section.
- Chain 5 rows: Begin and end with a chain 5 at the mesh section.
- Work until the mesh section and body of the shorts measures 8 inches.

Step 6: Divide for the Legs
- Locate the center bottom of the shorts. Count the total number of double crochets in the row and divide by 2 to determine the middle (e.g., 37 stitches = 18.5 for each leg).
- For the left leg:
- Attach yarn to the center bottom of the shorts and chain 10 (small/medium size) or 15 (large size).
- Join to the other side of the leg opening and slip stitch to join.
- Work in the round, placing double crochet stitches around.
- Crochet mesh rows as done for the body, alternating chain 3 and chain 5 rows.
- For the final row, fill the mesh with double crochets (3 dc in chain-5 spaces, 1 dc in chain-3 spaces).
- Repeat for the right leg.
Step 7: Add the Waistband Tie
- Create a long chain to use as a drawstring for the shorts.
- Weave the chain in and out of the top row of the waistband.
- Adjust the length as needed and tie knots to secure the ends.
Troubleshooting and Suggestions:
- Waistband Issues: If the waistband feels too tight or loose, reassess the foundation chain length. It should stretch comfortably to fit the hips without overextending.
- Mesh Sides: Maintain consistent tension when creating the mesh; loose or uneven tension can distort the pattern and cause gaps to appear uneven.
- If you’re having trouble keeping the mesh uniform, take care to always place your slip stitches into the correct chain link from the previous row.
- Leg Hole Balance: Make sure the double crochets on one leg match those on the other to ensure symmetry.
Creative Modifications:
- Add playful pops of color by using a gradient or ombre yarn, or alternate colors for the mesh and solid sections.
- Embellish the edges of the leg holes with a scalloped or picot border for a fun, feminine touch.
- Use cotton yarn for a breathable, summer-ready garment, or acrylic for a stretchy, more sporty fit.
- Extend the length of the shorts for a cycling-style fit, or make them shorter for chic loungewear.