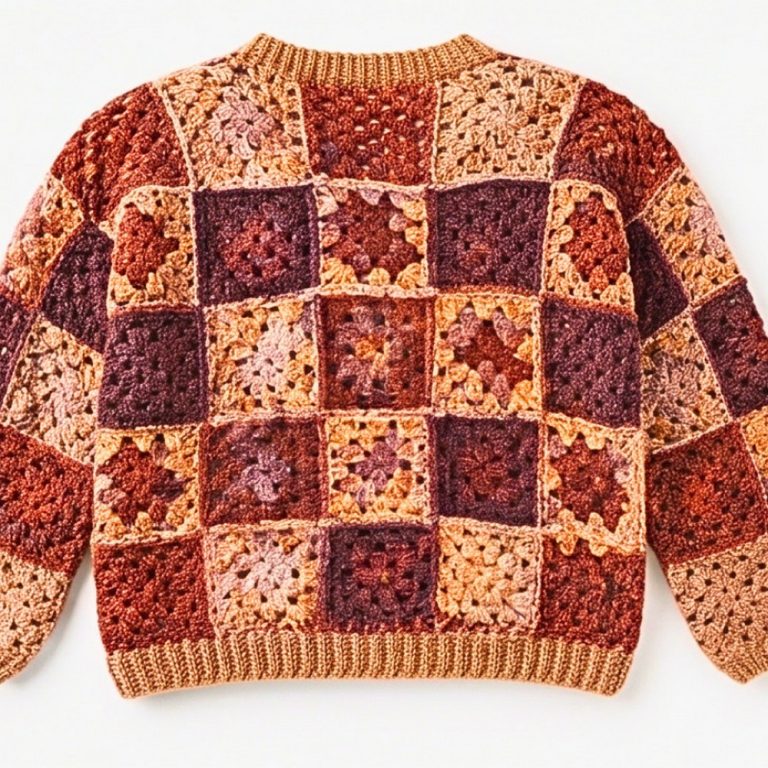
Crochet Granny Square Tote Bag with Ruffled Edge and Bow
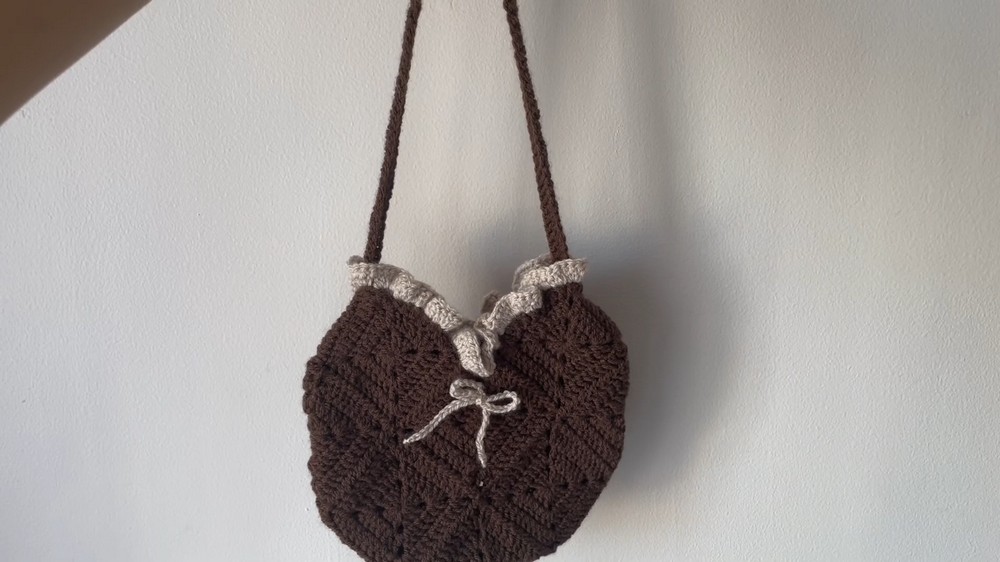
Looking for a small crochet tote with a playful finish? Thirteen solid granny squares form the bag, while cream ruffles and a tiny bow add a soft decorative touch.
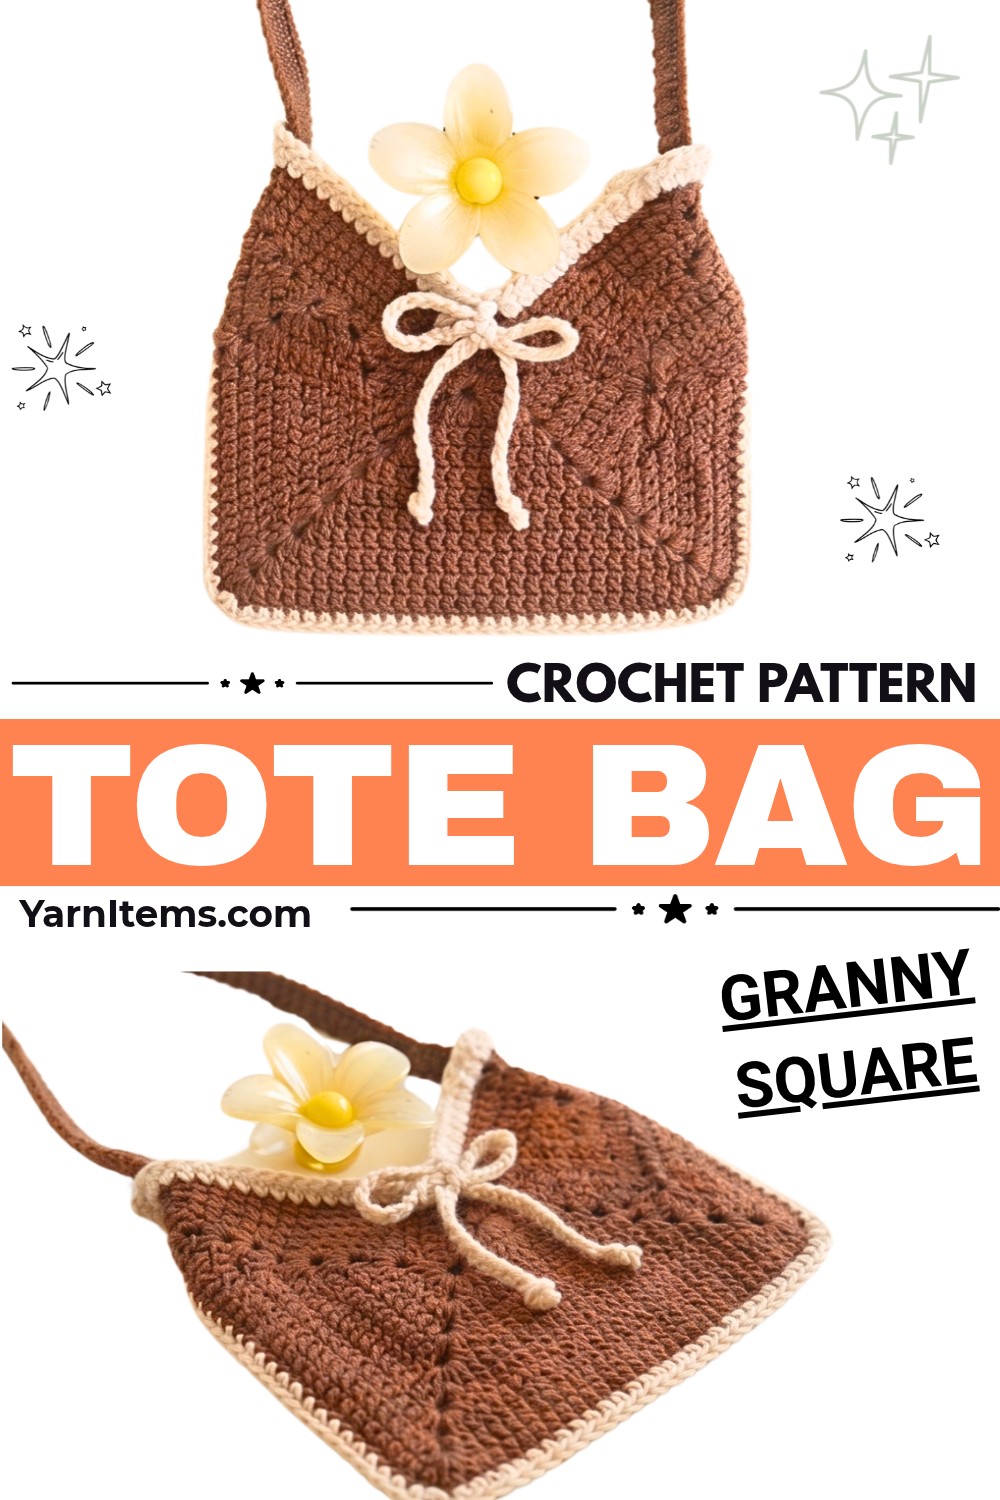
Rich brown granny squares give this little crochet tote a warm, everyday look, while the contrasting cream trim turns the top edge into a gathered ruffle. Its compact size makes it handy for carrying a phone, keys, wallet, and other small essentials without feeling bulky.
The pattern uses just three rounds for each square, followed by a simple 70-chain double-crochet strap. The most important part comes during assembly: arrange all 13 squares in the correct diamond formation, sew the adjoining edges carefully, then fold the shape into the finished crochet bag.
Credit The Crochet noire
Materials & Tools Needed
- Yarn: Medium-weight yarn in brown for the granny squares and strap, plus white or cream for the ruffles and bow
- Crochet hook: 3.5 mm
- Tapestry needle: For joining the squares, sewing the strap, and weaving in ends
- Scissors
Finished Size & Customization
This pattern creates a small everyday tote for essentials like a phone, keys, and wallet.
The easiest adjustment is the shoulder strap. The supplied strap uses 70 chains, but you can make it longer or shorter by changing the starting chain count. Color is another simple way to personalize the bag: keep the classic brown-and-cream combination, choose a completely different palette, or make each of the 13 squares a different shade for a patchwork effect.
Pattern Abbreviations
US crochet terminology is used:
- MR = Magic Ring / Magic Circle
- ch = Chain
- st(s) = Stitch(es)
- sl st = Slip stitch
- sc = Single crochet
- dc = Double crochet
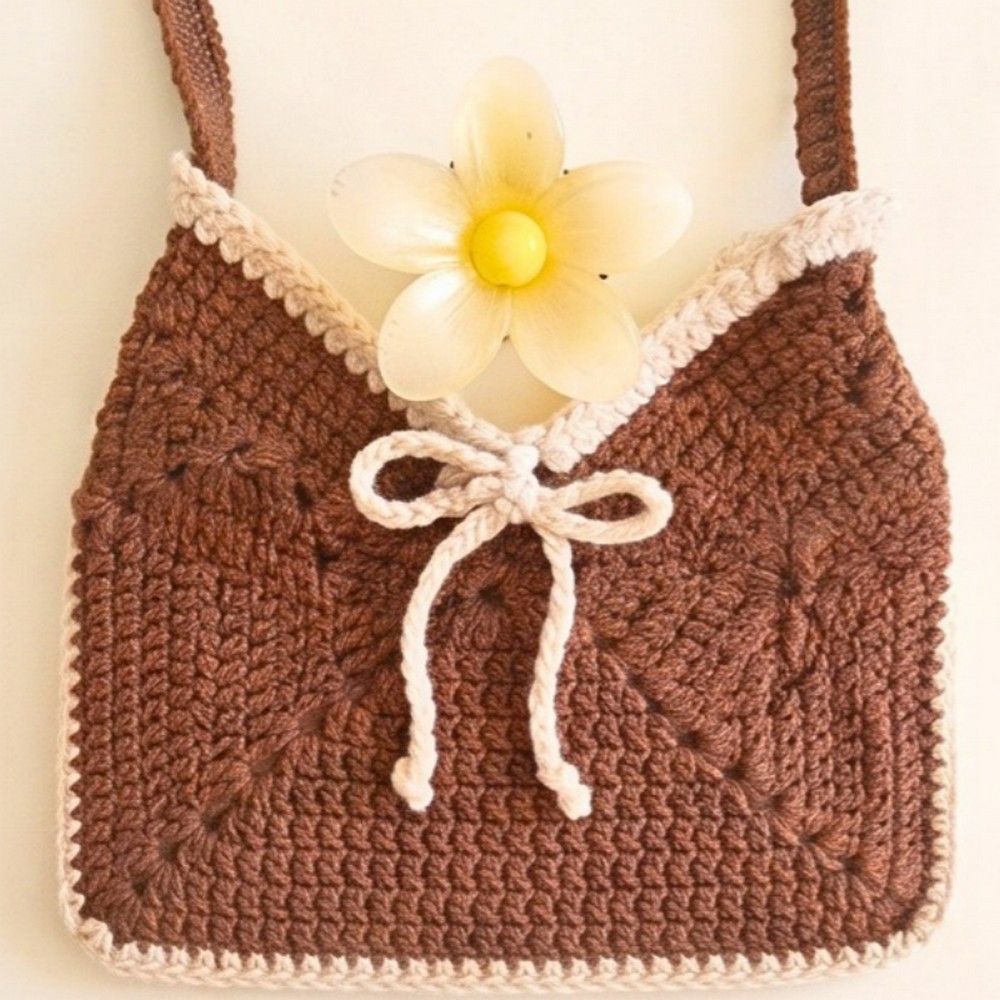
Make the 13 Granny Squares
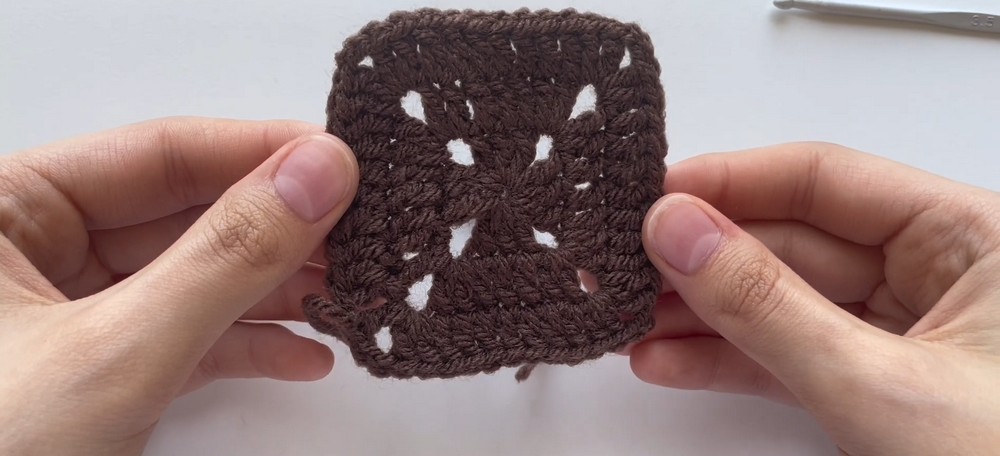
Make 13 identical granny squares in the main brown yarn. Each square is worked for three rounds.
Round 1
Create a magic circle, ch 2, 1 dc into the circle, ch 2, 3 dc into the circle, ch 2, 3 dc into the circle, ch 2, 3 dc into the circle, ch 2, 1 dc into the circle. Pull the starting tail firmly to close the center, then sl st into the 3rd ch from the beginning of the round and sl st into the adjacent ch-2 gap to position the yarn for Round 2.
The four ch-2 spaces establish the corners of the square. Notice that the first and last dc sit around the joining area; after the round is closed, moving into the adjacent ch-2 gap puts your hook in the correct position to begin building the corners evenly.
Round 2
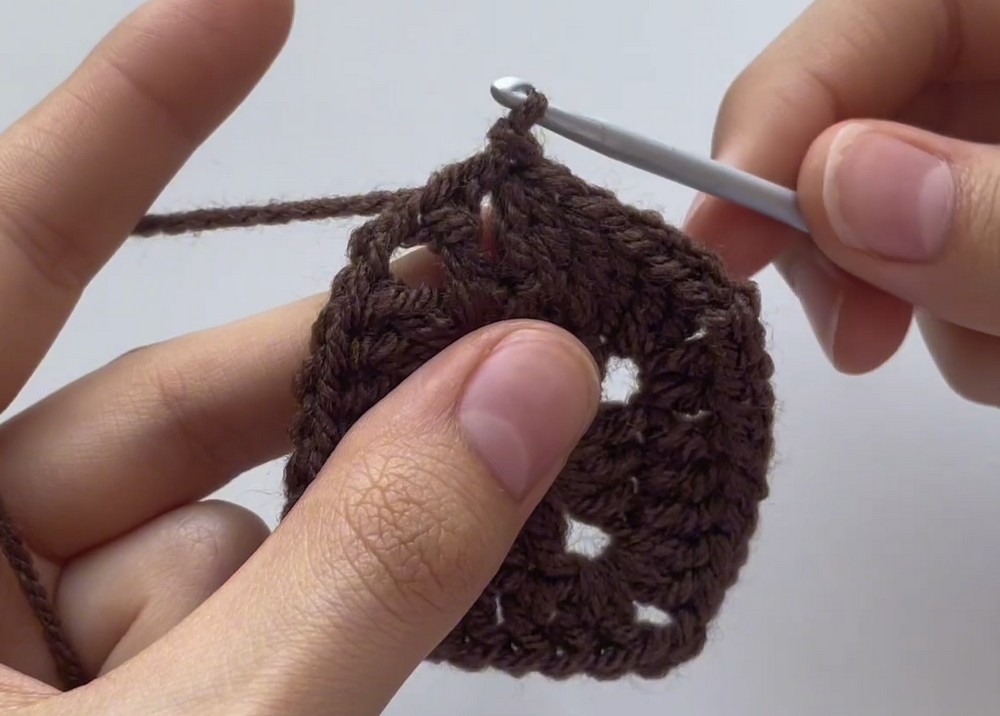
Ch 3, 1 dc in the same gap, ch 2, 2 dc in the same gap; 1 dc in each of the next 3 sts; [2 dc, ch 2, 2 dc] in the next ch-2 gap; 1 dc in each of the next 3 sts; [2 dc, ch 2, 2 dc] in the next ch-2 gap; 1 dc in each of the next 3 sts; [2 dc, ch 2, 2 dc] in the final ch-2 gap; 1 dc in each of the next 3 sts; sl st into the 3rd ch from the beginning, then sl st into the gap.
At the end of this round, the square should be noticeably larger, and its four corners should be easy to identify. The three dc along each side fill out the spaces between those corners.
Round 3
Ch 3, 1 dc in the same gap, ch 2, 2 dc in the same gap; 1 dc in each of the next 7 sts; [2 dc, ch 2, 2 dc] in the next corner gap; 1 dc in each of the next 7 sts; [2 dc, ch 2, 2 dc] in the next corner gap; 1 dc in each of the next 7 sts; [2 dc, ch 2, 2 dc] in the final corner gap; 1 dc in each of the next 7 sts; sl st into the 3rd ch from the beginning, then sl st into the gap.
Cut the yarn, fasten off, and weave in the ends.
Your completed square should have four defined corners and four equal-looking sides. Repeat Rounds 1–3 until you have exactly 13 granny squares.
Crochet the Flat Handle
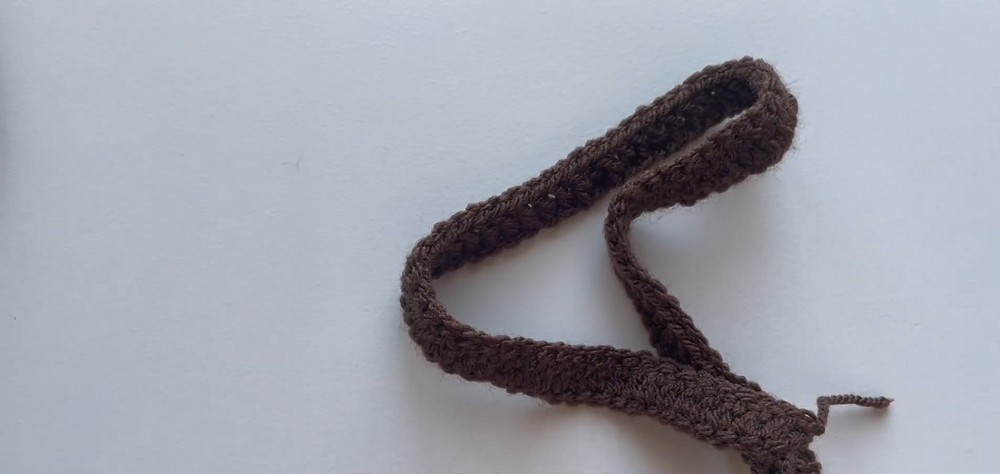
Using brown yarn, make a slip knot and ch 70, or adjust this number if you want a different strap length. Then ch 2 as the turning chain, 1 dc in the 2nd ch from the hook, and 1 dc in every chain across, giving you 70 dc in total.
Ch 1, cut the yarn leaving a long sewing tail, and fasten off.
Keep the strap flat rather than twisting it while you work. A flat strip will sit more naturally against the sides of the tote when you attach it.
Arrange the 13 Squares
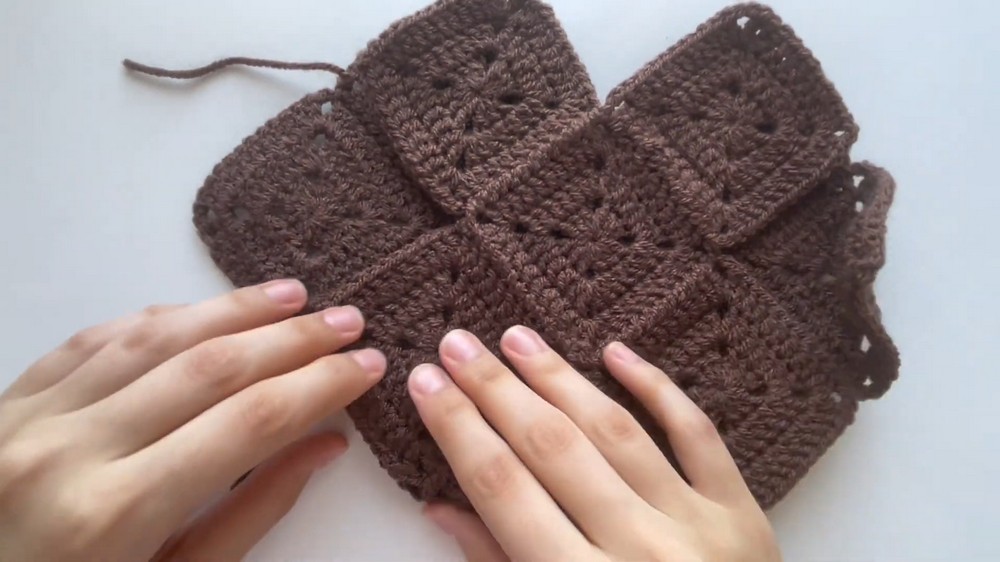
Before sewing anything, lay all 13 squares completely flat and arrange them into the required diamond/cross formation:
- Row 1: 1 square
- Row 2: 3 squares
- Row 3: 5 squares
- Row 4: 3 squares
- Row 5: 1 square
Take a moment to check the arrangement before picking up your needle. This layout is what creates the angled sides and pointed sections that will fold into the tote.
Sew the Bag Together
Thread your tapestry needle with brown yarn. Sew each square to the one directly beside it, following the layout above. Pass the needle under the outer loops of both adjoining squares to join their edges.
Continue until the complete flat arrangement is securely connected.
Now fold the joined shape so the bottom and side sections meet and begin forming the bag. Sew the remaining folded side edges together.
Do not sew the top zig-zag edges closed. Those edges form the open top of the tote and need to remain free.
Once the seams are finished, turn the bag into its natural orientation and gently straighten the squares so the sides sit evenly.
Attach the Handle
Turn the bag so one of its sharp side points is facing you. Find the stitch directly in the middle of the two intersecting granny squares at that side point.
Sew one end of the flat brown handle securely into this point. Carry the strap over the bag without twisting it, then attach the opposite end to the matching point on the other side.
Sew through the end of the strap and the underlying stitches several times so the handle is held firmly. Check that both attachment points sit at the same height before finishing the yarn.
Add the Cream Ruffled Edge
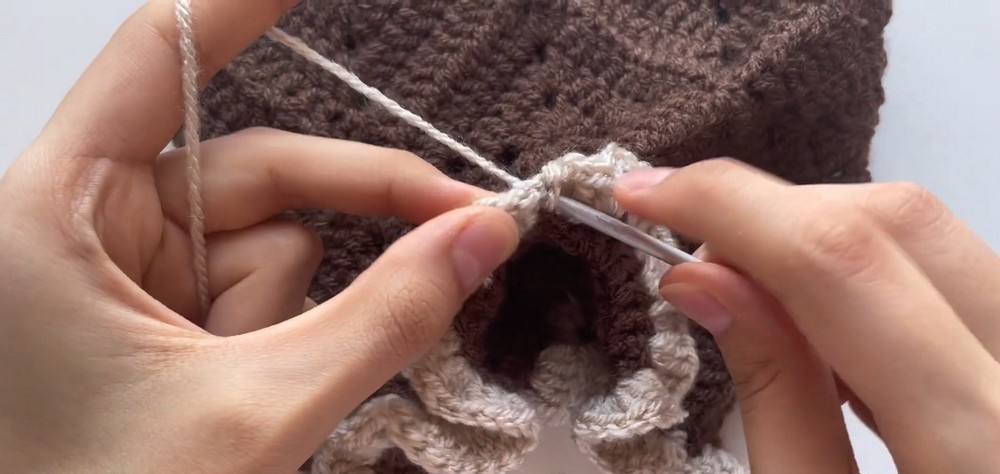
The ruffle is worked directly around the open top of the bag using the contrast yarn.
Create a slip knot and attach the cream yarn with a sl st into the center V-shaped gap at the front opening. Work 1 sc into the bag to secure the yarn, ch 3, then 4 dc into that same stitch.
Continue around the entire opening by working 4 dc into every stitch. Because four stitches are being placed into each individual stitch, the fabric naturally gathers and waves into a dense ruffle.
When you return to the starting point, work the final 4 dc, then sl st into the top of the initial ch 3, fasten off, and weave in the ends.
Keep checking that you are working into every stitch around the opening. Missing a stitch can make one section of the ruffle look noticeably less full than the rest.
Make and Attach the Decorative Bow
Using the cream yarn, ch 20, then fasten off and trim the yarn.
Tie this short chain into a small bow, adjusting the loops until they look balanced. Sew or tie the bow to the front center V-shaped dip, directly below the ruffled edge.
Positioning it beneath the center of the ruffle gives the front of the tote a clear focal point without interfering with the opening.
A Simple Fit Check
Open the top of the tote and make sure the ruffle remains loose enough to let you reach inside comfortably. Then check that the handle lies flat and that both ends are attached at matching side points.
The finished bag should retain the angular character of the granny-square layout while the cream ruffle softens the top edge and the small bow completes the front.