Handmade Crochet Pet Collar with Scalloped Edge
This cute crochet pet collar is a quick and beginner-friendly project, perfect for adding a touch of handmade charm to your furry friend’s everyday look while keeping them comfortable.

The crochet pet collar with a scalloped edge is a lovely handmade accessory for your furry friends. It’s designed to be cute, stylish, and functional, adding a unique touch to your pet’s everyday look. With its delicate, decorative scalloped edge, this crochet collar adds extra charm to pets of all sizes. Great for walks, playtime, or special pictures, this collar is both adorable and practical.
Why It’s Special?
This collar stands out with its scalloped edge, making it more than just a simple pet collar; it’s a fun accessory. The design is easy to adapt for different pets, and the look can complement any furry companion’s personality. It’s soft and lightweight design on your pet’s neck for comfortable wear. This crochet pet collar is an effortless and unique idea for pet lovers.
Credit Zhote Crochet
Key Features and Construction:
This cute crochet pet collar is a simple, comfy band your furry friend can wear every day.
- Worked flat in rows to create a long, slim band, then fastened around your pet’s neck
- Uses basic stitches (chain, single crochet) for a sturdy but flexible fabric
- Simple shaping by working to your pet’s neck measurement for a custom fit
- Finished with an easy button closure so the collar can be taken on and off safely
- Optional embellishments like a bow, flower, or charm to personalize the look
The Collar -Making Process:
The collar begins with a basic foundation chain that sets the length of the band. You’ll measure your pet’s neck and add a little extra for ease and overlap, then chain to that length. From there, you work back along the chain using simple stitches—usually single crochet—to build a neat, dense strip of fabric that’s soft yet strong enough to hold its shape. Because you’re working flat in straight rows, it’s very beginner-friendly and easy to adjust as you go.

Once the first row is established, you continue working row by row in the same stitch pattern. This creates an even texture that feels smooth against your pet’s fur and doesn’t have any bulky ridges. The repetitive motion makes the collar quick to whip up, and you can stop at any point once the band reaches the width you like—slim and dainty, or slightly wider for a more “statement” look. Turning chains at the start of each row keeps the edges clean and straight.
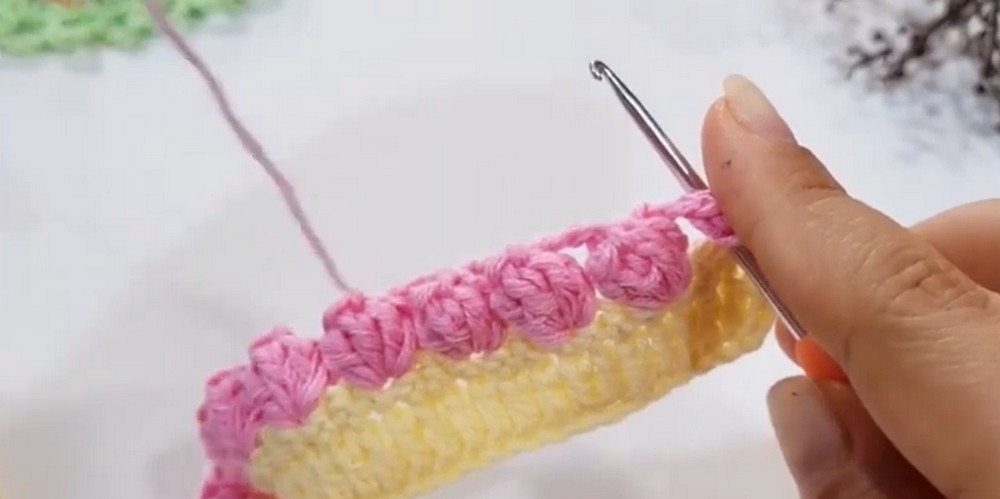
When the band is the right size, you’ll shape one end to accommodate the closure. Most versions use a built‑in button loop created simply by chaining a small loop and then securing it back into the collar end. The opposite end will have a flat edge where you sew on a button. This kind of closure is both decorative and practical, avoiding metal hardware that might be too heavy for very small pets.

The fun part comes with embellishments. The tutorial-style collar often includes an optional bow or flower that you can crochet separately and stitch onto the band. This might be a tiny layered flower made in the round or a simple bow created from a rectangle cinched in the center. You can also add a small ring or loop if you’d like to attach a lightweight name tag or charm (avoiding anything too heavy or dangling for the pet’s comfort and safety).

Video Tutorial
Materials:
- Yarn (soft, pet-friendly)
- Crochet Hook (size according to yarn)
- Scissors
- Measuring Tape
- Yarn Needle
- D-ring
- Clasp
Detailed Step-by-Step Instructions:
- Measure Your Pet’s Neck:
- Use the measuring tape to get the circumference of your pet’s neck. Add an extra inch for comfort.
- Creating the Foundation Chain:
- Make a slip knot and chain stitches until the chain is the desired length (neck measurement plus an inch).
- First Row:
- Starting in the second chain from the hook, create a single crochet in each chain across. Chain 1 and turn your work.
- Second Row:
- Make a single crochet in the first stitch, then half double crochet in the next stitch, followed by double crochet in the subsequent stitch. Repeat this pattern until the end of the row. Chain 1 and turn.
- Repeat Rows:
- Continue alternating the single crochet, half double crochet, and double crochet pattern until the collar reaches the desired width, typically about 1 inch.
- Final Row:
- Finish with a row of single crochet stitches to ensure the edges are uniform. Fasten off and weave in the ends using a yarn needle.
- Attaching the Clasp and D-ring:
- Sew one end of the collar to the clasp attachment. On the other end, securely attach the D-ring. Ensure both are securely fastened.
Troubleshooting and Suggestions
- Collar too tight or too loose: Always measure your pet’s neck and add about 1–2 fingers of ease. If it’s tight, simply add more chains at the start; if it’s loose, unpick and remove a few chains.
- Uneven edges: Make sure you’re working into every stitch across the row and using the correct number of turning chains. Mark the first and last stitches with stitch markers until you’re comfortable.
- Stitches too stiff or too floppy: If the collar feels stiff, go up a hook size or loosen your tension. If it’s too floppy, try a smaller hook or a slightly thicker yarn for more body.
- Button loop issues: Test your chain loop around the button before fastening it permanently. Add or subtract a few chains so it slides over snugly without stretching out too much.
Creative ideas:
- Use striped rows by changing colors every 1–2 rows for a fun, sporty look.
- Work the band in back-loop-only single crochet for a subtle ribbed texture.
- Add a small crocheted bow, heart, or flower to one side for a dressy touch.
- Try cotton yarn for warm weather, or a soft acrylic for everyday use.
- Adapt the design into a headband, bracelet, or key fob by changing the length and leaving off the pet-specific features.