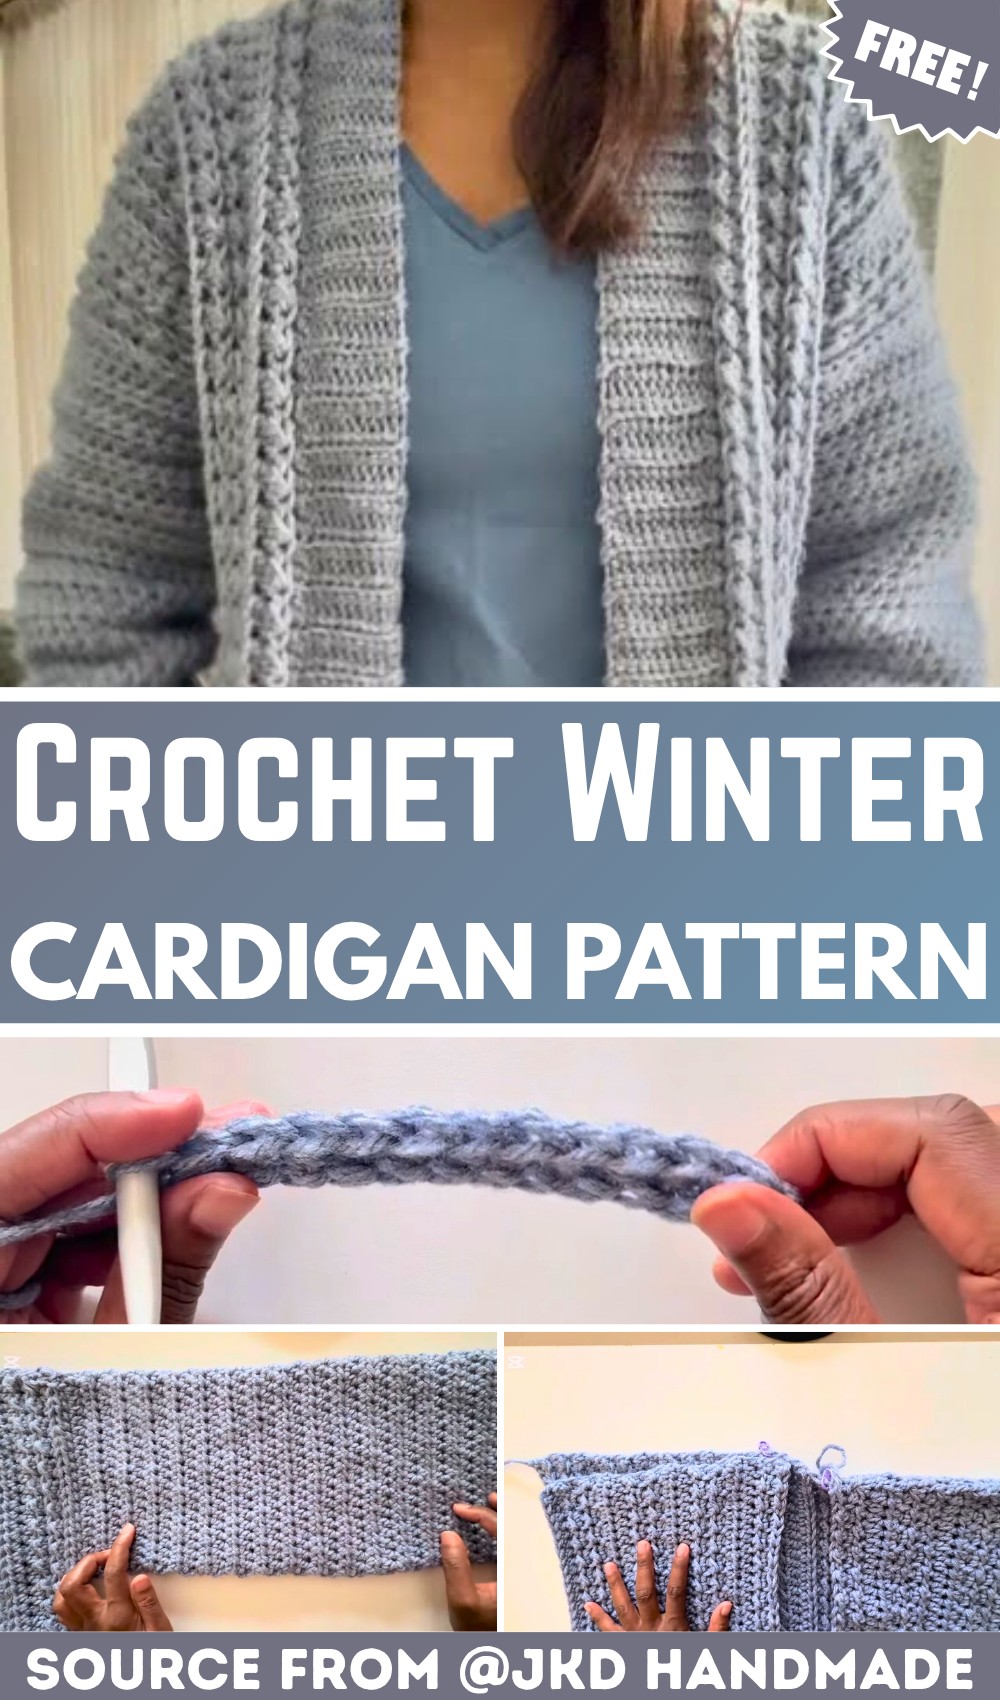
Cozy Crochet Winter Cardigan Pattern Free
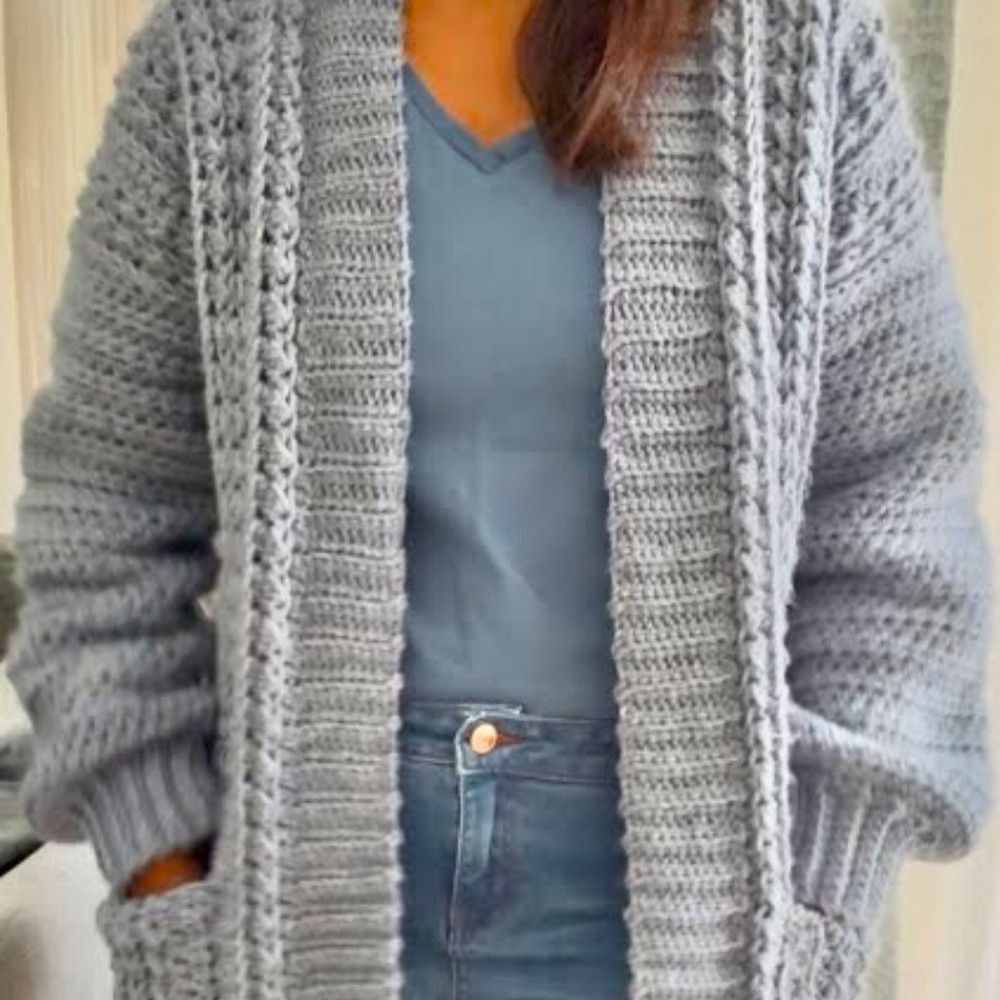
Wrap yourself in a warm, textured cardigan made to your measurements, with cozy ribbing and practical pockets that make the finished crochet piece as useful as it is comfortable.
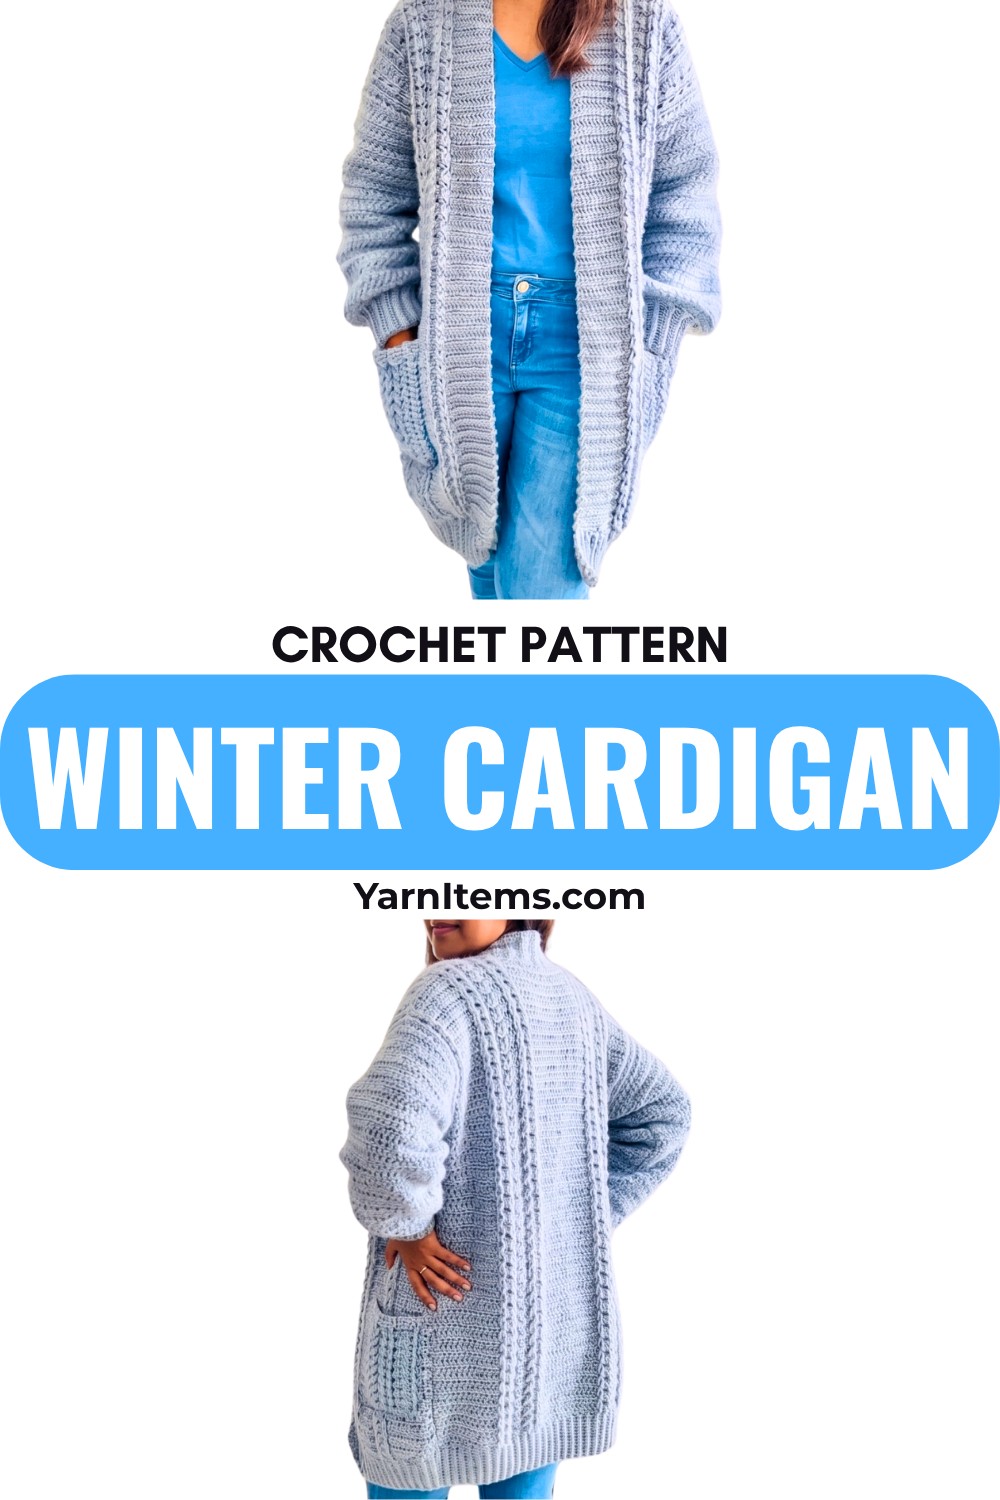
Crochet Winter Cardigan Pattern
A winter cardigan is much more satisfying to crochet when you can decide exactly how long and roomy you want it to be. This design is built from simple textured panels, so you can work toward your own measurements rather than trying to force the crochet cardigan into a fixed size.
The crochet design is straightforward, but a few measurements matter more than others. The back panel sets the overall width, the front panels determine how the cardigan sits across the front, and the armhole depth controls where the sleeves begin.
Checking these points before moving on will make the final assembly much easier. This made-to-measure approach also reflects a useful garment-making principle: choose the size from your actual measurements and check the fit as you go, rather than relying only on a standard clothing size.
Credit JKD Handmade
Materials & Tools Needed
- Yarn: Chunky category 5 yarn, approximately 9 skeins of 100 g each for a medium-size cardigan
- Category 4 worsted-weight yarn can also be used, although the fabric and finished measurements may change.
- 5 mm crochet hook: For the ribbing
- 8 mm crochet hook: For the main cardigan
- Scissors
- Measuring tape
- Yarn or wool needle: For seaming and weaving in ends
- Stitch markers
A Quick Fit Check Before You Begin
Because this is a garment, your yarn and tension can affect the final dimensions. If you substitute the recommended yarn, make a small swatch first and compare the fabric to the intended texture and measurements. A gauge check is particularly useful for sweaters and cardigans because even a small difference in stitch size can become noticeable across a wide panel.
Finished Size & Customization
The pattern can be adapted from approximately XS through 5XL by working from your own measurements.
Length
Measure from your shoulder down to where you want the cardigan to finish:
- Waist
- Upper hip
- Lower hip
- Or any preferred length
Use this measurement to determine the length of your foundation row.
Width
For the back panel, use: Shoulder-to-shoulder measurement + approximately 2 inches (5 cm)
For each front panel, use approximately: Half of your shoulder-to-shoulder measurement
You can make the cardigan roomier by adding more ease or shorten it for a cropped silhouette.
Other Customization Options
- Make the body longer or shorter.
- Choose either side of the textured fabric as your preferred right side.
- Add buttons and buttonholes.
- Adjust the sleeve length.
- Add or omit the pockets.
Pattern Abbreviations
This pattern uses US crochet terminology.
- ch: Chain
- hdc: Half double crochet
- sl st: Slip stitch
- sc: Single crochet
- blo: Back loop only
- fl: Front loop
Unless the instructions say otherwise, work stitches through both loops.
Important: Keep the foundation stitch count odd. This allows the alternating hdc and slip-stitch texture to line up correctly.
Crochet the Back Panel
The back panel determines much of the cardigan’s overall width, so take your shoulder measurement before starting.
Foundation Row
- Switch to the 8 mm hook.
- Work foundation half double crochet stitches until the chain measures your desired cardigan length.
- For the medium reference, the pattern uses approximately 81 foundation hdc.
- Make sure the total stitch count is odd.
Row 1
- Begin with 1 hdc.
- Work 1 sl st in the next stitch.
- Continue alternating:
- hdc
- sl st
- Start the pattern with hdc and finish with hdc.
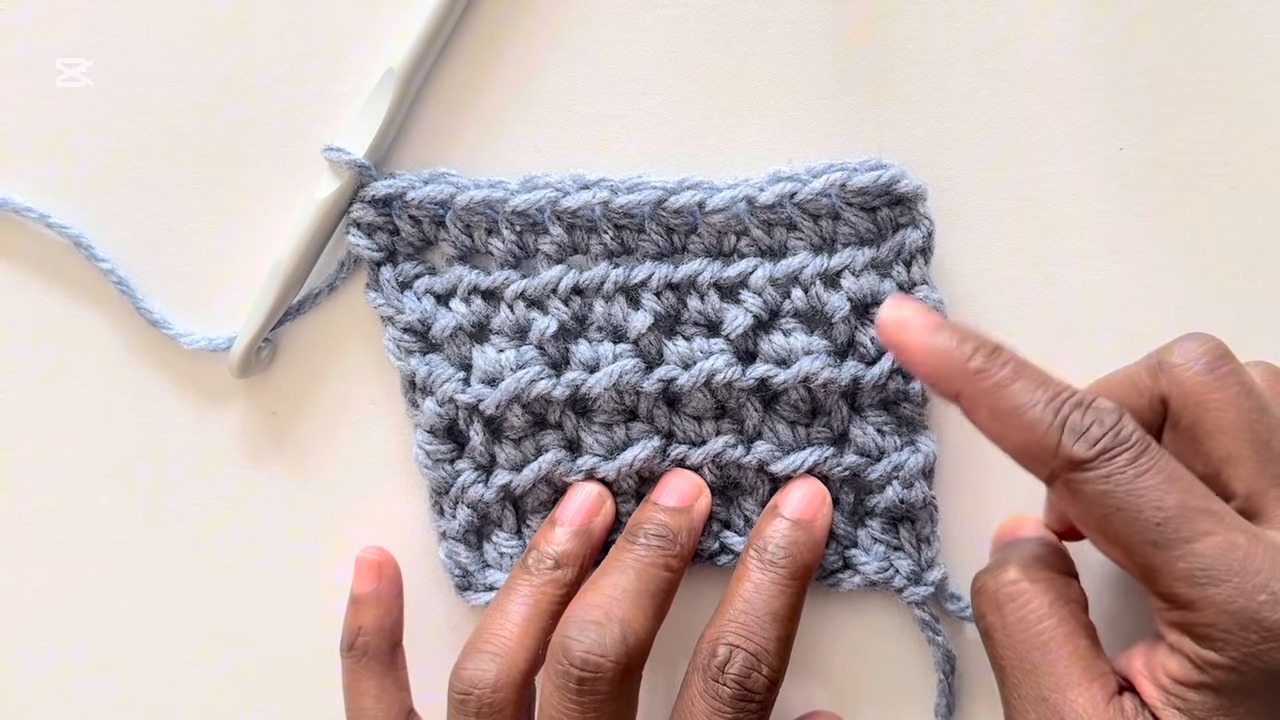
This alternating texture forms the main fabric of the cardigan.
Row 2
- Chain 1 and turn.
- Work into the back loops only.
- Alternate hdc and sl st across the row.
- Finish with an hdc.
Row 3
- Chain 1 and turn.
- This time, work through both loops.
- Alternate hdc and sl st across.
- Finish with hdc.
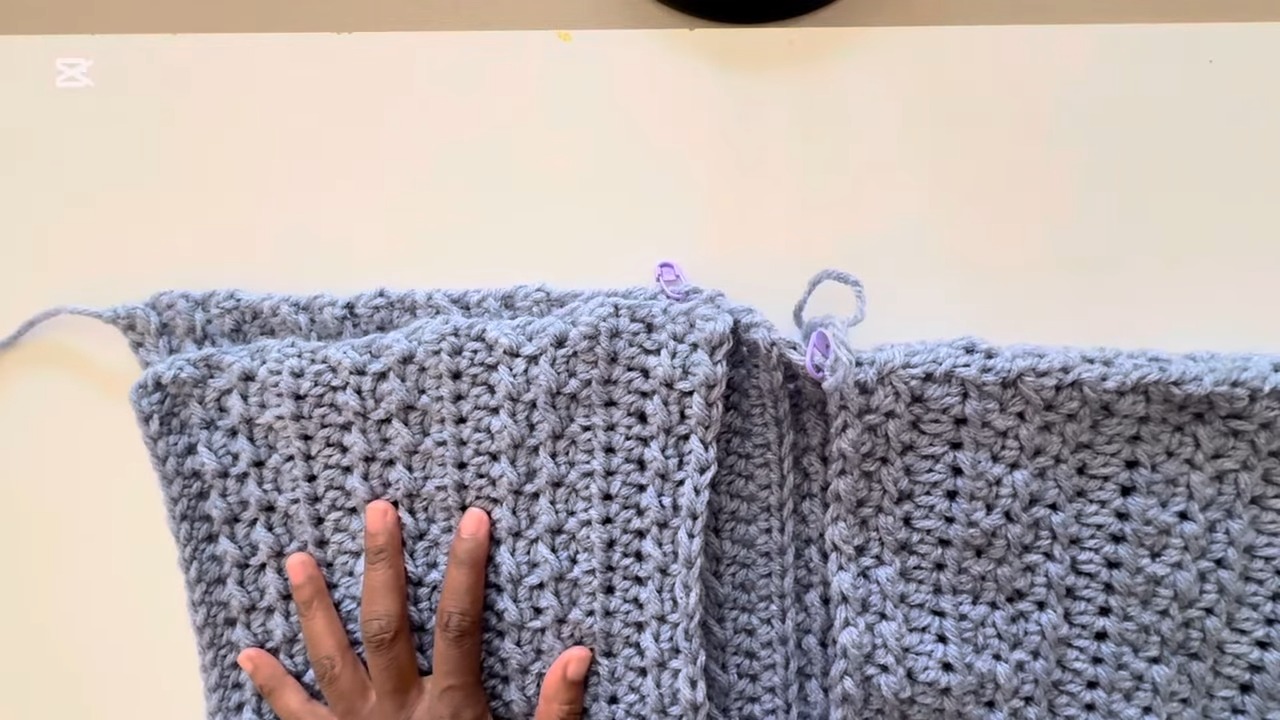
Continue the Texture
Repeat the established Rows 2–7 until the panel reaches your calculated back width: Shoulder-to-shoulder measurement + 2 inches (5 cm)
Keep checking the width as you work rather than relying only on the number of repeats.
Texture Check
The two working methods-back-loop-only rows and both-loop rows—help create the cardigan’s textured appearance. If you accidentally work an entire row through the wrong loops, the fabric can look different from the surrounding sections.
Before continuing, compare the new row with the previous texture so you can correct a misplaced stitch while it is still easy to undo.
Fasten off when the back panel reaches the desired width.
Make the Two Front Panels
Create two matching front panels using the same stitch pattern as the back.
Foundation Row
- Use the 8 mm hook.
- Work the same foundation stitch type used for the back panel.
- Keep the foundation count odd.
- Make the foundation row long enough to reach your desired cardigan length.
Work the Pattern
Repeat the same alternating hdc and sl st texture:
- Row 1: hdc and sl st
- Row 2: work through BLO
- Row 3: work through both loops
- Continue the established repeat
Work until each front panel reaches approximately half of your shoulder-to-shoulder measurement.
Keep Both Front Panels Identical
Before fastening off the second panel, place both front pieces together.
Check:
- Length
- Width
- Number of pattern repeats
- Texture direction
If the texture is meant to appear on the same side of both panels, make sure they are oriented consistently before assembly.
Assemble the Body
Once the three panels are complete, the cardigan begins to take shape.
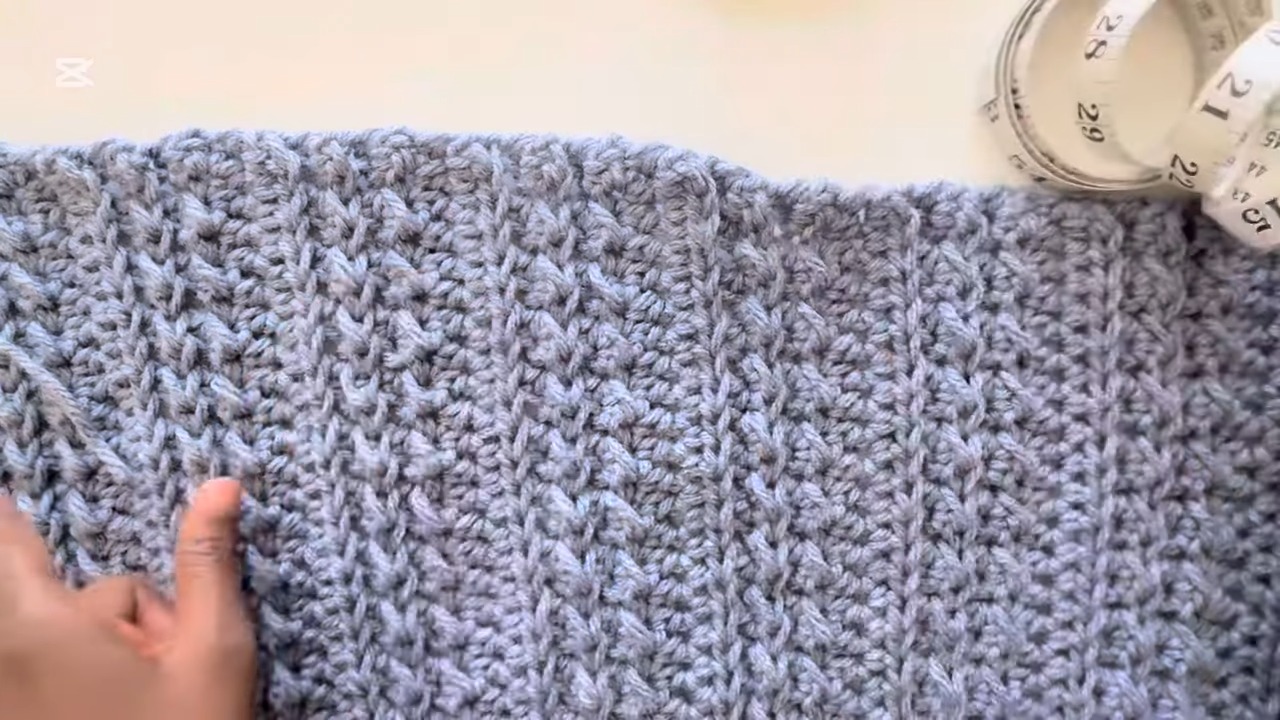
Mark the Neckline
- Lay the back panel flat.
- Mark approximately 2 inches (5 cm) at the center of the top edge for the neckline.
- Use stitch markers to keep this area clear while joining the shoulders.
Join the Shoulder Seams
- Place the front panels over the back panel with the right sides facing inward.
- Align the foundation edges.
- Match the outer edges carefully.
- Using a yarn needle, seam the first front panel to the back panel along the shoulder.
- Stop at the neckline marker.
- Repeat for the second shoulder.
The two shoulder seams should be approximately even so the neckline remains centered.
Create the Armholes
Before closing the sides, decide how deep you want the armholes.
For the medium reference, the armhole depth is approximately 7 inches from the shoulder seam.
- Measure downward from each shoulder seam.
- Place a stitch marker at the desired armhole depth.
- Repeat the measurement on the opposite side.
- Compare both markers before seaming.
This is an important fitting point: the armhole opening should be large enough for comfortable movement but not so deep that the sleeve hangs much lower than intended.
Seam the Sides
- Start below the armhole marker.
- Use the yarn needle to seam downward toward the bottom edge.
- Leave the marked armhole section open.
- Fasten off at the bottom.
- Repeat on the other side.
Before moving on, lay the cardigan flat and make sure both armhole openings are similar in size.
Crochet the Sleeves
The sleeves are worked directly from the armhole openings.
Main Sleeve
- Attach the yarn at the underarm edge using the 8 mm hook.
- Chain 2.
- Work hdc around the armhole.
- Slip stitch into the second chain of the starting chain to join.
- Chain 2 and turn.
- Continue working hdc around the sleeve.
- Slip stitch at the end of each round.
- Chain 2 and turn before beginning the next round.
Continue until the sleeve is approximately 2 inches shorter than the desired final length.
That extra space is reserved for the cuff ribbing.
Sleeve Fit Check
Try the cardigan on before starting the ribbing.
Check:
- Sleeve width around your arm
- Overall sleeve length
- Position of the underarm
- Comfort when bending your arm
If the sleeve needs to be longer, add more rounds now. It is much easier to change the sleeve before the cuff is attached.
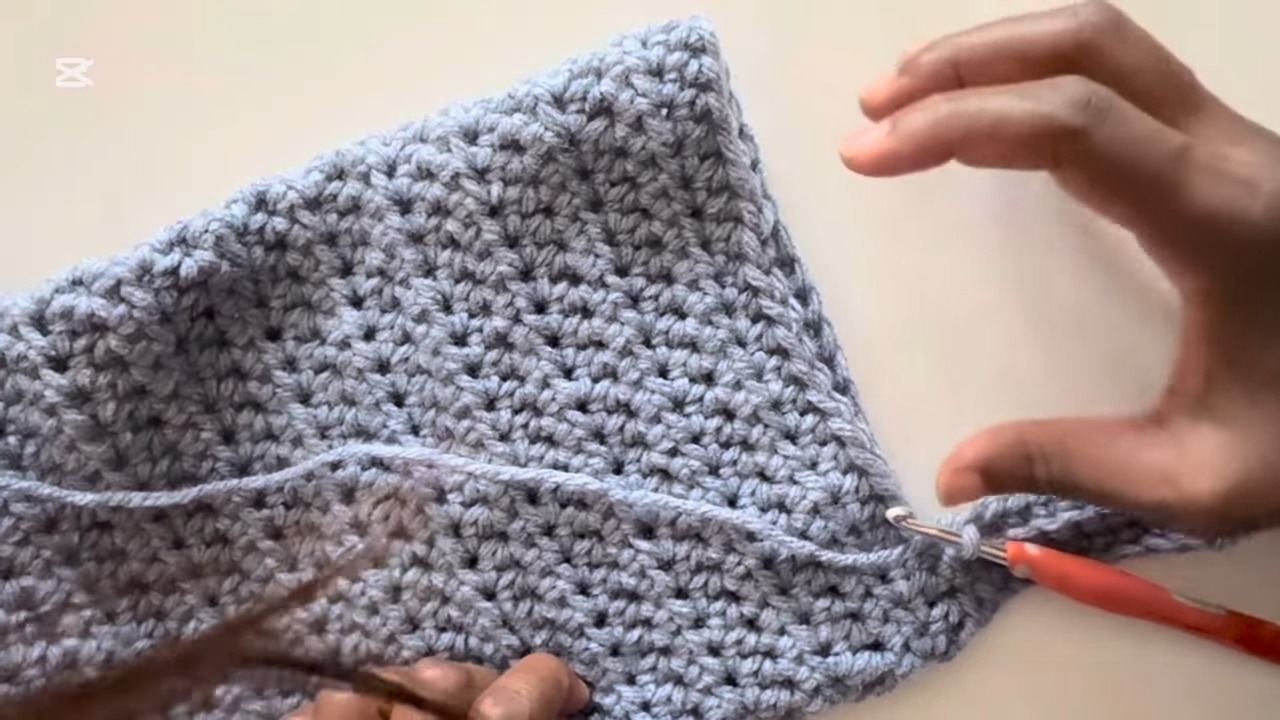
Add the Sleeve Ribbing
Switch to the 5 mm hook for a firmer cuff.
Foundation
- Chain 11.
- Adjust the chain length if you want a wider or narrower cuff.
- Work 1 sc in the second chain from the hook.
- Continue with sc across.
- You should have 10 sc.
Attach the Ribbing
- Slip stitch the ribbing to the sleeve edge using 2–3 slip stitches.
- Turn.
- Work the next ribbing row through the back loops only.
- Continue turning and attaching the ribbing to the sleeve edge.
- Repeat until the entire sleeve opening is covered.
Once the ribbing reaches the starting point, join the two ends with slip stitches.
Fasten off and weave in the end.
Repeat the same process for the second sleeve.
Add the Front Opening Ribbing
The front ribbing gives the cardigan a cleaner edge and helps the opening sit neatly.
- Switch to the 5 mm hook.
- Attach the yarn at the bottom of the front opening.
- Chain 11.
- Work the ribbing using the same basic method as the sleeve cuff.
- Attach the ribbing to the cardigan edge with slip stitches.
- Use approximately 2 slip stitches along the panel edges.
- Along the neckline, use approximately 1 slip stitch per edge section where needed.
- Continue around the front opening and neckline.
Keep checking the ribbing as you work so it does not pull the cardigan edge inward.
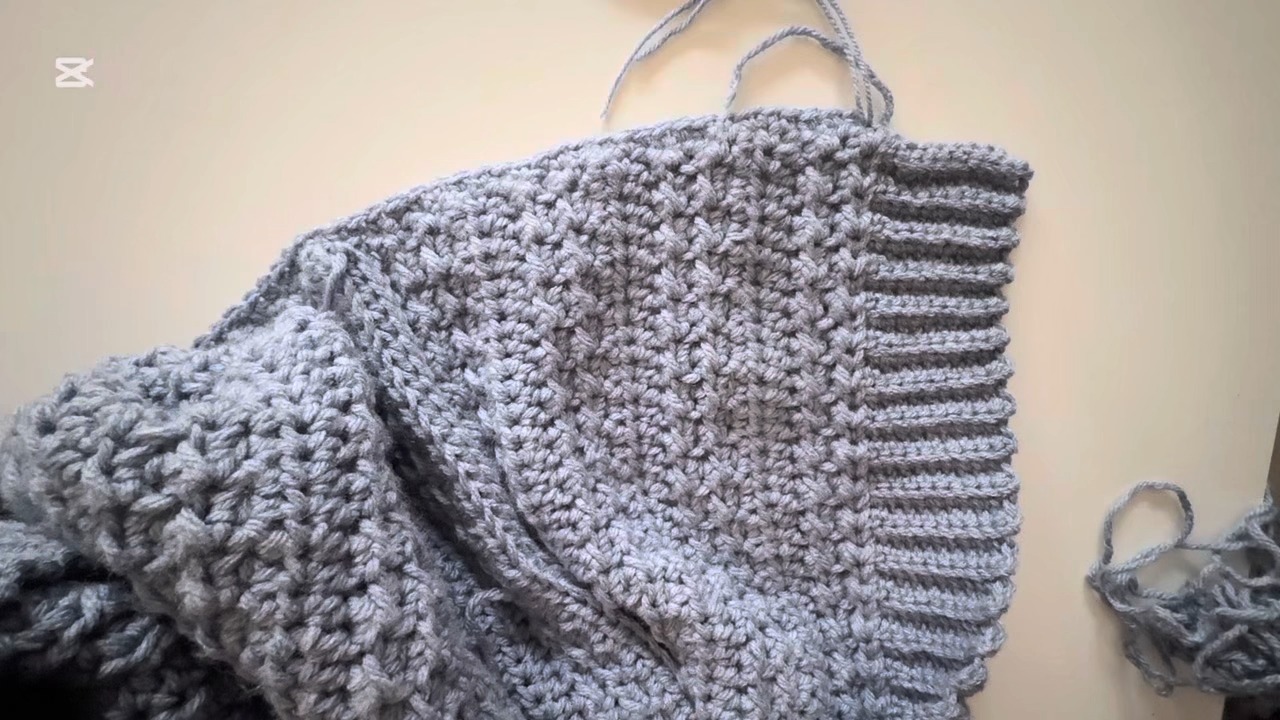
Add Bottom Ribbing
Before adding the bottom ribbing:
- Turn the cardigan so the wrong side is facing up.
- Work a row of sc along the bottom edge.
- Attach the yarn at one corner.
- Chain 11.
- Work the ribbing in the same way as the front opening.
- Continue attaching it along the entire bottom edge.
- Join the ribbing when you reach the opposite corner.
The smaller hook helps the ribbing create a firmer finish against the looser main fabric.
Add the Pockets
The pockets are optional, but they add useful everyday function without changing the main construction.
Make Each Pocket
- Work 21 foundation hdc for the starting width.
- Adjust this number if you want a larger or smaller pocket.
- Repeat the cardigan’s textured Rows 2–7.
- Continue until the pocket reaches your preferred height.
- Fasten off.
Attach the Pocket
- Decide where you want the pocket positioned.
- Place it on the front panel.
- Use a yarn needle to seam around the two sides and bottom.
- Leave the top edge open.
Make sure both pockets are positioned at approximately the same height if you’re adding one to each front panel.
Finishing & Final Fit Check
Before considering the cardigan complete:
- Weave in all loose ends securely.
- Check both shoulder seams.
- Compare the armhole openings.
- Check that both sleeves are the same length.
- Make sure the ribbing is sitting evenly.
- Try on the cardigan to check the overall fit.
- Add buttons or buttonholes if desired.
- Block the cardigan if the yarn and fabric benefit from it.
Blocking can help even out stitches and improve the final drape, but the garment should be shaped according to the measurements you actually want rather than stretched excessively.
Final Thoughts
This winter cardigan is built around a simple idea: measure first, crochet the panels, and check the fit before moving to the next stage. The alternating hdc and slip-stitch texture gives the chunky yarn plenty of visual interest, while the ribbed cuffs and edges bring the larger pieces together with a more finished look.
The most useful part of making this cardigan yourself is the freedom to adjust it along the way. You can change the body length, add ease for an oversized fit, alter the sleeve length, or include pockets and buttons without changing the basic construction. Once the main panels are measured correctly, the rest of the cardigan becomes a much more manageable series of assembly and finishing steps.