Quick & Easy Crochet Hexagon Baby Cardigan Pattern
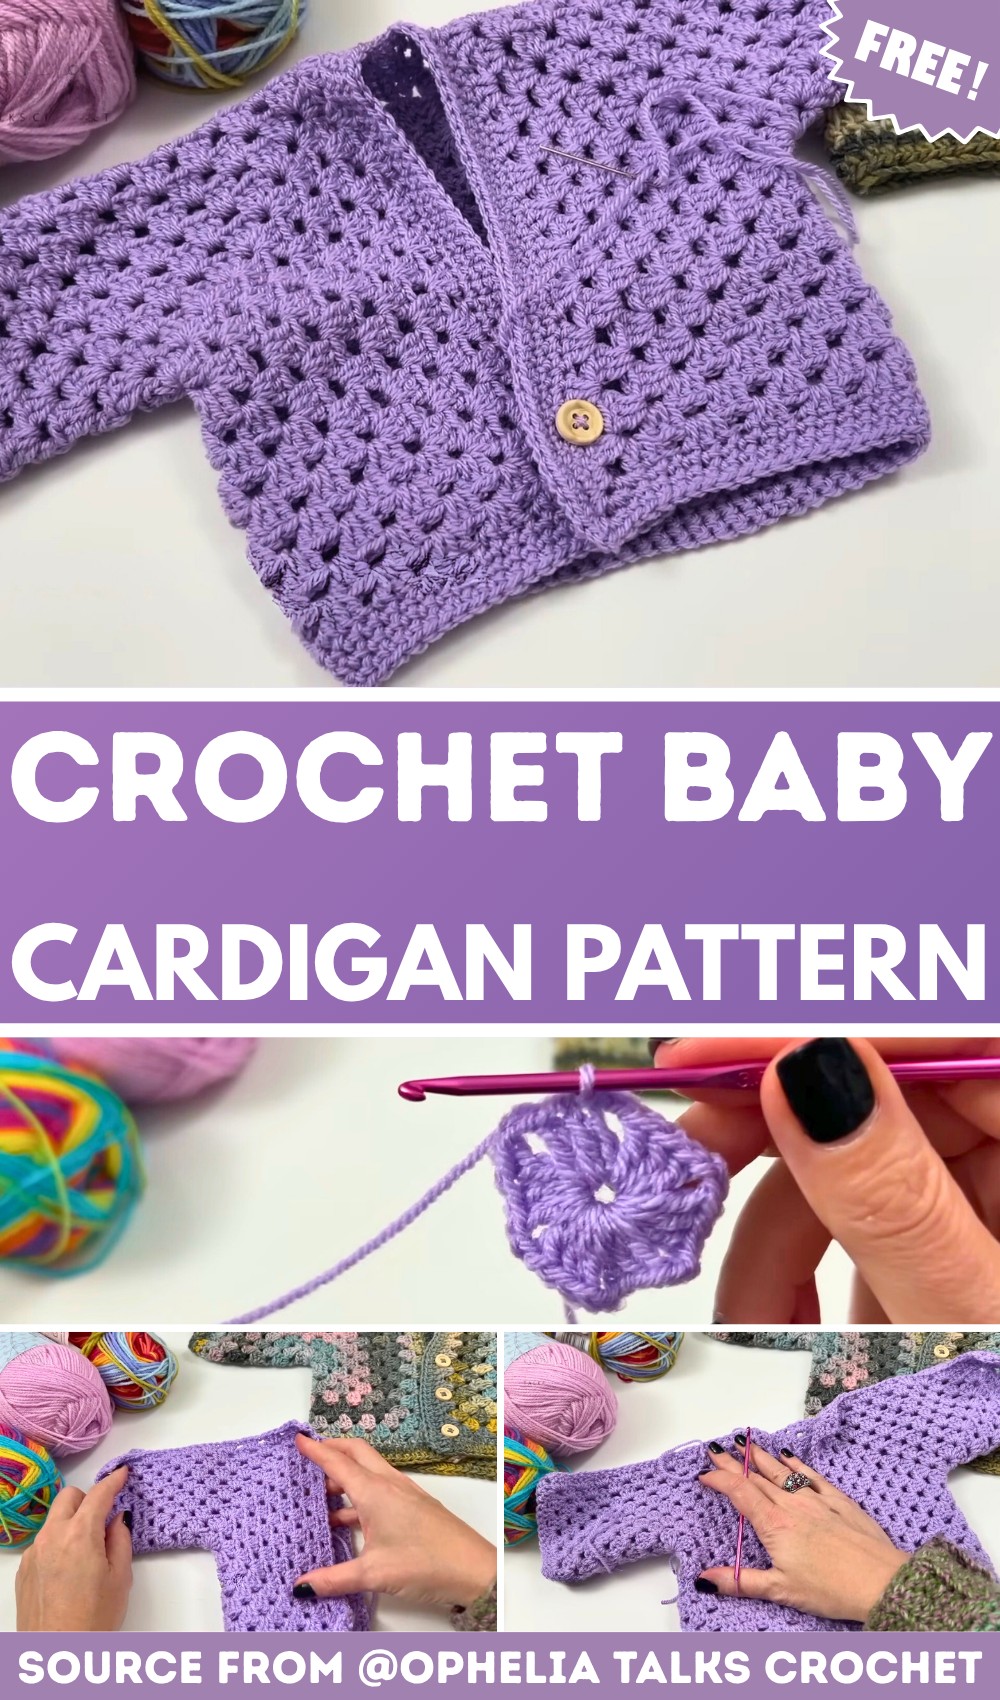
Here’s a quick crochet hexagon baby cardigan that starts with two simple shapes and turns into a cozy, adjustable layer for newborns through 9 months.
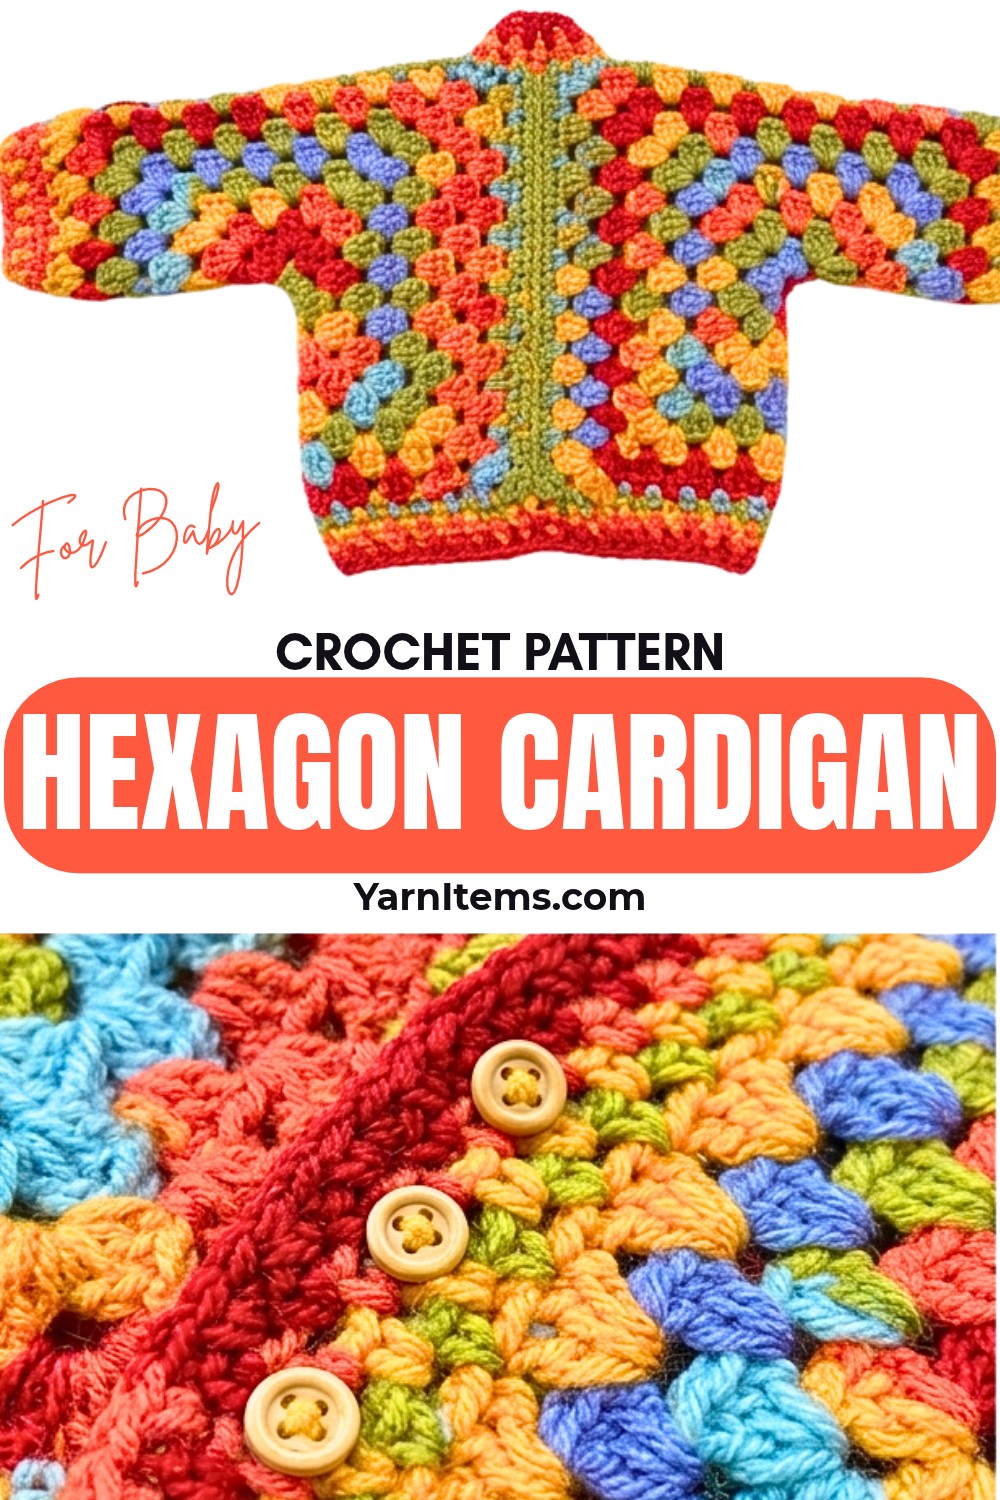
Small hexagons make this baby crochet cardigan especially interesting because the shape does much of the work for you.
Two crocheted hexagons form the starting point, then simple joining and seaming turn those pieces into sleeves and a wearable cardigan.
Sizing comes mainly from the number of rounds worked on the hexagons, so you can stop at 7 rounds for a newborn/1–3 month size or continue to 10 rounds for larger baby sizes.
After the crochet hexagons are shaped, one receives an extra row for back width before the pieces are joined, then the shoulders and sleeves are seamed, cuffs are added, and a simple sc border finishes the crochet cardigan.
Credit Ophelia Talks Crochet
Materials & Tools Needed
- Yarn: DK weight yarn, such as Wendy’s Supreme, Stylecraft Special DK, or scrap yarn. Less than one 100g ball is required for the smallest newborn size.
- Crochet Hook: 3.5 mm. This smaller hook is recommended for a slightly denser fabric even though DK yarn commonly uses a 4.0 mm hook.
- Scissors
- Darning Needle: Choose one with an eye large enough for DK yarn but a shaft thin enough to pass through the button holes.
- Buttons: 3 plain wooden buttons in varying sizes depending on the scale of the cardigan.
Finished Size & Customization
The size is primarily controlled by the number of rounds worked on the two base hexagons:
- 7 rounds: Newborn / 1 to 3 months
- 10 rounds with standard DK: 3 to 6 months
- 10 rounds with thicker DK: 6 to 9 months
You can also crochet additional rounds if you need more size as the baby grows.
For extra back width without making the sleeves excessively wide, work additional flat rows along the back edges of the hexagons before joining them. Sleeve cuffs can also be changed according to preference, using half double crochet, single crochet reductions, or linen stitch.
Pattern Abbreviations & Terminology
US crochet terms are used throughout.
- ch: Chain
- sl st: Slip Stitch
- sc: Single Crochet
- dc: Double Crochet
- sc2tog: Single Crochet Two Together
- sp/sps: Space/Spaces
- st/sts: Stitch/Stitches
- Cluster: 3 double crochets worked into the same space
How to Work sc2tog
Insert the hook into the next stitch and pull up a loop; insert the hook into the following stitch and pull up a loop; yarn over and pull through all 3 loops on the hook.
Crochet the Two Hexagons
Make 2 hexagons. Their size determines the overall baby cardigan size, so keep the round count consistent between both pieces.
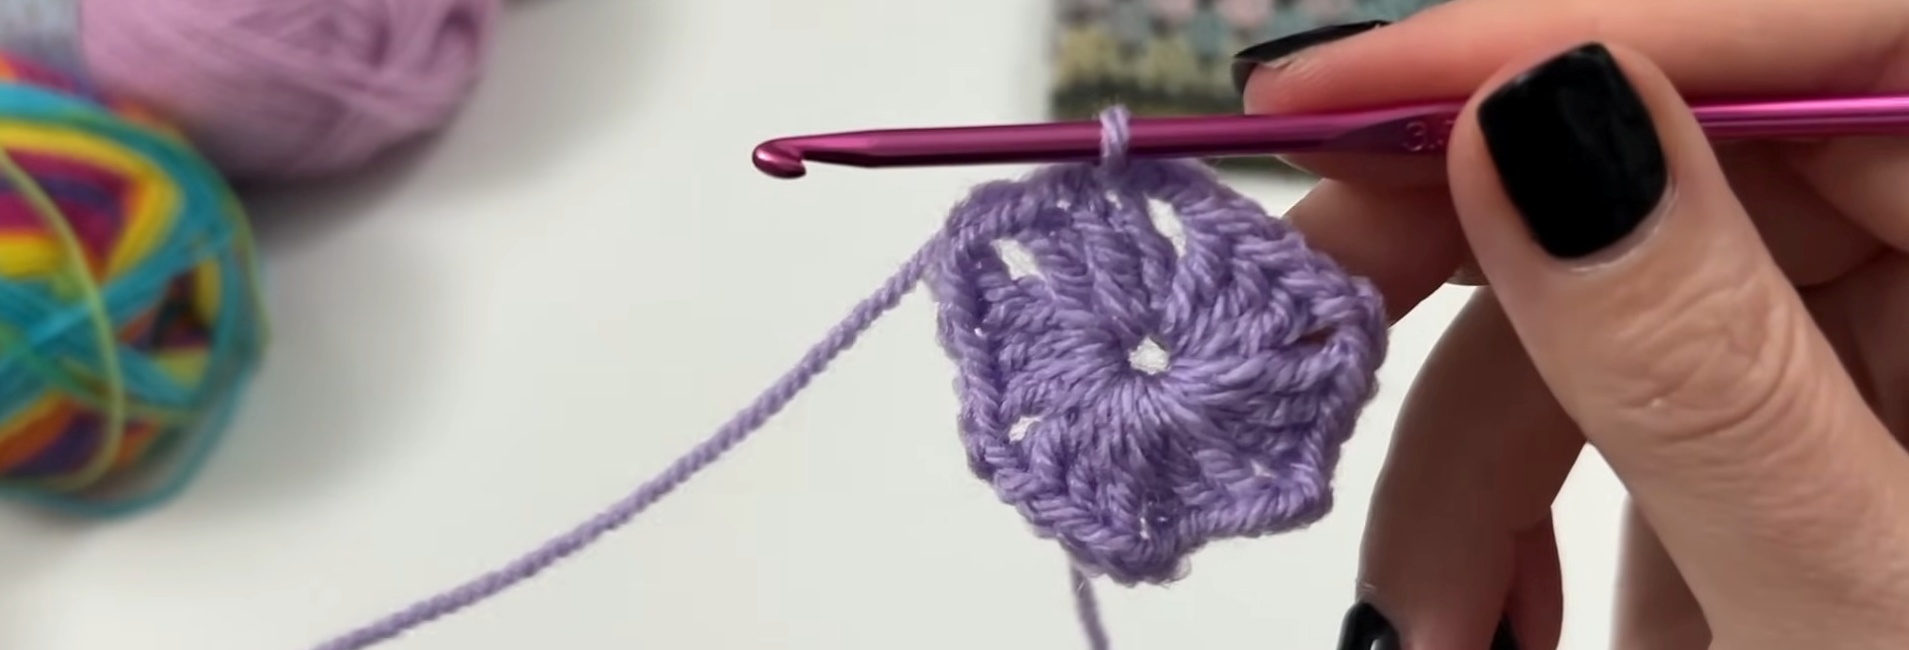
Round 1: Start with a slip knot; ch 4 and join with a sl st into the first ch to form a small circle; ch 2, which counts as the first dc of the first cluster; work 2 dc into the circle; *ch 2, work 3 dc into the circle; repeat from * 4 more times; ch 2; skip the initial starting ch-2 and sl st directly into the top of the first true dc to join; total: 6 clusters of 3 dc and 6 ch-2 spaces.
The final slip stitch is made into the first true dc rather than the beginning ch-2. This keeps the center joining point tidy and makes the next round easier to position correctly.
Create the Corners
Round 2: Sl st into the next st, then sl st into the following ch-2 space to position the yarn correctly; ch 2, which counts as the first dc; work 2 dc into the same space; ch 2, then work 3 dc into the same space to create the first corner; *in the next ch-2 space work (3 dc, ch 2, 3 dc); repeat from * in all remaining ch-2 spaces around; skip the starting ch-2 and sl st into the top of the first true dc; total: 6 corners.
Round 3: Sl st into the next st and then into the corner ch-2 space; ch 2, 2 dc, ch 2, 3 dc all in the corner space to create the first corner; *work 3 dc into the space between the clusters of the previous round; in the next corner space work (3 dc, ch 2, 3 dc); repeat this sequence around; join with a sl st to the first true dc.
Rounds 4–10: Repeat Round 3 until the desired hexagon size is reached; with each consecutive round, the number of isolated clusters along each flat side increases by one, and every corner continues to receive (3 dc, ch 2, 3 dc).
For a newborn/1–3 month size, stop after 7 rounds. For the standard 3–6 month size, work 10 rounds with standard DK yarn. Thicker DK worked for 10 rounds can provide the larger 6–9 month size.
Hexagon Size Check
Both hexagons need to match. Count the rounds rather than relying only on appearance, especially if you are working loosely or changing yarn.
If you are making both pieces for the same cardigan, using the same yarn, hook, and number of rounds will help keep the sleeves and body sections balanced when the pieces are folded and joined.
Prepare the Hexagons for Joining
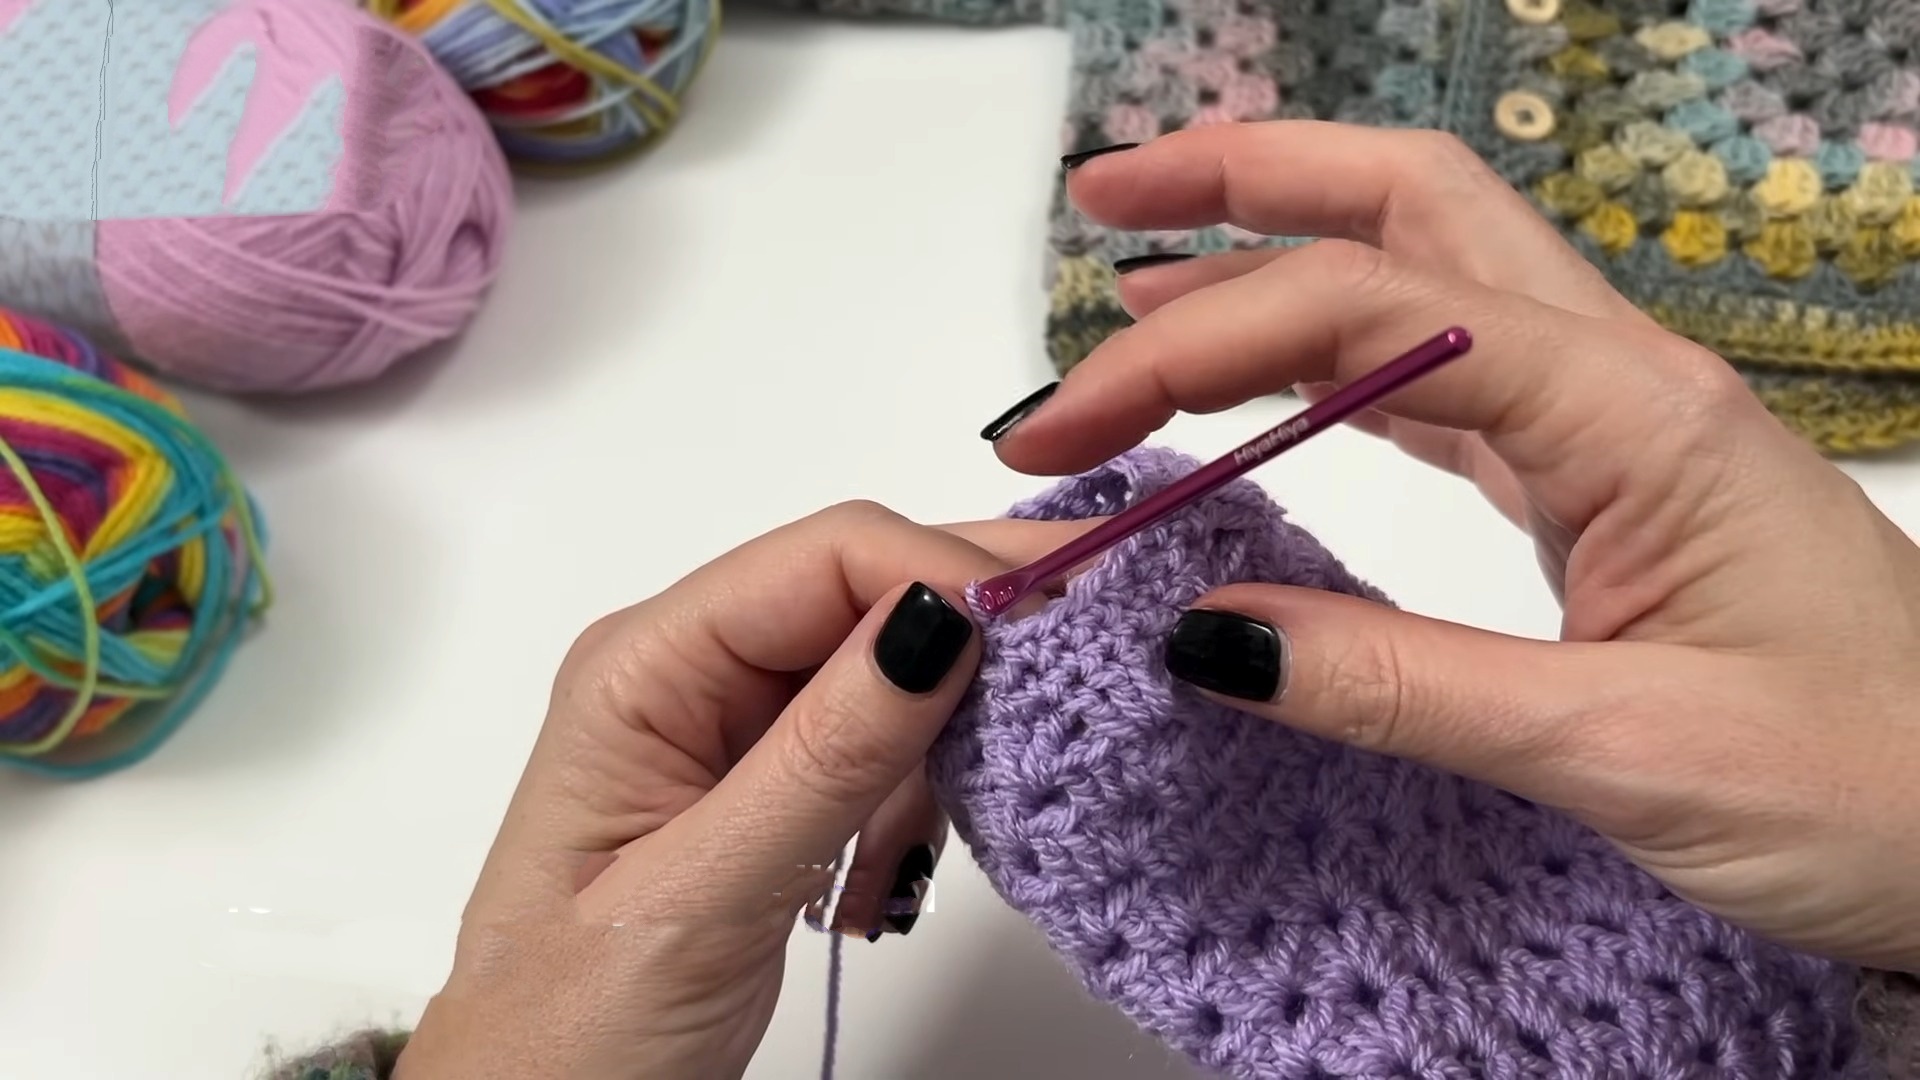
The two hexagons are finished slightly differently because one receives an additional row that gives the back more width.
Finishing Hexagon 1: After completing Round 10, sl st over to the corner space; ch 2 and work 2 dc in the corner space; work 3 dc into each space across one side only, finishing with 3 dc in the subsequent corner space; fasten off.
This extra row creates additional width for the back panel. Keep it on only one side of Hexagon 1 as described so the pieces will meet correctly during joining.
Finishing Hexagon 2: Work Hexagon 2 exactly as Hexagon 1 for 10 rounds, but do not fasten off; leave the working yarn active because it will be used to join the back panels together.
Join the Back Panel
Before beginning the seam, fold both hexagons into an L shape. One half of each L becomes part of the sleeve, while the other half forms part of the cardigan body.
Lay the two pieces side by side with the extra row on Hexagon 1 meeting the corresponding active side of Hexagon 2.
Joining: On Hexagon 2, sl st into the corner space and ch 2; insert the hook into the first V-stitch of the extra row on Hexagon 1, pull up a loop, and sl st to connect; work the 2nd dc into Hexagon 2’s corner space and sl st into the 2nd st of Hexagon 1; work the 3rd dc into Hexagon 2’s corner space and sl st into the 3rd st of Hexagon 1; *work a 3-dc cluster into the next space on Hexagon 2, pull up a loop, and sl st into the corresponding space between clusters on Hexagon 1; repeat this zig-zag joining method across the entire side; finish with 3 dc into the final corner space of Hexagon 2, securing each dc with a sl st to the final corresponding stitches of Hexagon 1; fasten off.
Joining the first cluster stitch-by-stitch gives the beginning of the seam extra security, which is particularly useful for a garment that will be worn and handled frequently.

Seam the Shoulders and Sleeves
Once the back pieces are joined, turn the cardigan inside out so the seams can be worked from the wrong side.
Shoulder/Sleeve Seam
Seaming: Start at the end of a sleeve cuff or at the neck corner; attach the yarn with a slip knot in the corner chain space and work 2 sc into the corner space to secure it; working through both layers, loosely sl st the corresponding V-stitches of the front and back panels together all the way down the shoulder seam and sleeve; finish with 2 sc in the final chain space and fasten off.
Repeat the same process for the opposite shoulder and sleeve seam, then turn the cardigan right side out.
Seam Check
Before moving on to the cuffs, gently open the cardigan and check both sleeve seams.
The corresponding V-stitches should meet evenly, and the seam should not be pulled tightly. Keeping the slip stitches loose helps the joined fabric retain its flexibility.
Add the Sleeve Cuffs
The cuffs are worked directly around the sleeve openings.
Round 1: Attach yarn with a sc in any V-stitch directly under the arm to hide the seam; work 1 sc into each stitch around the entire sleeve opening; when crossing the underarm join, place 1 sc into the front chain space and 1 sc into the back chain space to bridge the gap cleanly without adding bulk; skip the first sc and sl st into the next stitch to close the round.
Round 2: Ch 1; *sc in the next 5 sts, sc2tog; repeat from * around to slightly taper the cuff; join with a sl st.
Check the sleeve opening after this round. If you prefer a tighter cuff, you can work another reduction round or change the decrease ratio.
Round 3: Ch 1; sc into each stitch around to give the cuff a little more width; join with a sl st and fasten off.
Repeat Rounds 1–3 for the second sleeve, keeping the same stitch counts and decrease approach for matching cuffs.
Crochet the Cardigan Edging
The final border travels continuously around the bottom hem, both front edges, and the neckline.
Round 1: Join yarn with a sc anywhere along the bottom hem, preferably near the back or side; work 1 sc into each stitch around the entire opening, along the bottom, up the first front panel, around the neck opening, and down the opposite front panel.
Front Bottom Corners
When reaching either front bottom corner, work (2 sc, ch 2, 2 sc) into the corner space.
Corner Tip: Skip the first stitch immediately after the corner to help prevent the edge from buckling or pointing outward.
Neckline Shaping
When crossing the shoulder joins at the back of the neck, place the stitches carefully so the neckline remains flat.
Neckline Placement: Work 1 sc in the chain space, 1 sc around the dc post, completely skip the physical shoulder join, 1 sc around the next dc post, and 1 sc in the next chain space; mirror this placement on the opposite side.
Close the round with a sl st.
Rounds 2 & 3: Repeat the sc border for two more continuous rounds, continuing to work (2 sc, ch 2, 2 sc) into both bottom front corner spaces; fasten off.

Border Check
Lay the cardigan flat after completing the border. The front corners should sit neatly rather than flare outward, while the neckline should lie flat without bunching.
If the neckline begins to ripple, pay particular attention to the stitch placement around the shoulder joins. Those joins are intentionally skipped in the border to keep the neckline from becoming crowded.
Finish with the Buttons
Weave in the Ends
Thread the darning needle with the appropriate yarn and securely weave all loose ends into the inside of the cardigan.
Use the Natural Buttonholes
No separate buttonholes are required. The natural spaces between the 3-dc clusters along the front edge act as built-in buttonholes.
Lay the front edges together and identify three evenly spaced cluster gaps that will accommodate the buttons.
Attach the Buttons
Sew the 3 plain wooden buttons firmly onto the opposite front band, checking that each button lines up horizontally with its corresponding cluster gap.
Because this cardigan is intended for a baby, make sure every button attachment is securely fastened and check the buttons regularly for looseness before use.

Final Fit Check
Before dressing the baby in the finished cardigan, check the following:
- Both hexagons were worked to the same number of rounds.
- The back joining seam is secure.
- Both shoulder and sleeve seams are evenly joined.
- Sleeve cuffs match in size.
- The bottom front corners lie flat.
- The neckline is not ruffling.
- All loose yarn ends are securely woven in.
- All three buttons are firmly attached.
The hexagon-based design makes this cardigan particularly flexible for sizing. More rounds can be added to the base shapes for a larger fit, while extra flat rows along the back edges can provide additional comfort without simply making the sleeves wider.