Cute Crochet Ghost Granny Square Pattern Free
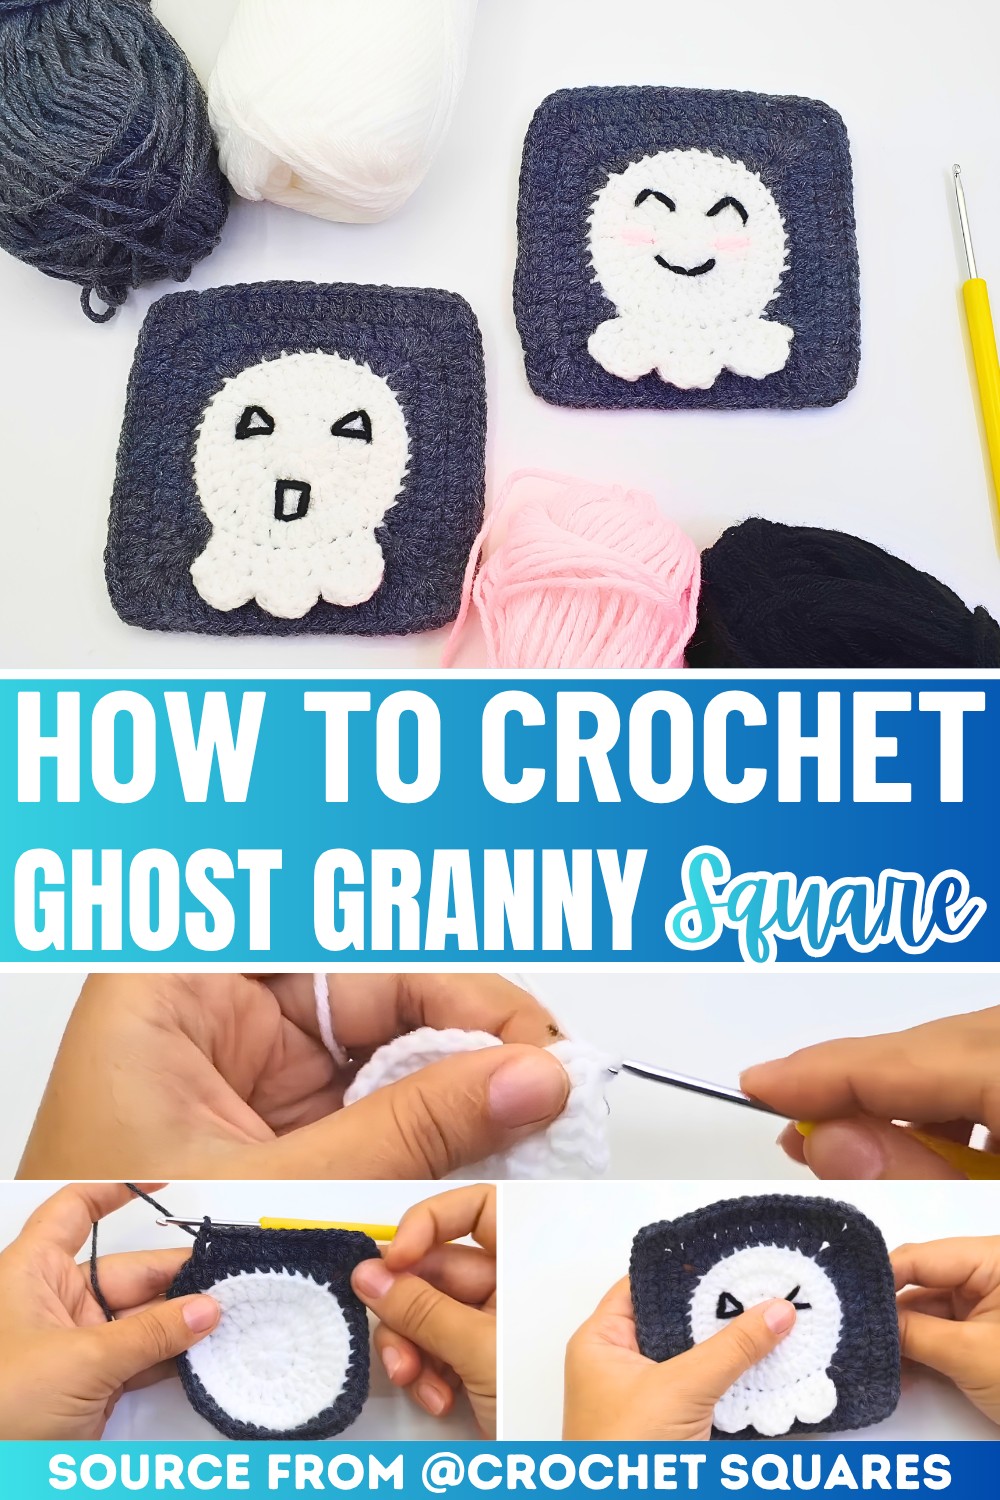
A classic granny square gets a spooky little makeover in this Ghost Granny Square pattern, instead of building a simple block of crochet stitches.
This crochet design slowly reveals a tiny ghost shape at the center, turning an everyday crochet technique into a fun seasonal piece. Keep reading to see how the square takes shape and how the ghost details come together.
Free Crochet Ghost Granny Square Pattern

This tutorial walks you through creating a ghost-themed granny square that can be used on its own or combined into larger crochet pieces. With familiar granny-square construction and a playful character design. The pattern is easy to follow for beginners and enjoyable for experienced crocheters who love quick, creative pieces.
Credit Crochet Squares
Materials & Tools Needed
- Yarn: Medium weight yarn (Category 4 / Worsted weight)
- White: For the ghost body
- Dark Grey / Charcoal: For the square background
- Black: Scrap yarn for facial details
- Pink (optional): Scrap yarn for rosy cheeks
- Crochet Hook: 3.0 mm hook
- Tapestry Needle: For weaving in ends and embroidery
- Scissors

Finished Size & Customization Ideas
- Size: Approximately 4″ x 4″ (10 cm x 10 cm), depending on your tension.
- Customization Ideas:
- Create two types of face variations:
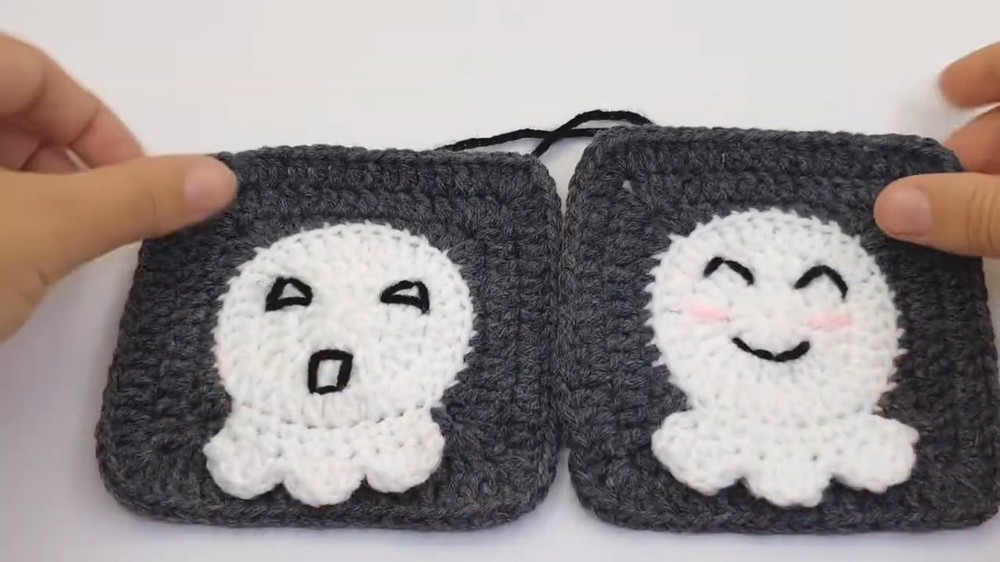
- Scary/Surprised Expression: Triangular eyes and an open-mouth rectangle.
- Cute/Happy Expression: Curved eyes (upside-down “V’s”) with blushing pink cheeks.
- Use these granny squares to design Halloween-themed projects:
- Blankets
- Pillow Covers
- Tote Bags
- Combine ghost squares with simpler granny squares for variety.
- Create two types of face variations:
Pattern Abbreviations & Terminology
- ch: Chain
- st / sts: Stitch(es)
- sl st: Slip Stitch
- sc: Single Crochet
- hdc: Half Double Crochet
- dc: Double Crochet
- inc: Increase (2 stitches in the same stitch)
- BLO: Back Loop Only

Step-by-Step Crochet Instructions
Component 1: The Circle (Ghost Body)
Using White Yarn:
- Round 1: Magic Ring Setup
- Create a magic ring, ch 2.
- Work 12 dc into the ring. Pull the tail tightly to close the center hole.
- Join with a sl st into the first dc.
(12 sts)
- Round 2: Circle Increases
- ch 2.
- Work 2 dc in the same stitch as the join, and 2 dc in every stitch around.
- Join with a sl st into the first dc.
(24 sts)
- Round 3: Final Circle Round
- ch 2.
- Work 1 dc in the same stitch as the join, then 2 dc in the next stitch.
- Repeat the pattern (1 dc, 2 dc) all the way around.
- Join with a sl st into the first dc.
- Fasten off the white yarn and weave in ends.
(36 sts)

Component 2: Squaring off the Circle
Attach Dark Grey Yarn:
- Round 4: Squaring the Frame (Working in BLO)
- Attach grey yarn to the back loop only (BLO) of any stitch from Round 3.
- ch 3 (counts as the first dc).
- Work 1 dc in the same back loop. ch 1.
- Then work 2 dc in the next back loop (First corner completed).
- Across the next 7 stitches:
- Work 2 hdc, 3 sc, then 2 hdc.
- For the second corner:
- Work 2 dc in the next stitch, ch 1, then 2 dc in the next stitch.
- Repeat this sequence around to complete all sides and corners.
- Join with a sl st to the top of the initial ch-3.
- Round 5: Building out the Square
- sl st across to the ch-1 corner space.
- In the corner space:
- ch 3 (counts as dc), 1 dc, ch 1, 2 dc.
- Work 11 dc along the side of the square.
- In the next corner space:
- 2 dc, ch 1, 2 dc.
- Repeat the pattern of 11 dc along each side, and 2 dc, ch 1, 2 dc in each corner.
- Join with a sl st to the top of the ch-3.
- Fasten off and weave in ends.

Component 3: The Ghost Ruffles (Bottom Skirt)
Re-attach White Yarn:
- Row 1: Base for Ruffles
- Locate the front loops left unworked from Round 4 on the white circle.
- Choose the bottom side (opposite to where the ghost’s head will be).
- Attach white yarn to the first front loop.
- ch 1, work 9 sc across the next 9 front loops.
- ch 1, turn your work.
- Row 2: Creating the Waves
- In the very first stitch: sl st, 1 hdc.
- In the next stitch: 2 dc.
- In the next stitch: 2 dc.
- In the next stitch: 1 hdc, sl st.
- Repeat the shell pattern one more time across the remaining stitches to create the wavy bottom border.
- Fasten off and weave in tails neatly.
Component 4: Facial Details (Embroidery)
Using Black Yarn (and optional pink yarn):
- Stitch on the ghost’s face according to your chosen expression:
- Scary Face:
- Embroider two triangular eyes on Round 2 of the white circle.
- Below them, create a small open-mouth rectangle.
- Cute Face:
- Embroider a pair of curved line eyes that look like happy, closed “upside-down V’s.”
- Add a small smile line below the eyes.
- Optional: Use pink yarn to embroider rosy cheeks—two short, horizontal bars right under the eyes.
- Scary Face:

Key Notes:
- If your square edges curl up slightly, blocking the finished pieces on a flat surface will help them lay neatly.
- Alternate between facial expressions for variety when making multiple squares for larger Pattern.