Crochet Granny Mosaic Blanket Pattern With Textured Border
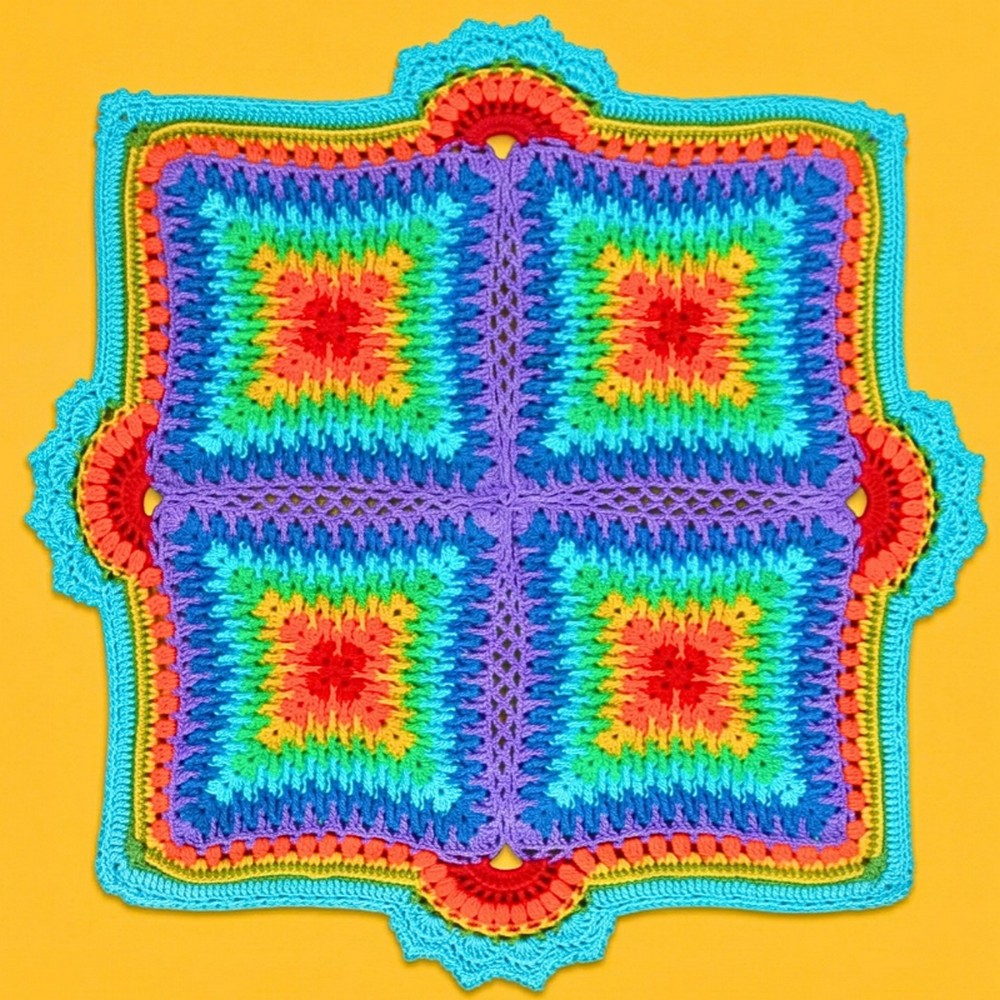
Looking for a colorful blanket with more than ordinary granny-square texture? This crochet mosaic design builds raised umbrella motifs and a delicate picot border from simple repeating squares.
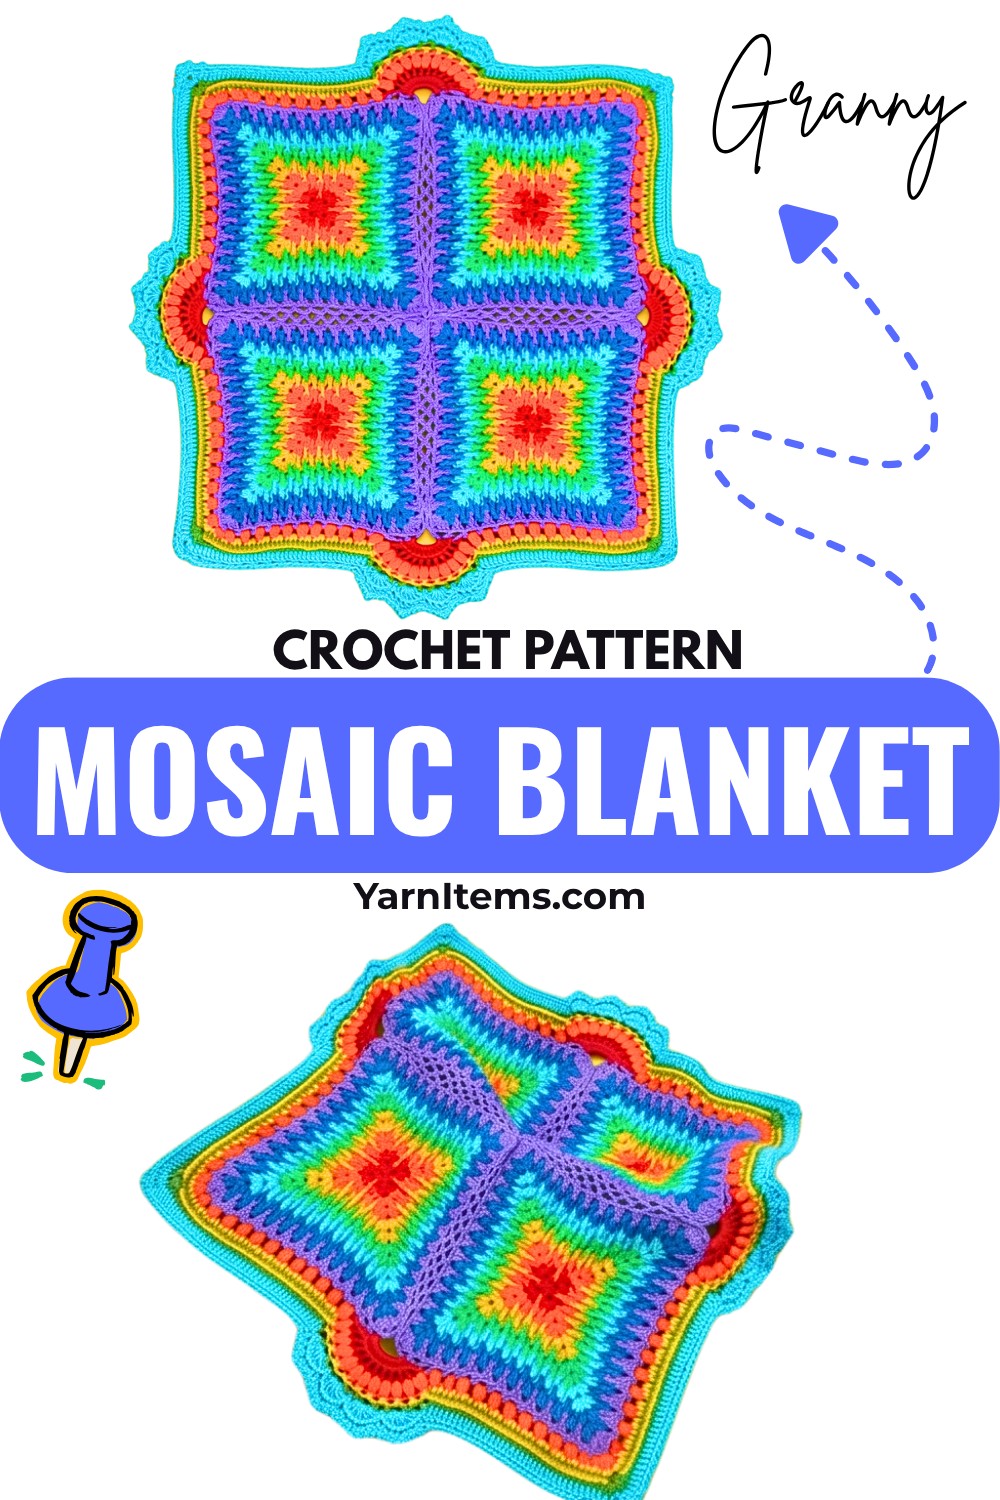
Color changes do much of the visual work in this crochet granny mosaic blanket, but the real surprise appears where the squares meet. The joined motifs create raised umbrella-like details across the seams, while the final border carries that texture outward with puff stitches, shells, and picots.
Planning the square count correctly is important before you begin because the finished layout depends on multiples of four. You’ll work the standard motifs through 13 rounds, prepare two different square types for joining, then build the crochet blanket outward through six border rounds. The instructions below keep those transitions clear so you know which square to prepare, where each join belongs, and how the border develops.
Credit Simple Crochet
Plan the Blanket Before Crocheting
There are two decisions worth making before you start crocheting the squares.
First, decide how large you want each motif to be. The standard square uses 13 rounds. For a larger blanket, the same repeating motif can continue to 26 rounds before the squares are prepared for joining.
Second, plan the number of squares. The total number must be divisible by 4, such as 4, 16, or 24 squares. This matters because the unusual border design needs the square layout to line up correctly at the joined seams.
You will also divide your finished squares into two groups:
- Type A: Squares without the special chain-4 edging
- Type B: Squares with the chain-4 edging
You need half Type A and half Type B. Keeping this division in mind while making the squares will save you from having to alter finished motifs later.
Yarn & Tools
- Yarn: Multiple colors of your choice. Rainbow colors work well, while self-striping or batik yarn can reduce the number of ends you need to weave in.
- Crochet hook: Choose a hook size appropriate for your yarn weight.
- Tapestry needle: For securely weaving in yarn ends
- Scissors
If you use solid colors and change yarn at every round, fasten off and weave in the ends after each round. With self-striping yarn, you can continue into the next round without cutting the yarn.
Abbreviations
- ch: Chain
- sc: Single Crochet
- dc: Double Crochet
- sl st: Slip Stitch
- fptr: Front Post Treble Crochet
- bptr: Back Post Treble Crochet
- bpdc: Back Post Double Crochet
- puff st: Puff Stitch
- picot: Picot Stitch – ch 3, sl st into the first ch
- sp/sps: Space/Spaces
- st/sts: Stitch/Stitches
Build the Granny Mosaic Squares
The square starts like a traditional granny motif, then the front-post treble stitches begin reaching down into earlier rounds. That lower stitch placement is what creates the vertical mosaic texture, so take particular care with the first few fptrs; they establish the alignment for the rounds that follow.
Center and First Mosaic Rounds
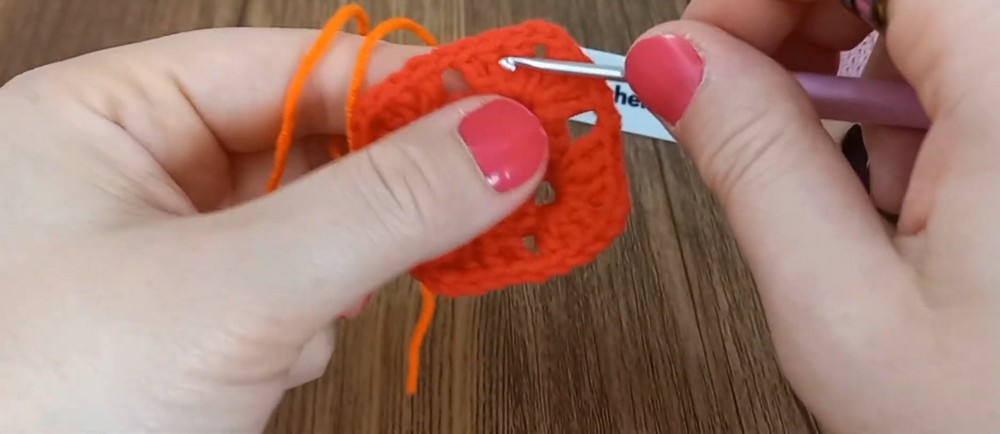
Round 1: Make a magic ring; ch 3 (counts as 1 dc), 2 dc into the ring, ch 2; [3 dc, ch 2] 3 times; pull the ring tight and join with a sl st to the top of the beginning ch-3. Fasten off.
Round 2: Join the next color in any ch-2 corner sp; ch 3, 2 dc, ch 2, 3 dc into the same corner sp; ch 1, skip 3 sts, [3 dc, ch 2, 3 dc] into the next corner sp; repeat from * to * 2 more times; ch 1, join with a sl st to the top of the ch-3. Fasten off.
At this stage you should have four clear corners and a ch-1 space along each side. Those side spaces become the working points for the first mosaic detail.
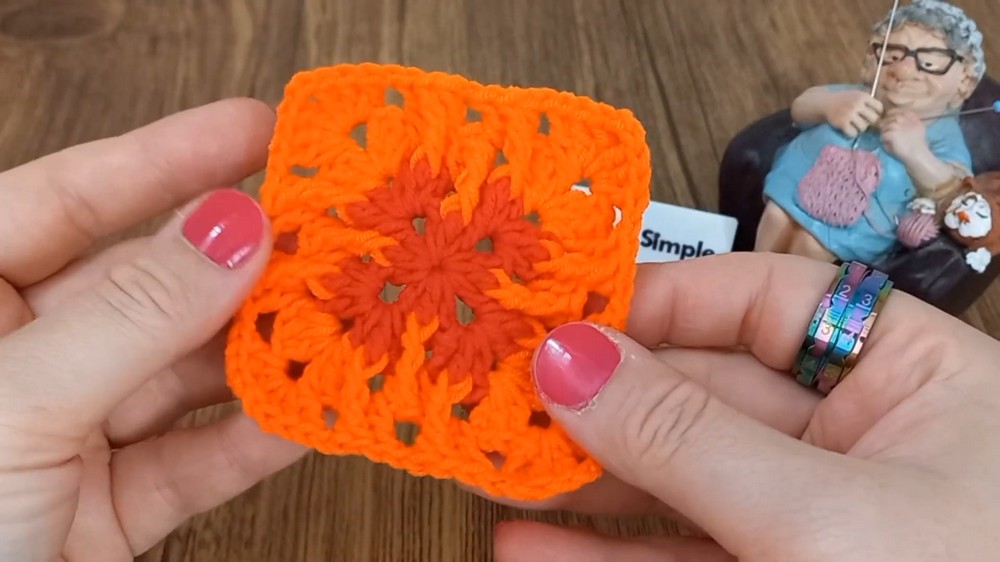
Round 3: Join the next color in any ch-2 corner; in the corner sp make [3 dc, ch 2, 3 dc]; ch 1; in the next ch-1 sp make [1 dc, 1 fptr around the 2nd (middle) dc of the 3-dc cluster directly below it from Round 1, 1 dc]; ch 1; in the next corner sp make [3 dc, ch 2, 3 dc], ch 1; in the next ch-1 sp make [1 dc, 1 fptr around the middle dc from Round 1, 1 dc], ch 1; repeat from * around; join with a sl st to the top of the ch-3. Fasten off.
The important part of this round is the fptr reaching down to Round 1, rather than simply working into the nearest stitch. This gives the mosaic section its first vertical anchor.
Continue the Mosaic Texture
Round 4: Join the next color in a corner; make [3 dc, ch 2, 3 dc] in the corner sp, ch 1; in each ch-1 sp across the side, make [1 dc, 1 fptr around the middle dc of the cluster 2 rounds below, 1 dc], ch 1; at the next corner make [3 dc, ch 2, 3 dc], ch 1; repeat around; join with a sl st. Fasten off.
Notice that the post stitch now reaches to the cluster two rounds below. Keep that relationship consistent as the square grows.
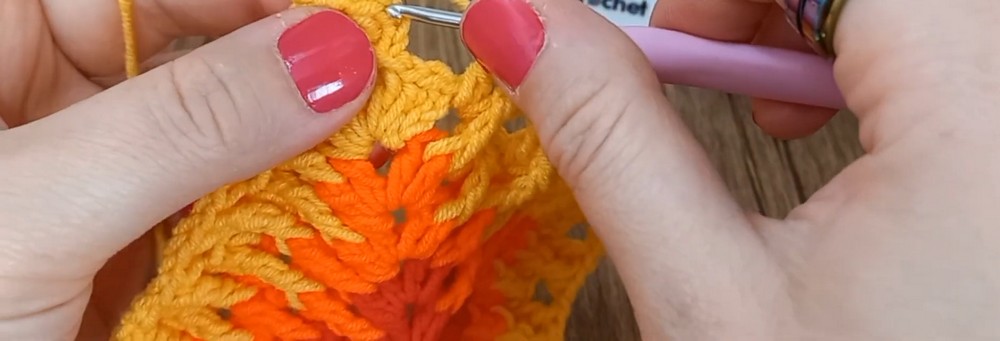
Rounds 5–13: Continue repeating the Round 4 diagram; always place [3 dc, ch 2, 3 dc] in each corner, and in every ch-1 side space work [1 dc, 1 fptr around the stitch 2 rounds below, 1 dc], separated by ch-1 spaces. Stop at Round 13 for the standard square, or continue the same repeat to Round 26 when making the larger version.
The corners remain structurally the same throughout these rounds. Along the sides, the fptrs should continue forming a visually aligned vertical pattern rather than drifting from one round to the next.
Prepare the Squares for Joining
Once all your squares have reached the chosen size, divide them evenly into Type A and Type B.
Type A: Leave the square exactly as it is after its final motif round.
Type B: Add the special chain-4 edging.
Type B Edging Round: Join yarn in a corner ch-2 sp; ch 1, 1 sc into the corner sp, ch 4, 1 sc into the same corner sp; ch 4, 1 sc into the next ch-1 sp; repeat across the side; at the next corner make [1 sc, ch 4, 1 sc]; repeat around; join with a sl st and fasten off.
When this edging is complete, Type B will have a series of ch-4 spaces around its perimeter. These spaces are not decorative extras—they are the points that the Type A squares will connect to during the asymmetrical join.
Join the Squares with the Zigzag Seam
The blanket uses an asymmetrical join-as-you-go method, so the two square types are deliberately treated differently.
Place one Type A square beside one Type B square.
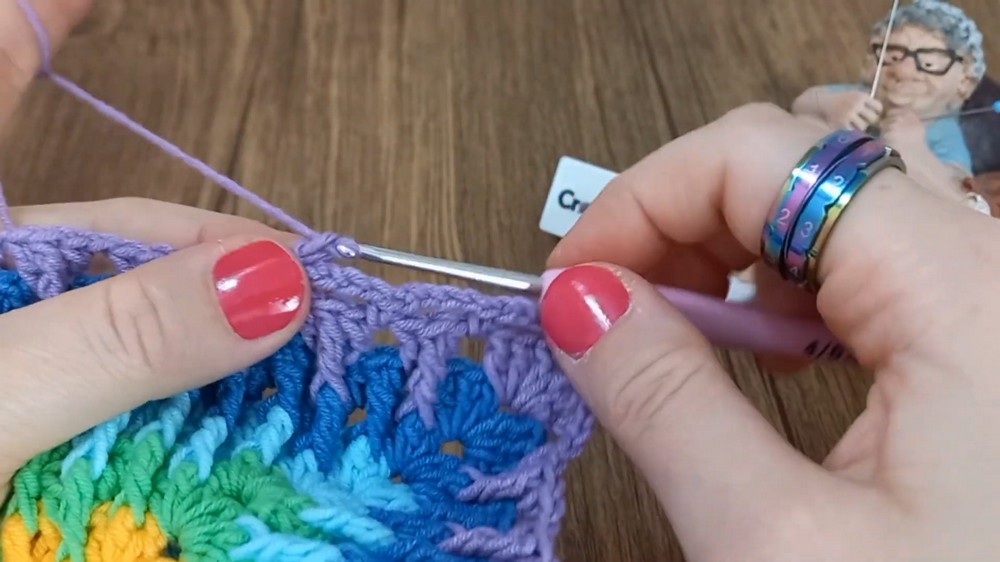
Join yarn in the corner space of the Type A square and ch 2.
Make 1 sc into the corresponding corner ch-4 sp of the Type B square, ch 2, 1 sc into the first ch-1 sp of the Type A square, ch 2, 1 sc into the next ch-4 sp of the Type B square, ch 2.
Continue alternating between the Type A ch-1 spaces and Type B ch-4 spaces across the entire side.
This creates the characteristic zigzag connection. Keep the two squares aligned as you move along the edge rather than pulling the joining chains too tightly; the spaces need enough flexibility for the later border motifs to form cleanly.
Continue using this method until all of the squares are joined into the complete blankt.
Build the Raised Border Motifs
Once the square layout is joined, the border is worked in stages. The first border round is especially important because it creates the raised umbrella motif at the places where four squares intersect.
Border Round 1 – Umbrella Motif
Work this round at the center seams where the squares intersect.
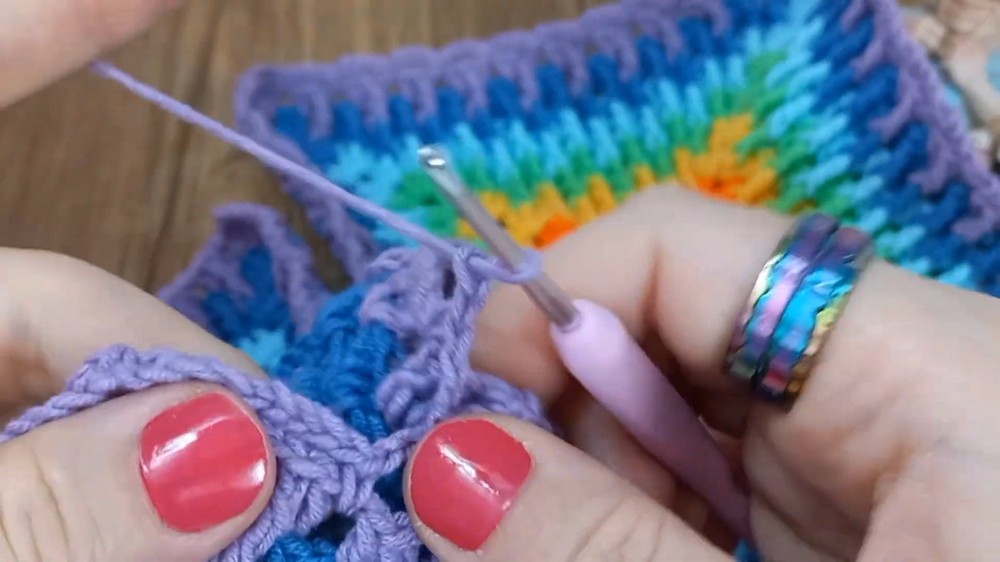
Join yarn with a sl st and 1 sc into the ch-4 space at the corner seam; ch 6, skip the joining gap, and make 1 sc into the adjacent square’s ch-4 space; ch 3, make 1 sc into the next ch space on the square, turn; make 11 dc into the ch-6 loop for 12 sts total including the turning chain; make 1 sc into the next ch space on the square; ch 5, make 1 sc into the next ch space, ch 1; turn; make 1 bptr into each dc, skipping the first and last dc and placing ch 1 between every bptr, giving 11 bptr and 11 ch-1 spaces; end with 1 sc into the next ch space and fasten off.
Repeat this motif at every square intersection.
The turning points in this round are easy to miss, so check the shape before continuing. The first half creates the curved foundation; the second pass with bptrs pulls the texture upward into the umbrella-like arch.
Border Round 2 – Puff Texture
Join the next color in the first ch-1 space of an umbrella motif.
Work [1 puff st, ch 3] in every ch-1 space around the umbrella. Continue along the straight blanket edge, placing [1 puff st, ch 3] into every ch-1 or ch-4 space. At the main blanket corners, work [1 puff st, ch 3] into the corner sc.
Join with a sl st and fasten off.
The puff stitches begin filling the open framework created by the first border round, so keep each puff similar in size for an even textured edge.
Border Round 3
Join the next color.
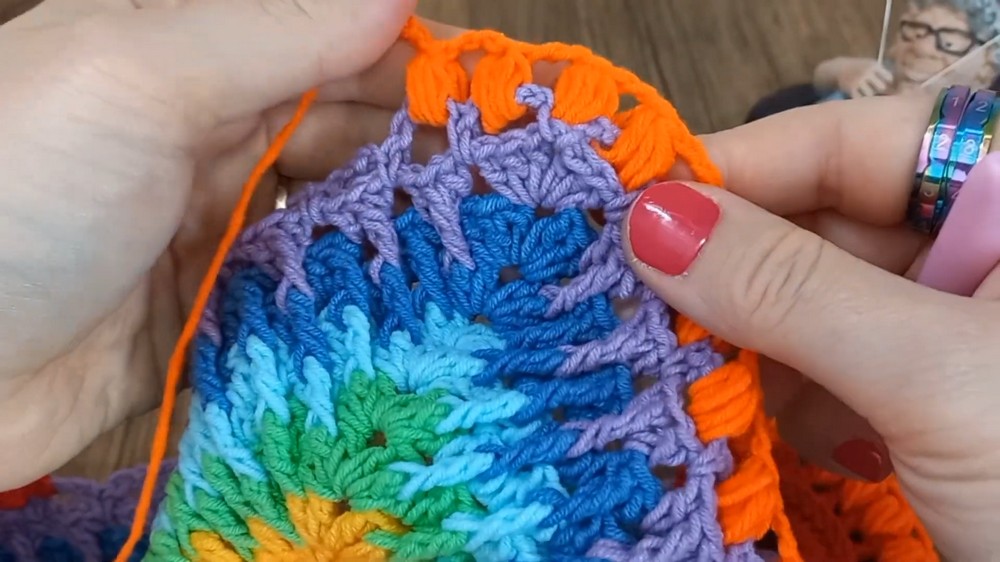
Along the straight sides, make 2 dc into each ch-2 space and 1 dc on top of every puff st. At the blanket corners, make [2 dc, ch 2, 2 dc].
Over the umbrella motifs, make [1 sc, ch 3] into the top of every puff st, approximately 10 times.
Join with a sl st and fasten off.
Border Round 4
Join the next color.
At the blanket corners, make [2 dc, ch 2, 2 dc]. Along the straight edges, work 1 bpdc into every dc stitch across.
Over the umbrella motifs, make [1 sc, ch 4] into every ch-3 space from the previous round, approximately 9 times.
Join with a sl st and fasten off.
The bpdc section adds another layer of raised texture along the straight edges, while the longer chain spaces preserve the open shape above each umbrella motif.
Border Round 5
Join the next color.
At the blanket corners, make [2 dc, ch 2, 2 dc].
Across the straight edges, repeat [1 sc, ch 2, skip 2 sts, 1 sc into the 3rd st] across.
Over the umbrella motifs, work [1 bpdc, ch 1] around every post stitch of the shell pattern across the arch.
Join with a sl st and fasten off.
Keep the skipped-stitch rhythm consistent along the straight sides. It controls how the final picot edge will sit in the next round.
Border Round 6 – Picot Edge
Join the final color.
At each main blanket corner, make [1 sc, 1 picot, 1 sc].
Along the straight edges, make [1 sc, ch 2] into each ch-2 space.
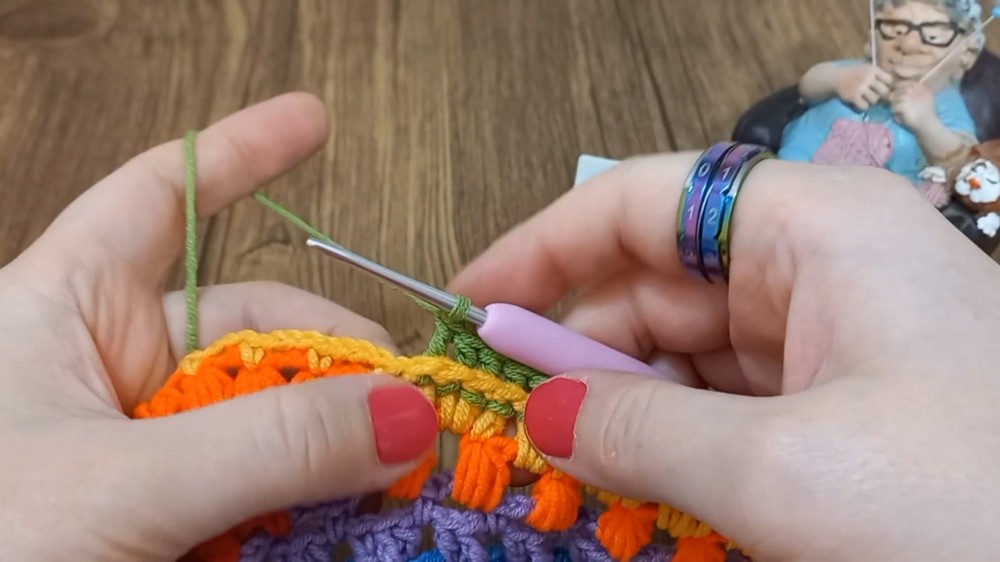
Over the umbrella motifs, work [1 sc, 1 picot] in the chain spaces, and cluster 3 picots together directly on top of the back post double crochets.
Join with a sl st and fasten off.
The final round adds the delicate pointed edge without covering the raised mosaic texture underneath. After all six border rounds are complete, weave in the remaining yarn tails securely.
Size & Layout Options
For the standard version, stop each square at Round 13. If you want larger individual motifs, continue the same square repeat through Round 26 before preparing the pieces for joining.
Whichever size you choose, keep the total square count divisible by four. Examples include 4, 16, and 24 squares. This keeps the intersections and the umbrella-style border motifs aligned across the finished blanket.
Once the loose ends are woven in, the blanket can be lightly steam blocked to relax the stitches and help the raised mosaic texture settle into a crisp, even shape.