
Lightweight, stylish, and perfect for summer, these crochet mesh shorts blend breathable texture with a customizable fit for lounging, layering, or casual outings.

Crochet mesh shorts are light, airy, and stylish bottoms that you can wear over swimsuits, leggings, or just on a warm day at home. This Shorts pattern turns simple yarn into a pair of cozy shorts that look trendy and relaxed at the same time. The open mesh design keeps them breathable, making them perfect for summer or beach days.
Crochet Mesh Shorts Tutorial
The making process of Crochet Mesh Shorts is beginner‑friendly: you mainly work in easy, repeated rows that build the mesh look step by step. You create panels for the front and back, then shape the waistband so they sit comfortably on your hips. Once the pieces are joined, you can adjust the length, flare, or fit to suit your style. Add a drawstring or keep the top simple for a clean finish.
These crochet shorts can be worn as a cover‑up at the pool, as loungewear at home, or styled with a tank top for a casual outfit. You can play with colors, go for a soft pastel, a bold, bright shade, or stripes. The pattern is a nice way for beginners to move from small items to real clothing without feeling overwhelmed, while still ending up with something useful, stylish, and fun to wear.
Credit Brenda DIY
- Foundation & Waistband: Begin with a snug chain that fits your waist, transitioning into a sturdy, customizable waistband.
- Mesh Body: The main body of the shorts uses an airy mesh stitch pattern for breathability and texture.
- Leg Openings: The pattern is divided into two sections to create the left and right legs, worked individually in the round.
- Finishing Touches: Add optional enhancements like edging, embroidery, or a functional drawstring or elastic waistband for a polished look.
The design kicks off with a foundation chain that’s tailored to your specific waist measurement. After ensuring the chain is joined without twists, you’ll build a secure, single crochet waistband. This component can be made even more stretchy and dynamic by using ribbed post stitches if you’d like to add some flair. You’re encouraged to customize—opt for a wider or narrower waistband depending on your personal style.
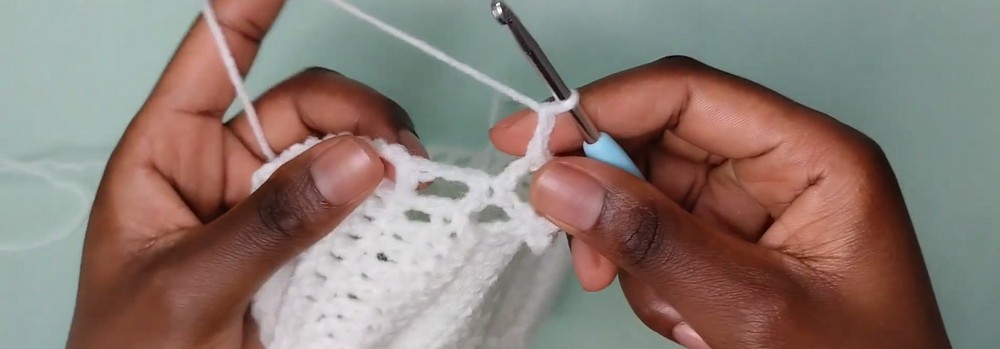
Next comes the star of the show: the airy mesh body design. The mesh stitch, which alternates blocks of double crochet with chain spaces, creates a light, breathable texture that makes these shorts both stylish and practical. The rows of the mesh expand downward, forming the main tube of the shorts. Here, you have the freedom to decide on the length of the body before transitioning to the leg openings, which adds to their versatility.

Once the shorts’ body is complete, you’ll divide the piece to form the left and right legs. Stitch markers come in handy to ensure an even split, helping you create two equal sections. Each leg is worked independently in the same mesh stitch pattern, giving the shorts their breezy, summery look. You can adjust the leg length as you go to match your preferences, from a short pair of loungers to longer shorts for more coverage.

Finishing touches pull it all together. By adding a simple edging or a more decorative style to the leg openings, you can elevate the design. If you’re looking for more security around the waist, you can insert a drawstring or elastic—both practical and chic. Finally, weave in all those ends for a clean, seamless finish.

Video Tutorial
Step-by-Step Pattern
Materials
To create your crochet mesh shorts, gather the following supplies:
- Yarn: Use lightweight yarn (Category 3 or 4) for a breathable and comfortable texture. Cotton or cotton blends are ideal.
- Suggested yarn: Lion Brand Coboo or Paintbox Cotton DK.
- Hook: A crochet hook in size 4.5 mm or 5 mm, depending on the recommended size for your yarn or your tension.
- Measuring tape: For accurate measurements and sizing.
- Scissors: To cut your yarn.
- Tapestry needle: For weaving in ends.
- Stitch markers (optional): To mark the beginning of rounds or sections.

Pattern Inst ructions
Part 1: Foundation and Waistband
- Foundation Chain:
Create a chain long enough to fit snugly around your waist. For example, chain 80-130 chains depending on your size. Join the last chain to the first with a slip stitch (Sl st) to form a circle. Ensure the chain isn’t twisted. - Waistband:
- Round 1: Work 1 Sc into each chain around. Join with Sl st to the first Sc.
- Round 2-5: Continue working 1 Sc into each stitch for 4 more rounds. (You can make the waistband wider if you prefer.)
Optional: Use a ribbing stitch (e.g., front-post or back-post stitches) for a stretchy look.
Part 2: Creating the Mesh Pattern
- Set Up the Mesh Stitch
- Round 6: Start with 2 Dc into the first stitch, Ch-2, skip 2 stitches, then work 2 Dc into the next stitch. Repeat this around the row. Join with Sl st.
- Repeat the above round for about 10-15 rows, depending on your desired length between the waistband and leg openings.
- Divide for Legs
- Lay the shorts flat and place stitch markers at the center front and center back. Use them to divide the tube into two equal parts for the left and right leg holes.
Part 3: Crocheting the Legs
- Left Leg:
- Attach your yarn to one side of the shorts to begin working in the round for the left leg.
- Round 1: Start with 1 Dc, Ch-2, skip 2 stitches, 2 Dc into the next stitch. Repeat for the round, joining with a Sl st.
- Work approximately 7-10 rows in the mesh stitch, or until the shorts reach the desired length for the leg.
- Right Leg:
- Repeat the same pattern for the second leg, ensuring symmetry.

Part 4: Finishing Touches
- Edging (Optional):
Add a round of Sc or decorative edging to the ends of each leg for a cleaner finish. - Weave in Ends:
Using your tapestry needle, weave in all loose ends. - Elastic or Drawstring (Optional):
If you prefer more security at the waistband, insert a drawstring or elastic band before use.

Troubleshooting and S uggestions
Common Issues:
- Twisted Foundation Chain: To avoid twisting, lay the chain flat and check it carefully before joining it in the round.
- Inconsistent Mesh Tension: Maintain even spacing in stitches and chain spaces to ensure the mesh pattern looks cohesive throughout the piece.
- Uneven Legs: Use stitch markers and count stitches diligently to avoid asymmetry between the legs.
Creative Modifications:
- Experiment with striped yarn or alternating colors in the mesh stitch rows for a vibrant, playful look.
- Use a decorative edge pattern for the leg openings, such as scallops or picots, to add a touch of whimsy.
- Adjust the design to create beach cover-up shorts by increasing the length and leaving a slightly looser fit.


