Stylish Crochet Shorts Tutorial for Summer Wear
These comfy, customizable crochet shorts are the ultimate warm-weather staple—perfect for lounging, casual outings, or crocheting a personalized summer wardrobe.

Crochet shorts are a charming way to bring creativity into your wardrobe. If you’re relaxing at home or basking in the summer sun, they offer comfort and style all in one. These shorts are lightweight, breathable, and uniquely hand-made, making them feel extra special. Plus, they’re super versatile; pair them with a tank top for a casual look or wear them over swimwear at the beach.
Handmade Crochet Shorts Pattern
Making crochet shorts is surprisingly simple. The pattern focuses on shaping the shorts to your preferred fit without being overly complex, making it suitable for beginners. You can personalize your shorts with your favorite colors and experiment with designs. With just a little time and effort, you’ll have something stylish and handmade to wear.
Key Features of the Pattern:
- Waistband: A sturdy band worked in single crochet provides a snug, supportive fit that stays in place.
- Shaped Body & Texture: Alternating rounds of double and half double crochet create a stylish, textured fabric that flatters the hips.
- Customized Legs: The shorts are shaped into two leg openings, with options to adjust the fit and length for added comfort.
- Finishing Touches: Seamless finishing and optional decorative edging lend a polished, personal touch.
These crochet shorts begin with a simple yet essential step: crocheting a waistband that fits securely around your waist. Using single crochet stitches, you’ll create a ring that won’t stretch out of shape with wear. This part is worked tightly for structure, and after about 2 inches of height, you’ll have a foundation that anchors the shorts comfortably.
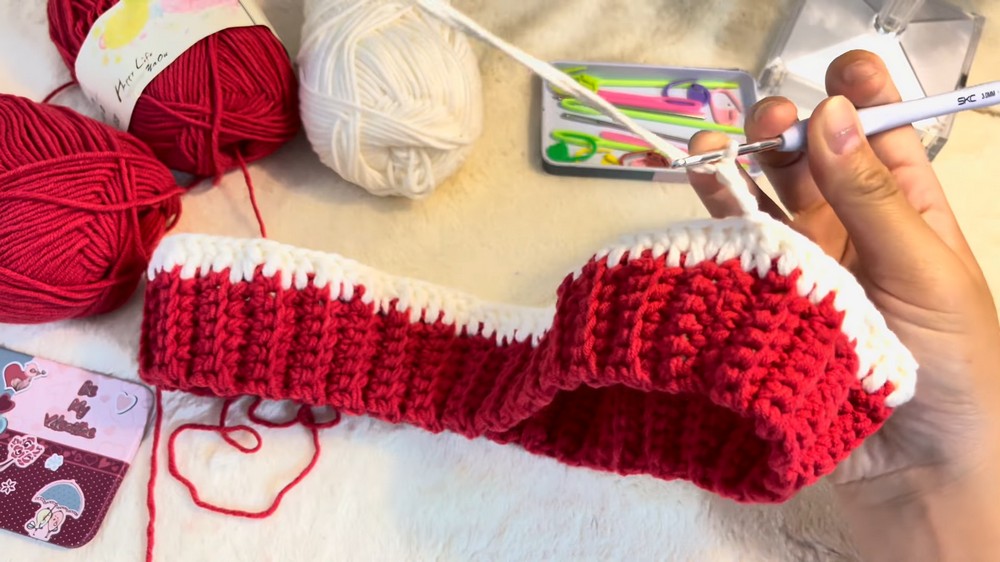
From the waistband, you’ll shift into working the main body in rounds. To accentuate the hips and provide a flattering fit, you’ll gradually increase stitches around the waist. Alternating rounds of double crochet and half double crochet create a subtle, textured pattern that adds depth to the shorts’ design. By the time you’ve reached the point where the legs begin, you’ll have a well-proportioned base that follows your body’s natural shape.

The shorts are then split into two sections to form the legs. Each leg is worked in the round individually, allowing for easy customization of the opening’s width and the leg length. This step is perfect for tweaking the fit if you’d like slim-fit legs or a looser, breezy feel. You can even play with increases or decreases to make the shorts your own.
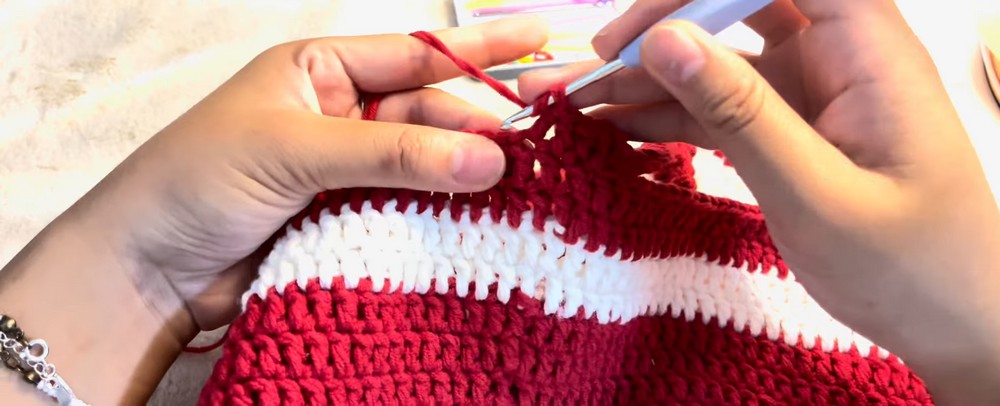
Finally, the pattern comes together with seamless finishing touches. Weave in all ends for a tidy look and check for any small gaps between the legs or at joins, using slip stitches to fix them if necessary. For a little flair, you can finish with a decorative edge around the leg openings, like a classic single crochet border for clean lines or a playful picot edge for something more feminine.

Video Tutorial
Materials
- Yarn: Cotton or acrylic yarn, preferably lightweight (DK or Sport weight)
- Crochet hook: Size G/6 (4.0 mm)
- Stitch markers
- Scissors
- Measuring tape
- Tapestry needle
Detailed Pattern
- Waistband:
- Start with a chain long enough to wrap around your waist comfortably.
- Join with a slip stitch to form a ring.
- Work in single crochet for about 2 inches, ensuring a tight and supportive waistband.
- Body:
- From the waistband, work in rounds.
- Increase stitches evenly around the waist to shape the hips.
- Alternate between double crochet and half double crochet rounds for texture.
- Continue until the desired length is achieved from waist to crotch.

- Legs:
- Split the body into two sections for the legs.
- Work each leg separately, continuing in rounds.
- Add increases or decreases as needed to shape the leg opening for a comfortable fit.
- Crochet until each leg reaches the desired length.
- Finishing:
- Fasten off and weave in all ends using a tapestry needle.
- Use a slip stitch to join any remaining seams or gaps.
- Optionally, add a decorative edge at the bottom of the legs with a round of single crochet or a picot edge.
Troubleshooting and Suggestions:
- Common Issues: When making the waistband, ensure your tension is consistent, and don’t crochet too loosely—this section needs to stay snug to avoid slipping down. If your increases in the body feel uneven, try placing a stitch marker to track the start of each round and space the increases carefully.
- Creative Modifications: Experiment with different color combinations, such as stripes, color blocks, or even gradient yarn for a unique look. You could also try adding a drawstring to the waistband for added adjustability or embellish the leg edges with simple appliqués like flowers or tassels. Want longer coverage? Extend the legs to create crochet bike shorts!
- Adapting Fit: If your shorts feel tight around the hips or thighs, consider adding a few extra increases evenly during the body or leg sections. For a looser fit, use a hook size slightly larger than recommended for a more relaxed fabric.