Easy Crochet Shrug Pattern – Lightweight Handmade Layer
Want a lightweight crochet shrug to wear over your favorite tops and dresses? This design combines open mesh, textured rows, and simple sleeves for a relaxed handmade layer.
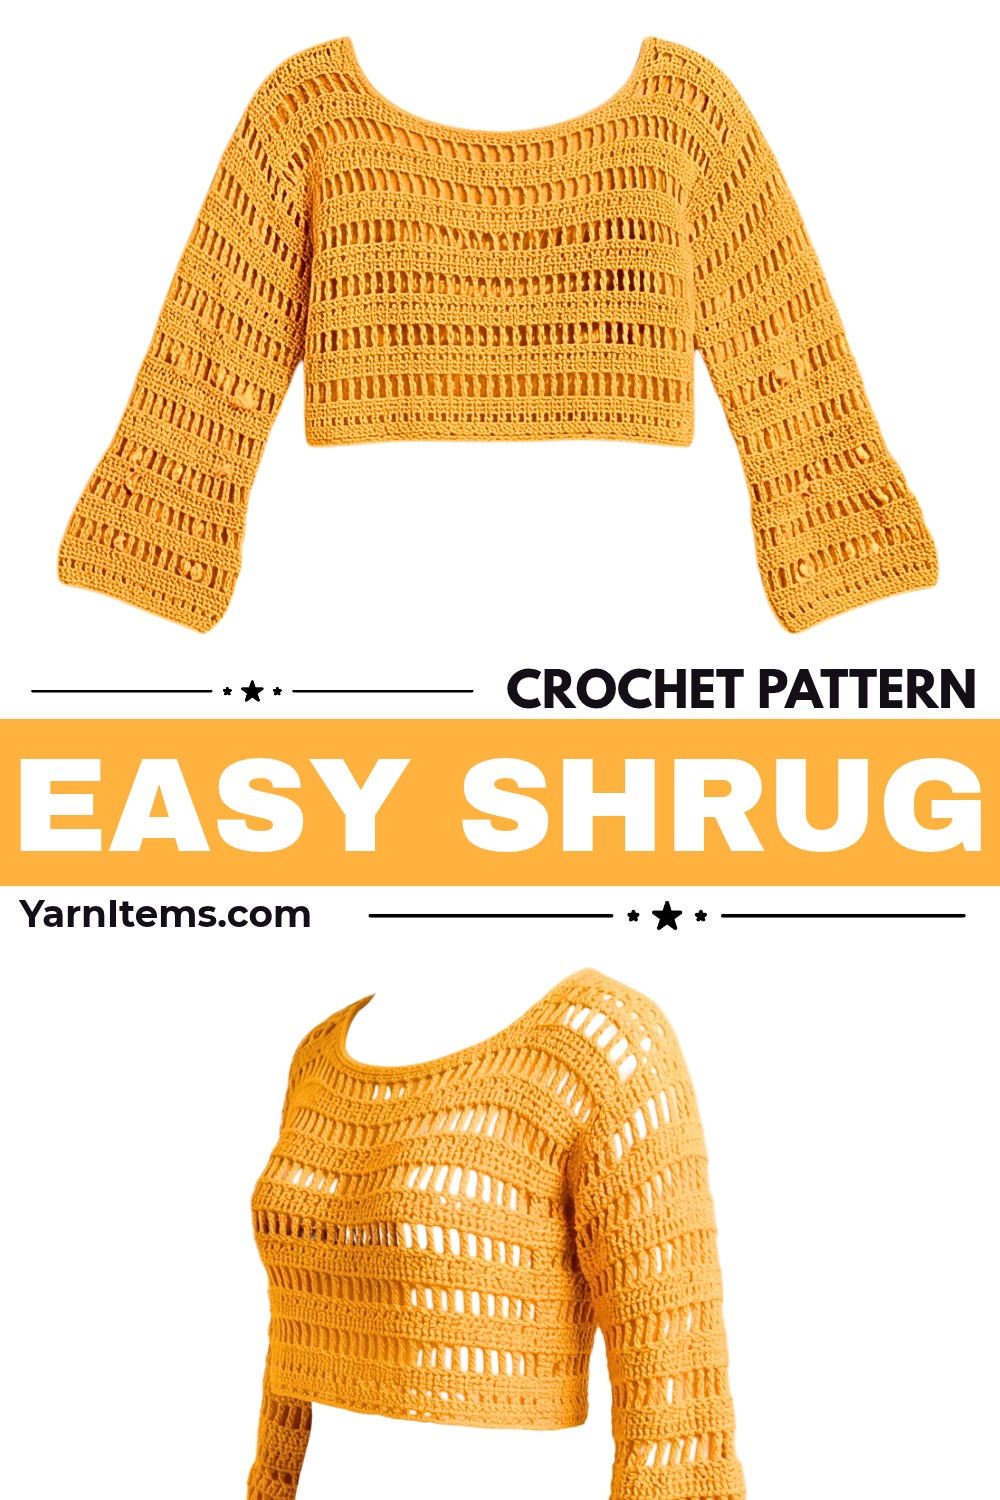
The finished crochet shrug has a wide, comfortable back panel and an open front, with matching sleeves that complete its easygoing style. Denim-printed cotton-blend yarn gives the crochet stitches definition while keeping the fabric soft and drapey.
You’ll make one rectangular body panel and two sleeve panels, following a six-row stitch sequence. I’ll walk you through the rows, measurements, and joining steps, with extra guidance where you may need to check the instructions before sewing the crochet pieces together.
Credit Eliknits
Materials & Tools Needed
Gather the following supplies before starting so you can work through the body and sleeve panels without interruption.
- Yarn: No. 3 cotton yarn (Light/DK weight). The tutorial uses denim-printed cotton yarn containing approximately 80% cotton and 20% polyester. This blend gives the stitches clear definition and helps the finished fabric drape beautifully.
- Crochet Hook: 4.5 mm.
- Tapestry Needle: For weaving in yarn ends and sewing the garment panels together.
- Stitch Markers: For marking the armhole openings before joining the shoulders.
- Scissors: For cutting the yarn after completing each section.
Finished Size & Customization Ideas
The following measurements are taken from the tutorial:
- Main Panel Width: Approximately 50 cm when folded, with an unfolded span of about 100 cm.
- Main Panel Height/Length: Approximately 40 cm.
- Sleeve Circumference: Approximately 40 cm, corresponding to the 77-chain foundation.
These measurements provide a reference for the finished shrug. Your actual size may vary depending on your yarn, tension, and crochet technique, so measure your fabric as you work.
How to Adjust the Width
The foundation chain of the main body panel determines its overall span from one side to the other. Add or remove chains to make the shrug wider or narrower.
Make any adjustments in suitable multiples for the stitch pattern so the mesh and textured rows remain properly aligned.
How to Adjust the Length
The six-row stitch sequence controls the height of the main panel. Repeat the sequence more times for additional back coverage, or work fewer repeats for a shorter shrug.
Measure the panel from top to bottom as you go. Stop when it reaches your preferred length, using the tutorial’s 40 cm measurement as a reference.
How to Customize the Sleeves
You can change the sleeve length by adding or subtracting rows from both sleeve panels. Fewer rows create shorter, elbow-length sleeves, while additional rows give you longer sleeves that reach closer to the wrists.
Keep both sleeve panels the same length so the finished garment looks balanced.
Pattern Abbreviations & Terminology
This pattern uses standard US crochet terminology.
- ch: Chain
- st(s): Stitch(es)
- sc: Single Crochet
- hdc: Half Double Crochet
- dc: Double Crochet
- dtr: Double Treble Crochet (wrap the yarn around the hook 3 times)
- sk: Skip
- sp: Space
- t-ch: Turning Chain
- rep: Repeat
- [ ]: Time stamps corresponding to the video tutorial
Understanding the Double Treble Crochet (dtr)
The double treble is a taller stitch than a regular double crochet. To make it, wrap the yarn around your hook three times before inserting the hook into the indicated stitch or space. Yarn over and pull through two loops at a time until only one loop remains on the hook.
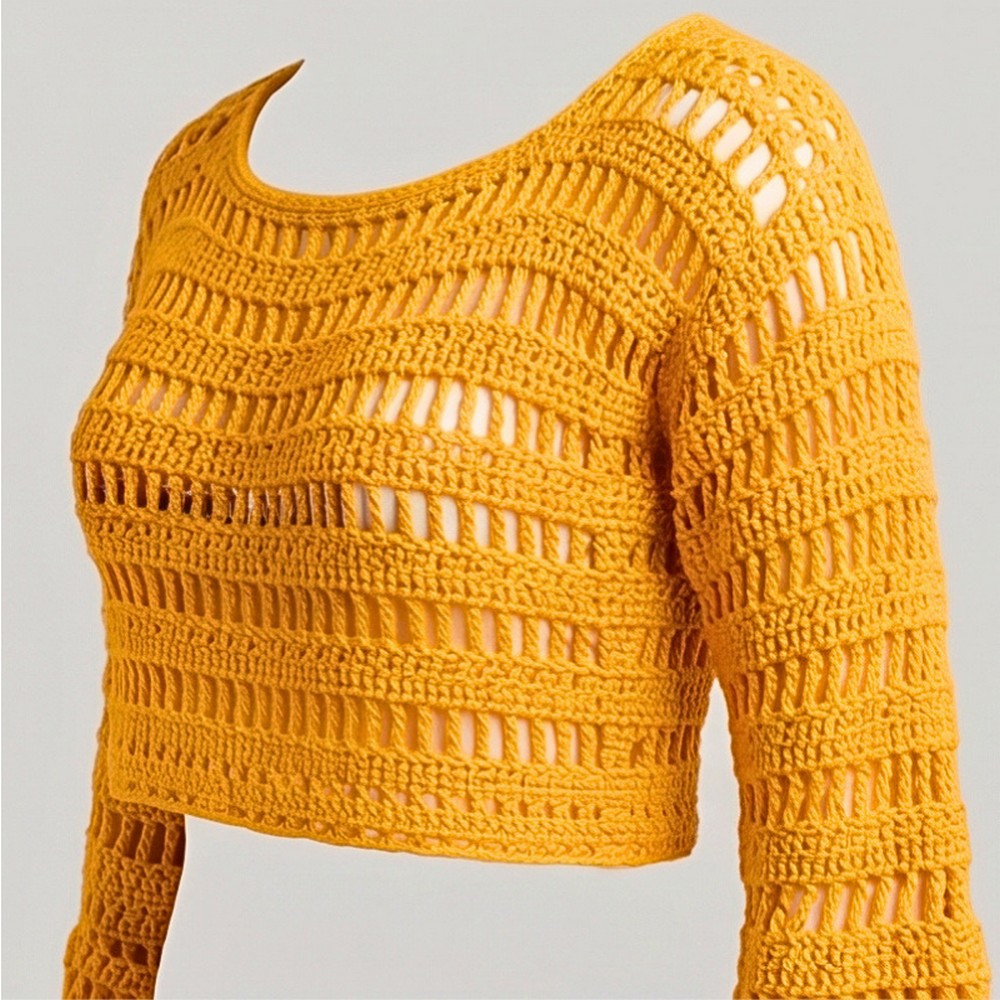
This taller stitch creates the open, airy appearance used in the laced row.
Step-by-Step Crochet Shrug Instructions
The shrug is made from one main rectangular panel and two matching sleeve panels. You will crochet these pieces separately, fold and seam them, and then attach the sleeves to the marked armhole openings.
Part A: Main Body Panel
The main panel forms the back and front span of the shrug. Start with the foundation chain and work through the six-row stitch sequence until the fabric measures approximately 40 cm in height.
Foundation Chain
With your 4.5 mm crochet hook and No. 3 cotton yarn, make a slip knot and chain 87 stitches (87 ch).
This foundation chain establishes the width of the main panel. According to the tutorial, the panel measures approximately 50 cm when folded, or about 100 cm across when unfolded.
Try to keep your chain stitches even. A very tight foundation chain can pull the lower edge inward and make the panel difficult to measure accurately.
Row 1 – HDC Base Row
Skip the first 3 chains from the hook. Work 1 half double crochet (hdc) into the 4th chain from the hook.
Continue making 1 hdc in each chain across the foundation.
The supplied instructions state that this row should contain 86 hdc stitches. Chain 3 (3 ch) and turn your work.
Helpful tip: Count your stitches before starting the next row. The stated foundation chain and stitch count need checking: working from the fourth chain of an 87-chain foundation leaves 84 chains available, not 86. Check the tutorial’s actual starting placement before proceeding if you need to reproduce the stated count exactly.
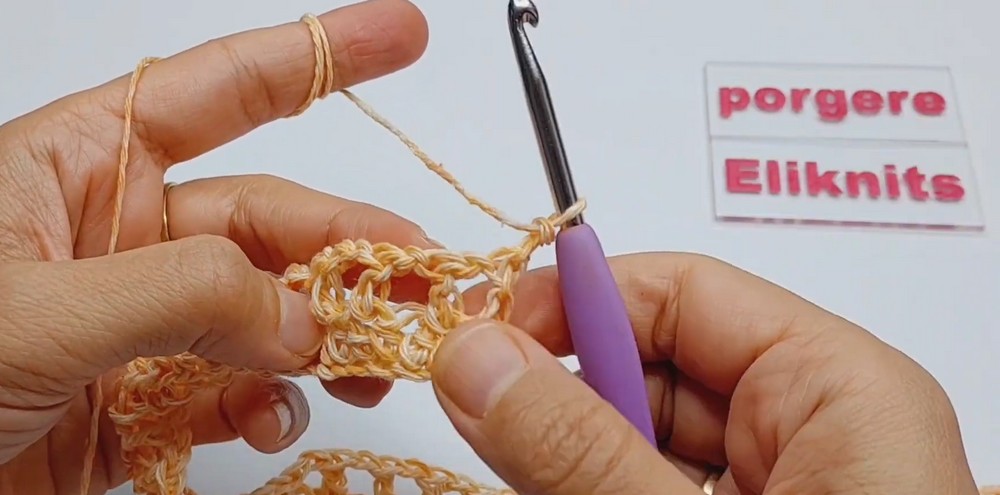
Row 2 – Open Mesh Row
This row creates the first open section of the fabric using double crochet stitches and chain spaces.
Skip the first stitch and work 1 double crochet (dc) into the next stitch. Chain 1 (1 ch), then skip the next stitch.
Repeat the following sequence across the row:
- Work 1 dc into the next stitch.
- Chain 1.
- Skip 1 stitch.
Continue repeating this sequence to create the open mesh pattern.
At the end of the row, chain 2 (2 ch) and turn.
Helpful tip: The chain-1 spaces are the openings created between the double crochet stitches. Keep these spaces consistent because they are used again in the following solid-fill row.
Row 3 – Solid Fill Row
This row fills the chain spaces from the previous mesh row to create a denser section.
Work 1 double crochet (dc) into the first stitch. Then work 2 dc into each chain-1 space across the row.
Continue placing 2 dc in each chain-1 space until you reach the end of the row.
Chain 2 (2 ch) and turn.
Helpful tip: Insert your hook into the chain-1 spaces rather than splitting the chain. Working both double crochets into the same opening helps create the solid block texture described in the tutorial.
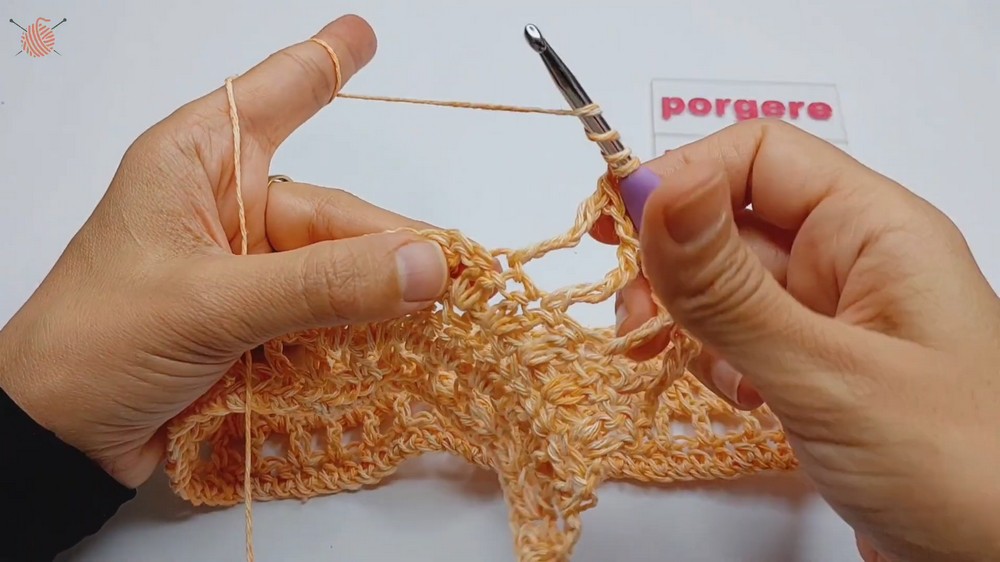
Row 4 – Textured Moss/Seed Stitch Row
For this row, work 1 single crochet (sc), chain 1 (1 ch), and skip the next stitch.
Repeat this sequence across the row:
- Work 1 sc.
- Chain 1.
- Skip 1 stitch.
The combination of single crochet stitches and chain spaces produces a lightly textured, open fabric.
Chain 2 (2 ch) and turn.
Row 5 – HDC Repeat Row
Work 2 half double crochets (2 hdc) into each chain space or stitch pattern across the row, following the sequence shown in the tutorial.
Continue across the panel to rebuild the fabric’s height and add another textured section.
Chain 5 (5 ch) and turn.
Helpful tip: Keep the placement of the two hdc stitches consistent as you work. The supplied description refers to each chain space/stitch pattern, so check the tutorial for the exact insertion points before repeating this row.
Row 6 – Tall Laced DTR Row
This row adds a taller, airy lace effect.
Work 1 double treble crochet (dtr), chain 1 (1 ch), and skip the next stitch.
Repeat the sequence across the row:
- Work 1 dtr.
- Chain 1.
- Skip 1 stitch.
Turn your work at the end of the row.
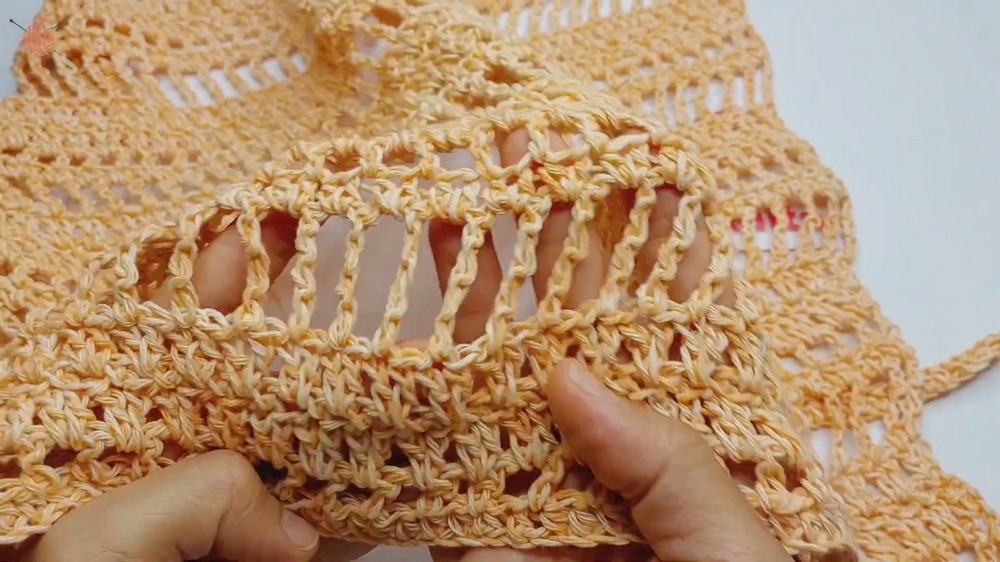
Helpful tip: Keep the chain spaces relaxed without making them excessively loose. This helps the tall stitches form an even laced pattern.
Continue the Six-Row Pattern
Continue repeating Rows 1 through 6 in sequence until the main panel reaches approximately 40 cm in height.
Measure the panel from one edge to the other without stretching the fabric. Once it reaches the desired height, fasten off the yarn.
If you want to use the remaining yarn tail for assembly, leave a generous length before cutting.
Part B: Sleeves (Make 2 Identical Panels)
Make two matching sleeve panels using the same yarn and hook. Each panel will be folded into a tube and sewn before being attached to the main body.
Foundation Chain
Chain 77 stitches (77 ch) using your 4.5 mm hook.
The tutorial associates this foundation with a sleeve circumference of approximately 40 cm.
Row 1 – HDC Base Row
Skip the required starting stitches as shown in the tutorial and work 76 half double crochets (76 hdc) evenly across the foundation chain.
Check that the stitches are distributed evenly so the sleeve panel does not become wider at one edge.
Sleeve Pattern Rows
Continue working the alternating stitch pattern using the six-row sequence from the main body.
Repeat the pattern rows until the sleeve panel reaches your preferred length. You can use your arm length or desired cuff position as a guide.
For a shorter sleeve, work fewer rows. For a longer sleeve, add more rows while keeping the stitch pattern consistent.
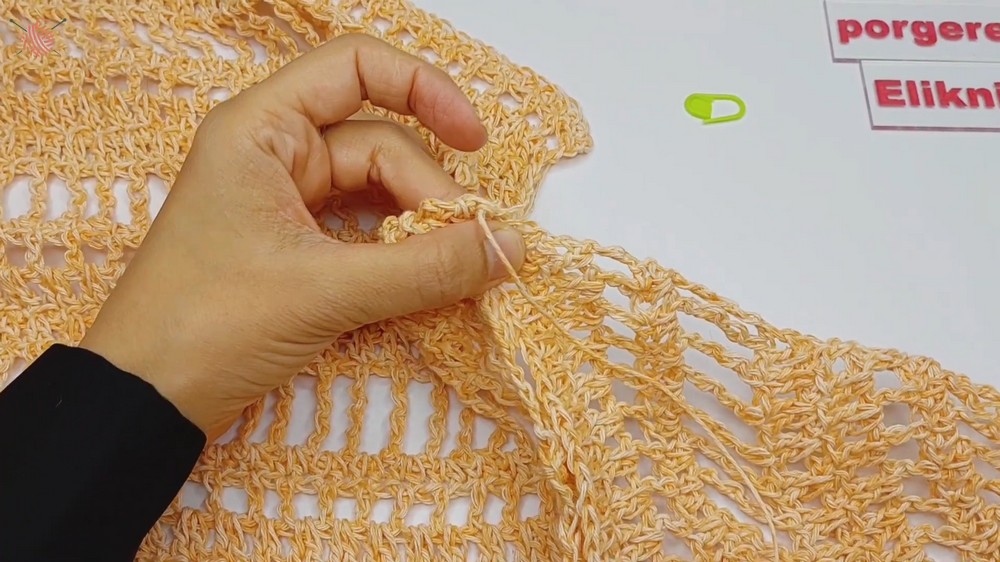
Finish the First Sleeve
Fasten off, leaving a generous yarn tail. You will use this tail to sew the long sleeve seam and attach the sleeve to the main shrug body.
Make a second sleeve panel following the same foundation chain, row sequence, and length as the first one.
Before assembly: Lay the two sleeve panels together and compare their measurements. Matching lengths make it easier to attach both sleeves evenly.
Assembly & Joining Methods
Once the main panel and both sleeve panels are complete, you can shape the shrug by folding and sewing the pieces together. Take time to mark the openings before seaming so the neckline and armholes remain correctly positioned.
1. Fold the Main Panel and Mark the Armhole Openings
Lay the main body panel flat. Fold it in half, bringing the top and bottom edges together.
Measure 10 cm inward from each outer folded edge. Place a stitch marker at each measurement to identify the armhole openings.
These markers show where the shoulder seams should stop. The center section must remain open to create the neckline.
2. Seam the Shoulders
Thread the tapestry needle with a suitable yarn tail.
Starting at one outer edge, sew the shoulder section toward the stitch marker. Stop at the marker and leave the remaining center section unseamed.
Repeat on the opposite side.
Check that both shoulder seams are approximately the same length and that the neckline opening remains centered.
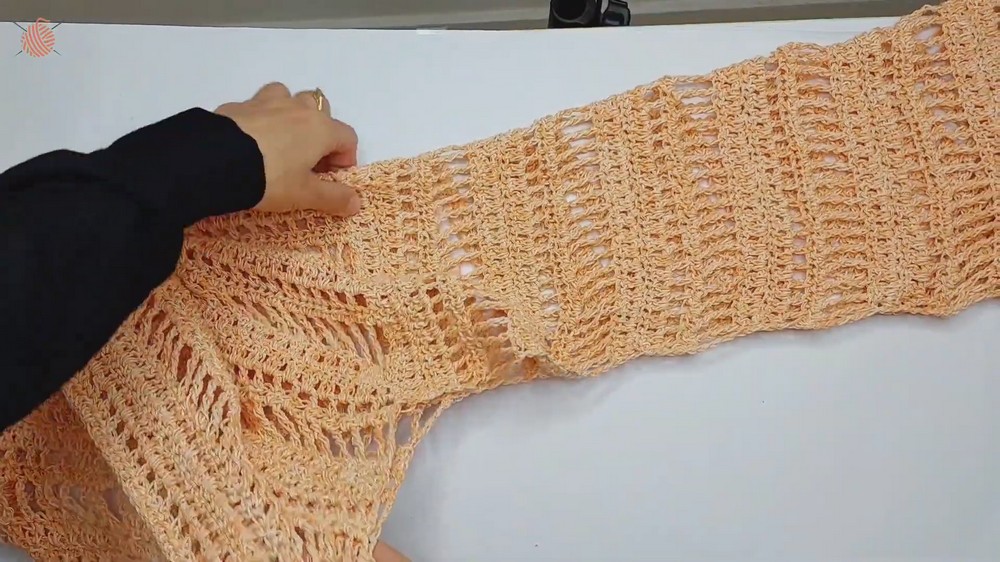
3. Fold and Seam the First Sleeve
Take one sleeve panel and fold it lengthwise so the two long edges meet.
Use a whipstitch or mattress stitch to sew these edges together, forming a cylindrical sleeve tube.
Try to keep the seam straight and avoid pulling the yarn too tightly. A tight seam can make the sleeve feel narrower than the crocheted fabric.
Repeat the same process with the second sleeve panel.
4. Attach the Sleeves to the Main Body
Take the first sleeve and position its open circular edge against the reserved 10 cm armhole opening on the main shrug body.
Align the sleeve with the opening and distribute the fabric evenly around the armhole. Use a tapestry needle and whipstitch to sew the sleeve securely in place.
Check the join as you work to make sure the sleeve is not twisted and that the seam does not create unwanted puckering.
Attach the second sleeve to the other armhole in the same way.
Finishing Techniques
Weaving in Loose Ends
After joining the sleeves, inspect the shrug for loose yarn tails.
Thread each tail through your tapestry needle and weave it back and forth through several hidden stitches on the wrong side of the fabric. Change direction once or twice to help secure the yarn.
Trim the excess close to the fabric without cutting into the stitches.
Blocking the Shrug (Optional)
Blocking can help open the delicate lace rows, even out the fabric, and smooth the edges.
You can lightly wet block the cotton shrug by dampening it, arranging it to the intended measurements, and allowing it to dry completely.
If you prefer steam blocking, check the yarn manufacturer’s care instructions first. Keep the steamer at a safe distance and avoid pressing a hot iron directly onto the crochet fabric.
Allow the shrug to dry fully before wearing it.
Wear Your Finished Crochet Shrug
Your easy crochet shrug is ready to add a handmade touch to your wardrobe. Wear it over a simple tank top, a sleeveless blouse, or your favorite dress. The combination of mesh openings, textured rows, and matching sleeves gives it a relaxed look that works well as a lightweight layering piece.