Crochet Granny Square Baby Romper for 3–5 Months
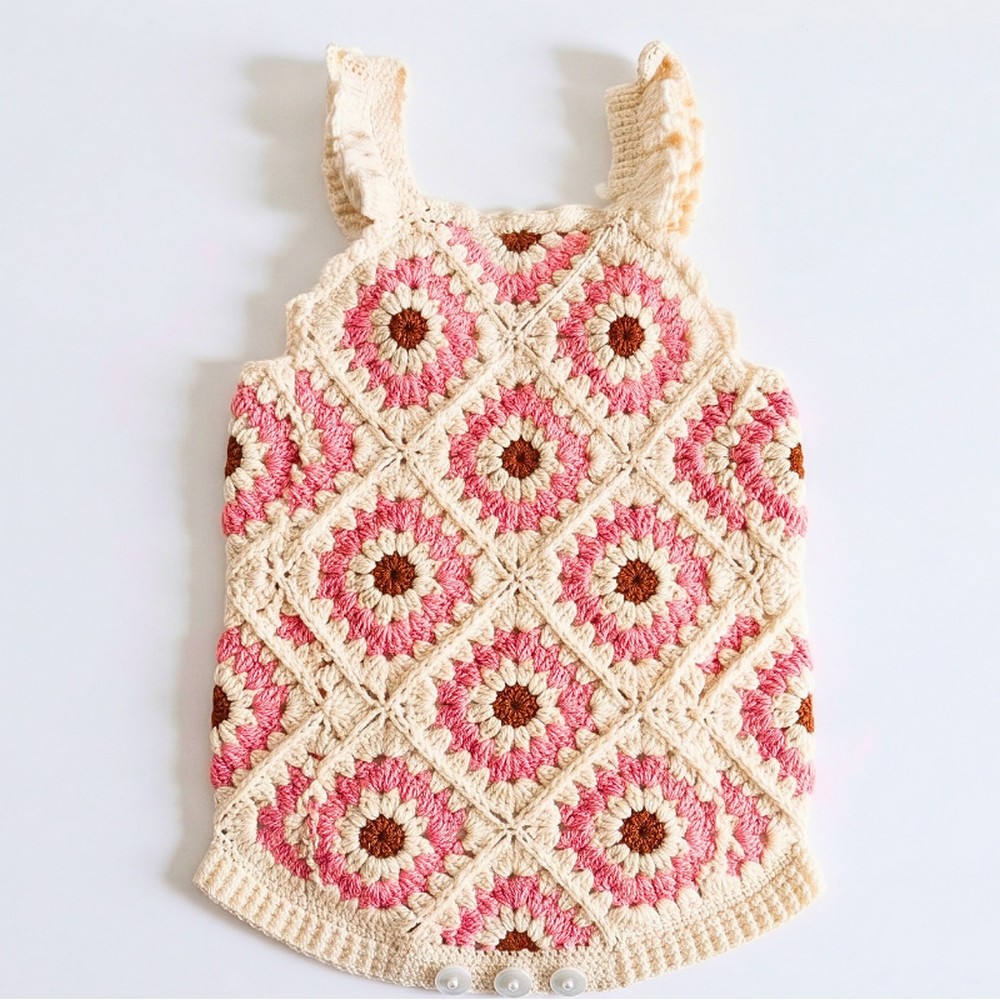
Here’s a sweet crochet baby jumper featuring colorful granny squares, delicate ruffled straps, and a practical buttoned back for little ones aged 3-5 months.
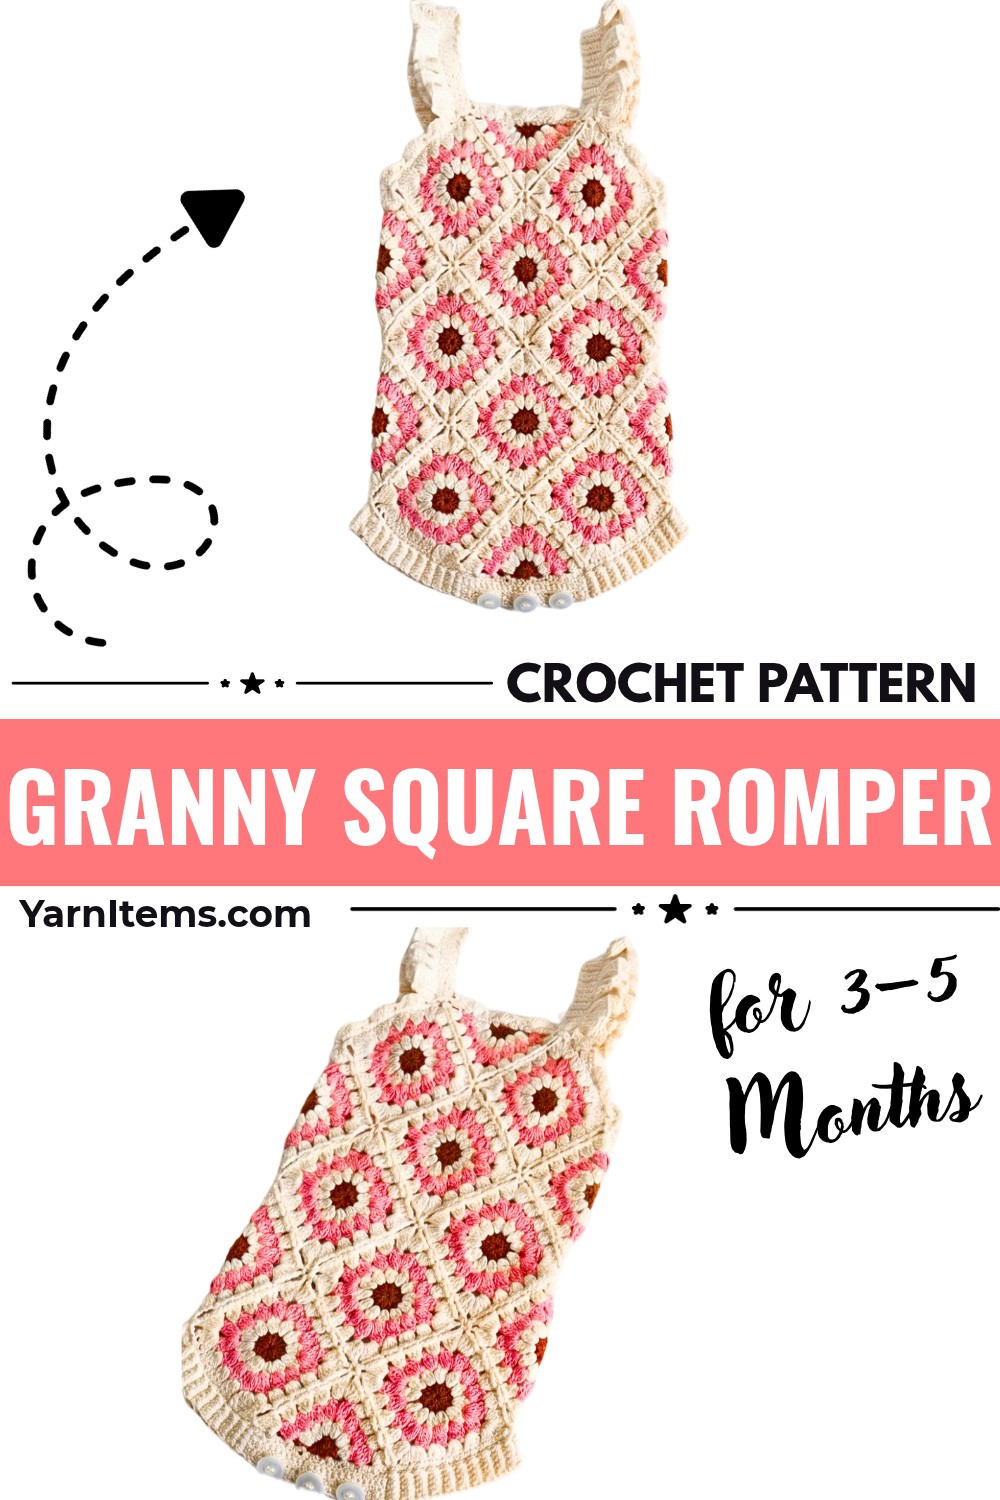
Soft colors and little crochet granny-square details give this baby jumper a charming handmade look, while the crossed straps and ruffled edges add a delicate finish. Its square-based crochet design also makes it easier to adjust the width by changing the number of motifs.
Follow the instructions to crochet the individual squares and triangles, join them into the front and back sections, and add the ribbed leg edging, button plackets, neckline border, and straps. You will also learn when to check the fit and align the buttons before completing the finishing crochet details.
Credit Casttañaz Crochets
Materials & Tools Needed
- Yarn: 4-ply or light DK baby yarn in three colors:
- Color A – Brick Red: Used for the centers of the square and triangle motifs.
- Color B – Off-White / Cream (Hueso): Used for the second and final rounds, joining, borders, and finishing.
- Color C – Dusty Rose (Palo Rosa): Used for the third round of the motifs.
- Crochet Hook: Choose a hook suitable for your yarn. A 2.5–3.5 mm hook is typical for baby DK or sport-weight yarn when you want a neat, firm fabric.
- Buttons: 3 small buttons for the back closure.
- Tapestry Needle: For sewing buttons and weaving in yarn ends.
- Stitch Markers: To mark important joining points and keep the garment sections organized.
Finished Size & Adjustments
This jumper is designed for a baby aged approximately 3–5 months.
- Main Body Height: Approximately 31 cm for the joined front and back body.
- Individual Motifs: Each square measures approximately 7.5 × 7.5 cm.
- Straps: 70 rows measure approximately 30 cm, although the length can be adjusted.
- Width Adjustment: To make the jumper wider, add more squares across the base row and leave a wider leg opening.
Check the motif measurements as you crochet. Keeping the squares close to the stated 7.5 cm size will help the joined panels maintain their intended proportions.
Crochet Abbreviations
- Ch: Chain
- Sl St: Slip Stitch
- Sc: Single Crochet
- Dc: Double Crochet
- Cluster: Three or four double crochet stitches worked together, as specified in the round.
- BLO: Back Loop Only
Before You Begin
Make the square and triangle motifs first, keeping the three yarn colors in their assigned rounds. The motifs form the main fabric of the jumper, so consistent sizing is important before joining them.
The pattern uses 17 square motifs and 2 triangle motifs. Make sure you have all 19 pieces ready before beginning the joining round. Keep the cream yarn available for the fourth round, which is worked while connecting the motifs.
Crochet the Square Motifs
Make 17 square motifs. Each square has three completed rounds before the joining round and should measure approximately 7.5 × 7.5 cm.
Round 1 – Brick Red Center
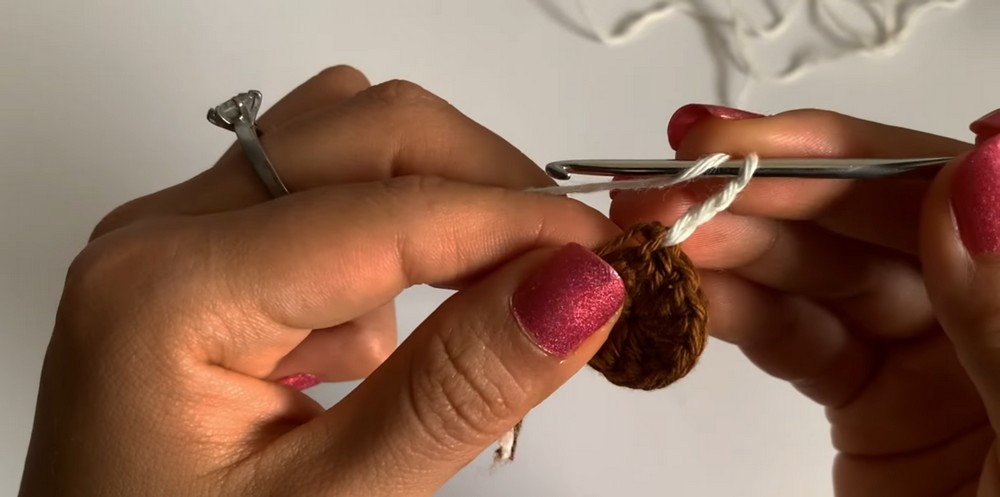
- With Color A, make an adjustable loop.
- Ch 3. This beginning chain counts as the first dc.
- Work 12 dc in total inside the ring.
- Pull the adjustable-loop tail to close the center.
- Join with a sl st into the third chain of the beginning ch-3.
- Fasten off.
Why this round matters: The first round creates the center of each square. Closing the adjustable loop helps prevent a visible opening in the middle.
Round 2 – Off-White Cluster Round
- Join Color B in any space between the stitches.
- Ch 3, then work 1 incomplete dc in the same space.
- Yarn over and pull through all the loops on the hook to complete the 2-dc cluster.
- Ch 2.
- Skip to the next space and work a 3-dc cluster.
- Continue around, working the clusters in the spaces for a total of 12 clusters.
- Join with a sl st and fasten off.
Why this round matters: The cream clusters build the second color section and create the spaces needed for the following round. Keep the chain spaces consistent so the square does not become uneven.
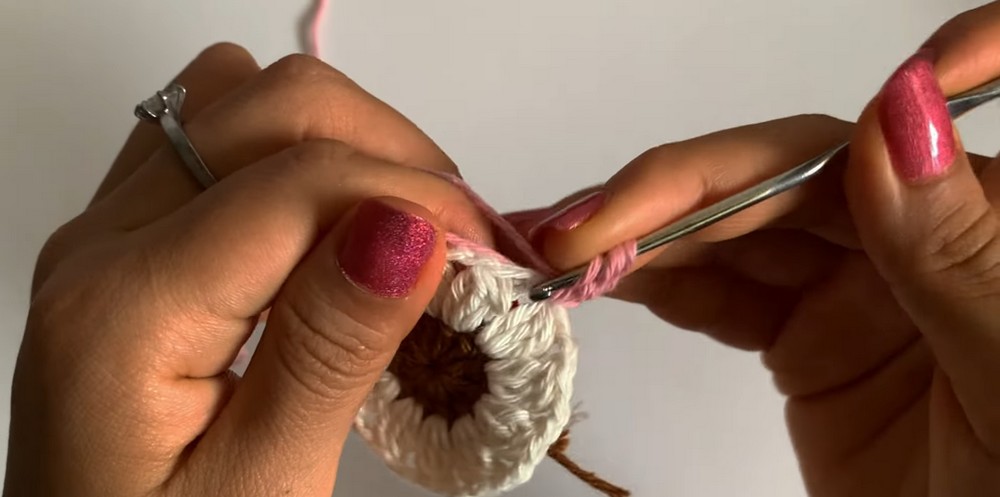
Round 3 – Dusty Rose Corners
- Join Color C in any space between the clusters.
- Ch 3, then work 3 more incomplete dc in the same space.
- Yarn over and pull through all loops to complete a 4-dc cluster, including the beginning chains.
- Ch 3 to form the first corner.
- Work another 4-dc cluster in the same space.
- Ch 1, skip the next space, and work a 4-dc cluster in the following space.
- Ch 1 and work another 4-dc cluster in the next space.
- In the next corner space, work [4-dc cluster, ch 3, 4-dc cluster].
- Continue around, repeating the same arrangement to form all four corners.
- Join with a sl st into the top of the beginning chain and fasten off.
What happens next: The dusty rose round gives the motif its square shape. The four corner spaces provide the turning points needed when the motifs are joined together.
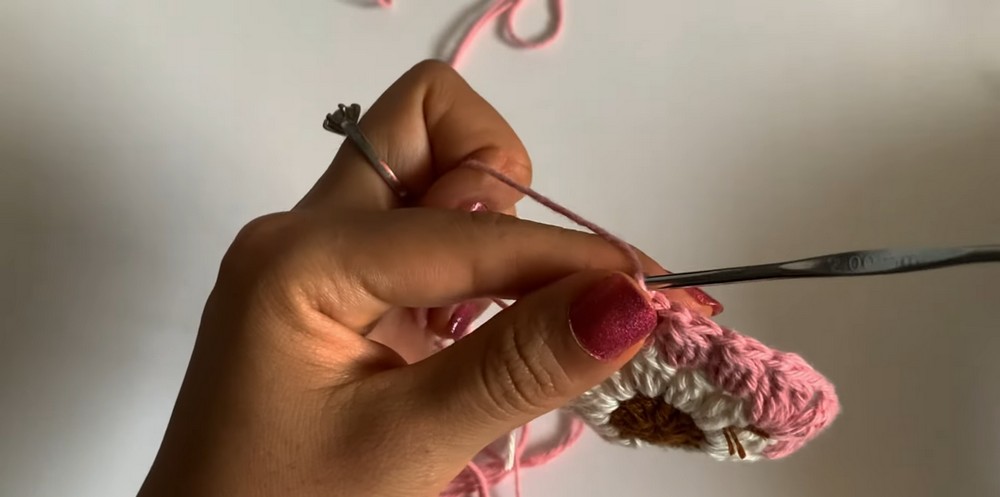
Crochet the Triangle Motifs
Make 2 triangle motifs using the same three colors. These pieces are used at the upper sections of the jumper.
Round 1 – Brick Red Center
- With Color A, make an adjustable loop.
- Ch 3.
- Work 8 dc into the circle.
- Pull the tail to close the center.
- Fasten off.
Round 2 – Off-White Shape
- Join Color B in the third chain of the beginning chain.
- Ch 4. This represents 1 dc and 1 ch.
- Work a 3-dc cluster in the next space.
- Ch 2 across and continue the sequence.
- At the end, ch 1 and work 1 dc into the top of the previous row stitch.
- Fasten off.
Round 3 – Dusty Rose Edging
- Join Color C in the third chain of the beginning chain.
- Ch 5. This represents 1 dc and 2 ch.
- Work [ch 1, 4-dc cluster in the next space] 3 times.
- In the next space, work the corner: [4-dc cluster, ch 3, 4-dc cluster].
- Work [ch 1, 4-dc cluster in the next space] 3 times.
- Ch 2 and work 1 dc into the top of the beginning chain.
- Fasten off.
Keep both triangle motifs together until you are ready to join the upper sections. Their placement is important because they help shape the top edges of the jumper.
Join the Motifs
The fourth round is worked in Color B while joining the motifs. This means you do not need to complete a separate cream border around every motif before assembling the garment.
Joining Round
- Corner: Work [4 dc, ch 2, 4 dc] in the corner space.
- Side spaces: Work 3 dc in each side space, without separating chains.
- Joining: When you reach a side or corner that meets a completed neighboring motif, replace the relevant chain space or single stitch with a sl st into the corresponding stitch or corner of the neighboring motif.
- Keep the wrong sides facing each other while joining.
Continue working around the motif, connecting it to the adjacent completed pieces according to the original layout.
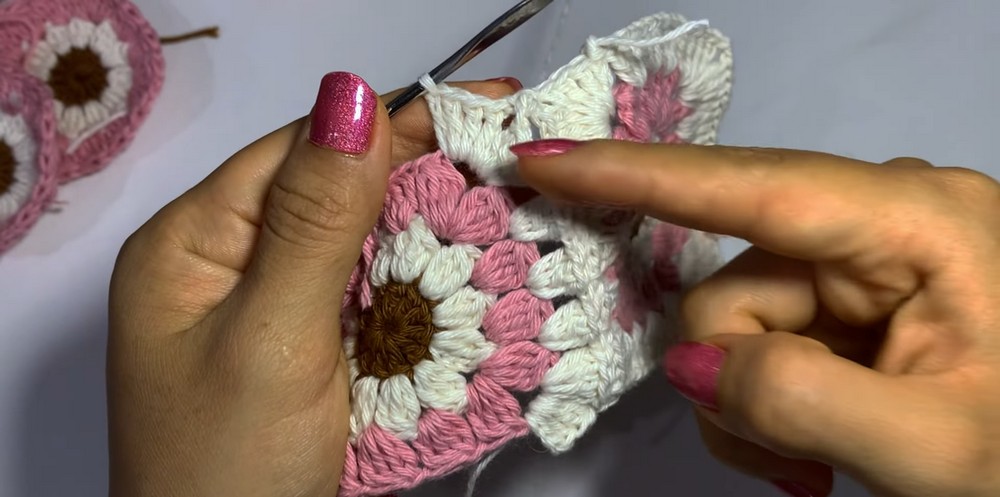
Front Panel
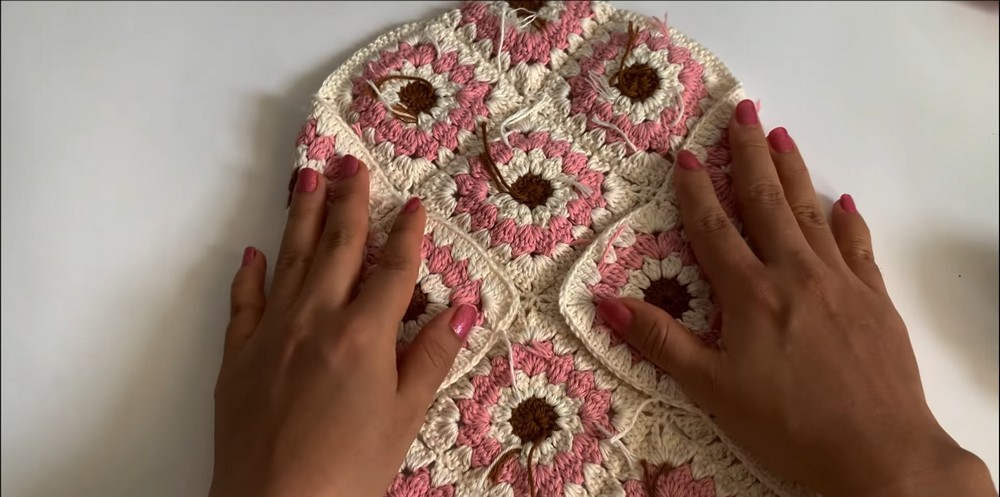
- Arrange the square and triangle motifs row by row according to the supplied grid layout.
- Use the fourth-round cream edging to connect the neighboring pieces.
- Continue until the lower front bib and body section are formed.
- Check that the joined edges sit flat and that the motifs remain aligned.
Back Panel
- Arrange the remaining motifs for the back section according to the original layout.
- Fold the side squares inward toward the center to create the back leg openings and back opening.
- Join the top edge using the second triangle motif.
- Check the shape before moving on to the edging.
Important layout note: The exact motif grid or placement diagram is not included in the supplied instructions. Follow the original layout reference for the precise arrangement rather than guessing the number or position of motifs in each row.
Bottom Edge and Leg Ribbing
Once the front and back sections have been joined, work the cream base round around the bottom leg and body opening.
Base Single Crochet Round
- Join Color B along the bottom edge.
- Ch 1.
- Work 1 sc in each available space around the entire bottom opening.
- Work 2 sc in larger corner or edge spaces where needed to cover the wider openings.
- Join with a sl st.
Why this round is needed: The base single crochet round creates a stable foundation for the ribbing. It also helps even out the edge before the narrow rows are added.
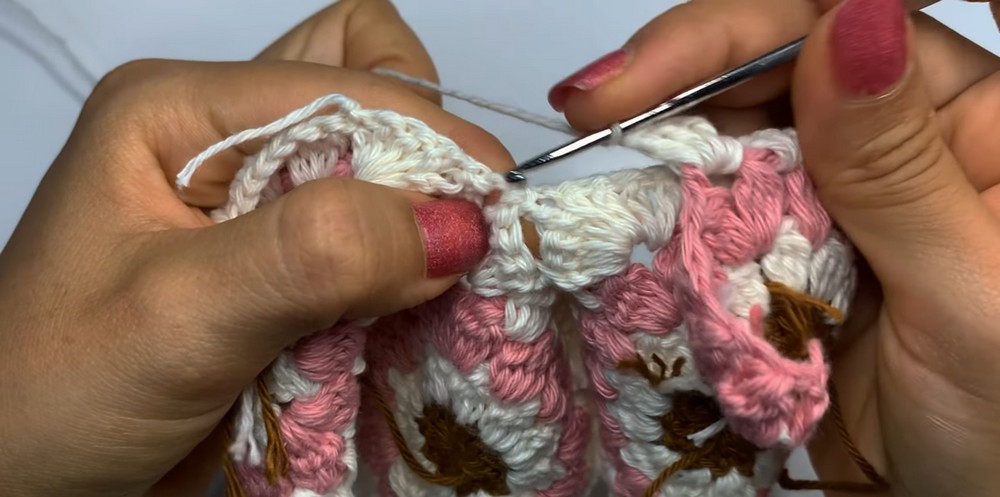
Ribbed Edge
- Ch 6.
- Skip the first chain and work 5 sc back along the chain.
- Sl st into the next 2 spaces along the base round to anchor the ribbing.
- Turn the work.
- Work 5 sc in BLO.
- Ch 1 and turn.
- Work 5 sc in BLO again.
- Sl st into the next base space, then sl st into the following space.
- Turn and repeat the same ribbing sequence around the edge.
Continue until the ribbing reaches around the opening. The back-loop stitches create the raised ridges that give the edge its flexible, ribbed appearance.
Back Button Plackets
The back opening needs two finished edges so the jumper can be fastened with buttons.
First Button Placket
- Rotate the work and join Color B along one edge of the back opening.
- Work single crochet rows along the edge.
- Continue until you have completed 5 rows.
Row 4 – Buttonholes
Work the buttonhole row as follows:
- Ch 1.
- 4 sc.
- Ch 3, skip 3 stitches.
- 3 sc.
- Ch 3, skip 3 stitches.
- 3 sc.
- Ch 3, skip 3 stitches.
- 4 sc.
Row 5
- Work sc across the row.
- Work 4 sc inside each ch-3 buttonhole loop.
- Continue to the end of the row.
Opposite Placket
- Work a matching elastic-style band along the opposite back edge.
- Make it the same height as the buttonhole placket.
- Join both sides at the base with a sl st seam.
- Fasten off.
- Sew 3 buttons onto the placket without buttonholes, aligning them with the three buttonholes on the opposite side.
Check the Fit and Button Placement
Do this before sewing the buttons permanently. This is a useful checkpoint because the back opening, leg edges, and strap positions all affect how the jumper sits on the baby.
- Lay the joined jumper flat with the front and back sections in their intended positions.
- Check that the back opening edges meet evenly and that the two plackets are the same height.
- Bring the buttonhole placket over the opposite placket and check that all three buttonholes line up with the intended button positions.
- Check that the leg openings remain clear and that the ribbed edge is not twisted.
- Place the straps in their intended crossed position over the back and check that their length is suitable before attaching the buttons.
Why this check matters: If the plackets are uneven or the straps are attached at mismatched points, the jumper may sit crooked when fastened.
When to make adjustments: Make any necessary positioning adjustments now, before sewing the buttons and finishing the straps. The next stage adds the neckline border and decorative strap ruffles, so checking the main shape first makes those finishing steps easier.
Upper Border
Use Color B to finish the neckline and back edge.
Round 1 – Single Crochet
- Join Color B along the neckline and back edge.
- Ch 1.
- Work 1 sc in each available space.
- Join with a sl st.
This round creates an even base for the decorative shell edging.
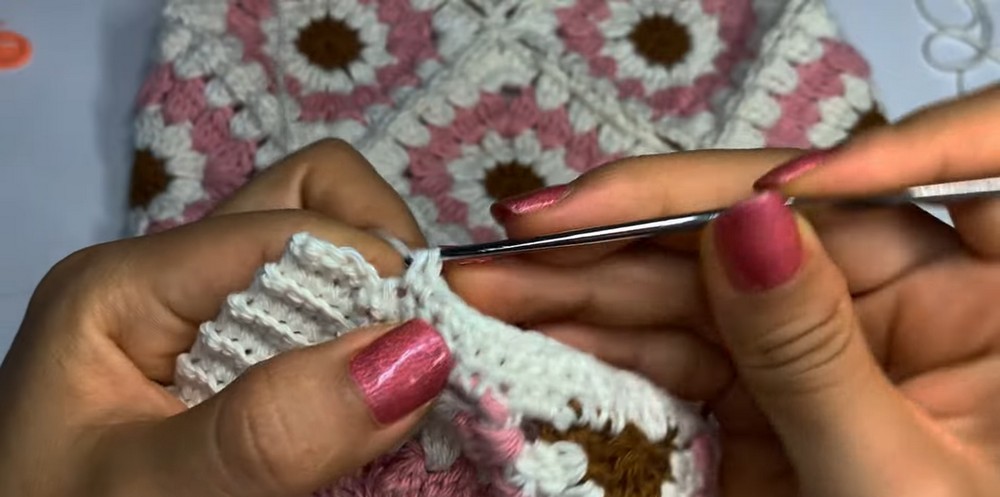
Round 2 – Shell Edging
- Ch 1 and work 1 sc in the first space.
- Skip 2 spaces.
- Work 6 dc in the next space.
- Skip 2 spaces.
- Work 1 sc in the next space.
- Repeat the sequence around: skip 2, 6 dc in the next space, skip 2, 1 sc in the next space.
- Join with a sl st and fasten off.
The shell stitches create the decorative finish along the upper edge.
Crochet the Straps
Make 2 straps using Color B.
- Attach the yarn at the designated upper back corner motif.
- Ch 1.
- Work 5 sc across.
- Ch 1 and turn.
- Work 5 sc in BLO.
- Repeat the same rows until you have completed 70 rows, measuring approximately 30 cm.
- Fasten off.
The straps are worked as narrow bands. Keep the stitch count at 5 sc in each row so the width stays consistent.
Add the Strap Ruffles
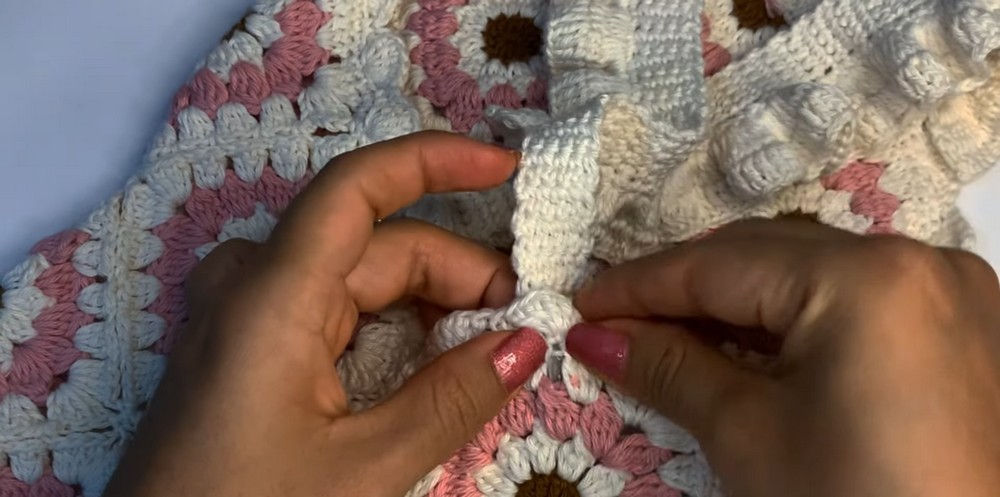
The ruffle is worked along the side of each strap, leaving the top 10 cm plain.
Row 1 – Base Row
- Join the yarn along the side of the strap.
- Work sc along the lower portion, stopping before the top 10 cm.
- Keep the stitches evenly spaced along the strap edge.
Row 2 – Ruffle Increases
- Ch 3 and turn.
- Work 3 dc in the same space.
- In the next space, work 4 dc.
- Continue alternating between 3 dc and 4 dc clusters in each space along the row.
The alternating stitch groups create the fullness of the ruffle.
Row 3 – Finishing Row
- Ch 3 and turn.
- Work 1 plain dc in each stitch across.
- Fasten off.
Repeat the same ruffle process along the second strap, leaving its top 10 cm plain as well.
Final Assembly
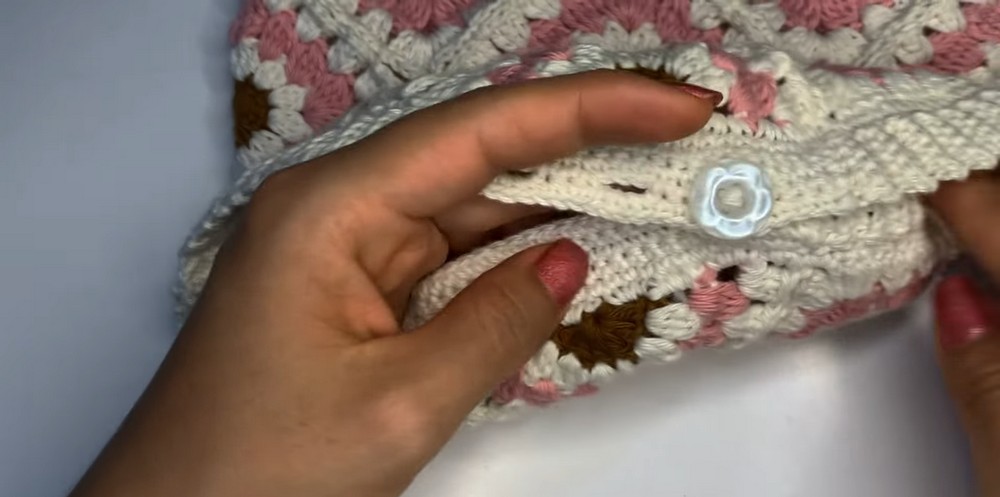
- Sew one button onto the end of each strap.
- Cross the straps over the back.
- Fasten the strap buttons into the open spaces of the upper front granny squares.
- Sew the 3 back buttons onto the placket without buttonholes, if you have not already done so.
- Weave in all remaining yarn ends with a tapestry needle.
Check that the straps cross neatly and that the buttons are securely attached before using the jumper.
Helpful Finishing Checks
Before considering the jumper complete, take a moment to inspect the details:
- Motifs: Check that the joined squares and triangles lie flat without pulling at the seams.
- Ribbing: Make sure the bottom edge is even and not twisted.
- Buttonholes: Check that all three buttonholes are open and that the buttons pass through them comfortably.
- Straps: Confirm that both straps have the same length and that the ruffles stop at the same point.
- Yarn Ends: Secure and weave in all loose ends carefully.
Because this garment is intended for a baby, inspect the buttons and all sewn details carefully before use. Make sure there are no loose parts or unsecured yarn ends.