Easy Crochet Textured Blouse Pattern – Step-by-Step Tutorial
Want to turn two simple rectangular panels into a wearable textured blouse? This step-by-step crochet tutorial walks through each stitch section, joining point, neckline, armhole, hem, and optional waist tie.
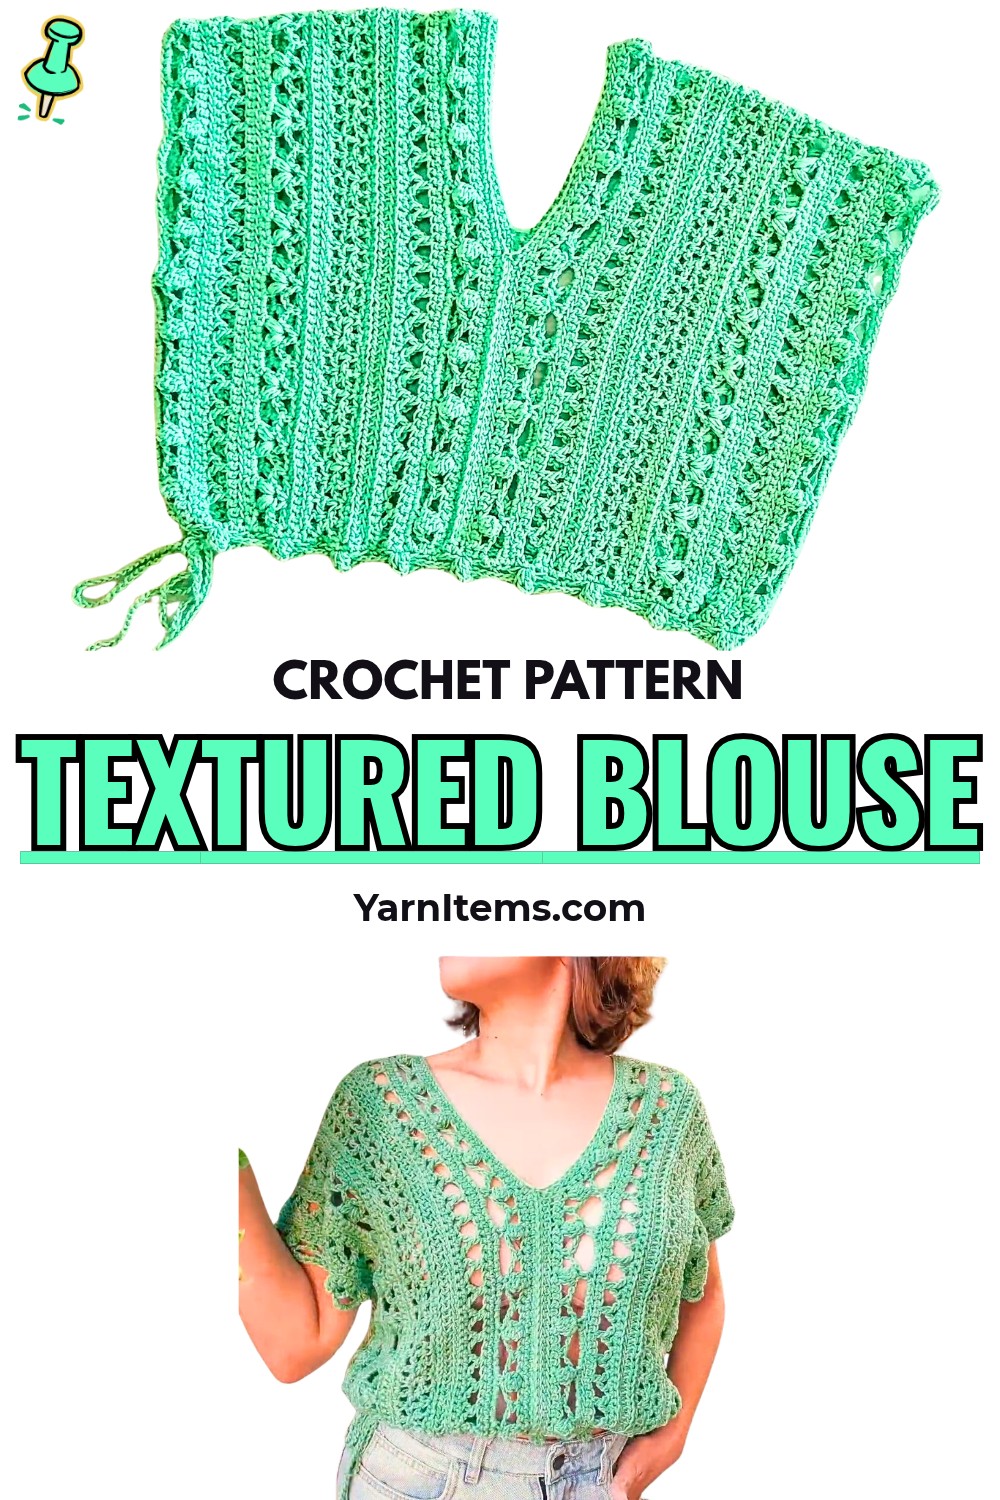
This crochet blouse has an interesting shape because its finished form comes from two matching rectangular panels rather than complicated garment shaping. Texture comes from popcorn stitches, open mesh sections, crossed Y-stitch details, and simple solid rows that help each section sit neatly beside the next.
If you enjoy crochet garments but prefer working through clearly defined sections, this crochet design gives you an easy-to-follow path from your first foundation chain to final finishing. You will also see where measurements matter, where panels need to match, and where joining needs extra care.
Credit Maricel Romina
What You Will Make
Two identical rectangular panels are crocheted horizontally across garment length. During assembly, panels are positioned vertically and joined around shoulders and sides to form blouse shape.
For standard sizing, each panel measures approximately 27 cm wide, while folded length from waist/bottom over shoulder measures approximately 42–44 cm.
Finished-result image: show complete blouse first so reader can understand final shape before beginning panel work.
Materials & Tools
- Soft semi-thick cotton yarn, approximately 2 mm thick
- Optional thinner yarn
- 5.5 mm or 6 mm crochet hook; tutorial uses 5.5 mm
- Stitch markers for neckline and armholes
- Scissors
- Yarn needle for finishing and joining
Choose Your Yarn Before Starting
Semi-thick cotton yarn is used in tutorial. If thinner yarn is selected, popcorn section changes slightly: use 5–6 dc instead of 4 dc for each popcorn group.
Because starting chain controls garment length, decide desired blouse length before making foundation chain.
Measurements to Check Before Your First Chain
Each panel needs approximately 27 cm width for standard sizing, with folded garment length around 42–44 cm.
Length and sizing can be changed by adjusting:
- Initial foundation chain for garment length
- Number of repeating rows for panel width
- Neckline opening depth
- Optional waist cord for fit
Important: Both panels must eventually have identical row counts and stitch sequence.

Begin Your First Panel
Foundation Chain: Set Garment Length First
Create foundation chain measuring desired blouse length.
Total chain count needs to follow: multiple of 6 + 3 extra chains
Tutorial example: 114 chains + 3 extra = 117 chains
This count matters because later textured sections depend on repeated stitch spacing.
Check before continuing: If chain count does not follow this formula, later pattern sections may not align correctly.
Tutorial image placement: show foundation chain and counting point here.
Row 1: Build Your Solid Base
Skip first space and work 1 sc across entire row.
Chain 1 and turn.
Keep edge stitches easy to identify because later rows depend on stable row edges.
Row 2: Create Front-Loop Texture
Chain 1 and turn.
Work 1 sc in each stitch through front loop across row.
At final stitch, insert hook under both loops before completing sc.
Chain 1 and turn.
Tutorial image placement: show hook entering front loop, followed by final stitch worked through both loops.
Check: Missing final stitch can make panel narrower and create problems when later pattern sections are repeated.
Add Raised Popcorn Texture
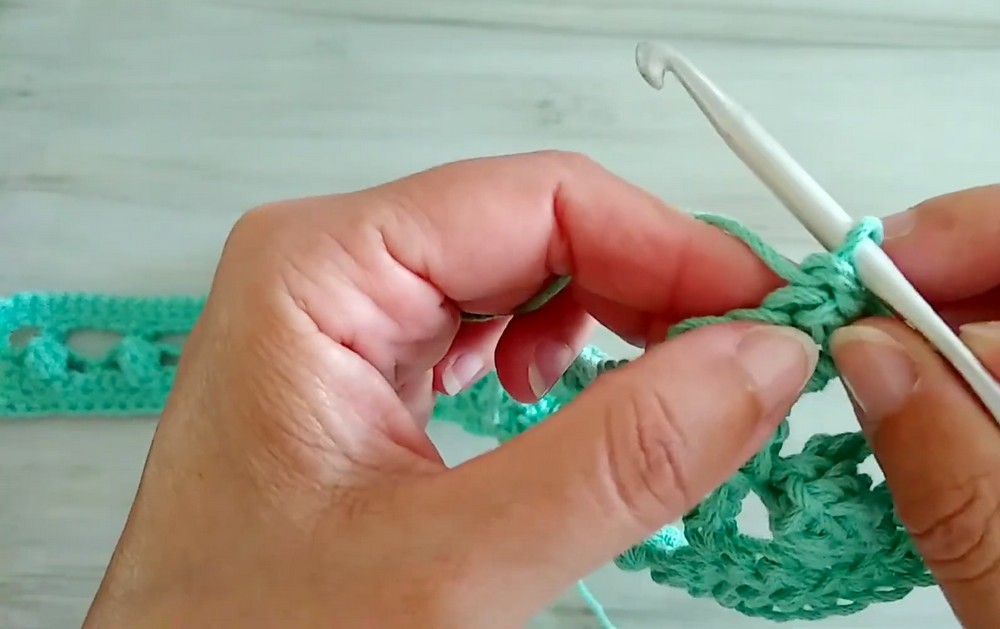
Row 3: Form Each Popcorn
Work 1 sc in initial stitch, then ch 3.
Yarn over, skip 2 spaces, and work 4 dc into third space when using semi-thick yarn.
For thinner yarn, tutorial uses 5-6 dc.
To close popcorn:
- Drop working loop.
- Insert hook front-to-back through top of first dc in group.
- Catch dropped loop.
- Pull loop through first dc to close group.
- Ch 3.
- Skip 3 spaces.
- Work 1 sc into next space.
Repeat sequence across row and finish with 1 sc.
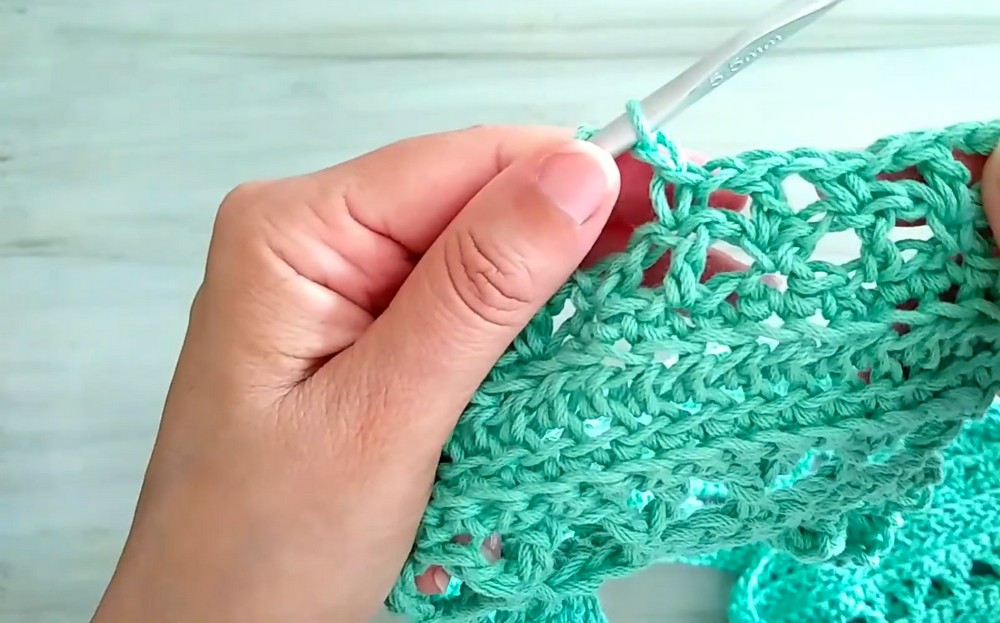
Tutorial image placement: this is one of most important visual images. Show dc group before closure and popcorn after closure.
What Your Popcorn Should Look Like
Each completed group should sit visibly raised from fabric rather than remaining as loose dc stitches.
If popcorn does not close cleanly, check hook placement through first dc before pulling dropped loop through.
Do not continue across several repeats while one popcorn remains incorrectly formed. Correct it immediately so texture stays consistent.
Turn Popcorns Into Open Arches
Row 4: Mesh Arches
Chain 5 and turn.
Work 1 sc directly into top of preceding popcorn.
Repeat: ch 5 → 1 sc into popcorn top
At row end:
- ch 2
- yarn over
- work 1 dc into final edge sc
- ch 1
- turn
Tutorial image placement: show ch-5 arch attached to popcorn top and final edge treatment.
Row 5: Stabilize Mesh
Work 1 sc into first space.
Then work:
- 2 sc into each arch
- 1 sc over each popcorn
Maintain original stitch count across row.
This row brings open arches back into stable fabric before next textured section.
Check: If stitch count changes here, later Y-stitch and window sections can become uneven.
Create Crossed Y-Stitch Texture
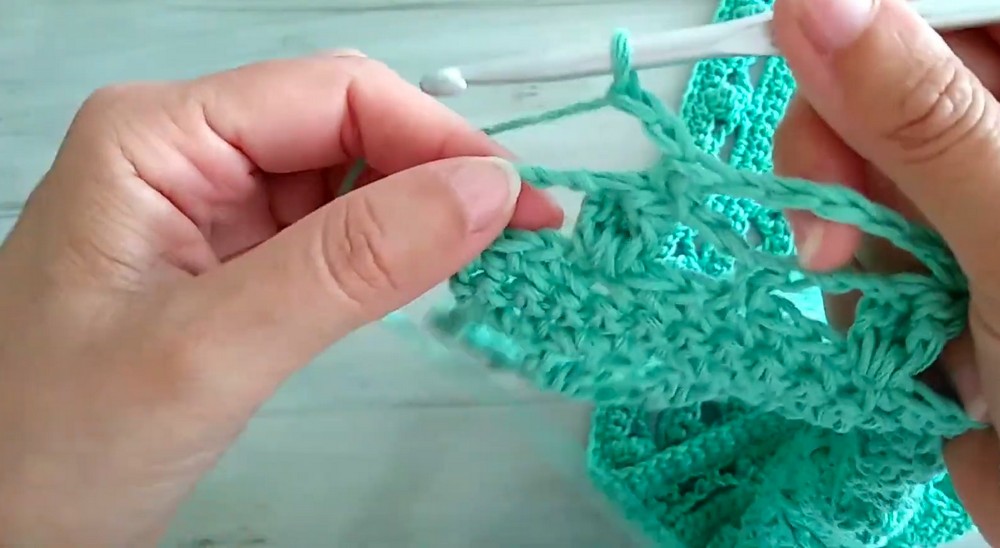
Row 6: Build Y Motifs Carefully
Work 1 sc in edge space, ch 3, then work extended double-treble sequence after skipping 3 spaces.
Use double yarn over and follow tutorial’s three-step extended stitch movement, pulling through loops in groups.
After forming crossed section:
- ch 1
- yarn over
- anchor through crossed base loops
- continue across row
Turn and work sc into arches and center of Y motifs as demonstrated.
Tutorial image placement: show crossed loops before anchor stitch and completed Y motif.
Check Your Y Motifs Before Moving On
Look across several repeats.
Each motif should cross consistently, with anchor point holding center securely.
If crossed loops look twisted or uneven, stop before completing more repeats and check where extended stitch was anchored.
Row 7: Back-Loop HDC Texture
Chain 1 and turn.
Work hdc through back loops only across row.
Keep stitch count aligned with foundation.
Tutorial image placement: show hook entering back loop only.
Important: Missing back loop changes texture. Check first few stitches before working full row.
Add Open Window Bands
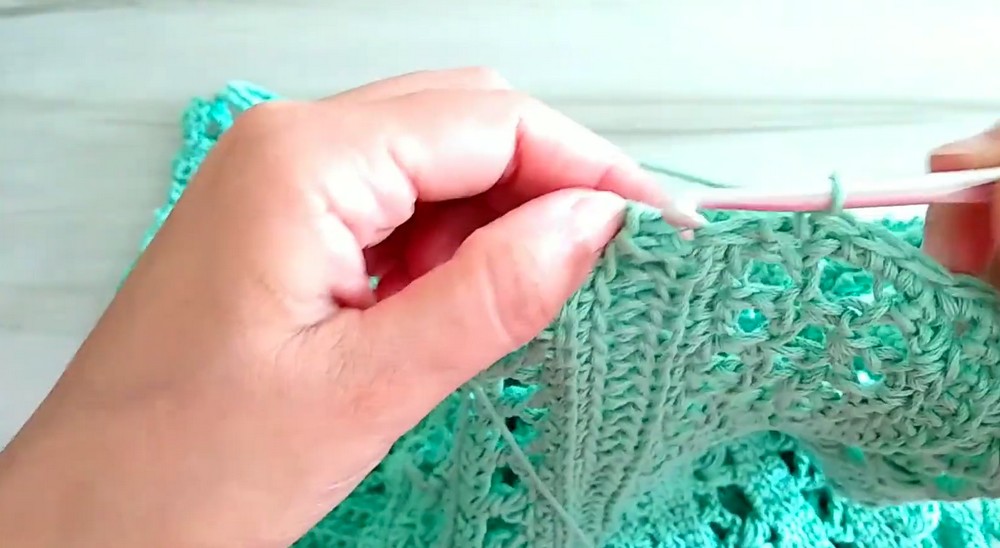
Rows 8-10: Open Window Mesh
Work three consecutive mesh rows.
For each row: ch 1 → ch 1 → skip 1 space → 1 dc
Repeat across.
These rows create open geometric windows between solid textured sections.
Follow these with stabilization sc rows as specified in tutorial.
Tutorial image placement: show completed open-window band so reader can recognize correct spacing.
Check Mesh Spacing
Open spaces should repeat evenly across panel.
If one window becomes noticeably wider or narrower, check skipped space and chain placement before continuing.
Repeat Pattern Blocks Until Panel Reaches Correct Width
Continue repeating core sections symmetrically:
- Popcorn rows
- Mesh arch rows
- Y-stitch texture
- HDC texture
- Open window bands
- Stabilization rows
Continue until panel reaches approximately 27 cm width, or desired customized width.
Finish with solid sc row.
Leave long yarn tail and fasten off.
Tutorial image placement: show complete flat panel before second panel begins.

Make Second Panel Exactly Like First
Repeat complete panel using identical:
- foundation chain count
- row sequence
- stitch sequence
- pattern repeats
- final row
Do not rely only on finished dimensions. Matching row sequence is important because panels need to align during joining.
Tutorial image placement: show both panels side by side before assembly.
Join Panels Into Blouse Shape
Shoulder Join: Keep Seam Flexible
Lay both panels flat and align top fold.
Join shoulders using loose slip stitches.
Keep seam loose rather than pulling stitches tightly. This preserves stretch and flexibility.
Leave approximately 20 cm centered neckline opening.
Tutorial image placement: show panel alignment, loose shoulder seam, and neckline opening.
Check Neckline Before Closing Sides
Look at garment from front before continuing.
Confirm centered neckline remains open and approximately 20 cm wide.
If neckline needs to sit deeper or higher, adjust opening according to preference before completing side joins.
Mark Armholes Before Closing Side Seams
Measure approximately 20 cm downward from shoulder fold on both sides.
Place stitch markers at these points.
These markers show where armholes remain open.
Tutorial image placement: show measuring 20 cm from shoulder and marker position.
Close Remaining Side Edges
Starting from bottom hem, close side edges upward until reaching base of armhole marker.
Use slip stitch or sewing method specified for joining.
Stop at marker so armhole remains open.
Check: Both armhole openings should match in position and length.
Finish Bottom Hem
Add Single Crochet Circumference Border
Attach working yarn to bottom hem edge.
Work complete round of sc evenly around entire bottom circumference.
Final stitch count needs to be a multiple of 6.
If needed, slightly space or skip stitches to gently cinch bottom border.
Finish round with slip stitch into first stitch.
Tutorial image placement: show yarn attachment and even sc border around hem.
Why Check Multiple of 6?
Optional popcorn trim uses repeating groups based on six-stitch spacing.
Checking count before adding trim helps repeats finish evenly.
Optional Popcorn Bottom Trim
For decorative finish, chain 3 and work matching popcorn round around bottom hem.
Use 4-dc clusters closed together, separated by ch 3 and 1 sc.
Fasten off securely and weave in loose ends.
Tutorial image placement: show completed popcorn edging and how repeat sits along hem.

Add Optional Adjustable Waist Cord
Create long foundation chain using same yarn and hook.
Thread cord through lower waistline stitches.
Tie cord to adjust fit.
Tutorial image placement: show cord passing through lower waistline and finished tie.
Final Fit Check
Before wearing, check:
- Both panels match.
- Shoulder seam remains flexible.
- Neckline opening is centered.
- Armholes are equal.
- Bottom border sits evenly.
- Optional popcorn trim repeats cleanly.
- Waist cord moves through lower stitches and adjusts comfortably.
Your finished blouse now combines rectangular construction with several textured stitch sections, giving simple panels more visual detail without requiring shaped front and back pieces.
Customization Notes
For different sizing or length, adjust initial chain and repeating rows while maintaining required stitch multiples.
You can also:
- Make neckline deeper or higher.
- Add optional waist cord for adjustable fit.
- Use thinner yarn with the popcorn adjustment described earlier.
- Change panel width by controlling repeating pattern blocks.
Keep both panels identical whenever possible so assembly remains balanced.