This stylish crochet bucket hat is a versatile accessory perfect for sunny days or as a trendy year-round statement piece.

A crochet bucket hat is a fun and functional accessory that anyone can enjoy. This bucket hat is lightweight, comfy, and perfect for shielding your face from the sun in style. You can personalize it with your favorite colors to complement your outfits or keep it simple for a timeless look. This crochet hat isn’t just practical, it’s a handmade piece you’ll be proud to wear.
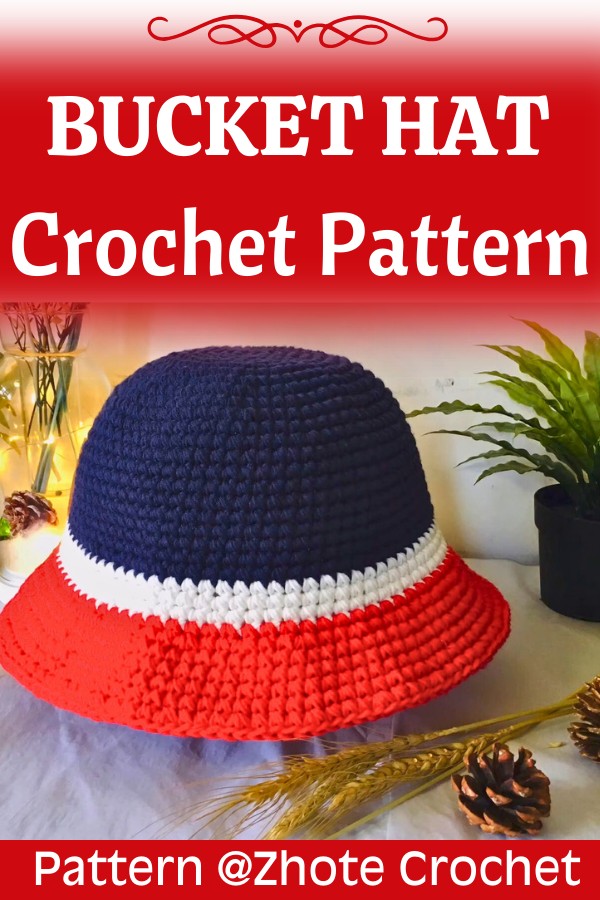
Crochet Bucket Hat With Full Pattern
This crochet bucket hat pattern is designed to be beginner-friendly, requiring only basic crochet techniques. Using basic crochet stitches, you’ll create a crochet hat that’s both stylish and easy to make. You’ll love how simple it is to stitch together. You can even make multiple hats for family and friends; they’ll love the handmade touch.
Credit Nala Crochet
Key Features of This Pattern:
- Worked in the round using basic stitches—ideal for beginners and fun for experienced crocheters.
- Crown shaping achieved through gradual increases.
- Wide brim created with strategic stitch increases for a flared look.
- Customizable fit with a simple stitch count adjustment.
- The hat can be adapted for different color combinations or textures to match your style.
The Overview:
If you’re ready to add a handmade twist to your wardrobe, this crochet bucket hat is a delightful pattern. Beginning from the top of the crown, the design grows outward in smooth, concentric rounds. Using simple stitches like single crochet or double crochet (common for beginner-friendly bucket hat patterns), the crown is shaped with even increases to achieve a rounded cap that hugs the top of your head comfortably.

Once the crown is complete, the sides are built with straight rounds—no increases here, which creates a neat vertical shape. This defines the “bucket” of the hat and allows lots of creative freedom. Are you envisioning a solid-tone classic look? Or perhaps a striped pattern to stand out? Either way, the choice is yours, and the pattern gives you plenty of room to experiment.

The star of the design is the wide brim, crocheted by working calculated stitch increases into each round. This creates that signature flared look bucket hats are known for. The brim can be customized to suit your style—keep it short for a subtle curve or extend it for extra shade and drama. Change the brim’s edge to include a finishing stitch like slip stitches or even a contrasting color for added personality.

Finally, the beauty of this pattern lies in its adaptability. You can take this base design and make it uniquely yours. Whether you add embellishments like appliques, embroidered designs, or even crochet flowers, this hat is an ideal blank canvas.

Video Tutorial
Materials:
- Worsted weight yarn (200g)
- Crochet hook (4.5 mm)
- Stitch markers
- Yarn needle
- Scissors
Detailed Pattern:
- Crown of the Hat:
- Start with a magic ring.
- R1: 8 hdc in the magic ring. Join with sl st to the first hdc. (8)
- R2: Ch 1, 2 hdc in each st around. Join with sl st to the first hdc. (16)
- R3: Ch 1, 1 hdc in next st, 2 hdc in next st repeat around. Join with sl st. (24)
- R4: Ch 1, 1 hdc in next 2 sts, 2 hdc in next repeat around. Join with sl st. (32)
- R5: Ch 1, 1 hdc in next 3 sts, 2 hdc in next repeat around. Join with sl st. (40)
- R6: Ch 1, 1 hdc in next 4 sts, 2 hdc in next repeat around. Join with sl st. (48)
- Continue increasing in this pattern until reaching desired circumference. The standard adult size would be roughly 70-80 hdc around.

- Body of the Hat:
- R1: Ch 1, hdc in each st around. Join with sl st. (Maintain the same stitch count as your final crown round.)
- Repeat this round until the hat measures approximately 6-7 inches from the top of the crown.
- Brim of the Hat:
- R1: Ch 1, 2 hdc in next st, 1 hdc in next 5 sts repeat around. Join with sl st.
- R2: Ch 1, 2 hdc in next st, 1 hdc in next 6 sts repeat around. Join with sl st.
- Continue this pattern of increasing by spacing more evenly every round until the brim reaches the desired width (typically 2-3 inches).
- Finishing:
- Finish off by doing one round of sc stitches for a neat edge.
- Fasten off, weave in all ends with the yarn needle.
Troubleshooting and Suggestions:
- Avoiding Wobbly Edges: Pay close attention to stitch count during increases, especially on the crown and brim. Uneven counts can cause the hat to ripple or look lopsided.
- Consistent Tension: Keep your stitch tension uniform, as inconsistent tension can alter hat size or cause irregular shaping.
- Adjusting Fit: To ensure a snug fit or accommodate different head sizes, adjust the number of stitches in the side section before starting the brim. Add or remove rounds as needed.
- Creative Modifications: Try a variegated yarn or alternate colors in stripes for a playful effect. For texture lovers, incorporate front post or back post stitches on the brim, or use a bulky yarn for a cozy, winter-ready version.
- Reinforcing the Brim: For a stiffer brim, you can crochet over a hat wire or use a tighter stitch tension during this section.