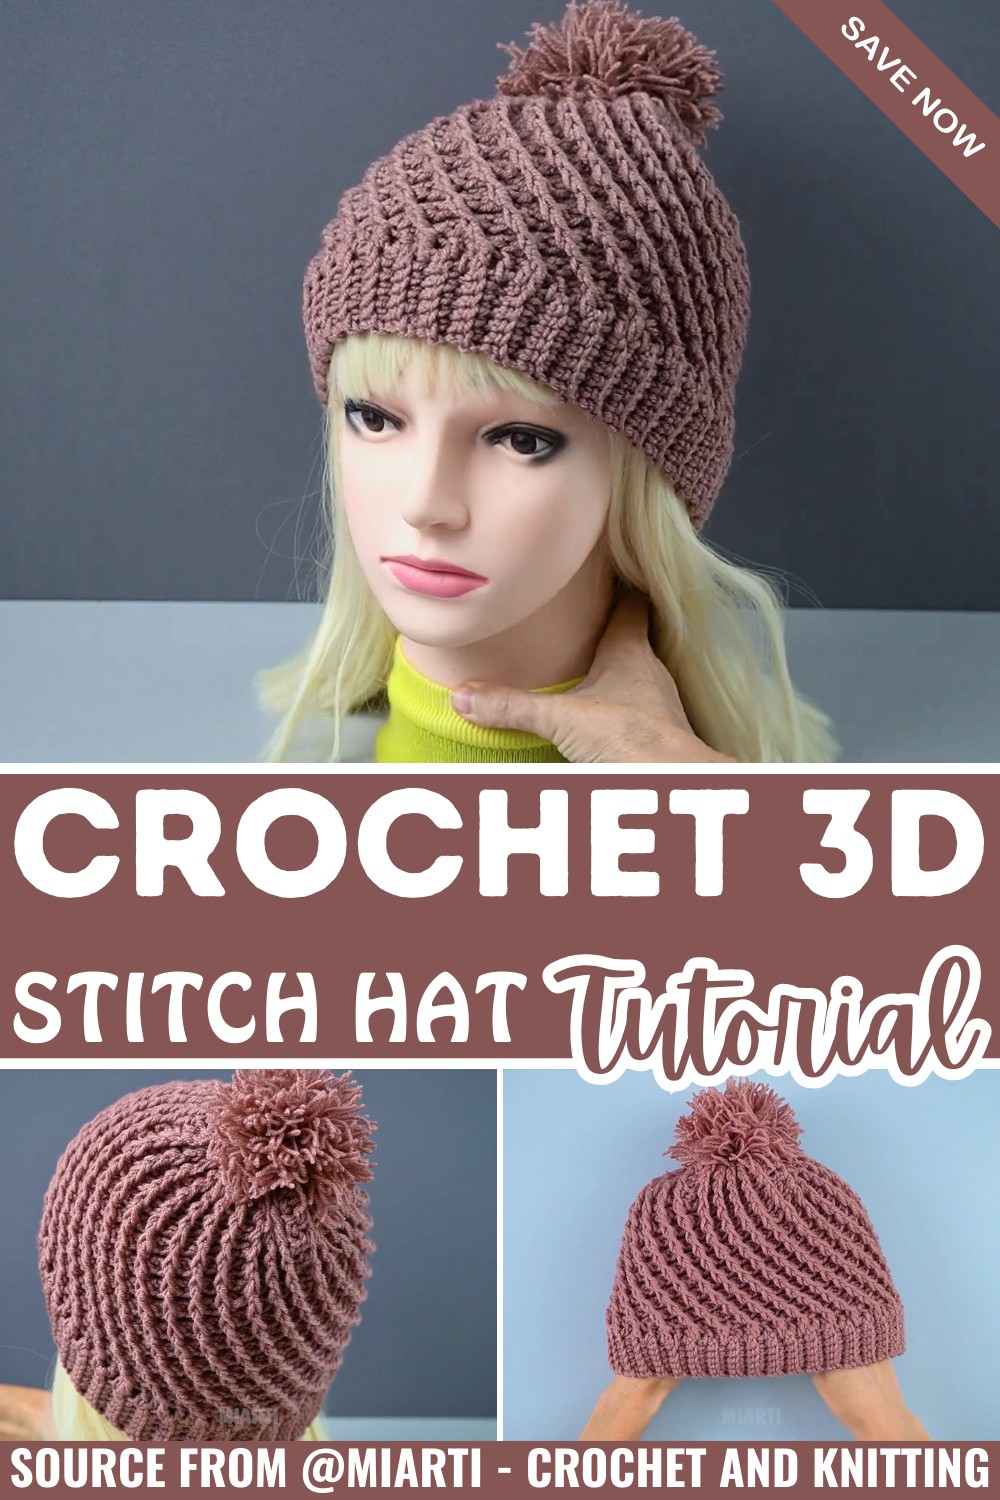
Crochet 3D Stitch Hat – Easy Textured Beanie Pattern
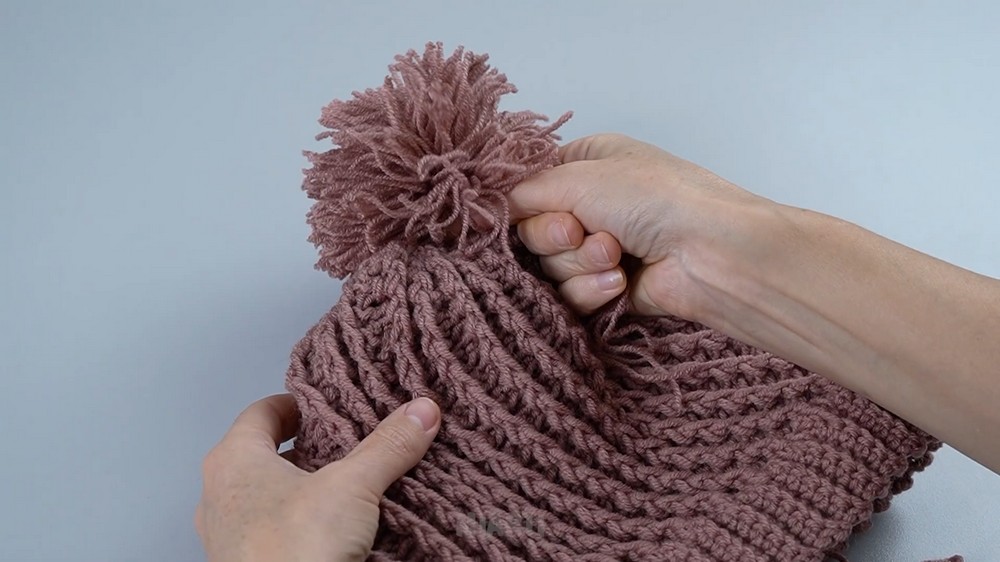
Bold diagonal texture gives this cozy crochet hat a modern look, while the stretchy ribbed brim creates a snug everyday fit that feels warm, comfortable, and easy to wear.
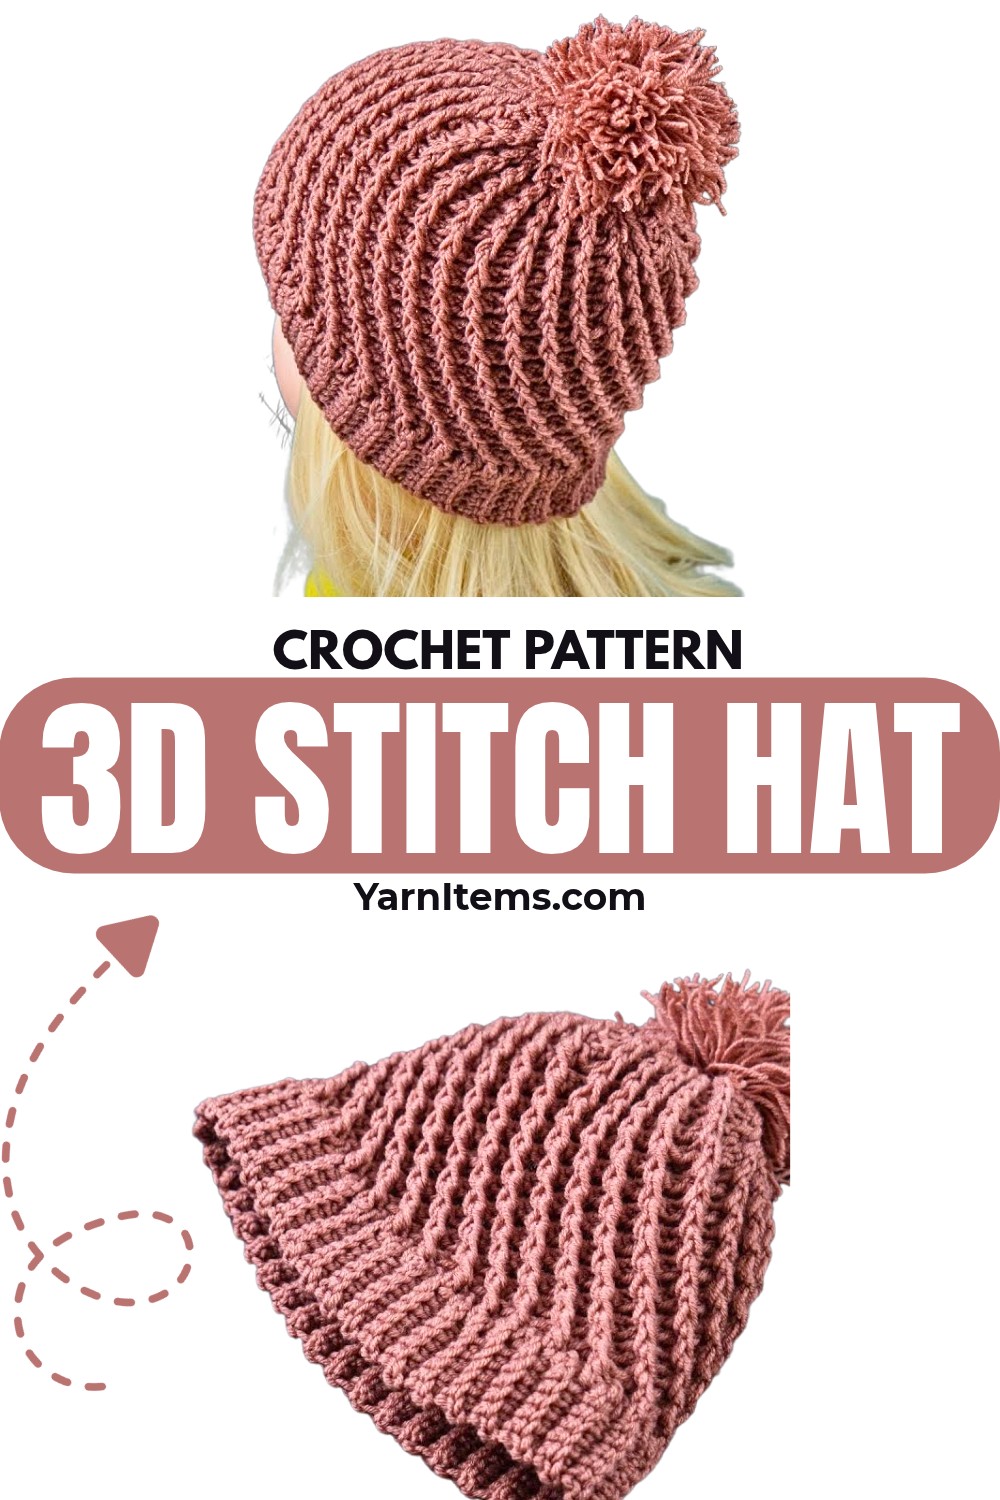
A textured hat has a way of looking more detailed than it actually is, and that is part of the charm of this crochet design. It begins with a simple ribbed band worked in rows, giving the hat a flexible brim before the textured body is added.
The interesting part comes when the raised front post stitches begin to build across the body. Round by round, the texture becomes more noticeable, then the crochet stitch count is reduced near the top to shape the crown. Add a yarn pompom for a playful finish or leave it plain for a cleaner look.
Credit Miarti – Crochet and Knitting
Materials & Tools
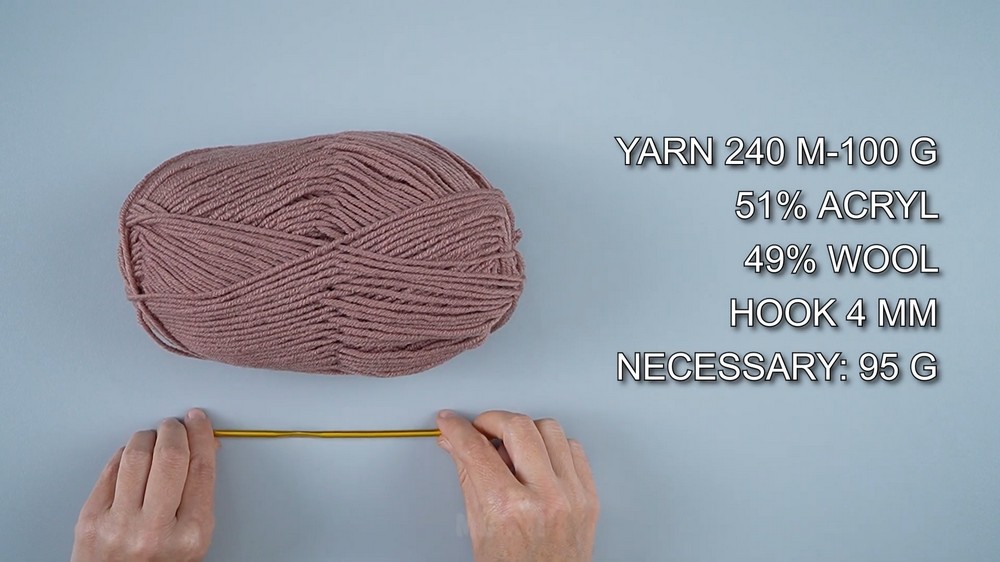
- 95 g medium weight yarn – approximately 240 m per 100 g, 51% acrylic and 49% wool
- 4.0 mm crochet hook
- Tapestry or yarn needle
- Scissors
- Pom-pom maker or cardboard, optional
Abbreviations
- ch – chain
- sc – single crochet
- sc-blo – single crochet in back loop only
- dc – double crochet
- fpdc – front post double crochet
- ss – slip stitch
- R – row or round
Before You Begin
This hat is easier to understand if you think of it as three connected sections: the ribbed brim, the textured body, and the decreasing crown. The brim establishes the circumference, the body builds the 3D texture, and the final rounds gradually bring the top inward.
The stitch count is especially important because the body pattern repeats around the hat. If the brim is changed for sizing, keep the adjustment compatible with the repeating pattern rather than changing the number of rows randomly.
Step by Sep Instruction
Crochet the Ribbed Brim
The brim is worked back and forth in flat rows. Every row contains 6 stitches, and working the sc through the back loop creates the ridged texture that gives the band its stretch.
Foundation
Foundation: Ch 7.
Row 1: Skip 1 ch, work 1 sc in each of the remaining 6 ch across, then turn. 6 sts.
Row 2: Ch 1, work 6 sc-blo across, then turn. 6 sts.
Rows 3-78: Repeat Row 2 until you have completed a total of 78 ribbed rows. 6 sts per row.
Row 79: Join the Brim
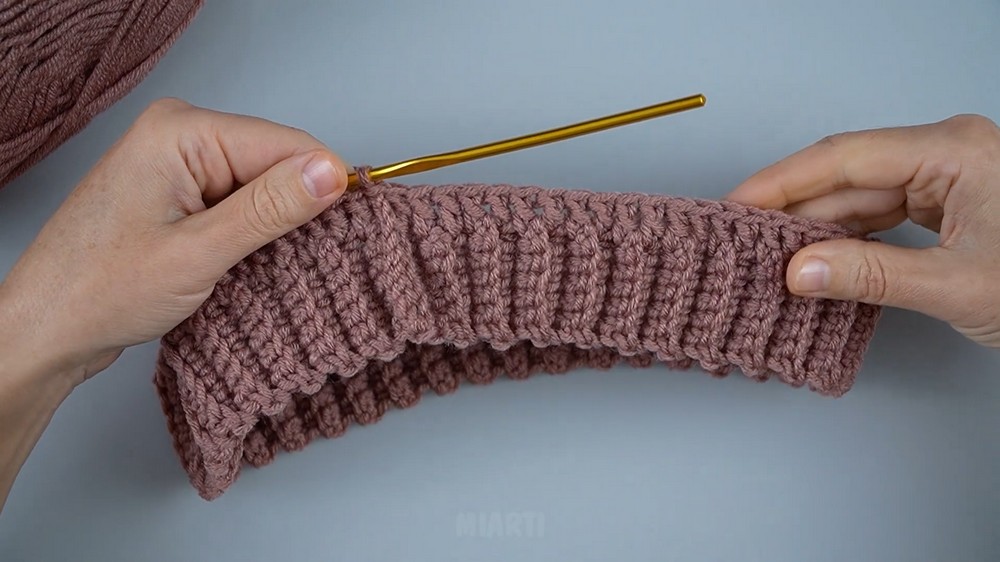
Row 79: Fold the ribbed band end to end and work 6 ss through both thicknesses across the short edges to join the band into a circle. 6 ss.
What You Should Have Now
You should have a long ribbed strip joined into a circular band. The ridges should run around the brim, and the band should not be twisted.
This circular band becomes the foundation for the entire hat. The next round will place double crochet stitches evenly around its top edge, giving you the 78-stitch base needed for the textured body.
Build the 3D Textured Body
Now the pattern changes from flat rows to rounds.
That change matters because the brim has already established the circumference. From this point forward, you are building upward rather than making the fabric longer from side to side.
Round 80: Create the Foundation for the Texture
Round 80: Ch 3, which counts as 1 dc, work 77 dc evenly along the top edge of the ribbed band, then join with a ss to the top of the beginning ch-3. 78 sts.
Why Round 80 Matters
This round creates the even foundation that the raised stitch pattern will sit on.
You should now have 78 stitches around the entire brim. Do not rush past this checkpoint if your stitch count is different, because the next round depends on this circular foundation.
Round 81: Begin the Raised Texture
Round 81: Ch 3, 2 dc, 1 fpdc, 3 dc; repeat from * to * 25 times total, ending with 1 fpdc, then join with a ss to the top of the beginning ch-3.
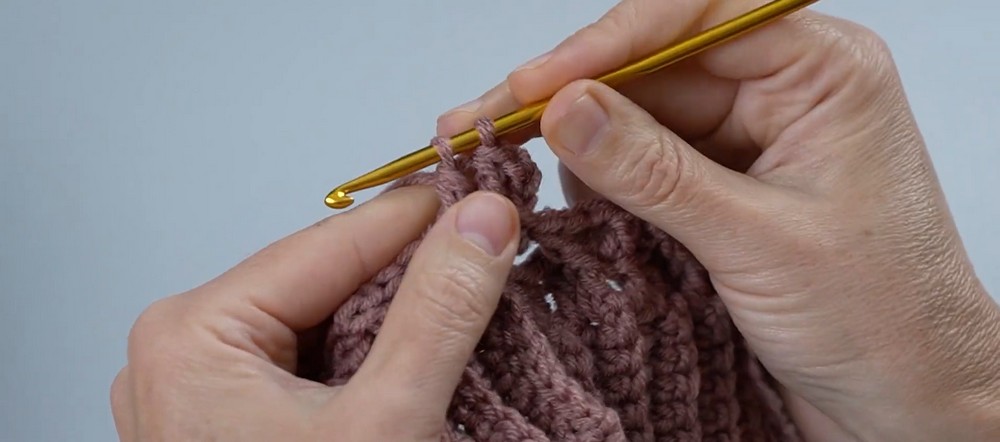
This is where the hat starts looking different from an ordinary beanie. The FPDC is worked around the post of the stitch rather than through its top loops, so it sits forward and creates a raised section.
Teaching Tip: Finding the FPDC Position
If you are unsure where the hook should go, look at the vertical body of the previous stitch. Instead of inserting into the two loops at the top, bring the hook around the post of that stitch.
That raised stitch is what gives the finished hat its dimensional texture.
Round 82: Continue the Pattern
Round 82: Ch 3, 2 dc, 1 fpdc, 3 dc; repeat from * to * 25 times total, ending with 1 fpdc, then join with a ss to the top of the beginning ch-3.
At this point, the repeated FPDC stitches begin establishing the visual rhythm of the textured design.
You may not see the full diagonal effect immediately. That is normal. The texture becomes clearer as more rounds are stacked above one another.
Rounds 83-100: Develop the Main Texture
Rounds 83–100: Repeat Round 82 for 18 additional rounds to build the main 3D diagonal texture.
What Happens During These Rounds?
These are the height-building rounds of the hat. You are not changing the basic stitch sequence; you are repeating it so the raised texture can develop across the body.
After several rounds, pause and look at the fabric rather than only at the individual stitches. The raised FPDCs should be easy to distinguish from the flatter dc stitches.
If the Texture Doesn’t Look Right
Check the placement of your FPDC first.
If you accidentally work a regular dc where an FPDC belongs, the raised pattern can become interrupted. It is much easier to correct an incorrect stitch while you are only a few stitches past it than after several complete rounds.
Shape the Crown
After Round 100, the main body has reached the required height and the textured section is established. The next step is no longer to keep adding height in exactly the same way.
Now the stitch count between the raised stitches decreases so the fabric can begin moving inward toward the crown.
Round 101: Begin the Reduction
Round 101: Ch 3, 1 dc, 1 fpdc, 2 dc; repeat from * to * 25 times total, ending with 1 fpdc, then join with a ss.
Why This Round Changes
Notice that the sequence now has 2 dc instead of 3 dc between the FPDC stitches.
That small change is what begins narrowing the upper portion of the hat. The textured posts remain part of the design while the surrounding stitches are reduced.
Rounds 102-105: Continue Narrowing the Crown
Rounds 102–105: Ch 3, 1 fpdc, 1 dc; repeat from * to * 25 times total, then join with a ss at the end of each round.
The stitch sequence is reduced again, leaving only 1 dc between each FPDC.
As these rounds are completed, the opening at the top becomes smaller. Keep checking that each round is joined cleanly before beginning the next one so the crown remains even.
Close the Crown
The final opening is gathered with the yarn tail rather than closed with another crochet round.
Fasten Off
Cut the yarn, leaving a long tail of approximately 25–30 cm.
Cinch the Crown
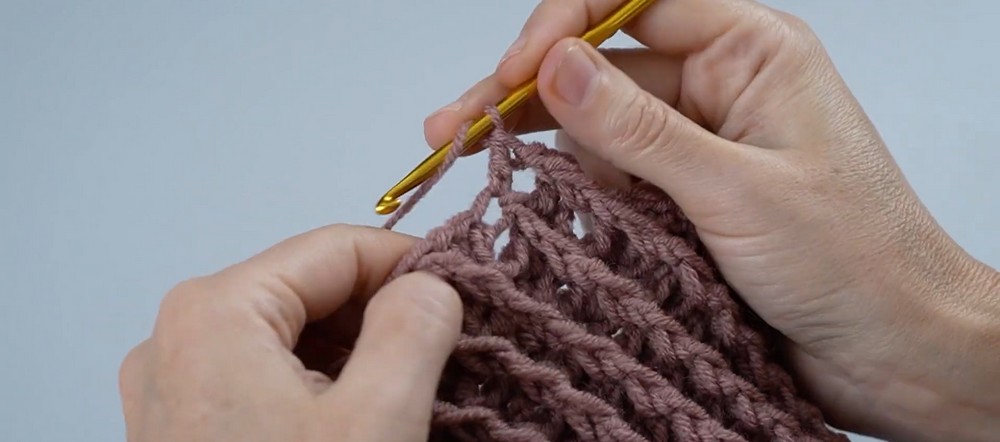
Thread the long tail onto a yarn needle. Weave the needle in and out through the top stitches of Round 105, working around the opening.
Once the yarn has been passed through the stitches, pull the tail firmly to gather the crown closed.
Secure the gathered top with a knot on the inside of the hat.
Why the Long Tail Is Important
You need enough yarn to travel around the entire opening and pull it closed securely. Leaving a 25–30 cm tail gives you enough working length to gather and secure the crown without running short.
Add the Finishing Touches
Attach the Pompom
If you want the playful look shown with this style of hat, attach a matching yarn pompom firmly to the gathered crown. A pompom maker or cardboard can be used to make it.
You can also use a faux-fur pompom or leave the top plain if you prefer a simpler finish.
Weave in the Ends
Use the tapestry needle to weave in all remaining yarn ends securely on the inside of the hat.
Before wearing it, check the crown, pompom attachment, and brim for loose ends.
Sizing & Customization
The supplied pattern makes an adult-size hat for a head circumference of approximately 56-58 cm (22–23 inches).
To adjust the circumference, change the number of ribbed brim rows in multiples of 3 before joining the band. Keeping the adjustment in multiples of 3 helps maintain compatibility with the repeating 3D texture.
For the cleanest fit, measure the ribbed band before joining it. Because the BLO ribbing has some stretch, the relaxed measurement and worn measurement will not necessarily be identical.
Color & Finishing Ideas
A solid color allows the raised FPDC texture to become the main feature of the hat. A contrasting pompom can add a little extra personality without changing the stitch pattern.
For a softer winter look, the acrylic/wool blend used in the supplied instructions provides both warmth and structure. You can also experiment with different colorways while keeping the same stitch sequence.
Final Check
Before calling the hat finished, check these points:
- The ribbed brim is joined without a twist.
- Round 80 contains 78 stitches.
- FPDC stitches are worked around the posts.
- The textured body continues consistently through Round 100.
- Round 101 begins the crown reduction.
- Rounds 102–105 continue narrowing the top.
- The crown is securely cinched.
- All loose ends are woven in.
Final Thoughts
The interesting part of this hat is how gradually the shape develops. The first 78 rows create a flexible ribbed foundation, Round 80 turns that band into a circular crochet base, and the repeated FPDC pattern builds the raised texture above it.
Then the pattern changes direction: Round 101 begins reducing the stitches, Rounds 102–105 bring the crown inward, and the final yarn-tail closure finishes the shape. Once you understand what each section is doing, the large number of rounds feels much more manageable-and you can follow the hat’s development instead of simply counting rounds.