Crochet a Bulky Mosaic Beanie with Stretchy Ribbed Band
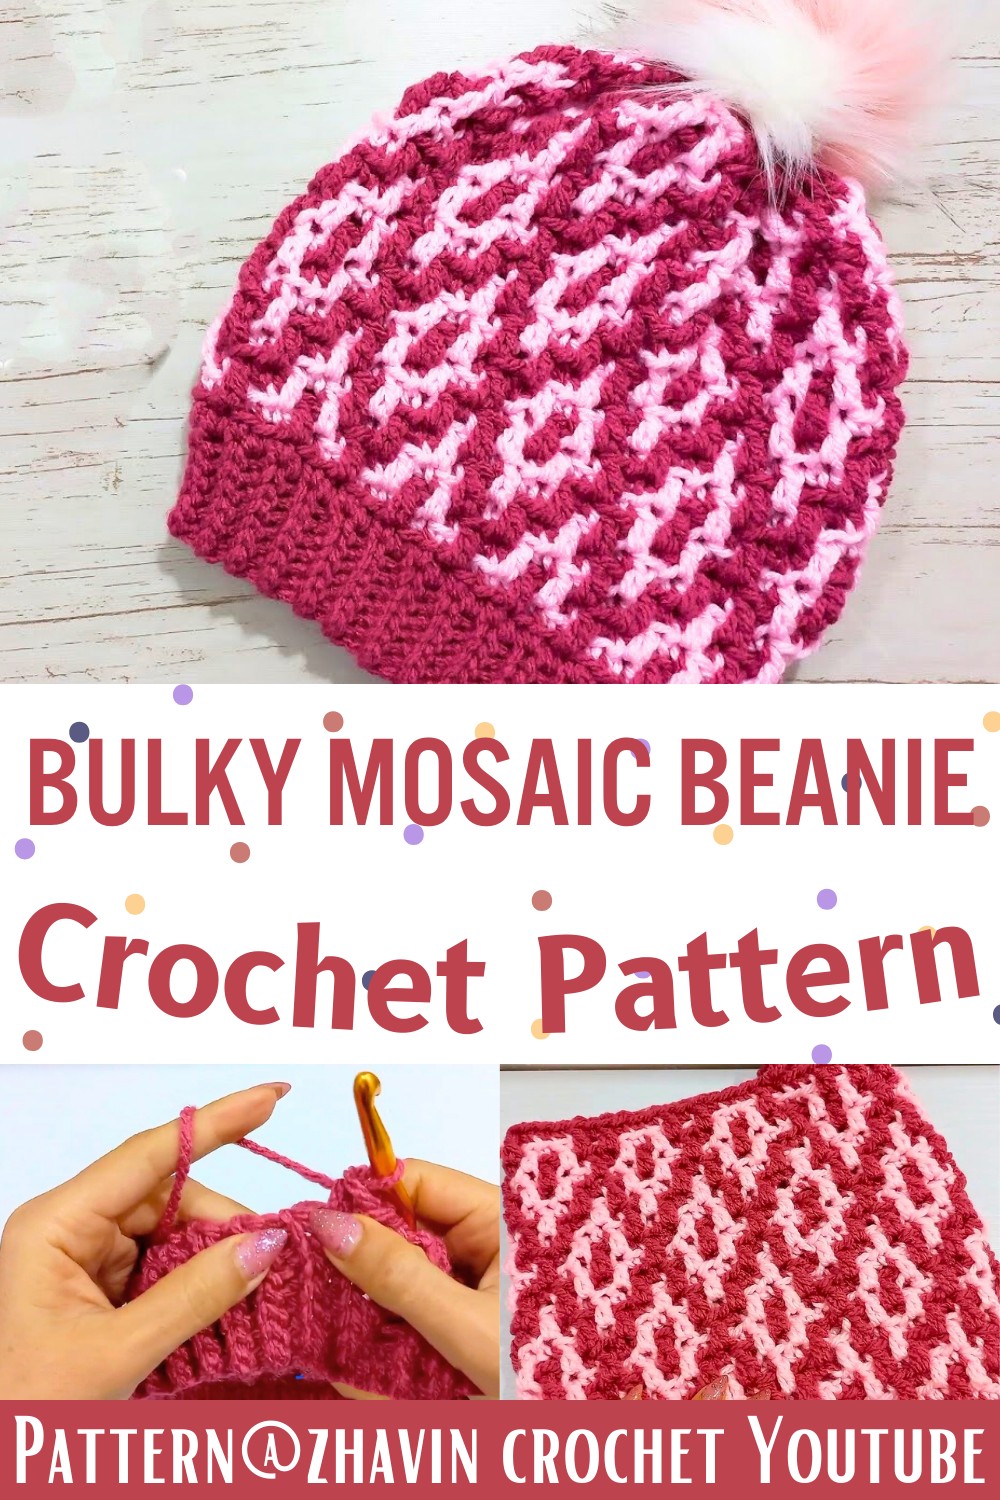
A beautiful mix of two yarn colors gives this crochet bulky mosaic beanie a rich texture that looks impressive without feeling complicated.
The stretchy ribbed band creates a snug and comfortable fit, while the relaxed shape adds a modern touch. This handmade crochet piece blends warmth, style, and everyday comfort into something you’ll reach for throughout the colder months.
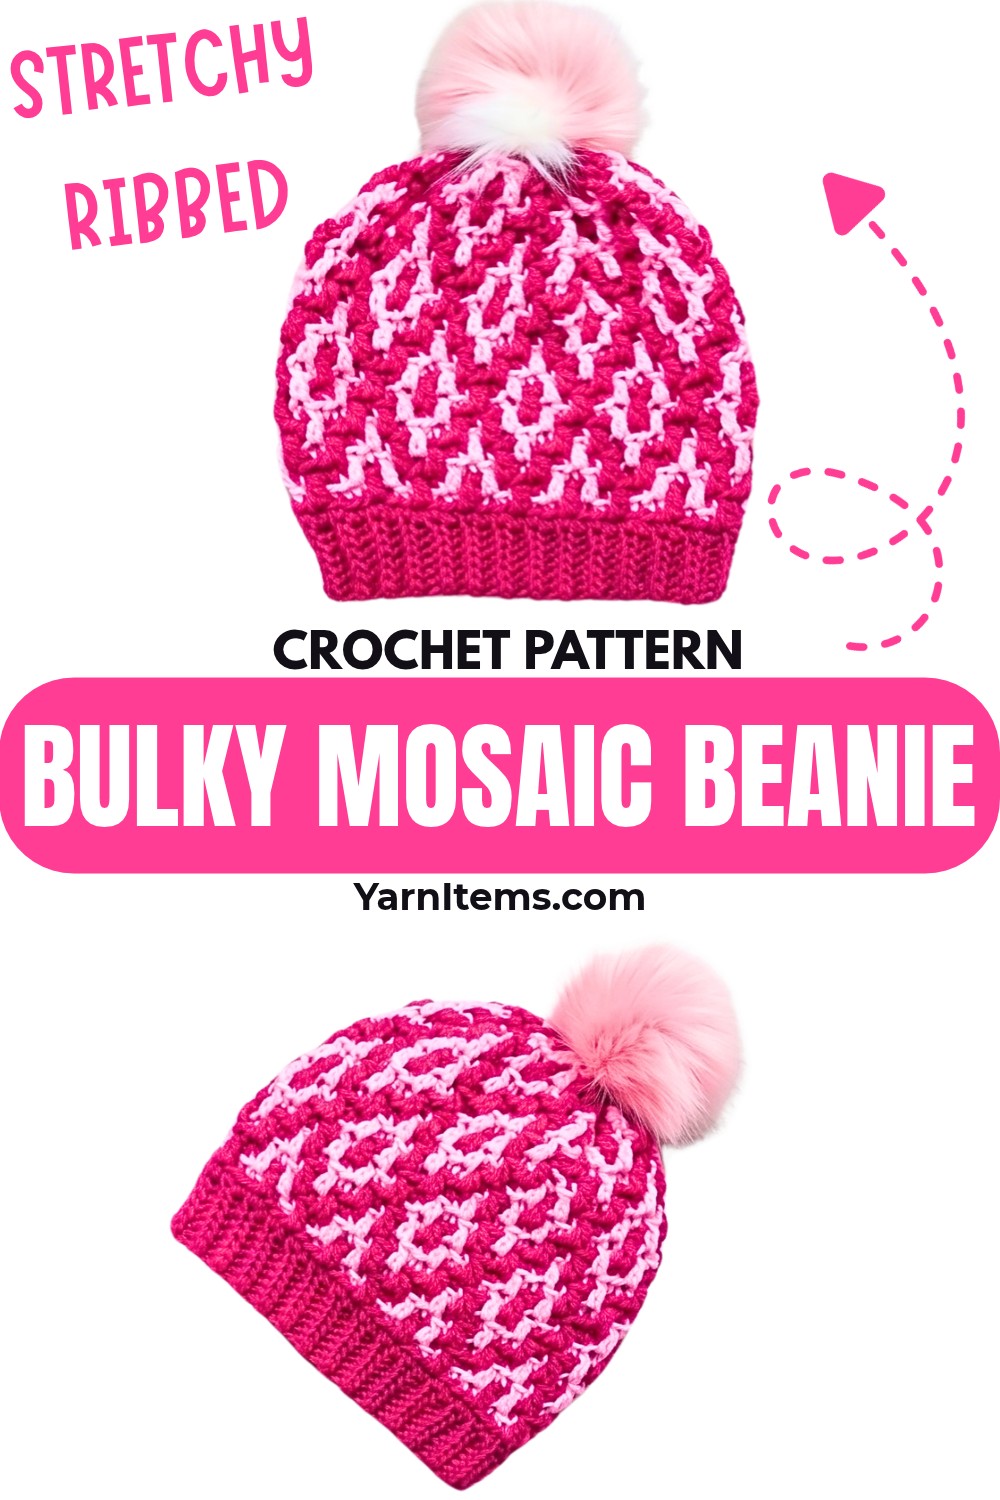
Soft bulky yarn works up into a cozy beanie that keeps you warm while showcasing a striking mosaic crochet design. The repeating stitch pattern is easy to follow, making this piece enjoyable for beginners as well as experienced crocheters. Whether you’re making it for yourself or as a thoughtful gift, the finished item offers a stylish look with lasting comfort.
Credit zhavin crochet
Materials & Tools Needed
- Yarn: Two colors of bulky weight yarn (or substitute with worsted weight if desired).
- Hook: 8 mm crochet hook.
- Additional Tools: Tapestry needle and scissors.
- Optional: Pom-pom for the top of the hat.
Finished Size & Customization Ideas
- Size: Adult slouchy fit.
- Height: Slightly taller than a standard hat for a slouchy effect.
- Circumference: Ribbed brim is adjustable and designed based on head size. The number of rows should be a multiple of 6.
- Customization:
- Add more chains to adjust the height of the ribbed brim.
- Add or remove repeats of the main body rounds to adjust the height of the beanie.
Pattern Notes
- Structure of the Pattern
- The pattern primarily consists of three rounds that are alternated in different orders to form the mosaic design.
- Color Changes
- Color changes happen at the end of each round.
- Do not fasten off between rounds.
- Use two skeins of yarn simultaneously, carrying the unused yarn up to avoid cutting and rejoining.
- Stitch Placement
- Work single crochets in back loops only (BLO).
- Work double crochets in front loops of stitches two rows below, unless otherwise stated in the instructions.
Pattern Abbreviations & Terminology
- ch: Chain.
- sl st: Slip Stitch.
- sc: Single Crochet.
- dc: Double Crochet.
- BLO: Back Loop Only.
- Front Loop (2 rows below): Insert the hook into the front loop of the stitch located two rows below the current working row.
- RS/WS: Right Side/Wrong Side.
All stitches use US crochet terminology.

Tips Before You Start
- Tension: Work slip stitches loosely for the ribbed brim to maintain stretch.
- Foundation Note: The number of rows in the ribbed brim is critical since it determines the circumference of the hat. Ensure the row count is a multiple of 6.
- Color Work: Always join the new color yarn at the end of rounds with a slip stitch.
- Height: Measure the total height periodically to ensure the slouchy hat fits as desired.
Step-by-Step Crochet Instructions
Part 1: Ribbed Band
- Start with a slip knot and ch 8 (for an adult brim).
- To adjust, add or subtract chains to change the height of the ribbed band.
- Work 1 sl st into the 2nd chain from the hook and into each chain across. (7 sl sts total)
- Ch 1, turn. Work 1 sl st BLO in each stitch across. Ensure stitches are loose. (7 sl sts)
- Repeat Step 3 until the ribbed band is long enough to fit the head circumference.
- The total number of rows must be a multiple of 6. For an adult size, make 66 rows.
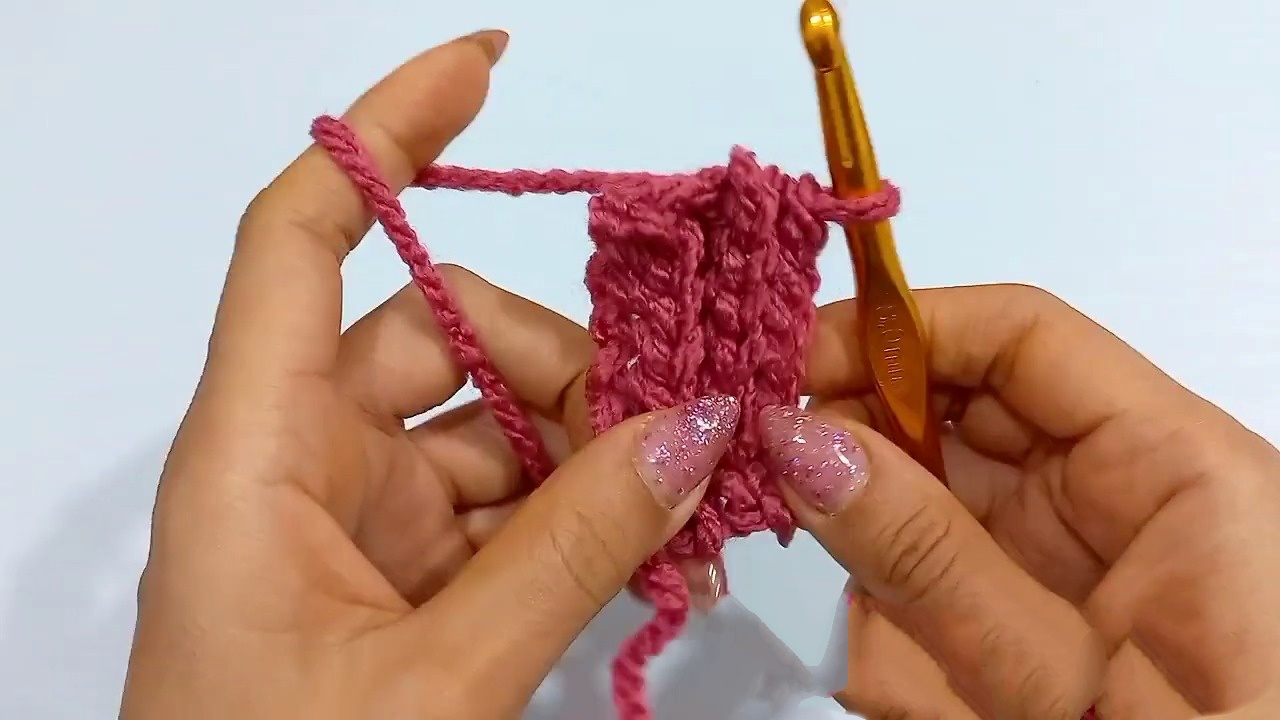
Joining the Ribbed Band:
- Fold the ribbed band in half so the first and last rows align.
- Join with sl sts: Insert hook through the back loop of the stitch from the last row and the front loop of the corresponding stitch in the first row.
- Continue to sl st across to seam the band together, creating a ring. Fasten off.
Part 2: Body of the Hat
Round 1: Foundation Single Crochet
- Attach Yarn A.
- Work 1 sc BLO into the last stitch of each row of the ribbed brim.
- Total: The number of scs should equal the number of rows in the brim (e.g., 66 scs for 66 rows).
- Join to the first sc BLO with a sl st. Change to Yarn B.
Main Pattern Rounds
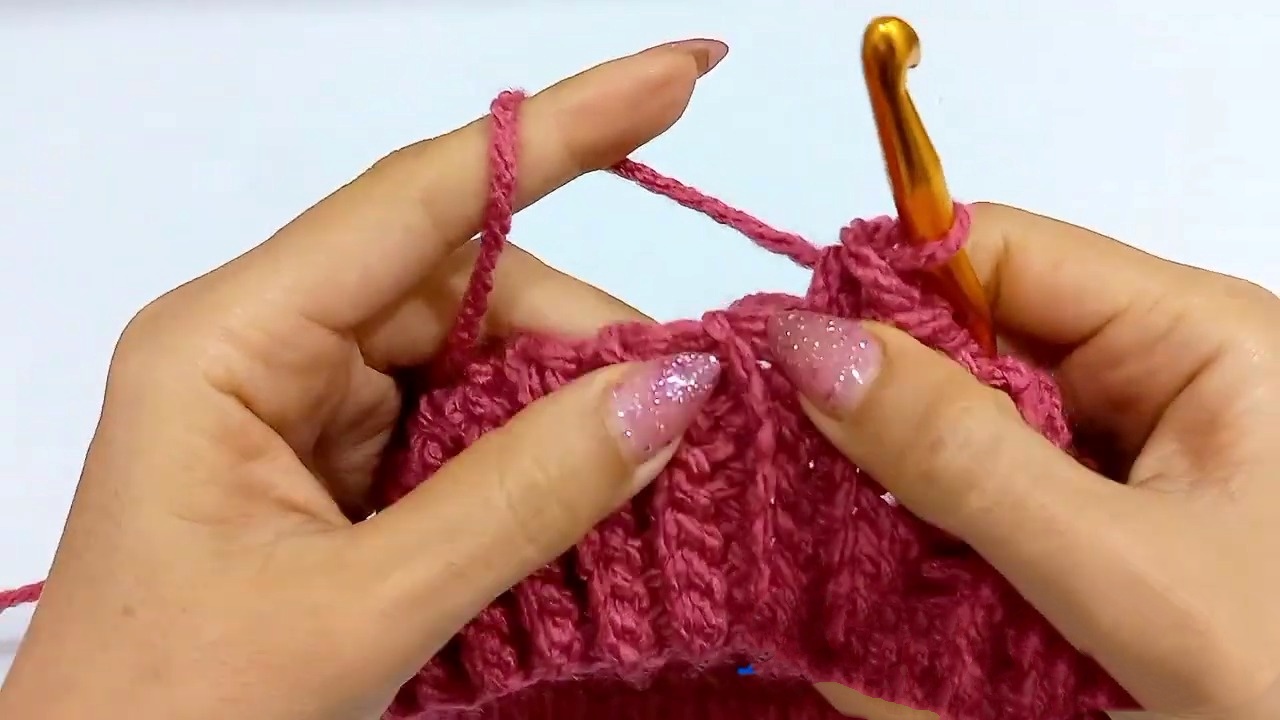
The following pattern consists of three rounds (Rounds 3, 4, and 5). These rounds are repeated in different orders to create the mosaic effect.
Round 2: BLO (Setup Round)
- With Yarn B, ch 1 and work 1 sc BLO in each stitch around.
- Join with a sl st to the first sc BLO and switch to Yarn A.
Round 3: Alternating Single and Double Crochet
- Ch 1. Work:
- 1 sc BLO in each of the first two stitches.
- 1 dc in the front loop of the next stitch (two rows below, skip the corresponding st of the current row).
- Repeat the sequence: 2 sc BLO, 1 dc front loop around.
- At the end of the round, join with a sl st, changing to Yarn B.
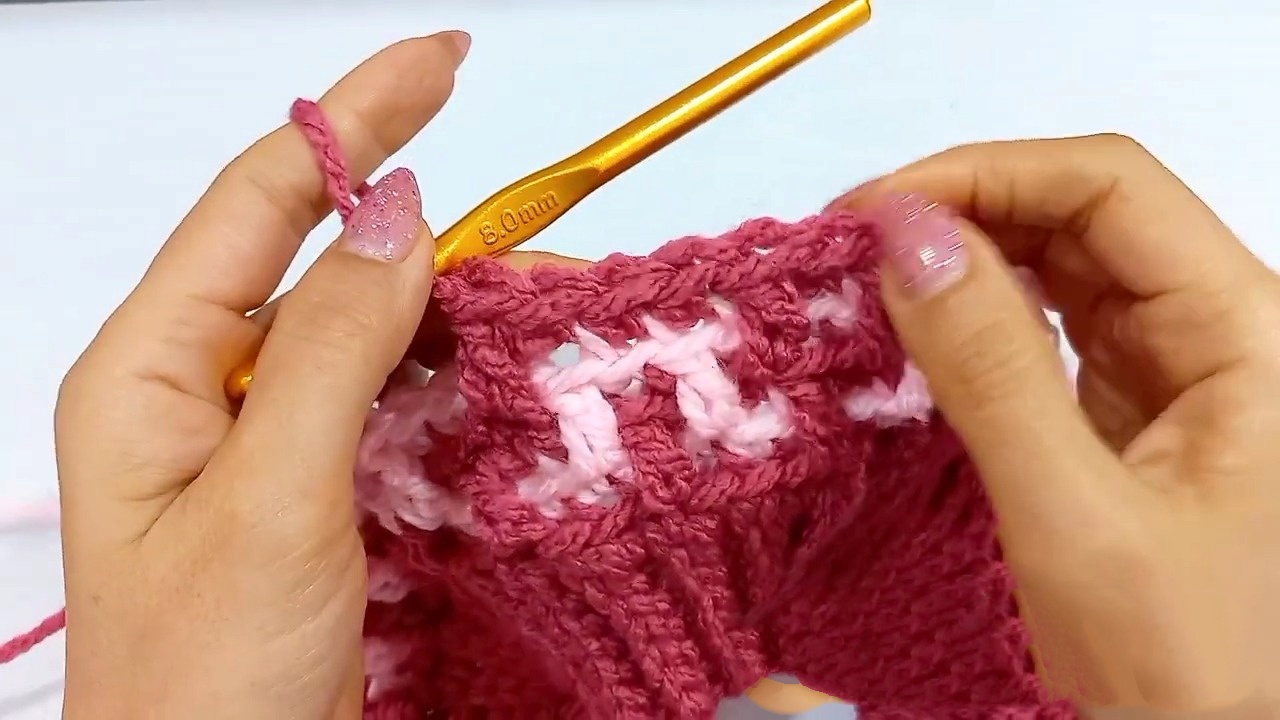
Round 4: Mosaic Pattern (Double, Singles, Single)
- With Yarn B, ch 1. Work:
- 1 dc front loop in the first stitch of 2 rows below.
- 3 sc BLO in the next 3 stitches.
- 1 dc front loop in the next stitch of 2 rows below.
- 1 sc BLO in the next stitch.
- Repeat the sequence: 1 dc front loop, 3 sc BLO, 1 dc front loop, 1 sc BLO around.
- Join with a sl st, changing to Yarn A.
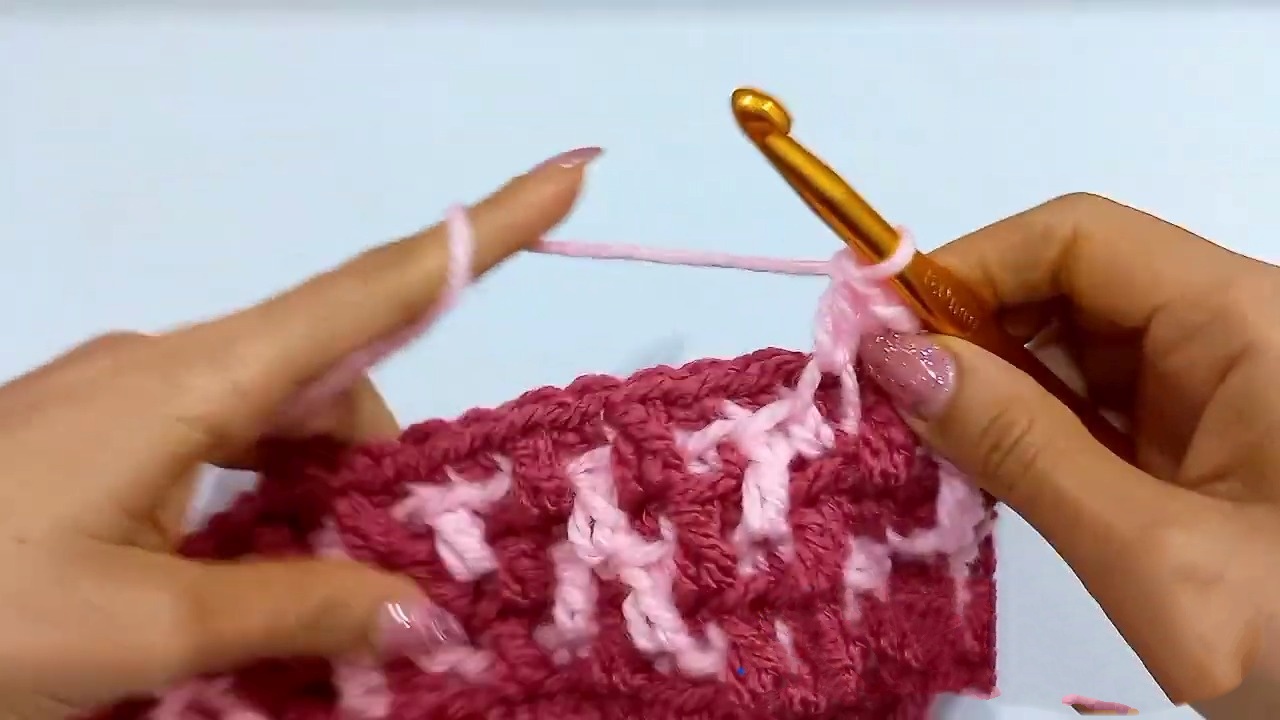
Round 5: Alternating Single and Double Crochet (Centered)
- With Yarn A, ch 1. Work:
- 1 sc BLO in the first stitch.
- 1 dc front loop in the next stitch two rows below.
- 3 sc BLO in the next 3 stitches.
- 1 dc front loop in the next stitch two rows below.
- Repeat the sequence: 1 sc BLO, 1 dc front loop, 3 sc BLO, 1 dc front loop around.
- Join with a sl st, changing to Yarn B.
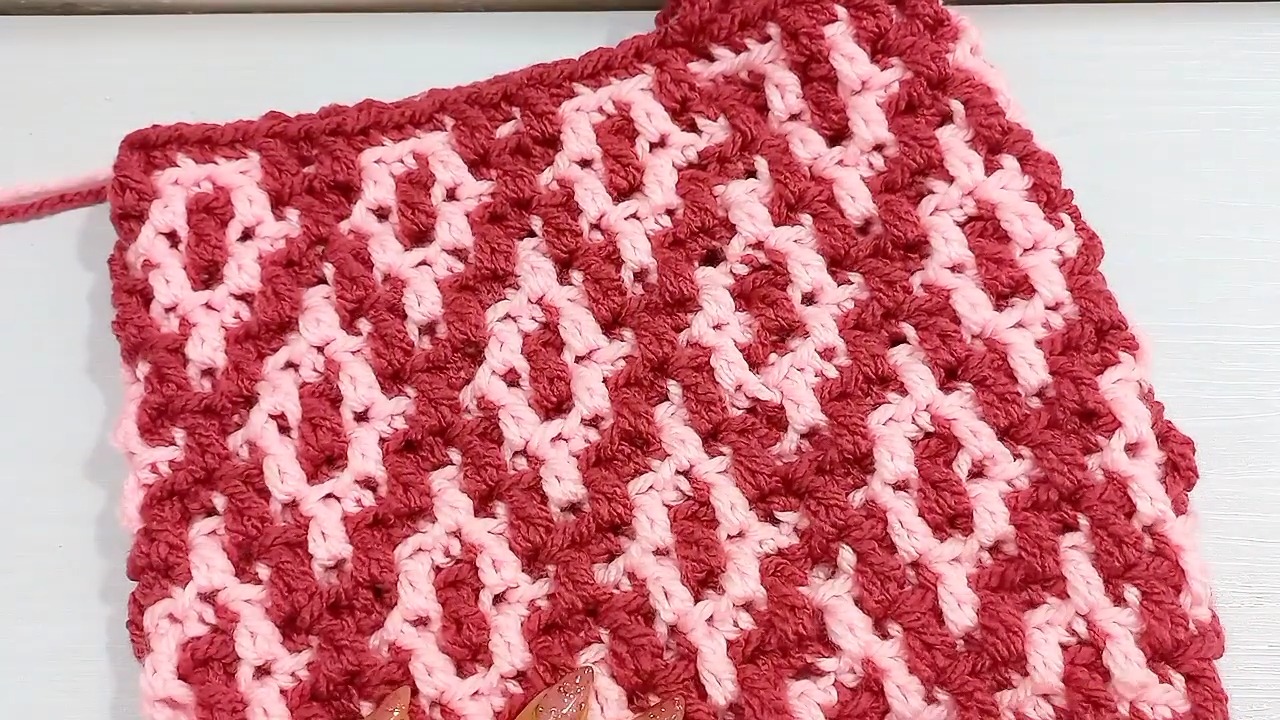
Repeating the Rounds
- Continue working the pattern in the following order:
- Three-round sequence: Round 3, Round 4, Round 5.
- Switch the order for the next sequence: Round 3, Round 5, Round 4.
- Alternate as above until the entire 12-round sequence has been repeated several times and the hat reaches the desired height.
Final Assembly
Close Hat and Add Pom-pom
- Fasten off both yarns, leaving a long tail.
- Use a tapestry needle to weave the tail through the BLO of the stitches in the last round.
- Pull tightly to cinch the top of the hat. Secure with several stitches.
- Optionally, attach a pom-pom to the top of the hat for decoration.
Conclusion
Your Bulky Mosaic Beanie is now complete! This beautifully textured and slouchy hat is perfect for winter. You can experiment with color combinations and adjust the height or circumference for a perfect fit. Enjoy and happy crocheting!