This festive crochet basket is a fun and practical holiday project, perfect for holding treats, decorating your home, or gifting with a handmade touch this Christmas.

A Crochet Christmas Basket is a sweet and simple way to add charm to your holiday celebrations. You can use it to hold candy, small gifts, or even as a festive table decoration. Its soft texture and seasonal colors make it a cozy addition to your home, and you can customize the size and colors to fit any occasion, not just Christmas. Whether tall or short, it’s always a useful little creation.
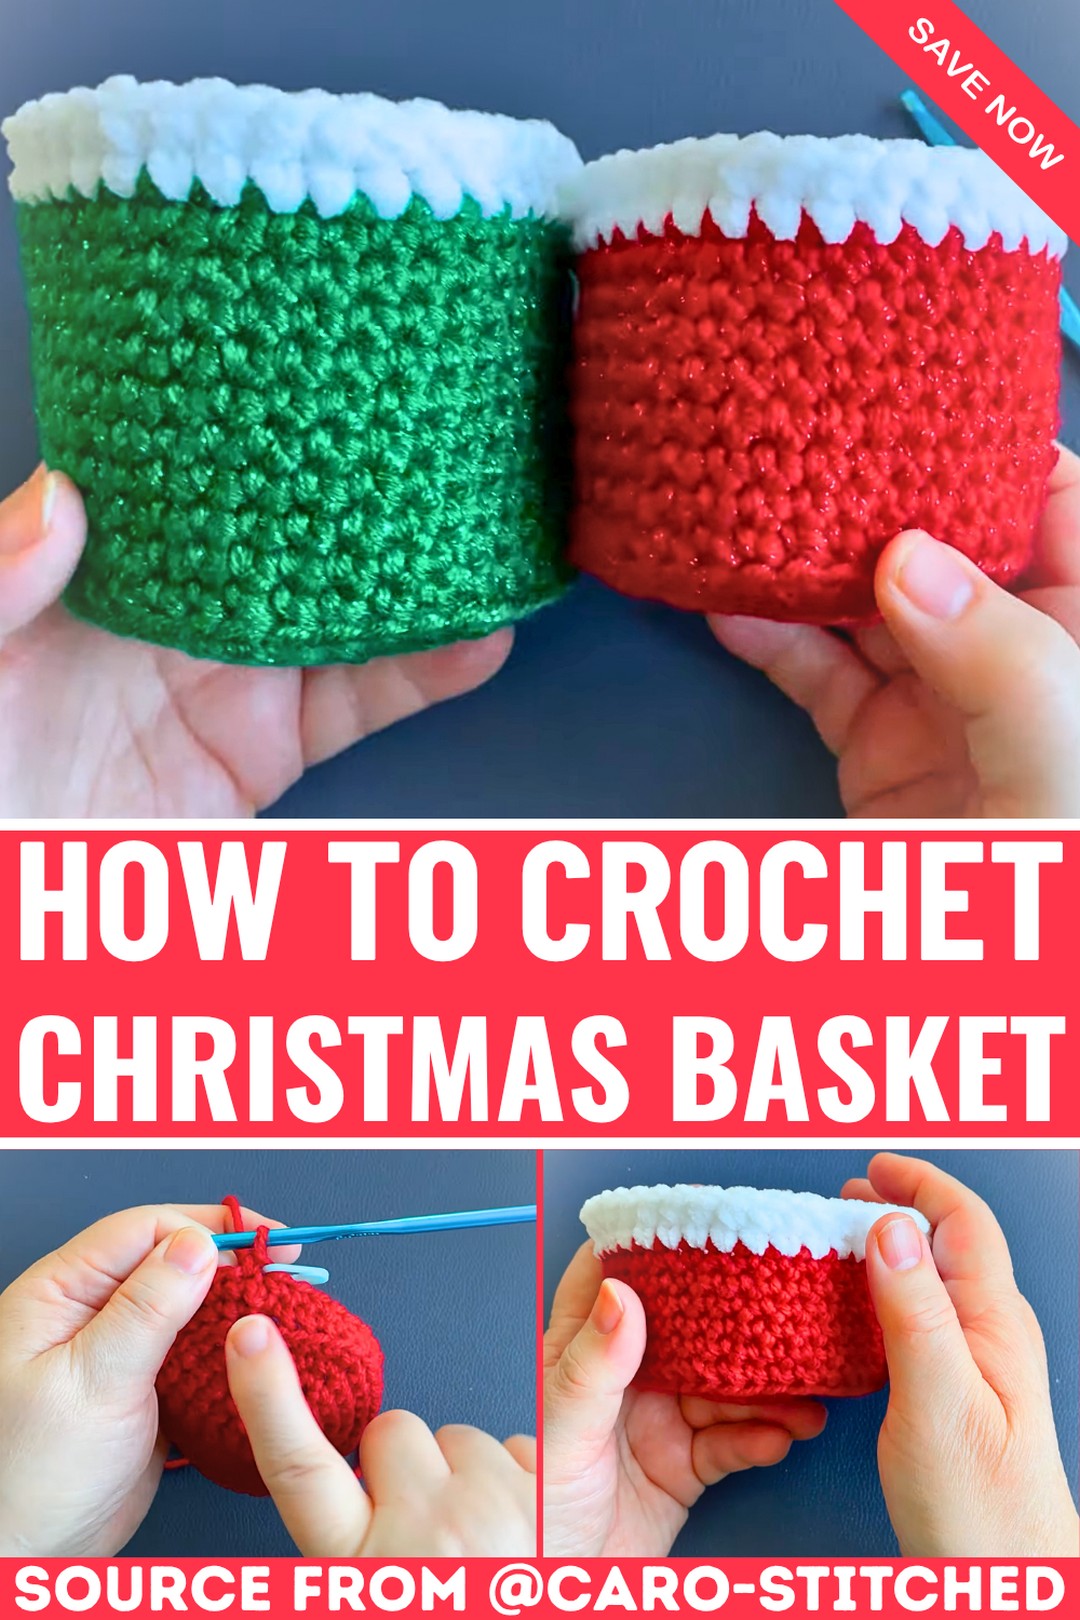
Crochet Christmas Basket Tutorial
Making this basket is beginner-friendly and a great way to practice your crochet skills. The step-by-step guide uses basic stitches, and you’ll learn how to shape the basket’s base and sides. Adding a fluffy white trim at the top gives it a cheerful holiday look, but the design can easily fit other holidays or themes with a simple change of colors. All you need are a crochet hook, yarn, and a stitch marker for a smoother workflow. It’s the kind of item everyone will love seeing (and using) in your home.
Credit Caro-stitched
Key Features of the Pattern
- Customizable Size: Create baskets as big or small as you like using simple increases.
- Worked in the Round: Start with a magic ring and build the base with increase rounds before forming the sides.
- Textured Shaping: Switch to working in the back loop to create defined edges for the basket’s body.
- Add a Contrast Rim: Give your basket a pop of festive flair with a fluffy white trim on top.
- Use Chunky Yarn: The pattern uses chunky yarn for sturdiness and a cozy holiday feel, paired with a 5mm crochet hook.
How the Basket Comes Together
This charming basket begins with a magic ring, setting the stage for a sturdy circular base. You’ll use UK double crochet (US single crochet) stitches to create the foundation, increasing strategically in each round to expand the bottom. The tutorial offers guidance on how to adjust the size, making this pattern versatile for various uses—from petite baskets to hold candy treats, to larger ones for decorations.

Once the base is complete and the desired diameter is reached, the sides take shape using a clever technique: working in the back loop only. This creates a slight ridge between the base and the walls, emphasizing the basket’s structure while adding texture. From there, the sides are built in continuous rounds of single stitches. Using a stitch marker here makes keeping track of progress simpler and ensures clean, even rounds.

Adding the finishing details transforms this simple basket into a cheerful holiday decoration. The tutorial includes instructions for switching yarn colors, introducing a soft white trim at the top. The fluffy texture of the rim adds warmth and a classic Christmas aesthetic, reminiscent of snow or Santa’s outfit. It’s a lovely touch and a great finishing point.

The beauty of this pattern is its adaptability. Whether you’re building taller sides or keeping them short, your basket can be perfectly tailored to your needs. Small adjustments in yarn weight, hook size, or stitch repetitions allow for endless possibilities.

Video Tutorial
Step-by-Step Pattern
Materials
Here’s everything you’ll need to make your Crochet Christmas Basket:
- Yarn: Bulky weight yarn, such as Flutterby Chunky Yarn (used in red or green for the base and white for the top)
- Crochet Hook: 5 mm hook
- Stitch Marker: Optional but helpful for marking the start of your rounds
- Scissors
- Darning Needle: For weaving in ends
Pattern Instructions
Step 1: Create the Magic Ring
- Form a magic ring and secure it with a chain.
- Work 6 UK doubles/US singles into the ring.
- Gently pull the yarn tail to tighten the ring slightly, leaving a small opening. You can adjust the tightness later.
Step 2: Crochet the Basket Base
The base of the basket is created by working in the round and increasing gradually.
Round 1: Increase
- Increase in every stitch (2 UK doubles/US singles in each stitch), ending with 12 stitches total.
- Join to the first stitch with a slip stitch and chain 1.
Round 2: Continue Increasing
- Work a pattern of 2 stitches in the first, 1 stitch in the next around the circle.
- This round ends with 18 stitches. Slip stitch to join, and chain 1.
Round 3: Continue Increase Pattern
- Work a pattern of 2 stitches in the first, 1 stitch in the next two stitches around.
- The row ends with 24 stitches. Join with a slip stitch.
Round 4: Repeat Increase
- Work a pattern of 2 stitches in the first, 1 stitch in the next three stitches around.
- Continue in this manner, adding one extra single stitch between increases in each new round, until you achieve the desired size for your basket base.
Note: For a standard-sized basket, the base typically has 36 stitches, but you can continue increasing rows to make the basket larger.
Step 3: Transition to the Walls
- Once the base is ready, chain 1.
- For the next round, work 1 UK double/US single crochet in the back loop only of each stitch. This creates a sharp crease to form the bottom edge of the basket.
- Join with a slip stitch at the end of this round and chain 1.
Step 4: Build the Basket’s Height
- Begin working in continuous rounds (i.e., do not slip stitch at the end of each round). Place a stitch marker in the first stitch of the round to keep track.
- Work 1 UK double/US single croche in each stitch around until the basket reaches your desired height.
Step 5: Add the White Trim
- Once the body of the basket is complete, slip stitch to join the final round.
- Attach the white yarn at the start of your last round with a slip knot.
- Continue working in rounds with 1 UK double/US single in each stitch to create the trim for the basket.
- For a fluffy, decorative look, you can make the trim 2-3 rows tall, depending on preference.
Step 6: Finish and Weave Ends
- Slip stitch to complete the final round of the trim.
- Chain 1, cut your yarn, and pull the tail through the loop to secure.
- Use a darning needle to weave in all loose ends. For extra security, tie small knots before trimming excess yarn.
Decorative Touches
- Add small embellishments like buttons, ribbons, or a crocheted poinsettia to give your basket extra charm.
- Create multiple baskets in different colors and sizes to use as gift baskets or decorative storage.
Troubleshooting and Suggestions
Troubleshooting:
- Magic Ring Issues: If the ring keeps loosening or feels tricky, take time to practice or watch the creator’s tutorial on this technique. Pulling yarn gently and ensuring even stitches is key.
- Stitch Consistency: As you work in continuous rounds, it’s important to keep your tension steady. Uneven stitches can result in wobbly basket sides.
- Joining Rounds: Pay close attention when making slip stitches to avoid gaps in the edges. Mark your starting point with a stitch marker to stay on track.
Suggestions for Modifications:
- Play with Colors: Swap the traditional red and green for bold tones like silver and gold or neutral gray and cream for year-round versatility.
- Embellishments: Add embroidered snowflakes, buttons, or pom-poms to personalize your basket.
- Alternative Uses: Create smaller baskets to hold jewelry or trinkets, or larger versions for yarn storage or plant pots. This pattern works beautifully beyond the holidays!