
Crochet Christmas Tree Keychain Free Pattern
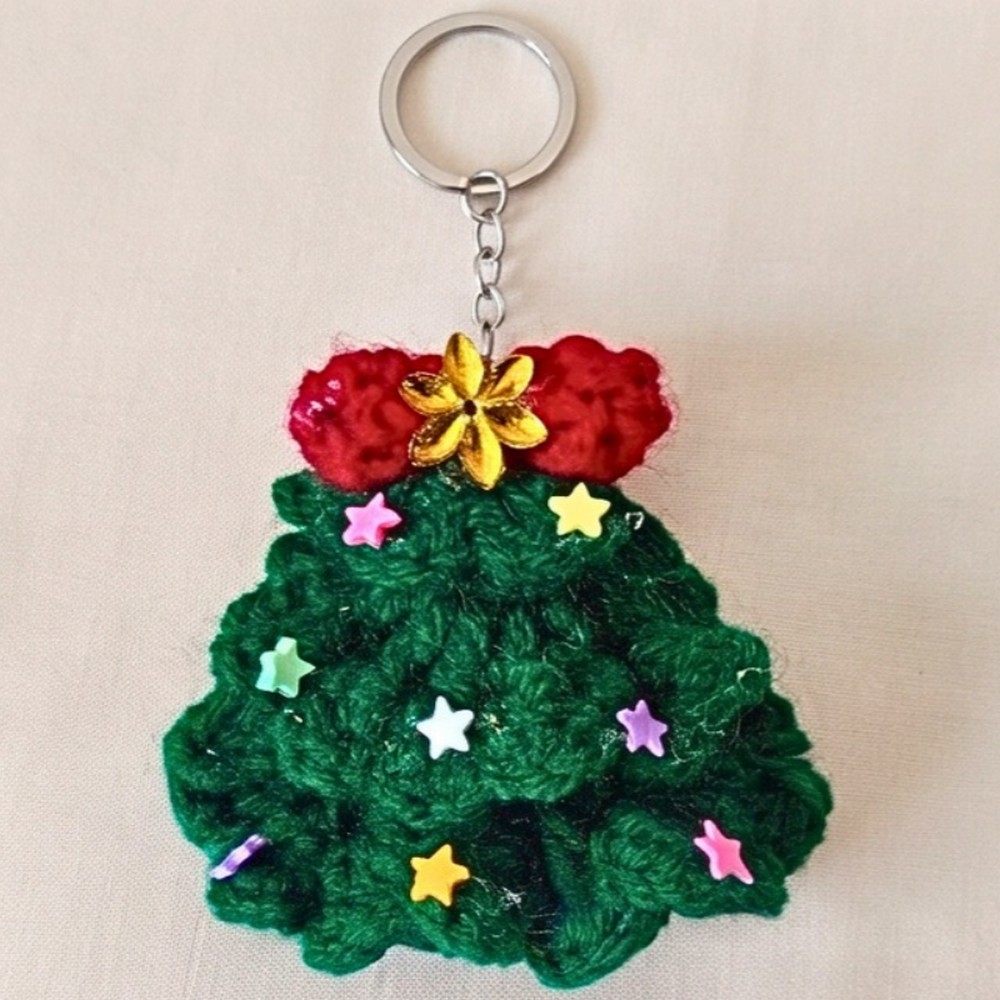
Make a miniature Christmas tree with three layered crochet sections, a tiny red bow, and sparkling decorations for a festive handmade keychain.

Festive colors and delicate, lace-like edges give this miniature crochet Christmas tree a charming, layered look. Three green sections create the tree, while a small red bow and colorful sequins add the finishing holiday details. Its compact size makes it a sweet accessory for keys, handbags, or Christmas crochet decorations.
The tree is made by crocheting three separate circular layers, each with its own number of rounds and decorative edge. You’ll shape the bow with red yarn, stack the green sections from largest to smallest, and finish by attaching the embellishments and keychain hardware. You can also skip the keyring and add a hanging loop to display your finished crochet tree as an ornament.
Credit The Crochet noire
Materials & Tools Needed
- Yarn: Cotton milk yarn (approximately 2 mm ply) or any comparable sport/DK weight yarn.
- Green Yarn: For all three tree layers.
- Red Yarn: For the bow.
- Crochet Hook: 2.5 mm.
- Notions:
- Scissors
- Yarn needle / Tapestry needle
- Stitch marker
- Craft glue or fabric glue
- Keychain hardware (split ring and chain)
- Decorative sequins or small star embellishments
Finished Size & Ways to Customize Your Tree
The finished Christmas tree measures approximately 2.5 to 3 inches tall, making it a lightweight accessory that can be used in several ways:
- Keychain: Attach the split ring and chain to carry it with your keys.
- Bag Charm: Add it to a handbag or backpack for a festive touch.
- Christmas Ornament: Skip the keychain hardware and attach a loop of metallic cord to the top.
- Winter Wonderland Style: Use pastel pinks and whites instead of green and red.
- Extra Sparkle: Weave gold metallic thread along the edges for a shimmering holiday finish.
Pattern Abbreviations & Terminology
- ch: Chain
- sc: Single crochet
- hdc: Half double crochet
- dc: Double crochet
- inc / dcinc: Double crochet increase (work 2 double crochets into the same stitch)
- sl st: Slip stitch
- rnd: Round
- st(s): Stitch(es)
Crochet Christmas Tree Pattern
The tree consists of three separate green sections. Each one is crocheted from the center outward, with a decorative petal-style edge added at the end.
Tier 1: Smallest Top Layer (Green Yarn)
Begin with the smallest section, which will sit at the top of the finished tree.
Round 1:
- Begin with a Magic Ring.
- Chain 2 (ch 2 – turning/starting chains here do not count as a stitch).
- Work 6 dc directly into the magic ring.
- Pull the starting yarn tail firmly to close the ring completely.
- Join with a sl st into the very first double crochet to close the round. (Total: 6 sts)

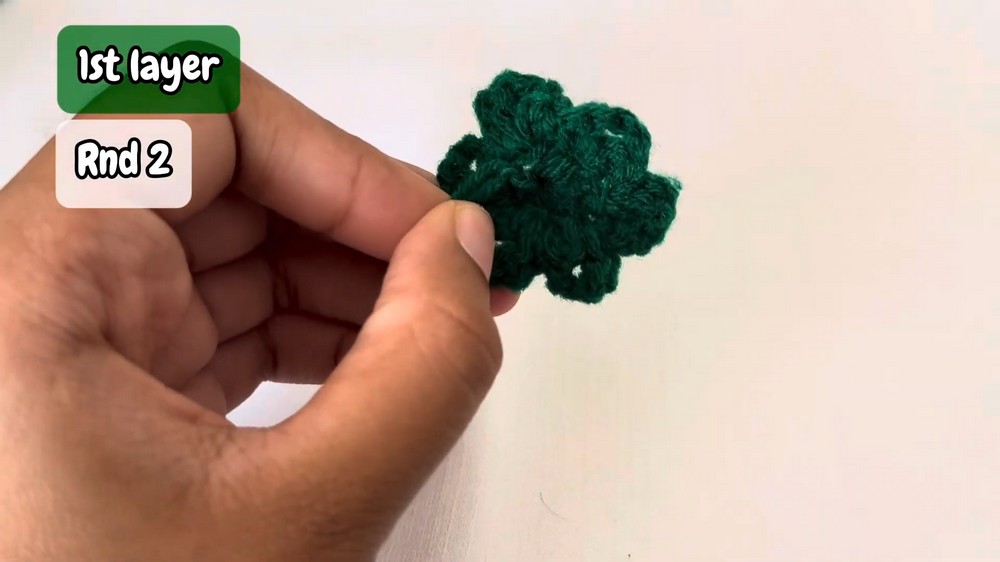
Round 2 (Petal/Lace Edge):
- Chain 2 (ch 2).
- Into the 1st stitch, work the petal sequence:
(sl st, ch 2, 1 dc, ch 2, 1 dc). - Repeat this exact sequence
(sl st, ch 2, 1 dc, ch 2, 1 dc)into each of the remaining 5 stitches around (6 petal clusters total). - Finish with a sl st into the base of the 1st stitch.
- Cut the yarn leaving a short tail, pull the tail through to the back/inside, tie secure knots, and trim the excess.
Tier 2: Middle Layer (Green Yarn)
The middle section starts with the same six-stitch center as the smallest tier. An increase round makes it wider before the decorative edge is added.
Round 1:
- Begin with a Magic Ring.
- Chain 2 (ch 2) and work 6 dc into the ring.
- Pull the tail to close the circle and join with a sl st into the 1st stitch. (Total: 6 sts)
Round 2:
- Chain 2 (ch 2).
- Work a dcinc (2 dc) in every single stitch around.
- Join with a sl st in the 1st stitch. (Total: 12 sts)
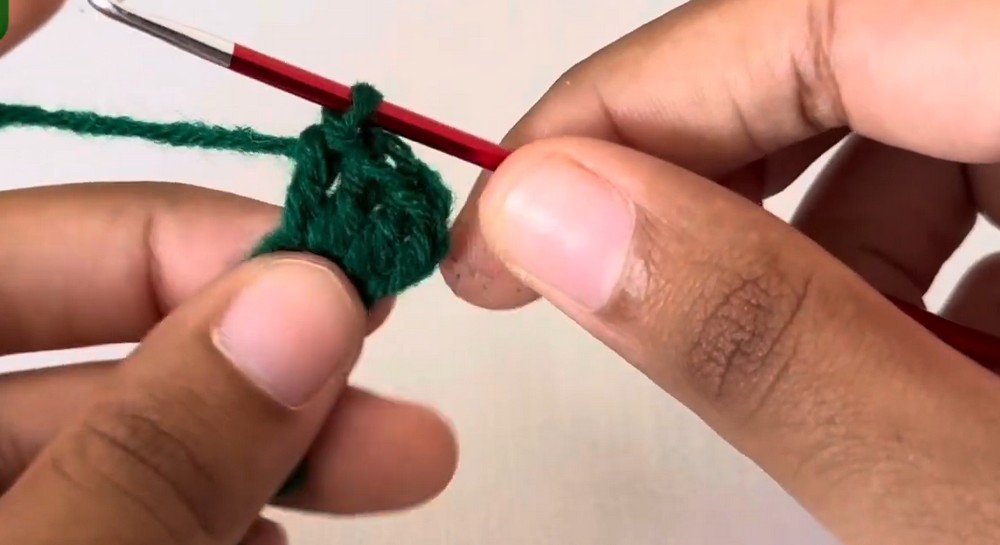
Round 3 (Petal/Lace Edge):
- Chain 2 (ch 2).
- In the 1st stitch, work
(sl st, ch 2, 1 dc, ch 2, 1 dc). - Repeat this petal sequence
(sl st, ch 2, 1 dc, ch 2, 1 dc)into each of the remaining 11 stitches all the way around. - Join with a sl st in the 1st stitch.
- Cut the thread, pull the tail inside, tie a secure knot, and trim.

Tier 3: Largest Bottom Layer (Green Yarn)
Make the largest section for the bottom of the tree. This tier has an additional increase round, giving it a wider shape than the other two sections.
Round 1:
- Begin with a Magic Ring.
- Chain 2 (ch 2) and work 6 dc into the ring.
- Pull the tail to close and join with a sl st into the 1st stitch. (Total: 6 sts)
Round 2:
- Chain 2 (ch 2).
- Work an inc (2 dc) in each stitch around.
- Join with a sl st in the 1st stitch. (Total: 12 sts)
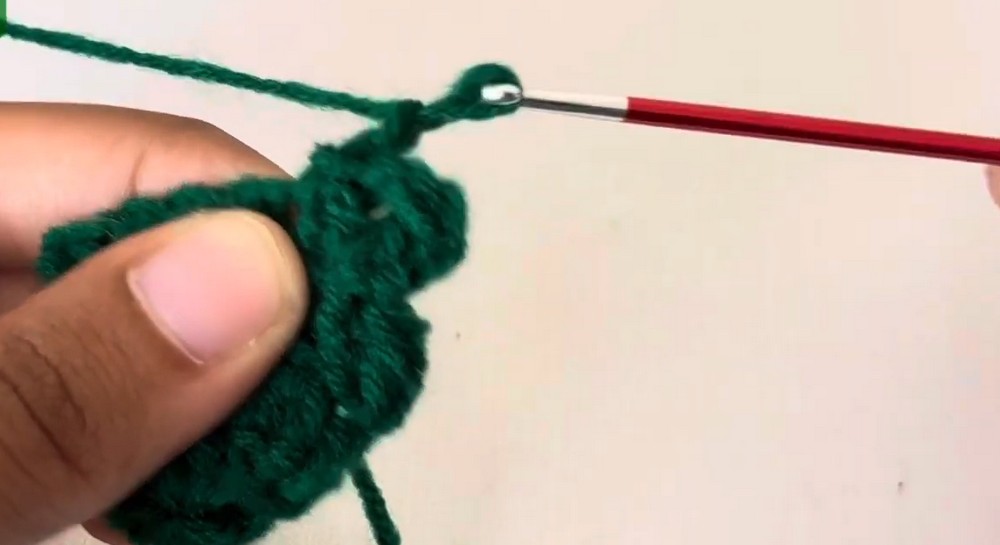
Round 3:
- Chain 2 (ch 2).
- Work the pattern
(1 dc, inc)alternating across the entire round. - Join with a sl st in the 1st stitch. (Total: 18 sts)
Round 4 (Petal/Lace Edge):
- Chain 2 (ch 2).
- In the 1st stitch, work
(sl st, ch 2, 1 dc, ch 2, 1 dc). - Repeat this petal sequence into each of the remaining 17 stitches all the way around.
- Join with a sl st in the 1st stitch.
- Cut the thread, pull the tail to the back, and secure with knots.

Make the Red Crochet Bow
The small red bow sits at the top of the tree. Its shape is created by working different stitches along a foundation chain, then wrapping the yarn around the center.
Foundation Chain:
- With red yarn, chain 15 (ch 15).
Working Across the Chain:
Starting in the 2nd chain from the hook, work the following sequence down the foundation chain:
1 sl st2 sc3 hdc1 sc2 sl st(serves as the center pivot)1 sc3 hdc2 sc1 sl st
Shaping the Bow:
- Cut the thread leaving a 6-inch tail.
- Secure with a knot.
- Use your yarn needle to wrap the remaining yarn tail tightly and neatly around the center pinch of the bow several times to form the bow loops and shape.
- Tie off securely at the back.

Assembly & Finishing Techniques
With all three green sections and the red bow ready, arrange the pieces to form the miniature Christmas tree.
1. Stack the Three Tree Tiers
- Lay out your three crocheted tree layers from largest (bottom) to smallest (top).
- Apply a small dab of craft or fabric glue to the center underside of the 2nd (middle) tier and stack it precisely centered on top of the 3rd (largest) tier.
- Repeat the process by gluing the 1st (smallest) tier onto the top center of the middle tier, creating a neat stepped Christmas tree pyramid.
2. Attach the Bow and Decorations
- Apply glue to the back of the red crocheted bow and press it firmly onto the top peak of the small tree tier.
- Glue a small gold star sequin directly onto the center knot of the red bow.
- Scatter and glue additional colorful star sequins or beads onto the branches of the tree tiers to mimic festive Christmas ornaments.
Placing the Decorations Without Covering the Tree Layers
Before applying glue, arrange the sequins and beads over the three green sections to decide where each decoration will sit. Spread the embellishments across the visible areas instead of placing them too close together.
Keep the lace-style edges and the spaces between the tiers visible. These details help distinguish the three layers and give the little tree its decorative shape. Position the red bow at the top so it remains the main accent, with the small gold star centered on its knot.
Once you are happy with the arrangement, attach the decorations with small amounts of craft or fabric glue.

3. Attach the Keychain Hardware
Securely attach your metal split ring and keychain chain through the top stitches right behind the bow. Let the glue dry completely before use.
Turn Your Crochet Tree into a Christmas Ornament
If you prefer to hang the tree on your Christmas tree rather than use it as a keychain, skip the metal split ring and chain. Attach a loop of metallic cord to the top instead, securing it behind the bow.
Pastel pink and white yarn can create a soft winter look, while gold thread adds a little extra sparkle. Make several trees in different color combinations to decorate gifts, hang around your home, or display together during the holidays.




One Comment