Pastel Crochet Headband with Elastic Hair Tie & HDC Texture
Create a soft pastel crochet headband with a neat elastic center, textured hdc clusters, and adjustable length for comfortable everyday wear.
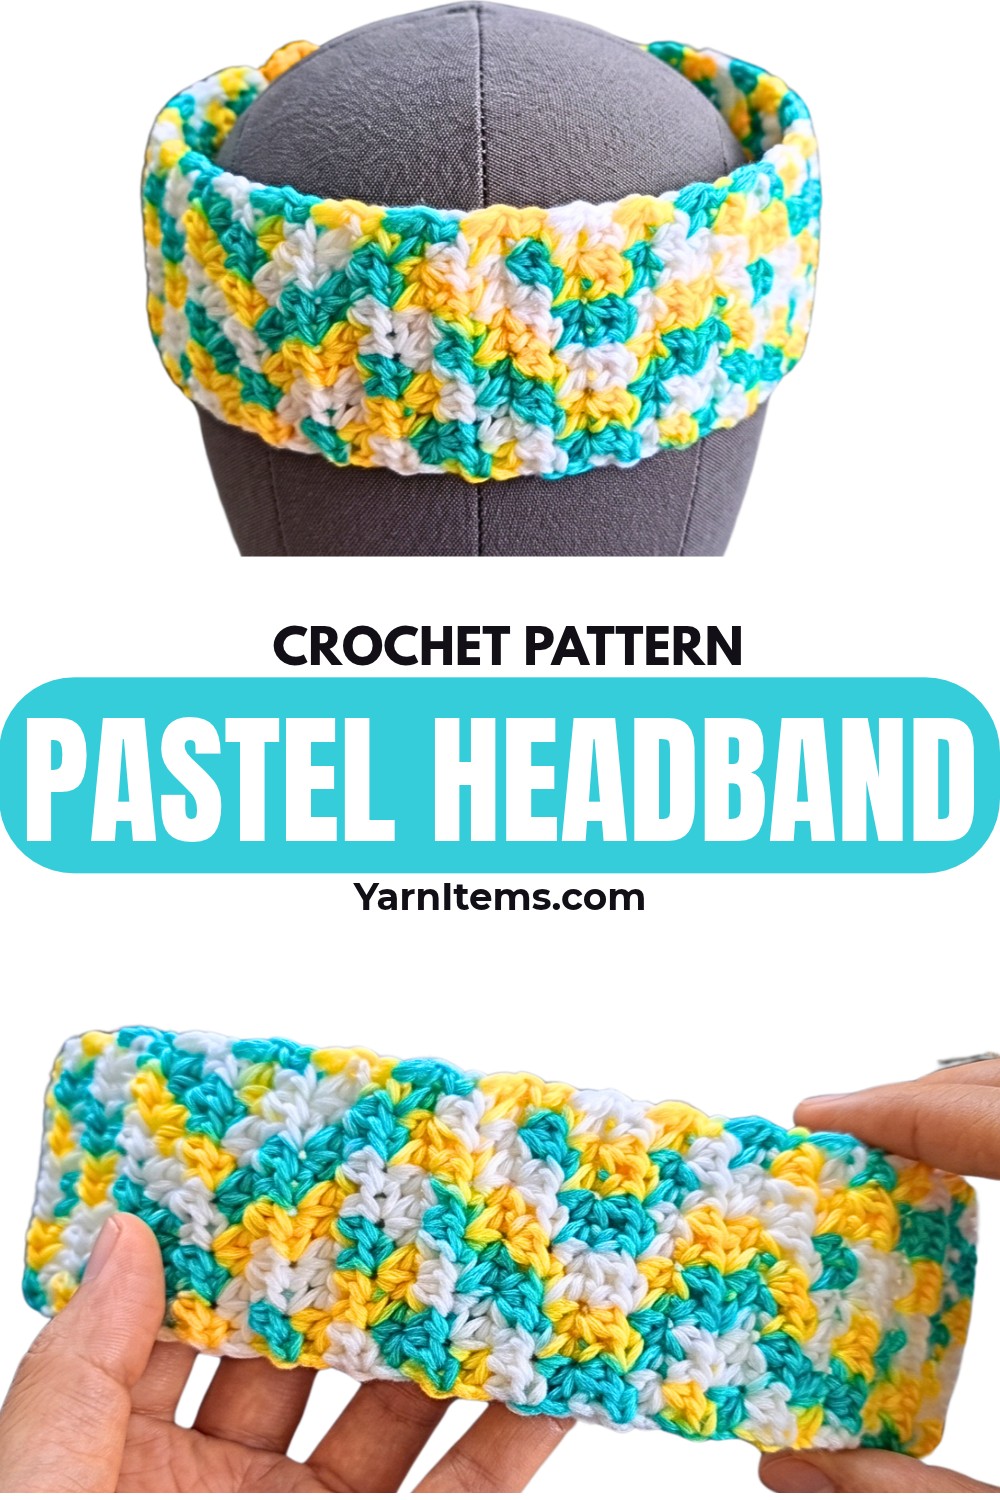
Pastel baby cotton yarn gives this crochet headband soft color variation, while repeating two-HDC clusters create its textured surface. Instead of relying on stretchy crochet ribbing, an elastic hair tie sits at the back of the head to provide a flexible fit.
The main crocheted panel reaches 40 cm before its second end is attached to the elastic. Row count can be changed to suit different head sizes, while starting stitch count can be increased for more width.
Crochet & Crafts Therapy by Chompu
Materials & Tools Needed
- Yarn: Baby cotton yarn, 4-ply. Tutorial uses a variegated pastel mix of yellow, green, and white.
- Hook: 2.5 mm crochet hook, Size 4/0
- Base: 1 seamless elastic hairband or hair tie, approximately 2 inches in diameter
- Notions: Scissors, measuring tape, tapestry needle for weaving in ends
Finished Size & Customization
Crocheted fabric panel measures 40 cm (approximately 15.7 inches) before the second end is attached to the hair tie.
For length adjustment, crochet more or fewer repeating rows before attaching the second end to the elastic. Check panel length against intended wearer rather than relying only on row count.
For more width, begin with more single crochets around elastic, keeping starting count even. Increase number of 2-hdc clusters in each row accordingly.
Pattern Abbreviations & Terminology
- ch: Chain
- sc: Single Crochet
- hdc: Half Double Crochet
- sk: Skip
- st(s): Stitch(es)
- rep: Repeat

Attach Yarn to Elastic Pattern
Secure Starting Yarn
Create a slip knot and secure the yarn to the elastic hairband.
Keep starting loop firm enough to hold yarn against elastic without squeezing or distorting band. This first attachment becomes the foundation for the crocheted panel.
Row 1: Work 12 sc tightly around the elastic hairband.
These 12 sc form the starting edge of the crocheted panel. Keep stitches close together around the elastic so the fabric stays secure and does not leave large gaps around the hair tie.
Before moving onward, check that all 12 sc sit evenly around elastic.

Build Main Headband Panel
Row 2: Ch 2, sk 1 st, work 2 hdc in next st; rep (sk 1, 2 hdc in next st) 5 times across row; finish with 1 hdc in final st. Turn.
You now have 5 clusters containing 2 hdc each, plus starting ch-2 and ending 1 hdc, giving 12 sts total.
Clusters create raised texture while skipped stitches leave small spaces between groups. Keep each pair of hdc together so texture remains consistent across panel.
Row 3: Ch 2, sk 1 st, work 2 hdc in next st; rep (sk 1, 2 hdc in next st) 5 times across; finish with 1 hdc into top of turning chain from previous row. Turn.
For this row, work each 2-hdc cluster into the top of the corresponding cluster from the previous row. This keeps textured sections lined up as panel grows.

Stitch Count: 12 sts.
Row 4 and onward: Repeat Row 3 exactly until crocheted panel measures 40 cm long.
Measure panel as you work rather than counting rows alone. Yarn tension can change finished length, so measuring directly gives more reliable sizing.
Keep row edges straight and maintain 12 stitches across each row. If stitch count changes accidentally, correct it before continuing several more rows because even row width will help second-end attachment sit neatly on elastic.

Length Check Before Joining
When the panel approaches 40 cm, place it around the intended wearer or compare it with the desired headband measurement.
For smaller sizing, stop once suitable length is reached. For larger sizing, continue repeating Row 3 until the panel reaches the required measurement.
Do not fasten off once desired length is reached. Working yarn needs to remain attached for second elastic connection.
Attach Second End to Elastic
Position Elastic
Bring the exposed, unworked side of the elastic hairband up to working yarn so the crocheted panel forms a circular headband shape.
Keep panel untwisted before joining. A quick flat check now helps ensure the textured side will face outward after finishing.
Secure First Stitch
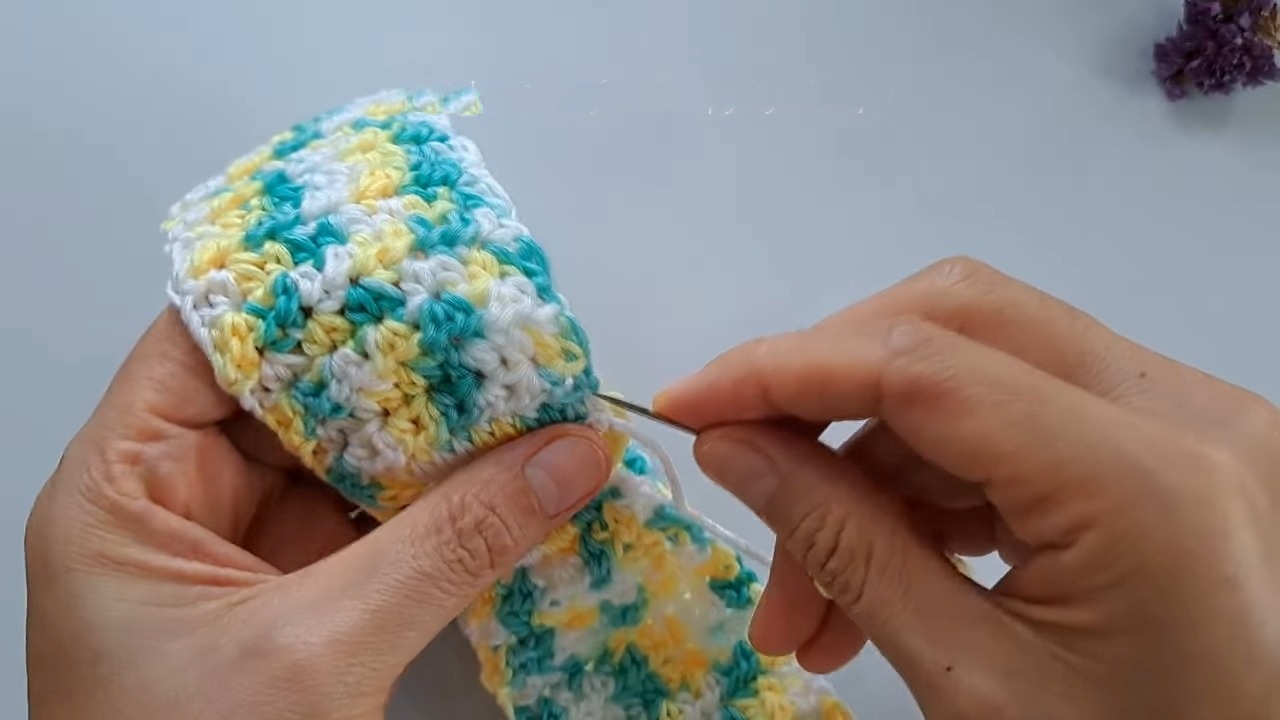
Insert hook through first stitch of active row, then place hook under elastic band.
Yarn over and complete 1 sc, catching elastic inside stitch.
This first joining stitch anchors the crocheted panel to the opposite side of the hair tie. Keep tension firm but avoid pulling elastic into a tight curl.
Secure Remaining Stitches
Work 1 sc into each stitch across the row, working entirely over the elastic hairband to secure fabric to tie.
Make sure every stitch catches elastic underneath. This creates continuous attachment along the second edge instead of leaving loose sections that could pull away during wear.
Fasten Off
At the end of the row, ch 1 to secure, cut yarn leaving a small tail, and pull through to fasten off.
Weave Ends
Thread tail onto tapestry needle and weave all loose ends into back of crocheted fabric.
Trim excess yarn after ends are securely hidden.

Fit & Finish Check
Stretch elastic gently several times before wearing or gifting. Check both attachment points for loose stitches and confirm the crocheted panel lies flat without twisting.
If panel feels too loose, shorter row length will reduce overall circumference. If it feels too tight, adding several repeating rows before second-end attachment gives more room without changing stitch pattern.
The final headband should have textured crochet across the front and flexible elastic sitting at the back of the head, giving the wearer stretch without requiring separate ribbing.