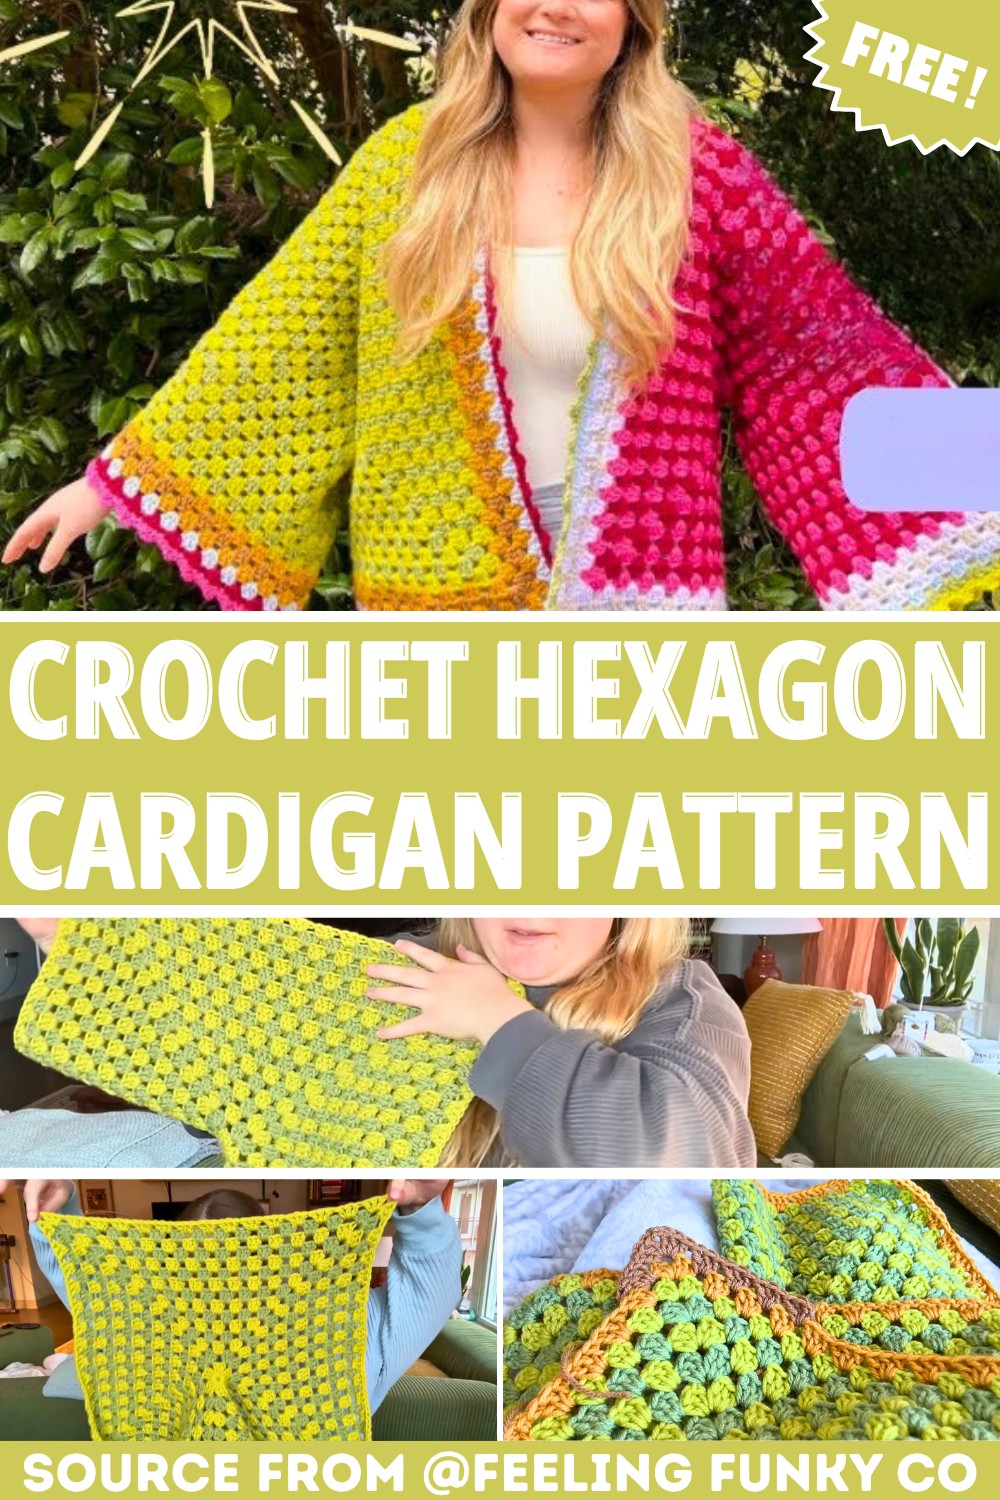
Easy Crochet Hexagon Cardigan Tutorial for Oversized Design
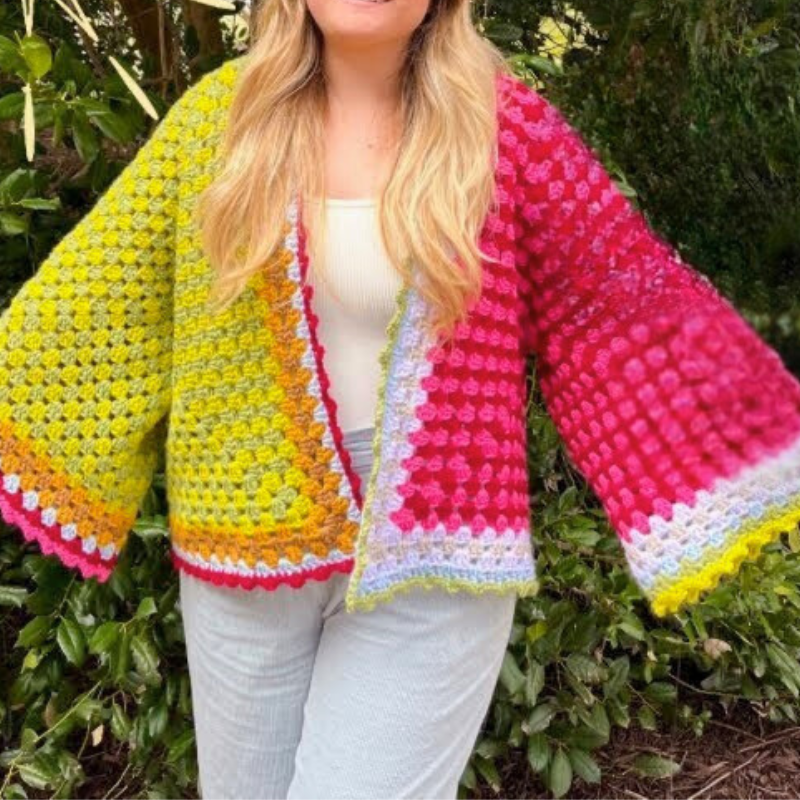
Ever noticed how a simple crochet shape can unfold into a cozy cardigan with surprisingly little effort? This oversized piece begins with two large hexagons that cleverly transform into a comfortable, wearable design.
The flexible construction makes it easy to adjust the fit by adding or reducing rounds. Thoughtful color changes and textured crochet granny clusters give the finished item plenty of charm and personality.
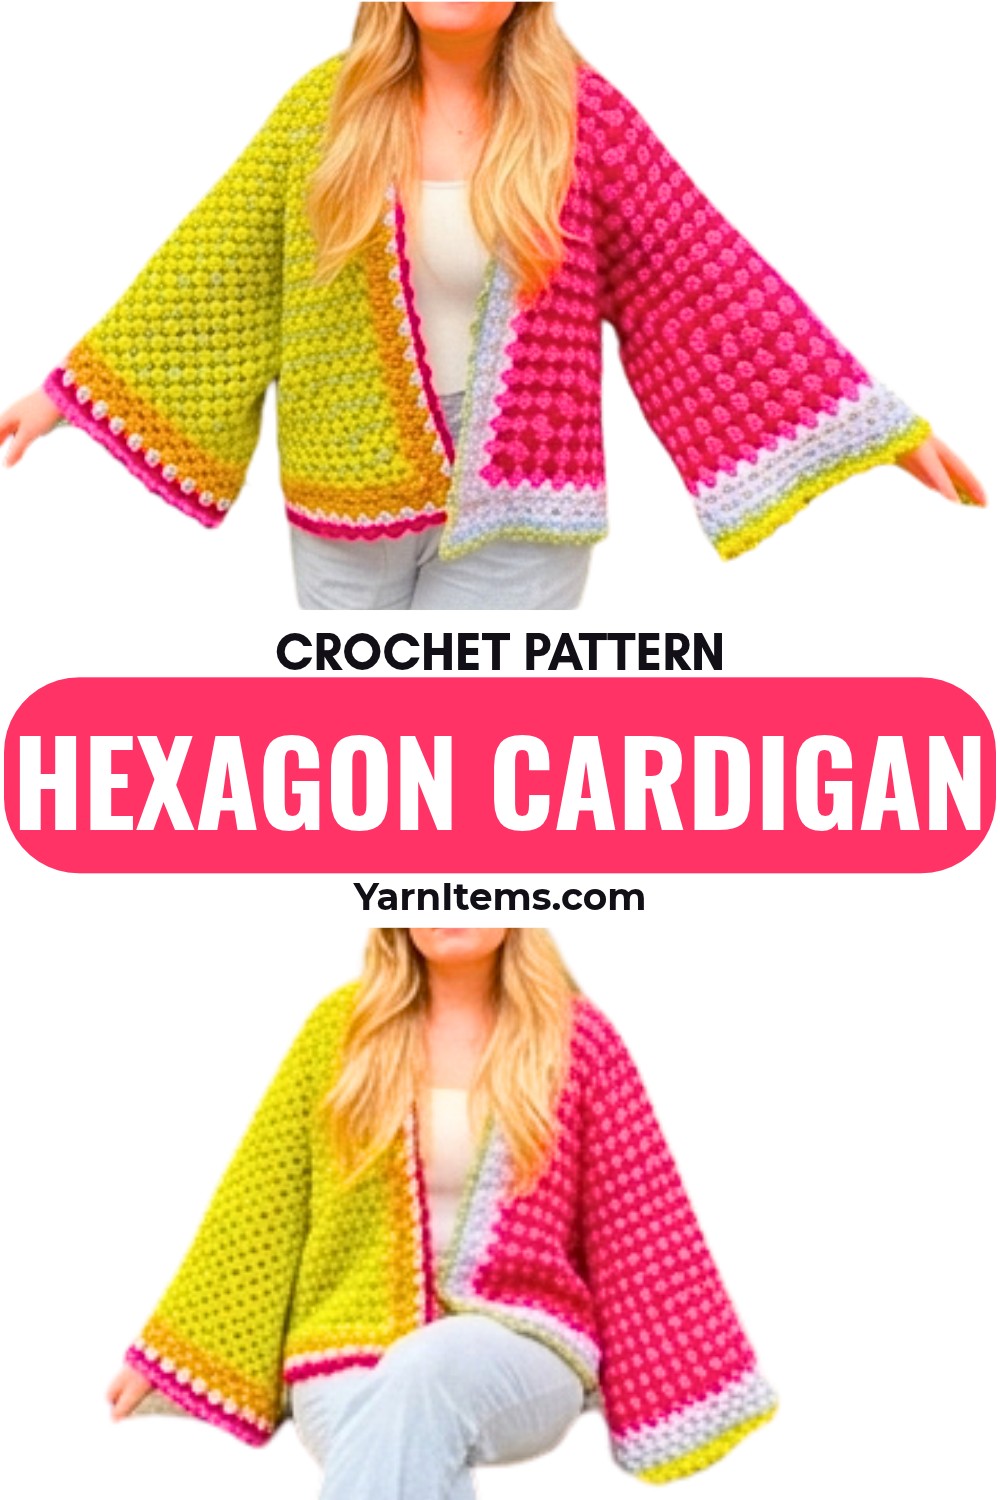
Nothing feels more satisfying than turning colorful yarn into a crochet cardigan you’ll reach for again and again. This guide covers the materials, gauge, stitch details, construction, joining, sleeves, borders, and finishing touches in a clear sequence. You’ll also find practical sizing tips and creative color ideas to help your piece reflect your personal style. Whether you prefer bold combinations or soft monochromatic shades, the finished crochet item is designed for comfort and everyday wear.
Credit Feeling Funky Co
The Only Materials You’ll Actually Need
- Yarn: Size 4 (worsted) weight yarn in multiple colors:
- Choose three complementary monochromatic color pairings for the panels (e.g., greens, reds, purples) and additional contrasting colors for borders.
- Hook: 6mm crochet hook
- Notions:
- Yarn needle for sewing panels and weaving in ends
- Scissors
- Stitch markers (optional)
- Additional Notes: Ensure you purchase enough yarn for all panels, as the tutorial notes challenges with limited yarn quantities.
Gauge
Gauge consists of 5 rounds of granny clusters measuring approximately 4 inches (10 cm) in width across the hexagon. Adjust your hook size if necessary.
Turn Any Pattern into a Perfect Outcome
- Construction:
- The cardigan is made from two oversized hexagons.
- Each hexagon is folded in half to form one side of the cardigan (front and back).
- Stitch Used:
- Granny cluster stitch: A group of three double crochets worked into the same space.
- Size Customization:
- To adjust the cardigan size, simply add more rounds for larger sizes or fewer rounds for smaller sizes to your hexagon pattern.
- Sleeves & Borders:
- Add additional rounds in contrasting colors to the sleeves and cardigan edges for an oversized and eclectic look (as described).
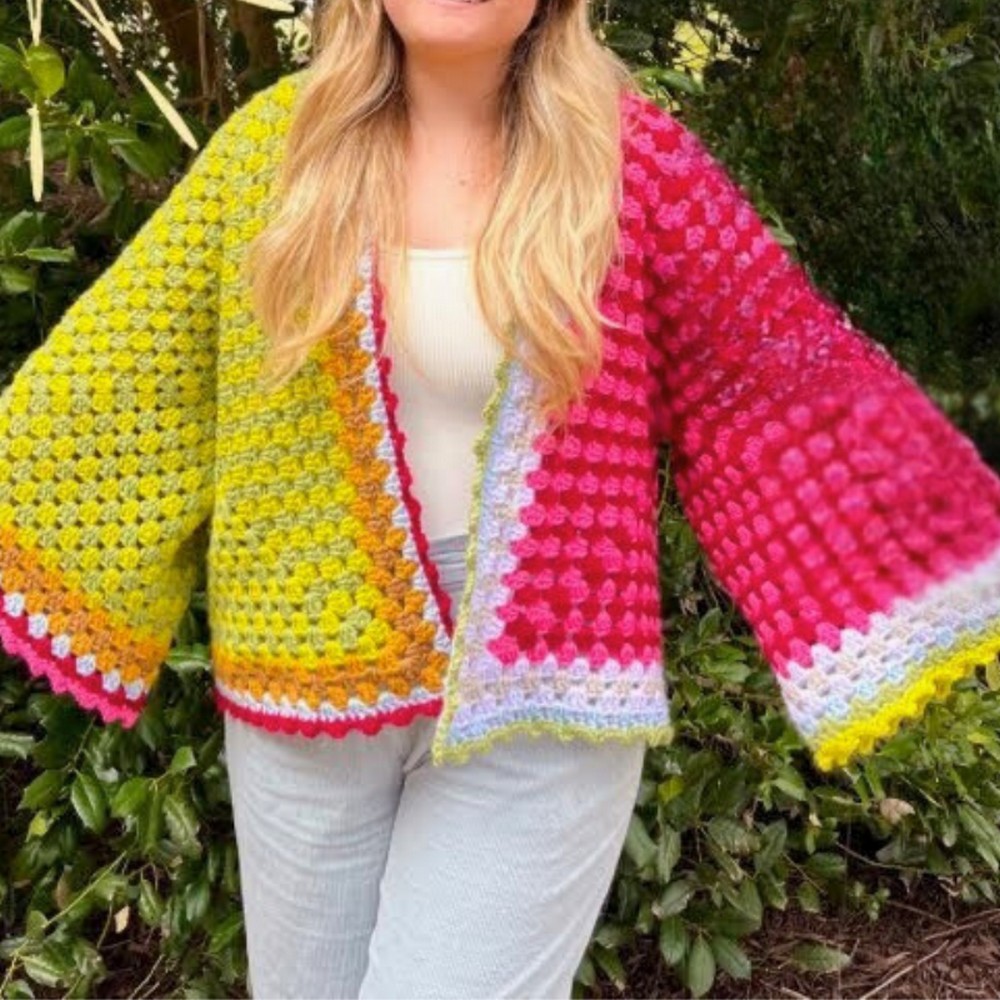
Finished Size & Customization Ideas
- Size:
- Adjustable to your preference.
- In the tutorial example: ~20 rounds per hexagon resulted in a comfortable oversized fit for the creator.
- Customization Ideas:
- Adjust Size:
- Add or reduce rounds to your hexagons.
- Fewer rounds = Snug fit.
- More rounds = Extra overlap and coziness.
- Experiment with Colors:
- Use bold, contrasting hues for a whimsical, playful look.
- Stick to neutral or monochromatic tones for a chic, minimalist vibe.
- Modify Sleeve/Border Lengths:
- Add additional stitches or rounds to extend the sleeves.
- Increase the border size for more coverage or detail.
- Adjust Size:
Everything You Need to Know About These Terms
This pattern uses standard US terminology:
- ch = chain
- sc = single crochet
- dc = double crochet
- sl st = slip stitch
- sp = space
- granny cluster stitch = 3 double crochets grouped in the same space
- RS = right side
- WS = wrong side
The Easiest Step-by-Step Method Explained
Hexagon Construction
Step 1: Begin the First Hexagon
- Form a Magic Circle (or chain 4 and join with a slip stitch to form a ring).
- Round 1 (RS):
- Ch 3 (counts as the first dc), work 2 dc into the magic circle.
- Ch 2 (forms a corner), then work 3 dc into the circle.
- Repeat [ch 2, 3 dc] four more times (for a total of 6 granny clusters and corners).
- Ch 2 and join with a sl st into the top of the ch-3. You should have 6 clusters separated by ch-2 spaces. Pull the magic circle tight.
- Tip: Place a stitch marker in the first cluster if needed.
- Round 2:
- Sl st into the next ch-2 sp.
- Work [Ch 3, 2 dc, ch 2, 3 dc] into the same ch-2 space (creating a corner).
- Move to the next ch-2 space and work [3 dc, ch 2, 3 dc]. Repeat this for all remaining corners (6 total corners).
- Join with sl st to the top of the initial ch-3.
- Round 3 and Beyond:
- Continue building out the hexagon by working granny clusters in each side space and [3 dc, ch 2, 3 dc] in each corner space.
- Continue in this pattern until you reach the desired round count for one half of your cardigan.
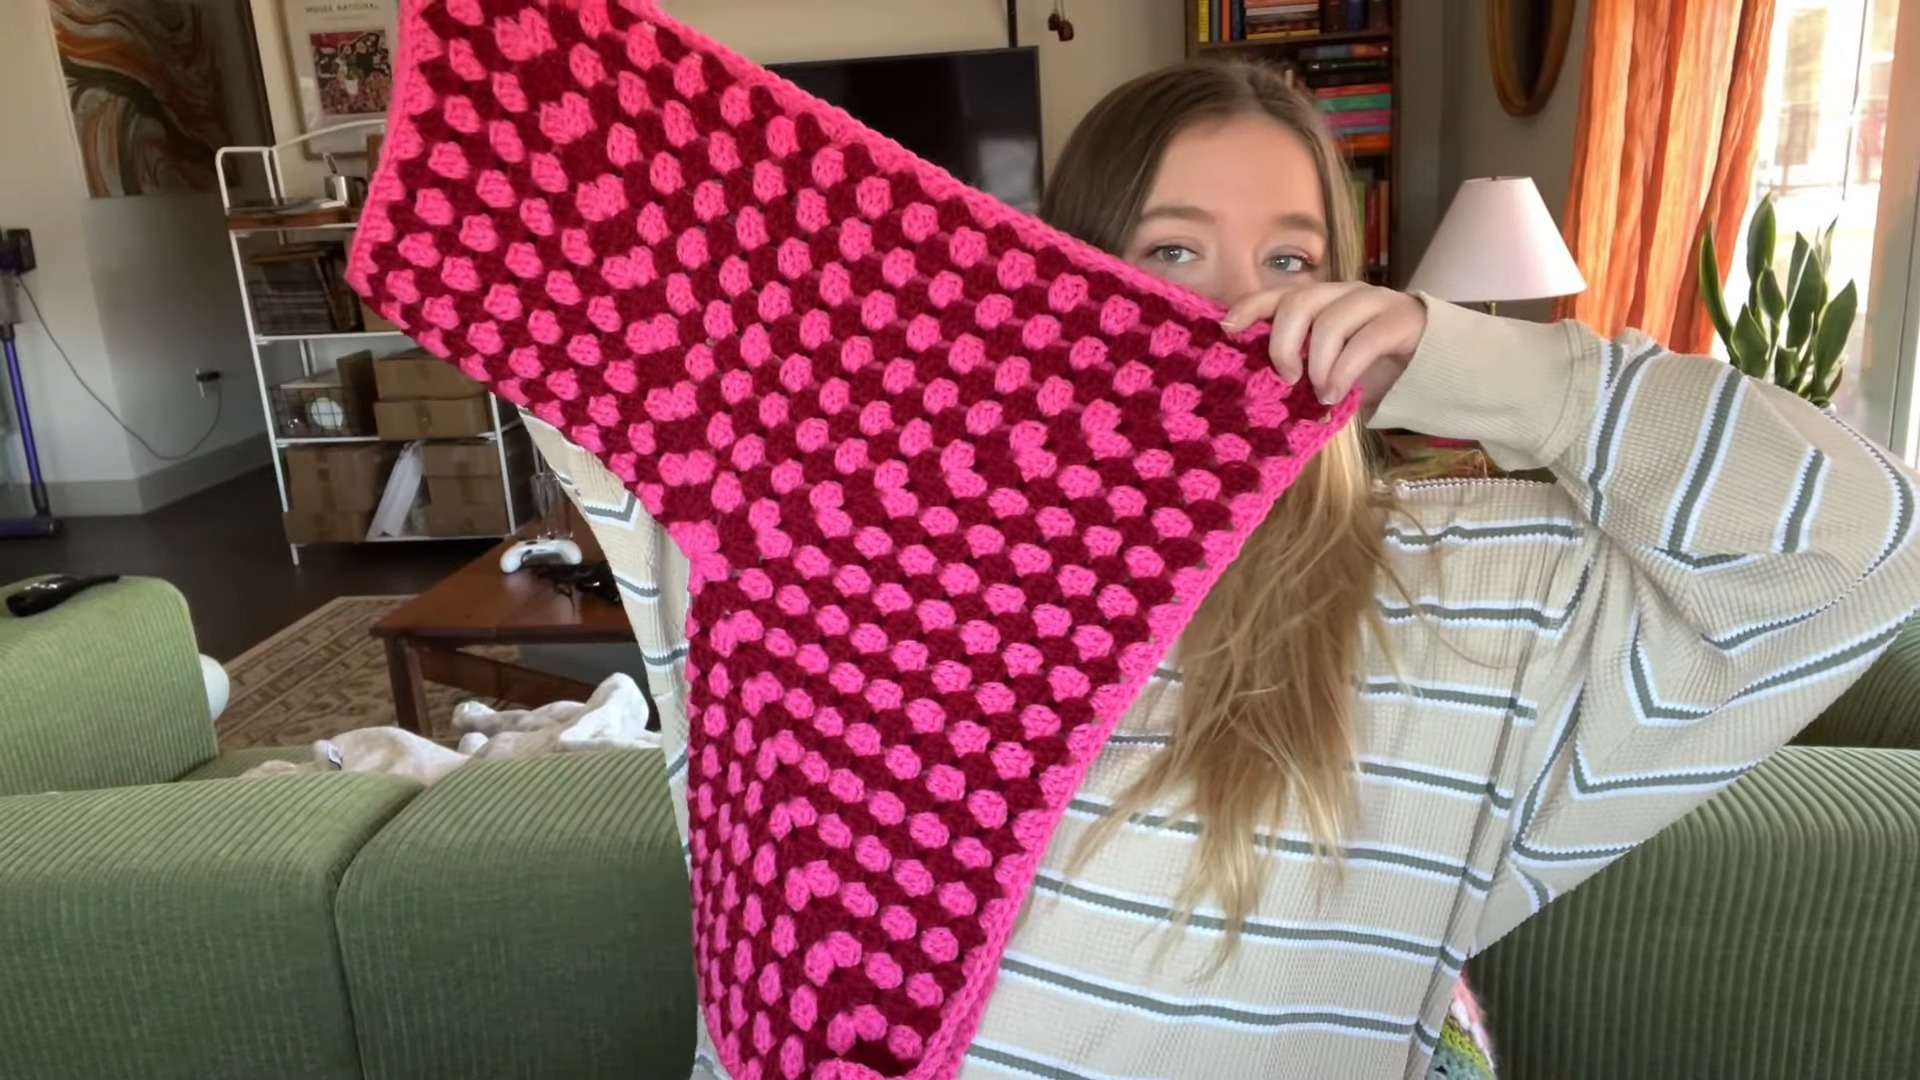
The creator used 15–20 rounds for the main hexagon panel, with further rows added for oversized customization.
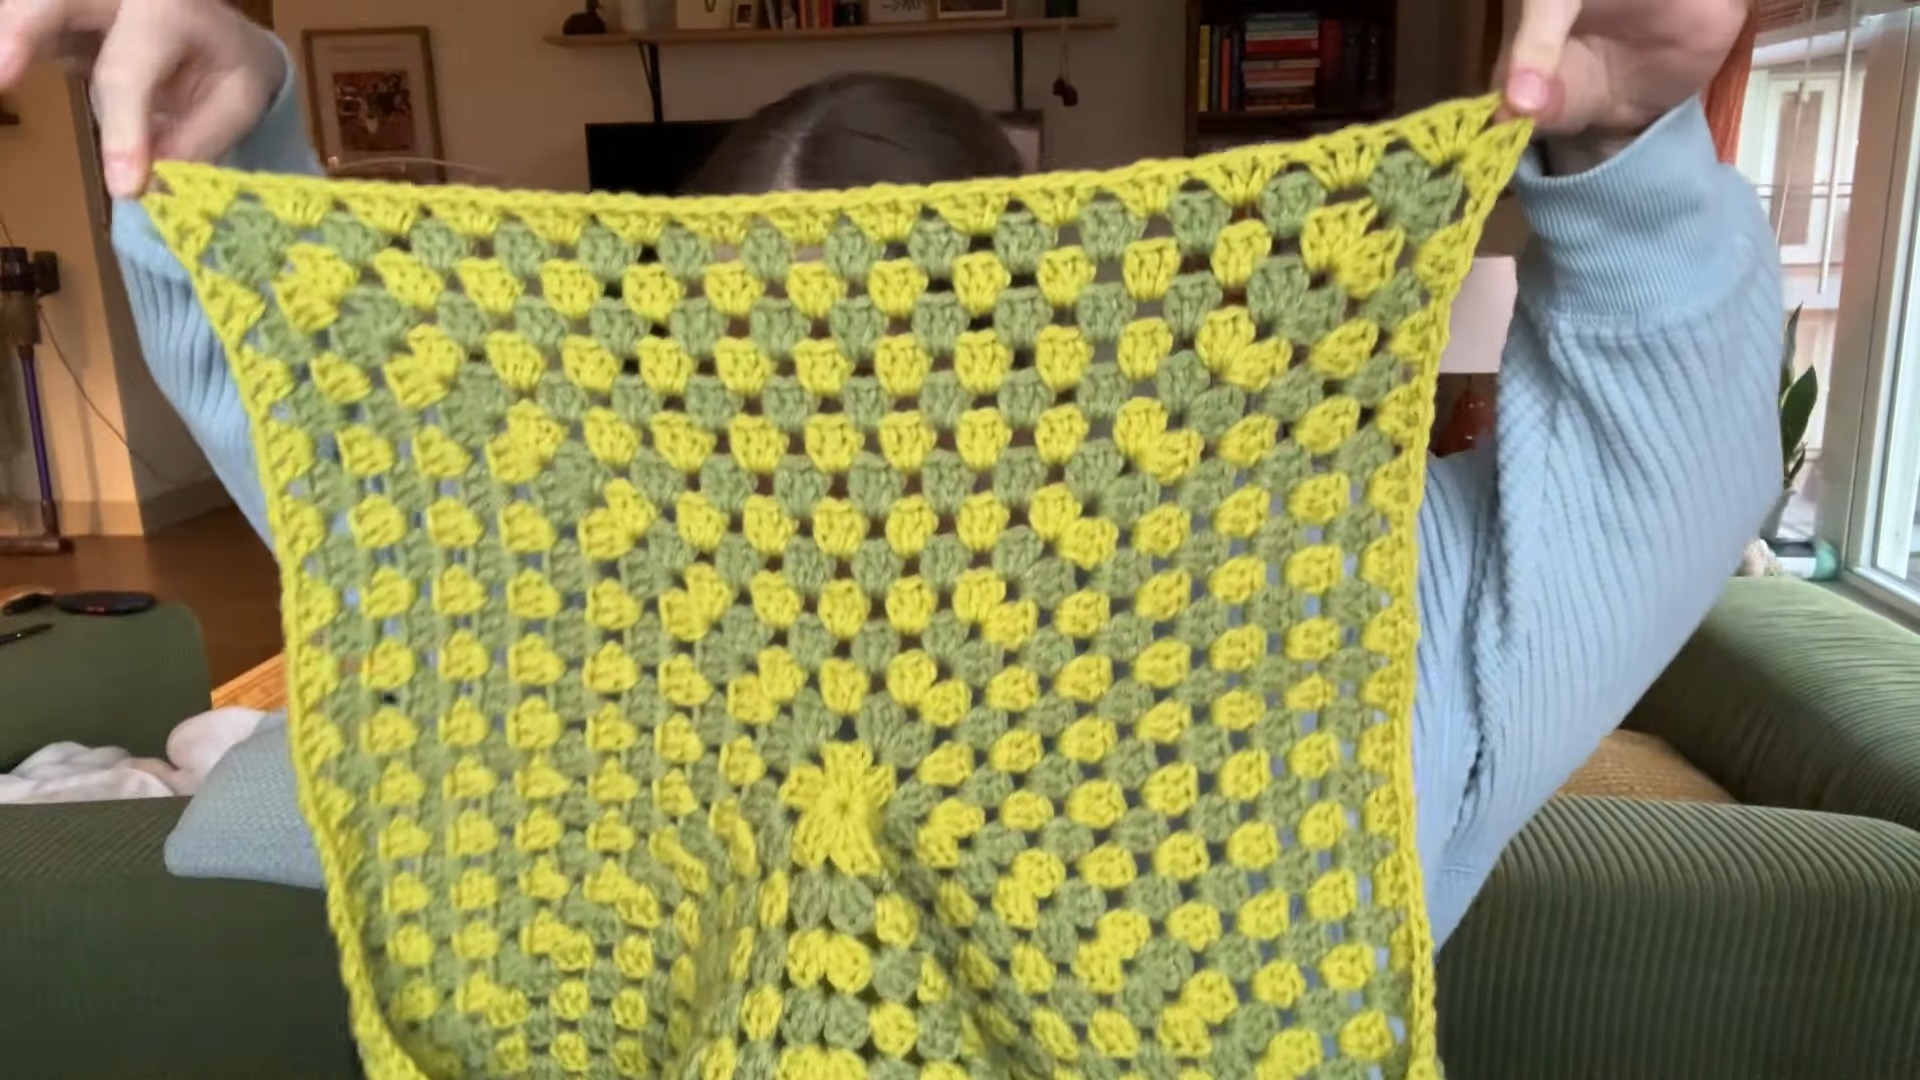
Step 2: Create the Second Hexagon
- Repeat the same steps from the first hexagon, using your next pairing of colors.
- Ensure the hexagons are the same size.
Customizing the Hexagons
- Once each hexagon is the desired size, switch to outer colors for additional rows:
- Add 1–3 extra rounds in each chosen outer border color.
- Example from the video:
- Green Hexagon → Continue with earthy tones such as mustard yellow and brown.
- Pink Hexagon → Add contrasting lavender or taupe for a striking combination.
- Experiment with complementary or contrasting palettes for a unique, patchwork-style design.
Joining the Hexagons
Step 3: Fold and Join Panels
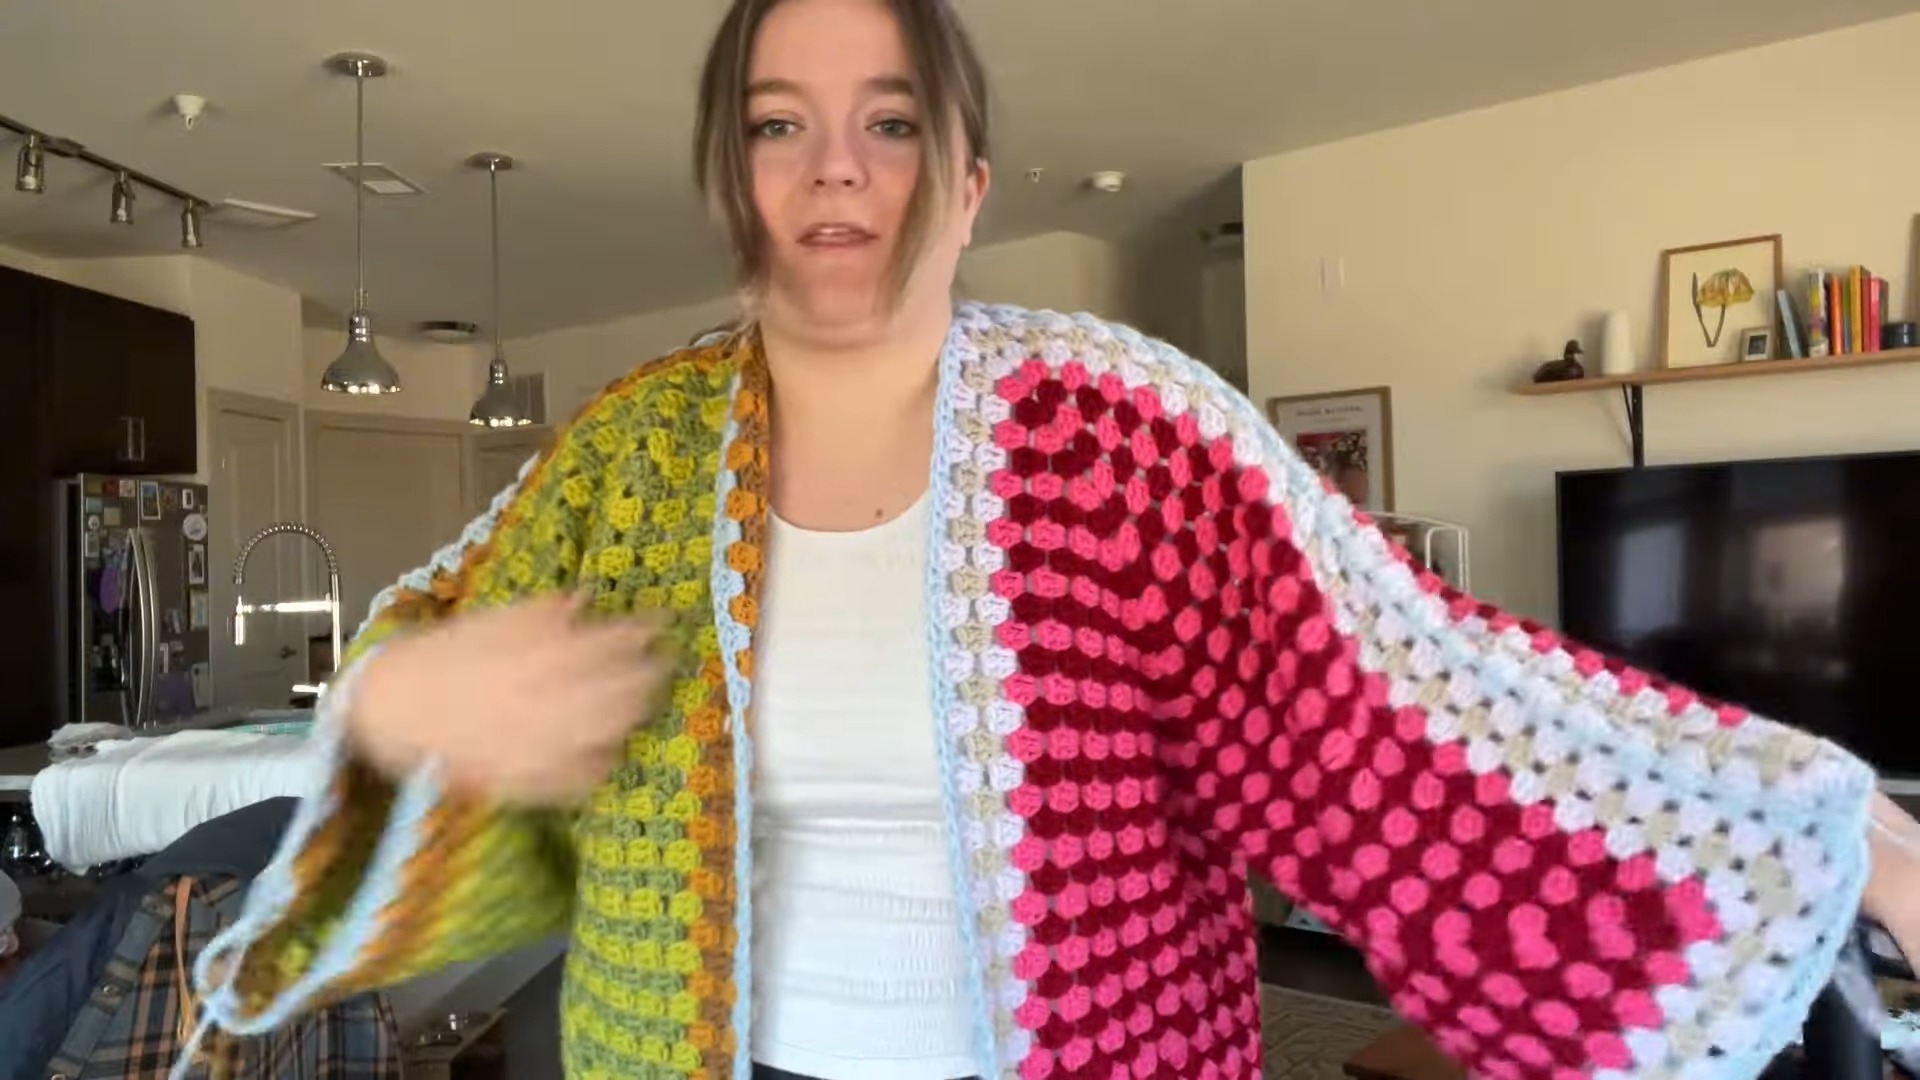
- Fold each hexagon in half along one corner to form two halves of the cardigan.
- Lay the halves side by side and seam the two panels together along the back spine using the join-as-you-go method or whip stitch with a yarn needle.
- Ensure corners align at the back and bottom.
Adding the Sleeves
- For each sleeve:
- Work additional granny clusters in rounds around the sleeve opening.
- Alternate or echo colors from the main panel for a harmonious look.
- End the sleeve with a simple border (e.g., pico stitch for a scalloped effect).
- Tip: Switch colors to maximize contrast and give a maximalist flair.
Adding the Border
- Work a continuous row of granny stitches along the front opening, hem, and neckline:
- Start with a contrasting color (e.g., blue in the creator’s example).
- Maintain a smooth flow around the corners and neckline by working extra stitches in each corner space.
- Add a decorative edge such as a scalloped border or pico stitch for extra detail.
Finish Like an Expert Every Time
- Weave in all ends using a yarn needle.
- Try on your cardigan to ensure a proper fit.
- Block if necessary to shape and smooth the cardigan.
Styling Tips:
- Color Pairings:
- Pair bold complementary colors like pink/red or green/yellow for high-energy and vibrant vibes.
- For a softer aesthetic, try analogous shades—like orange/red or blue/green—to maintain cohesion while still adding depth.
- Personal Flair:
- Switch Borders: Use contrasting or gradient colors for borders to make the design pop.
- Sleeve Accent: Add multicolor stripes or detailed embroidery for an extra dose of personality.
- Monochromatic Style: Elevate the overall look by sticking to shades within the same hue family (e.g., navy, sky blue, and teal for blues).
- Pattern Play: Experiment with small added details like geometric shapes, floral patterns, or quirky motifs that align with the cardigan’s overall playful vibe.
Accessory Pairings:
- Complement your cardigan with fun, bright accessories like tassel earrings or patterned scarves to lean into the playful theme.
- Neutral pieces will work well if you’re opting for monochromatic styling.