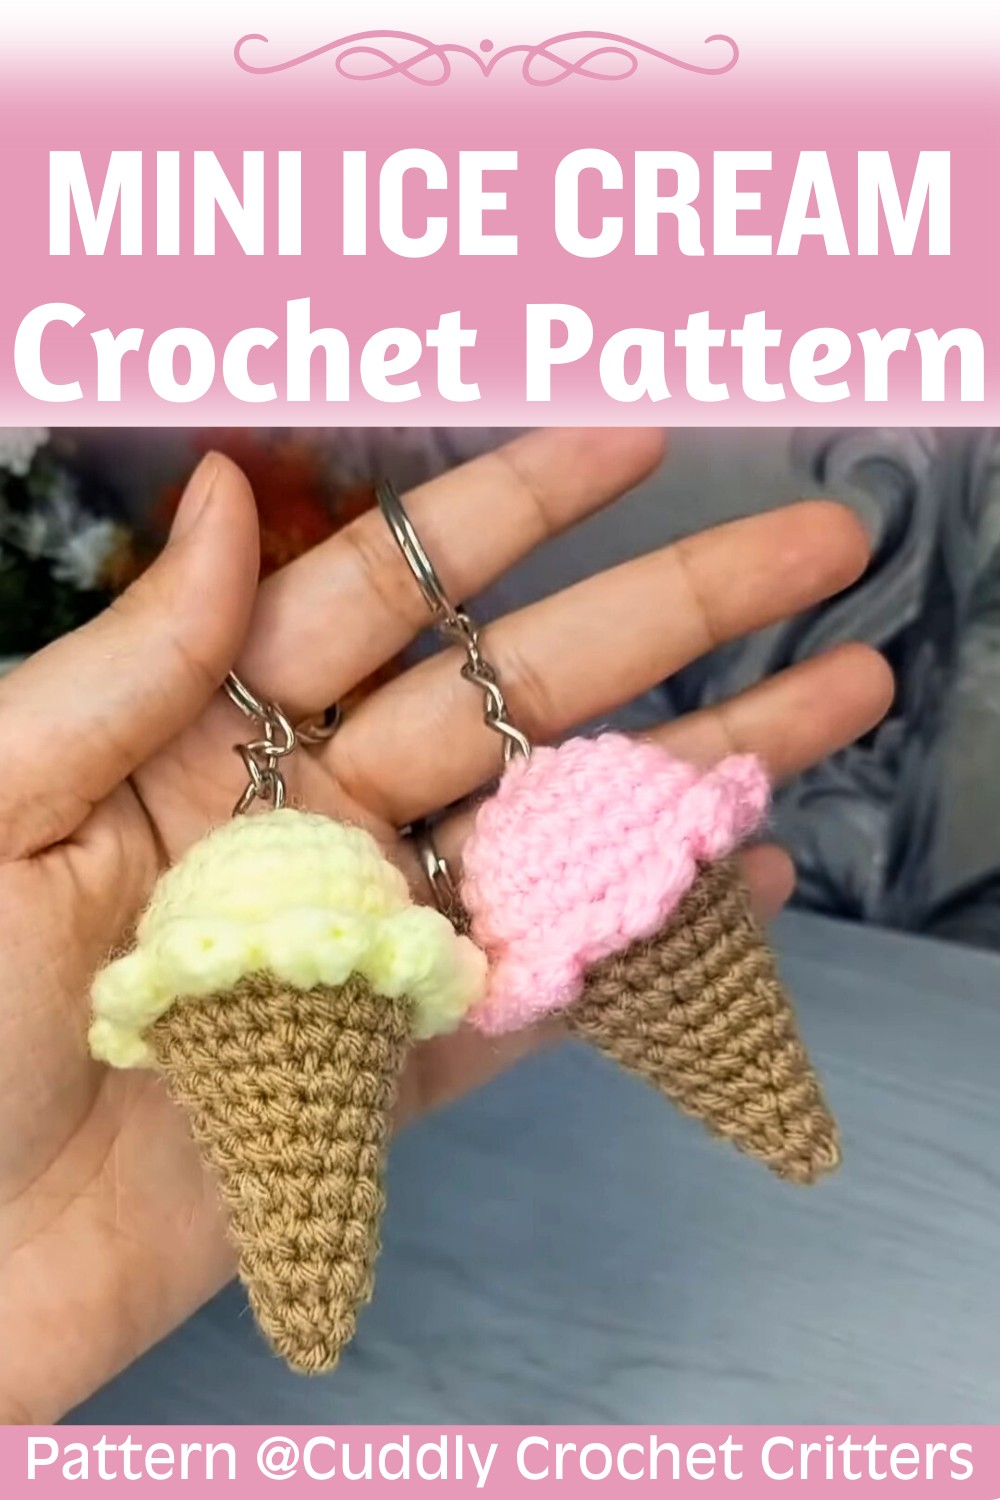
A delightful crochet ice cream keychain that’s sweet, fun, and endlessly customizable, perfect for adding a sprinkle of charm to your keys, bags, or accessories.

A crochet ice cream keychain is a tiny, cute cone you can carry everywhere. It looks like a little scoop of ice cream, but in yarn form. You can clip it to your keys, backpack, pencil case, or even hang it on a zipper. It’s small, cheerful, and adds a soft pop of color to your everyday things.
Crochet Ice Cream Keychain
You can make it in classic ice cream colors like vanilla, chocolate, or strawberry, or go bright and bold with rainbow yarn. You usually start with the cone, then build the “scoop” on top, shaping it so it looks round and sweet. A bit of stuffing gives it a soft, puffy look, and a simple key ring turns it into something you can use every day.
Credit Cuddly Crochet Critters
Key Features and Construction Overview:
- Built in two parts: The ice cream scoop and cone are crocheted separately, then stitched together for a neat, layered look.
- Worked in the round: Both pieces start with a magic ring and grow outward through increases to form their iconic shapes.
- Textured scoop design: Simple stitches give the scoop a soft, rounded appearance, while stuffing adds volume and structure.
- Tapered cone shaping: A gradual increase creates the cone’s classic pointed form.
- Personalized finishing touches: Optional decorations like sprinkles or cherries let you customize the keychain to suit your style.
The ice cream scoop is crocheted first, beginning with a magic ring filled with six single crochets (SC). Rounds of increases follow, gradually creating a dome-like structure. Once the desired size is reached, three rounds of plain single crochets maintain the width to define the body of the scoop. Beautiful shaping comes into play as you decrease, gradually tapering the dome and leaving space to stuff the scoop before fully closing it. This stuffing step is key to giving the scoop its soft, plush appearance.

The cone starts similarly, with a magic ring foundation, but this time only four single crochets begin the piece, emphasizing the cone’s narrow start. A steady rhythm of increasing and plain rounds creates the gradual taper, mimicking a realistic cone shape. As you work toward the designated stitch count, the piece slowly widens while maintaining a snug, structured taper.
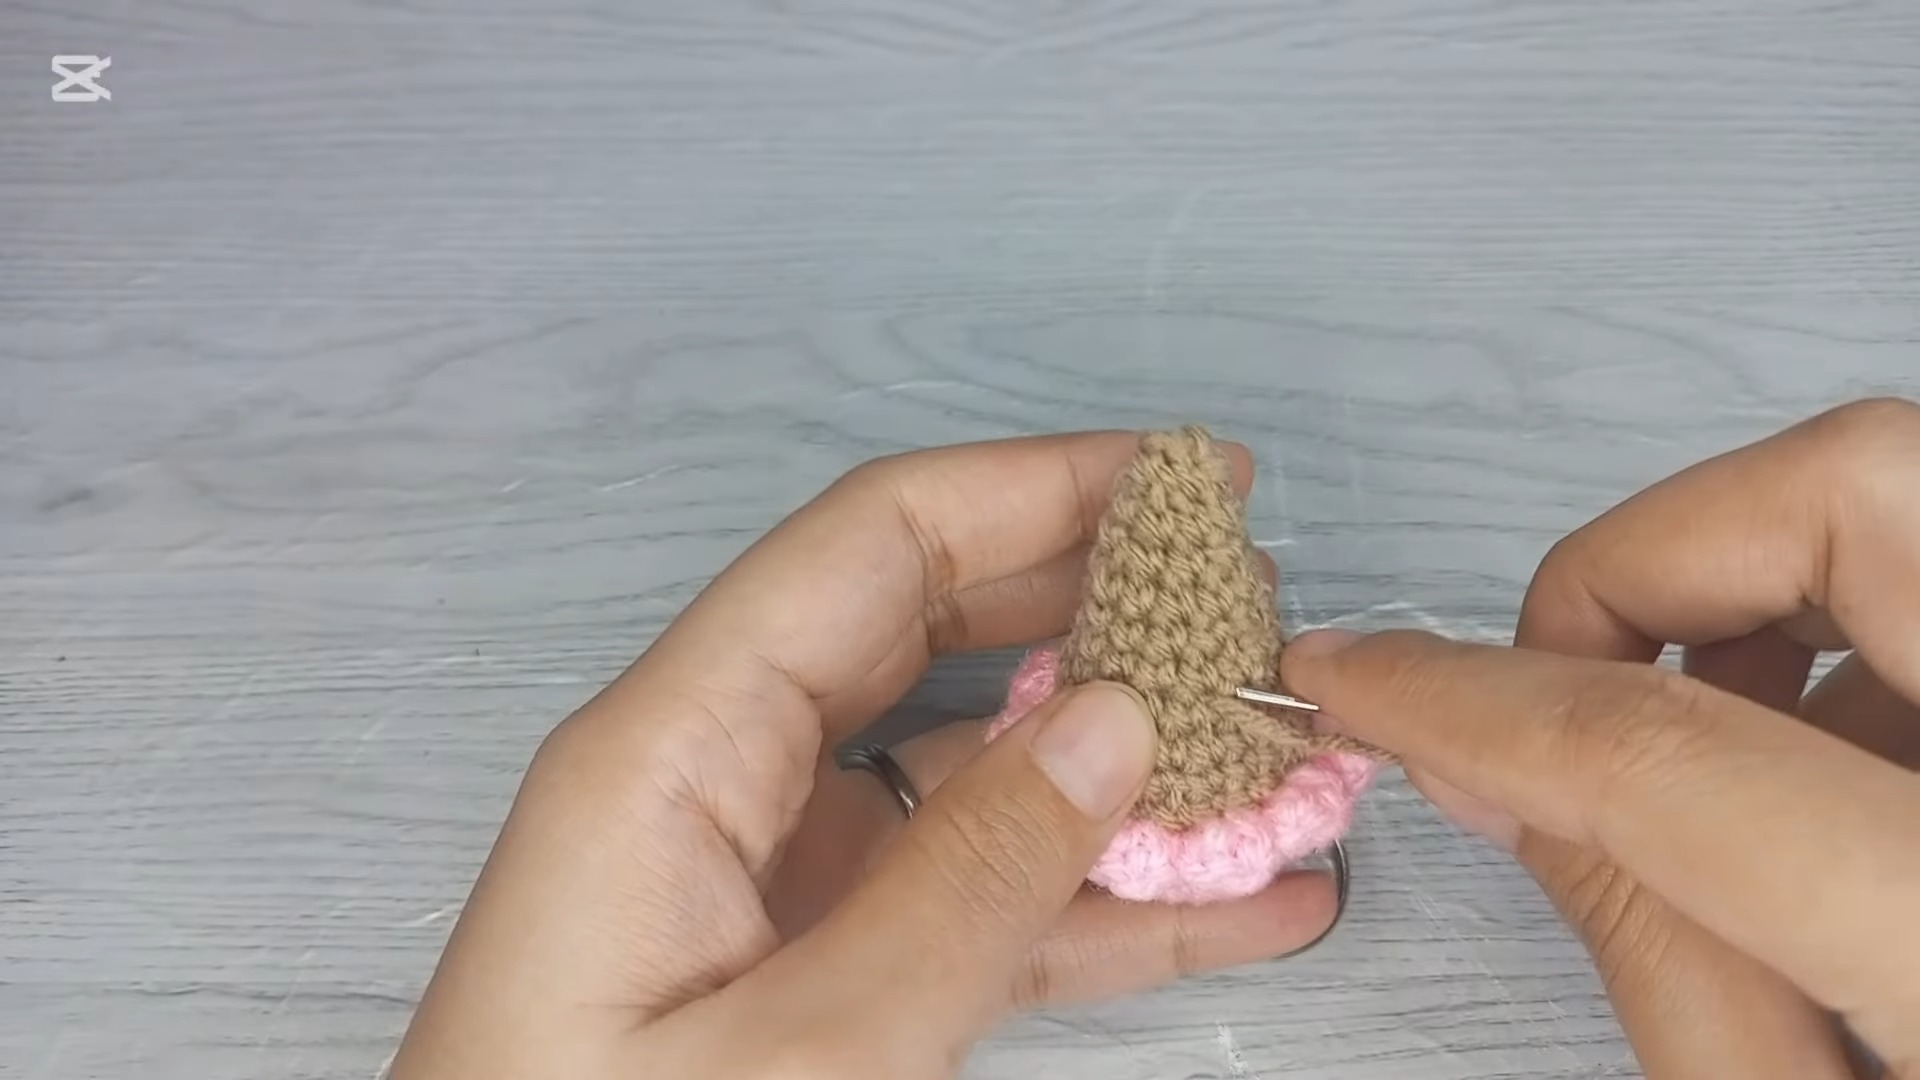
Assembly pulls the pattern together. The scoop is sewn securely to the cone using a tapestry needle, and the yarn tail left from finishing the scoop. The key here is to ensure the edges align neatly for a polished seam. Once these two parts are joined, simply attach a keyring or small loop of yarn to the top of the finished pattern to transform it into a usable accessory.
Adding optional decorations—like embroidered sprinkles, colorful appliqué details, or even a tiny red bobble cherry on top—lets you unleash your creativity. Each embellishment gives your keychain a playful and personal touch.
Video Tutorial
Materials
To create this adorable crochet ice cream keychain, gather the following materials:
- Yarn:
- Small amounts of worsted weight yarn in your desired flavors/colors of ice cream and cone.
- Optional: contrasting color for decorative sprinkles.
- Hook Size:
- 3.5 mm (E-4) crochet hook
- Additional Tools:
- Tapestry needle for weaving in ends
- Scissors
- Stuffing for the ice cream
- Metal keychain ring
- Stitch marker
- Yarn Weight Requirements:
- Worsted weight yarn (approx. 4ply)

Step-by-Step Pattern
Ice Cream Scoop
- Foundation Ring:
- Start with a magic ring.
- Round 1: CH 1, 6 SC in the ring. (6)
- Increase Rounds:
- Round 2: INC in each stitch around. (12)
- Round 3: (SC in next stitch, INC in next stitch) repeat around. (18)
- Round 4: (SC in next 2 stitches, INC in next stitch) repeat around. (24)
- Body of Scoop:
- Rounds 5-7: SC in each stitch around. (24)
- Shape the Scoop:
- Round 8: (SC in next 2 stitches, DEC) repeat around. (18)
- Round 9: (SC in next stitch, DEC) repeat around. (12)
- Stuff the Scoop:
- Firmly stuff the scoop with the filling until it holds its shape.
- Close the Scoop:
- Round 10: DEC around. (6)
- Fasten off, leaving a long tail, and weave the opening closed.
Cone
- Foundation Ring:
- Start with a magic ring.
- Round 1: CH 1, 4 SC in the ring. (4)
- Increase Cone Shape:
- Round 2: SC in each stitch around. (4)
- Round 3: (SC in next stitch, INC in next stitch) repeat around. (6)
- Round 4: SC in each stitch around. (6)
- Round 5: (SC in next 2 stitches, INC) repeat around. (8)
- Round 6: SC in each stitch around. (8)
- Continue in this manner, gradually increasing until you have 16 stitches.
- Finish off and weave in ends.
Assembly
- Join Ice Cream to Cone:
- Attach the ice cream scoop to the top of the cone using the tail left from the scoop and the tapestry needle.
- Secure them by weaving in and out through both parts.
- Add Keychain Ring:
- Use a small loop of yarn at the top of the ice cream to attach your keyring securely.
- Optional Decoration:
- Add sprinkles to the ice cream by stitching over with a contrasting color yarn.
Troubleshooting and Suggestions:
- Maintaining stitch tension: With a small design like this, especially worked in the round, consistent tension is crucial for achieving even shapes and clean edges. If your work feels too loose or floppy, try using a smaller hook size.
- Clean color transitions: If you want to use multiple colors for different scoops (e.g., a double scoop keychain), ensure your color changes are clean by finishing the last stitch of the previous round in the new color.
- Stuffing tips: To avoid overstuffing the scoop, which could distort its shape, add filling slowly and shape it as you go. The scoop should feel firm but not stretched.
- Creative adaptations: Swap out traditional tan yarn for waffle cone stripes in contrasting colors, or experiment with hand-dyed or variegated yarn for a “swirled” ice cream look. Want a sundae instead? Use the ice cream scoop instructions to make several smaller scoops to stack together.