Beginner-Friendly Pattern For Crochet Mesh Cardigan
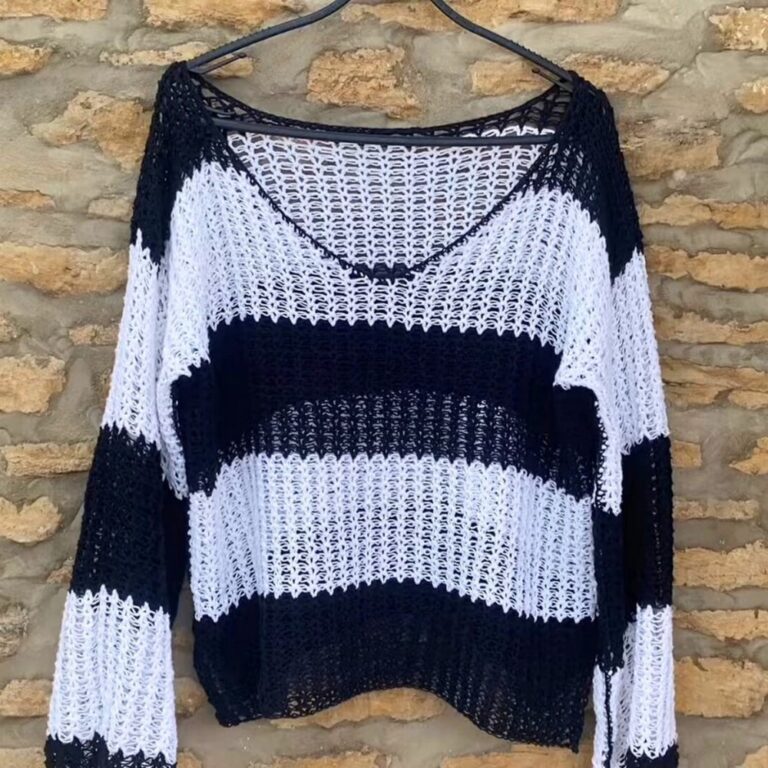
Create a lightweight mesh crochet cardigan that is shaped to your measurements rather than a fixed size. You’ll build simple front and back panels, shape the neckline with easy decreases, then add sleeves and adjustable front ties.

An airy crochet cardigan can be one of those garments that looks much more complicated than it actually is. This design gets its open, flowing texture from simple treble-crochet mesh, while the separate panels make it easier to control the width and length before everything is joined together.
The key to getting a good fit is not the number of rows alone-it is how you measure the panels before you start. Your bust measurement determines the back and front widths, while the armhole depth and neckline shaping determine how the pieces come together. Once those measurements are established, the rest of the cardigan follows a repeatable mesh crochet pattern that can be adjusted for a shorter, longer, or more relaxed fit.
Credit Playful Regal
Materials & Tools Needed
- Yarn: Smooth yarn suitable for a 5 mm crochet hook. A light worsted or DK-weight yarn can work well, depending on your tension and desired drape.
- Main Crochet Hook: 5 mm
- Joining Hook: 3.5 mm
- Stitch Markers: At least 4
- Tapestry/Yarn Needle: Optional for securing ends
- Scissors
- Measuring Tape
Before starting, have your bust measurement and your preferred finished cardigan length ready. These measurements are more useful for this made-to-measure construction than simply choosing a standard clothing size.
Finished Size & Customization
The tutorial sample is a size Small.
The cardigan is made to measure, so your starting chain and number of rows will depend on your measurements.
Back Panel Width
Measure your bust around the fullest part.
Back panel width = bust measurement ÷ 2
For example, the tutorial uses a 33-inch bust:
33 ÷ 2 = 16.5 inches
The sample rounds this to approximately 17 inches for the back panel.
Front Panel Width
Each front panel is approximately half the back-panel width.
Front panel width = back panel width ÷ 2
For the sample:
17 ÷ 2 = 8.5 inches
Unlike the back-panel example, keep the decimal measurement for the front panels rather than automatically rounding it.
Foundation Chain Rule
Both the back and front foundation chains need to satisfy two requirements:
- They must reach the required width when laid flat without stretching.
- The chain count must be a multiple of 3.
The tutorial sample uses:
- Back: 75 chains ≈ 17 inches
- Each front: 36 chains ≈ 8.5 inches
Your chain count may be different because yarn, tension, and hook size can change the finished width.
Armhole Depth
Measure downward from the top edge of the completed back panel.
Suggested depths from the tutorial:
- XS: 6 inches
- S: 7 inches
- M: 7–7.5 inches
- L: 8 inches
Place a stitch marker at the measured point on both sides of the back panel.
Body and Sleeve Length
For the tutorial’s Small sample:
- Back panel: 16 rows, approximately 13 inches long
- Front panels: 8 rows before neckline decreases + 8 decrease rows
- Sleeves: 5 rounds
You can add or remove rows and rounds to create a cropped cardigan, longer layer, shorter sleeve, or fuller sleeve.
Pattern Abbreviations & Terminology
US crochet terms are used throughout.
- ch: Chain
- sc: Single crochet
- tr: Treble crochet
- sl st: Slip stitch
- st(s): Stitch(es)
- sp(s): Space(s)
Treble Crochet
For this pattern, tr means US treble crochet.
Yarn over twice, insert the hook into the indicated stitch or chain, yarn over and pull through, then work off the loops two at a time three times.

Important Mesh Note
The beginning ch 6 functions as the height of a treble crochet plus a ch-2 space. Keeping this structure consistent helps the edges of the mesh panels remain even.
Crochet Mesh Cardigan Pattern
The cardigan is built from:
- 1 back panel
- 2 front panels
- 2 sleeves
- Front/neckline/bottom edging
- 2 front ties
The front panels are shaped with decreases so they create the V-neck when joined to the back.
Back Panel
Measure Before You Chain
First decide where you want the cardigan to end—waist, upper hip, or lower hip.
Then determine the back-panel width from your bust measurement.
Back width = bust ÷ 2
Measure the foundation chain without stretching it. Adjust the chain until it reaches your calculated width while still containing several chains that is a multiple of 3.
Back Foundation Chain: Ch until the chain reaches your calculated back-panel width without stretching and the total number of chains is a multiple of 3. (Tutorial sample: 75 ch ≈ 17 inches)
Before working the first row, lay the chain flat beside your measuring tape. This is the best time to add or remove chains; changing the size after several rows have been completed is much more difficult.
Row 1 – Treble Mesh
Row 1: Work 1 tr in the 3rd ch from hook, ch 2, sk next 2 ch, 1 tr in next ch; repeat (ch 2, sk 2 ch, 1 tr in next ch) across to the final chain. (Mesh established)
The first row creates the repeating spaces that will be used throughout the cardigan.
Row 2 – Mesh Repeat
Row 2: Ch 6, turn, 1 tr in the next stitch, ch 2, 1 tr in the next stitch; repeat (ch 2, 1 tr in next stitch) across. (Mesh repeat)
Row 3 – Mesh With Edge Treatment
Row 3: Ch 6, turn, 1 tr in the next stitch, then repeat (ch 2, 1 tr in next stitch) across until the second-to-last stitch; ch 2, skip the first 2 chains of the edge ch-6, and work 1 tr in the next chain. (Mesh repeat)
Rows 4–16 – Continue the Back
Rows 4–16: Repeat Row 3 until the back reaches your desired length. (16 rows in tutorial sample)
For the Small sample, the completed panel measures approximately 13 inches from top to bottom.

Fit Check
At this stage, stop and measure the panel.
The finished back length should correspond to the distance from your chosen lower edge of the cardigan up toward your bust/upper body. If you want a longer cardigan, add rows now rather than trying to lengthen the garment after assembly.
Mark the Back Armholes
Once the back panel is complete, lay it flat with the top edge clearly identified.
Measure downward from the top edge according to your desired armhole depth:
- XS: 6 inches
- S: 7 inches
- M: 7–7.5 inches
- L: 8 inches
Place one stitch marker on each side at the same height.
These markers are important because they tell you exactly where the side seams will stop. Do not join the sides above the markers, or you will close the armhole opening.
Front Panels
Make two matching front panels.
Each panel is approximately half the width of the back.
Front width = back width ÷ 2
For the Small example:
17 inches ÷ 2 = 8.5 inches
The tutorial uses 36 chains for each front panel.
Front Foundation Chain: Ch until the chain measures your calculated front-panel width without stretching and the total is a multiple of 3. (Tutorial sample: 36 ch ≈ 8.5 inches)

Row 1 – Mesh
Row 1: Work 1 tr in the 3rd ch from hook, ch 2, sk next 2 ch, 1 tr in next ch; repeat across to the end. (Mesh established)
Row 2 – Mesh
Row 2: Ch 6, turn, 1 tr in next stitch, ch 2, 1 tr in next stitch; repeat across. (Mesh repeat)
Row 3 – Mesh Edge
Row 3: Ch 6, turn, 1 tr in next stitch, then repeat (ch 2, 1 tr in next stitch) across to the second-to-last stitch; ch 2, skip 2 chains of the edge ch-6, and work 1 tr in the next chain. (Mesh repeat)
Rows Before Neckline Shaping
Continue repeating Row 3 until the front panel reaches the same level as the armhole marker on the back.
For the tutorial sample:
Rows 1–8: Work the mesh pattern without decreases. (8 rows)
At this point, the lower portion of the front panel should match the corresponding body section of the back.
Shape the Front Neckline
The neckline is shaped by decreasing one stitch per row along the inner edge of each front panel.
This is the point where it is especially important to keep track of which edge is the neckline edge.
The outer edge stays straight so that it can line up with the side of the back panel.
Decrease Row 1: Ch 6, turn, skip the first stitch, work 1 tr in the next stitch, then continue (ch 2, 1 tr in next stitch) across. (1 decrease)
Decrease Row 2: Ch 6, turn, work 1 tr in the next stitch, continue (ch 2, 1 tr in next stitch) until 2 stitches remain, then ch 2, skip 1 stitch, and work 1 tr in the final stitch. (1 decrease)
Remaining Decrease Rows
Alternate the beginning and ending decrease placement as established above while keeping the same inner neckline edge as the shaping edge.
Decrease Rows 3-8: Continue the alternating decrease sequence until you have completed the same number of decrease rows as the armhole section of the back. (8 decrease rows in tutorial sample)
Neckline Check
Lay the completed front beside the back before fastening off.
You should have:
- 8 rows below the armhole level
- 8 decrease rows above it
- 16 total rows on the front
- 16 total rows on the tutorial back
The tapered edge should face toward the center front, while the straight edge should remain available for the side seam.
If the taper is appearing on the wrong side, correct it before making the second panel.
Finish the Front Panel
Fasten Off: Ch 1, cut the yarn, pull through the final loop, and secure the end.
Make a second front panel using the same instructions, making sure its neckline taper mirrors the first panel.
Mark the Front Armholes
On each front panel, count upward from the bottom edge to the same armhole level used on the back.
For the tutorial sample, this is 8 rows from the bottom.
Place a stitch marker on the straight outer edge, not on the tapered neckline edge.
Repeat for the second front panel.
These markers need to correspond with the back markers when the side seams are joined.

Join the Shoulders
Switch to the 3.5 mm hook for joining.
Lay the back panel flat and position the first front panel on top.
The tapered neckline edge faces toward the center, while the straight edge aligns with the side of the back.
Shoulder Join: Attach yarn through the appropriate chain of the front panel’s final ch-6, ch 1, then align the corresponding chains and treble stitches of the front and back panels and join them with slip stitches across the shoulder. (Shoulder joined)
For chain spaces, work through the corresponding chains on both pieces. For treble stitches, insert the hook through corresponding portions of both stitches before making the slip stitch.
Finish with ch 1 and fasten off.
Repeat on the opposite shoulder.
Construction Check
Once both shoulders are joined, open the garment flat.
The neckline should now form a V shape between the two tapered front panels.
If one front panel appears higher than the other, check the row counts before continuing to the side seams.
Join the Side Seams
Keep the armhole openings free.
Attach yarn at the bottom of one side and align the front and back panels.
Side Seam: Join the corresponding front and back mesh sections with slip stitches, using the same multi-point joining method shown in the tutorial, and continue upward only until the armhole marker. (Stop at marker)
The important point is not to continue joining above the marker.
That unjoined section becomes the armhole.
Repeat on the opposite side.
Turn the Garment
After both side seams are complete, turn the cardigan inside out so the joining seams sit on the inside.
The outer surface should now have a cleaner appearance.
Add the Front, Neckline & Bottom Edging
Return to the 5 mm hook.
The edging runs continuously around the front opening, neckline, and bottom hem.
Left Edge: Attach yarn at the first mesh space near the bottom and work 4 sc into each mesh space while moving upward toward the shoulder. (Edge edging)
The 4-sc groups give the open mesh edge enough coverage to create a more defined border.
Neckline: Continue from the front edge and work 1 sc in each stitch and space around the neckline until reaching the opposite front edge. (Neckline edging)
Because the neckline contains both stitches and spaces, follow the actual edge rather than trying to force the front-edge 4-sc rhythm into this section.
Right Edge: Work 4 sc into each mesh space while moving downward toward the bottom edge. (Edge edging)
Bottom Hem
Bottom Edge: Work across the hem using 1 sc in the back of each treble crochet and 2 sc in each ch-2 space, placing 1 sc at the side seam as needed to transition between panels. (Bottom edging)
Finish by joining to the beginning edge, ch 1, and fastening off.
Crochet the Sleeves
The sleeves are worked directly from the armhole openings in joined rounds.
The tutorial uses 5 rounds for the sample.
Round 1 – Armhole Mesh
Attach yarn at the underarm seam.
Round 1: Ch 6, work 1 tr in the next armhole space, ch 2, 1 tr in the next space, and continue (ch 2, 1 tr in next space) around the armhole; at the shoulder seam, work across the seam as shown in the tutorial rather than closing over it, then ch 2 and sl st into the 4th chain of the beginning ch-6. (Round joined)
The shoulder seam is a small construction transition worth watching closely. The goal is to keep the mesh continuous without creating an overly bulky stitch directly through the seam.
Round 2: Ch 6, 1 tr in next stitch, ch 2, 1 tr in next stitch; repeat around, then ch 2 and sl st into the 4th chain of the beginning ch-6. (Mesh round)
Rounds 3–5: Repeat Round 2 for the desired sleeve length. (5 rounds in tutorial sample)
For a shorter sleeve, stop earlier. For a longer sleeve, continue additional rounds while checking the sleeve length against your arm.
Fasten Off: At the end of the final sleeve round, ch 1, fasten off, and weave in the end.
Repeat the sleeve on the second armhole.
Sleeve Fit Check
Try the cardigan on before finishing both sleeves if possible.
Because sleeve length is easy to customize at this stage, it is better to add or remove a round now than to alter the finished sleeve later.
Add the Front Ties
The cardigan closes with two simple chain ties.
Each tie is attached near the first neckline decrease.
First Tie
Locate the first decrease row on one front panel.
Attach yarn to the appropriate single crochet along the front edging.
Tie 1: Ch approximately 70, or continue until the tie reaches your preferred length, then fasten off. (Approx. 70 ch in tutorial)
Second Tie
Attach yarn to the matching position on the opposite front panel.
Tie 2: Ch the same number of chains as the first tie so both sides match. (Approx. 70 ch in tutorial)
Adjust the length if you prefer a larger bow or a closer-fitting closure.
Fit & Construction Checks
Before considering the cardigan finished, take a few minutes to check the areas that control the final fit.
Check the Bust Width
The back and two front panels should provide enough total width for your bust measurement and desired ease.
Check the Armholes
The front and back markers should meet at the same level, leaving a clean opening for the sleeve.
Check the Neckline
The decrease edges should mirror one another and create an even V-neck.
Check the Sleeve Length
Try the cardigan on and decide whether the five-round sleeve suits the look you want.
Check the Ties
Both ties should be long enough to cross or tie comfortably at the front.

Customization Ideas
Make It Cropped
Use fewer mesh rows on the back and front panels before reaching the armhole section.
Keep the front and back measurements synchronized so the seams still line up.
Make It Longer
Continue the back mesh pattern for additional rows before finishing.
Then make the front panels to the same body length before beginning their neckline decreases.
Change the Sleeve Length
The tutorial uses 5 rounds, but the sleeve can be shortened or extended by changing the number of mesh rounds.
Adjust the Front Ties
Use fewer chains for a shorter tie or add chains for a longer wraparound closure.
Experiment With Yarn
A yarn with good drape will help preserve the airy quality of the mesh. Before committing to the entire cardigan, make a small sample with your chosen yarn and 5 mm hook to see how open and flexible the fabric becomes.
Why the Construction Is Beginner-Friendly
Although a full cardigan can initially look intimidating, this design breaks the garment into manageable sections.
The back is a simple rectangle of repeating mesh. The front panels use the same mesh before introducing neckline decreases. Once those pieces are measured and marked correctly, the remaining work is mostly joining, edging, and repeating the same mesh around the armholes.
The most important thing is to work from measurements rather than assuming the tutorial’s Small sample will fit everyone. The back width, front width, armhole depth, body length, sleeve length, and tie length can all be adjusted while keeping the basic construction intact.
Final Thoughts
This crochet mesh cardigan is a lovely option when you want a lightweight layer with an airy, open texture rather than a heavy sweater. The simple treble mesh keeps the fabric relaxed, while the tie-front closure lets you adjust how the cardigan sits when worn.
The made-to-measure construction is what makes this design especially useful. Start with your bust measurement, take time to check the foundation chains, and keep the armhole and neckline shaping aligned as you build the panels. Once those key measurements are right, the rest of the cardigan comes together through a straightforward sequence of mesh, slip-stitch joins, edging, and sleeves.
Wear it over a simple top for an everyday layer, make the sleeves shorter for a breezier silhouette, or extend the body and sleeves when you want more coverage. The same basic pattern can adapt to your measurements and the style you want to wear.