Mini Crochet Christmas Stocking Ornament Pattern Free
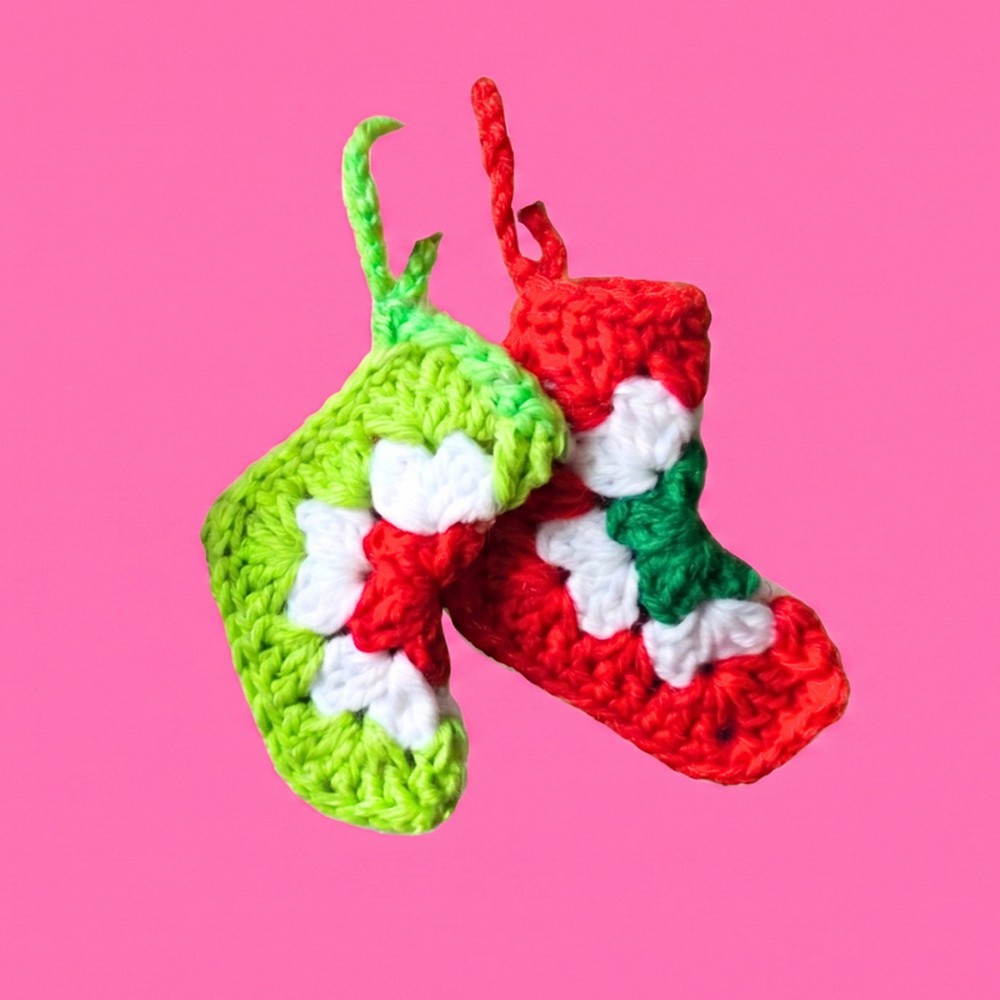
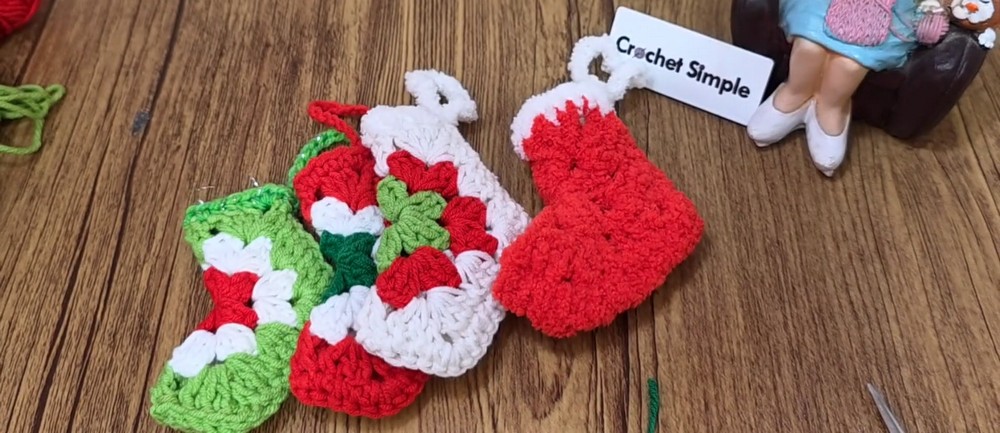
A mini crochet Christmas stocking may be tiny, but it instantly adds a festive handmade touch wherever it hangs. Tuck it onto your Christmas tree, attach it to a wrapped gift, or display several together as a cheerful holiday garland. Its classic crochet shape makes it a timeless decoration that you can personalize with your favorite seasonal colors.
Crochet Christmas Stocking
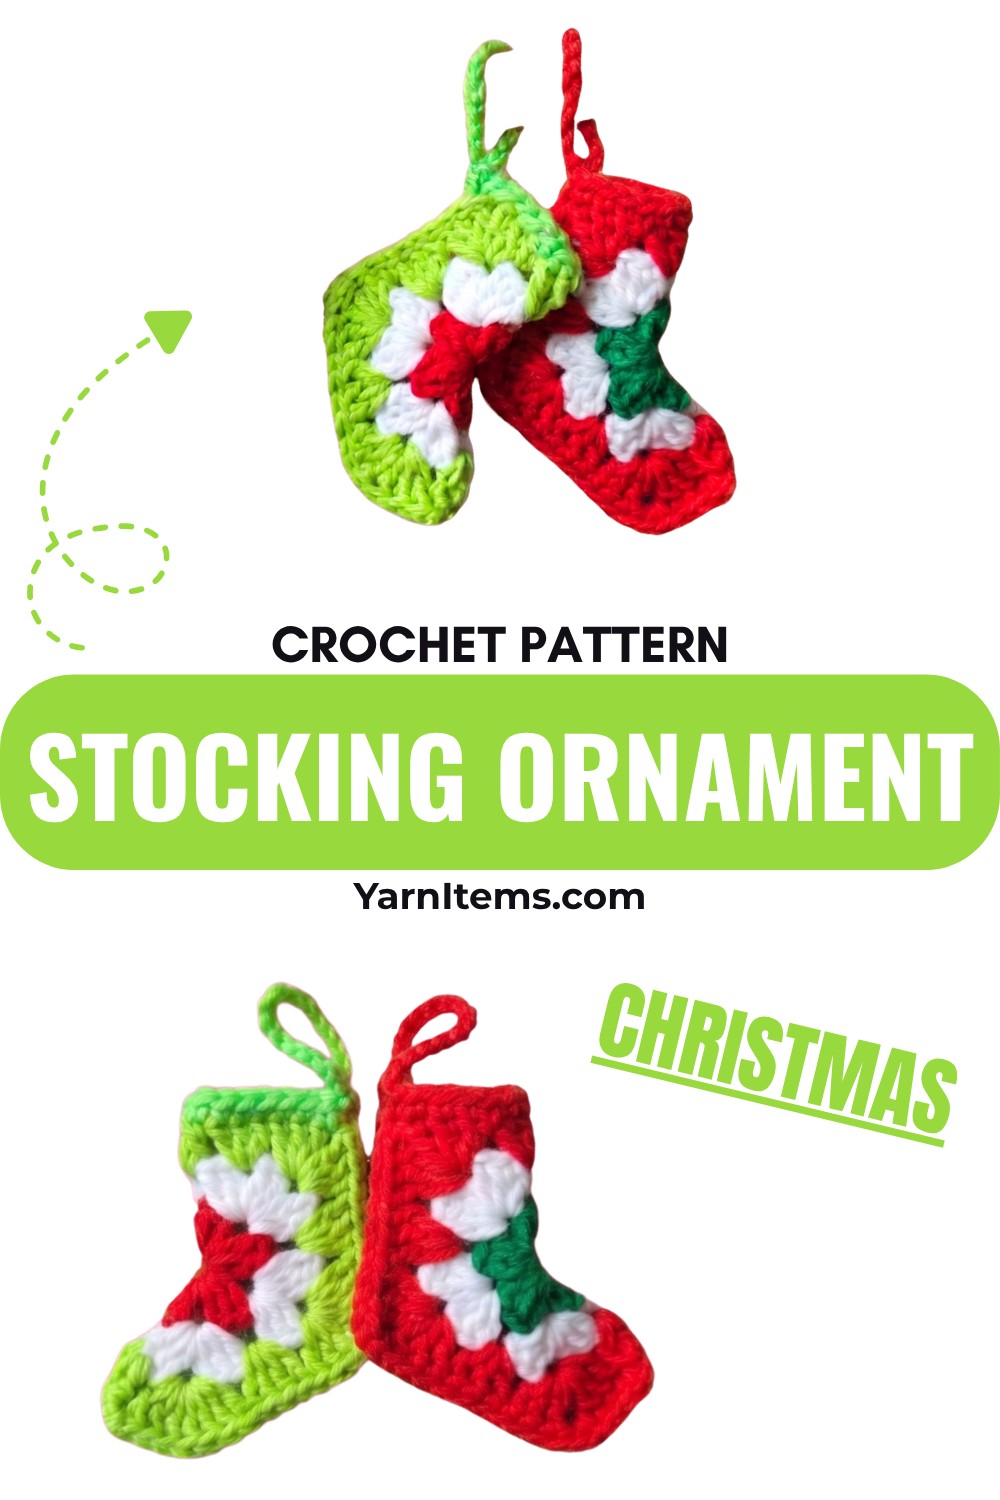
This pattern keeps the crochet piece simple while creating a neat, charming result that even beginners can enjoy. The instructions guide you through each section in an easy-to-follow order, making it perfect for a relaxing holiday craft. Before you know it, you’ll have a collection of miniature stockings ready to brighten every corner of your crochet Christmas décor.
Credit Simple Crochet
Materials & Tools Needed
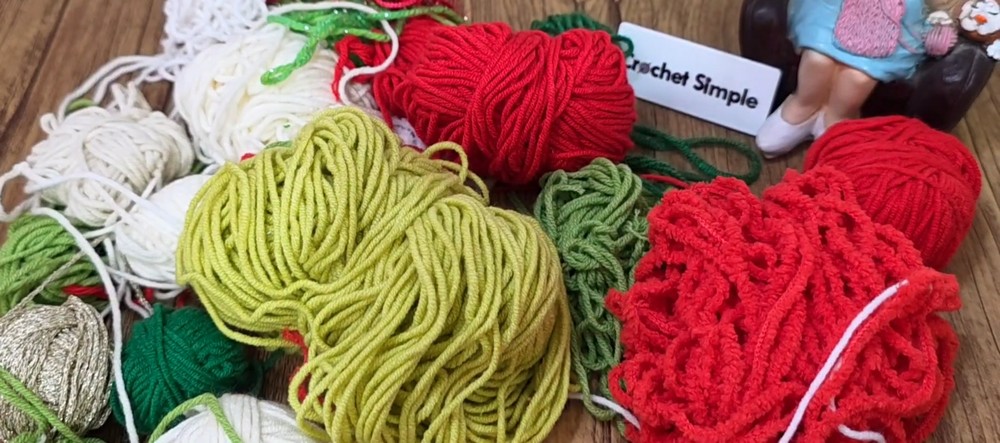
- Yarn: Use leftover yarn from previous projects (ensure all yarns are of the same or similar thickness).
- Hook: Recommended crochet hook size that matches your yarn (e.g., 4.0 mm or equivalent).
- Scissors: For cutting yarn.
- Tapestry needle: For weaving in ends.
- Optional: Ready-made loops or keyrings for the hanging loop.
Finished Size & Customization Ideas
Size: The finished stocking ornament is small enough to hang on a Christmas tree, approximately 3–4 inches tall, depending on your yarn and hook size.
Customization Ideas:
- Use multicolored yarn for a festive look.
- Crochet stripes or alternate stitches for a textured effect.
- Add tiny pom-poms, buttons, or embroidery for extra personalization.
Pattern Abbreviations & Terminology
- Ch: Chain
- Sl st: Slip Stitch
- DC: Double Crochet
- SC: Single Crochet
- Magic Ring: Adjustable loop to start the project
- [ ]: Repeat instructions inside brackets
- Cluster: Group of 3 double crochet stitches worked in the same stitch/space
- Terms follow US crochet terminology.
Step-by-Step Detailed Crochet Instructions
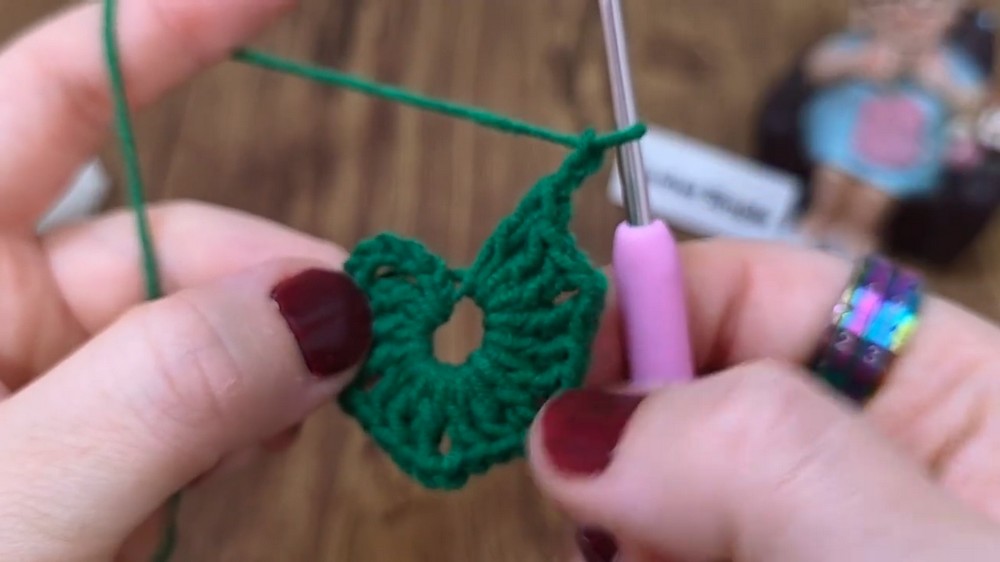
Starting Round – The Base
- Make a Magic Ring:
- Wrap yarn around your finger.
- Insert the hook into the center of the ring, pull up a loop.
- Yarn over and pull through the loop to secure the ring.
- Ch 5: Counts as the first DC plus Ch 2 (chain space).
- Cluster (3 DC):
- Yarn over, insert hook into the ring.
- Yarn over, pull through 2 loops twice.
- Repeat 2 more DC stitches.
- You now have 1 cluster of 3 DC.
- Ch 2 (chain space). Repeat for a total of 5 clusters: (Cluster [3 DC], Ch 2).
- Close the round:
- Slip st into the third chain from the beginning, Ch 5.
- Pull tightly to secure.
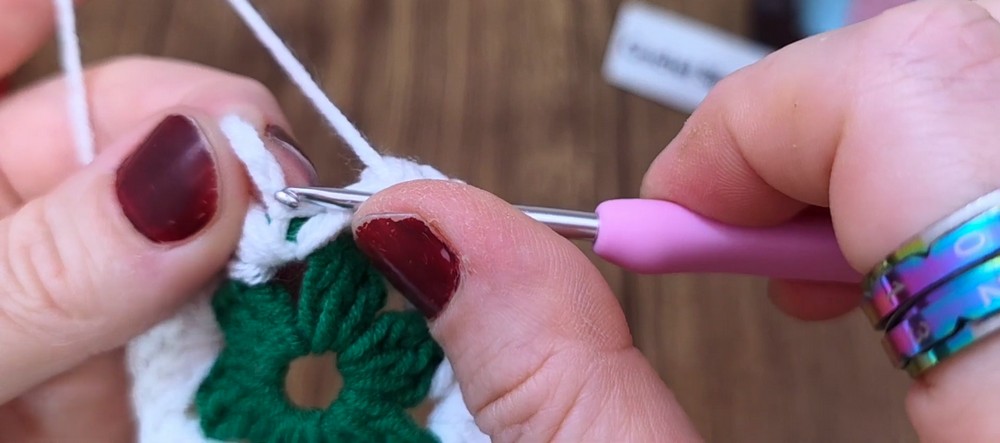
Round 2 – Start Building Height
- Introduce new color:
- Make a slip knot on your hook with the new color.
- Pull through and insert into the first chain space from the previous round.
- Ch 5: Counts as the first DC plus Ch 2 (chain space).
- Cluster (3 DC) in the same chain space.
- Repeat pattern:
- [Cluster (3 DC), Ch 2, Cluster (3 DC)] into each chain space around.
- Finishing this round:
- At the end of the round, before the starting chains, add 2 DC.
- Sl st into the third chain to join.
Round 3 – Creating the Hexagon
- Change to a new yarn color (optional) and prepare a slip knot.
- Ch 5: Counts as the first DC plus Ch 2.
- Clusters in corners:
- Work [Cluster (3 DC), Ch 2, Cluster (3 DC)] into each corner chain space.
- Clusters on sides:
- Work Cluster (3 DC) into each space between 2 previous clusters.
- Continue this pattern around:
- Corners: [Cluster (3 DC), Ch 2, Cluster (3 DC)].
- Sides: Cluster (3 DC).
- Ending the round:
- Add 2 DC at the end and join with a sl st to the third chain.
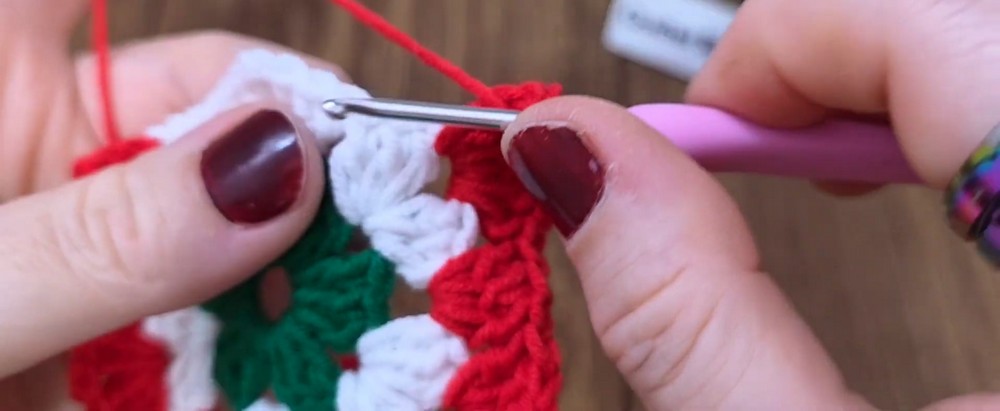
Joining & Shaping
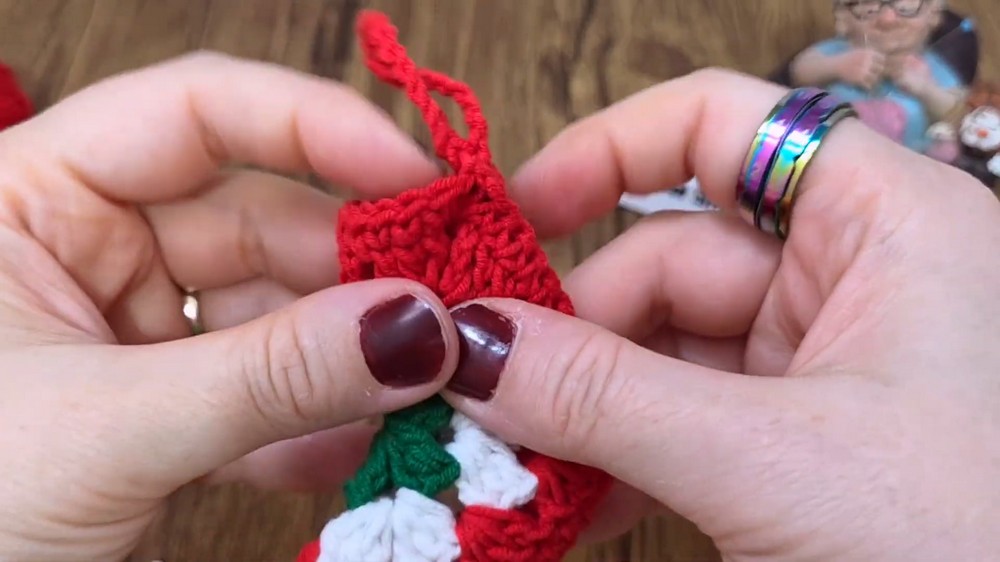
- Fold the hexagon in half:
- Bring two opposite edges together to form a stocking shape.
- Join with Single Crochet (SC):
- Starting from the top corner, insert the hook through both sides of the fabric’s edge.
- Work 1 SC into each stitch:
- Skip spaces between clusters.
- Align stitches carefully.
- Corners (Chain Space):
- Work 3 SC into each corner chain space.
- Continue along both sides:
- SC into matching stitches until reaching the end of the stocking.
Finishing Off
- Fasten off:
- Cut yarn, pull through the last stitch to secure.
- Use a tapestry needle to weave in the ends.
- Add the Loop:
- Option 1: Attach a ready-made keyring or loop.
- Option 2: Crochet your own loop:
- Insert hook into a corner stitch, Ch 20.
- Sl st into the same corner stitch.
- Cut yarn, secure ends.
Optional Embellishments
- Embroider festive designs like stars, snowflakes, or initials.
- Add glitter threads or beadwork for extra flair.
- Attach small applique designs or ribbons to the stocking.
Final Thoughts
Your mini stocking is now ready to hang as an adorable ornament! Experiment with colors and designs to make each piece unique for your tree or holiday gifting.