Crochet Pumpkin Pie Hat Pattern with Ruffled Crust and Whipped Cream
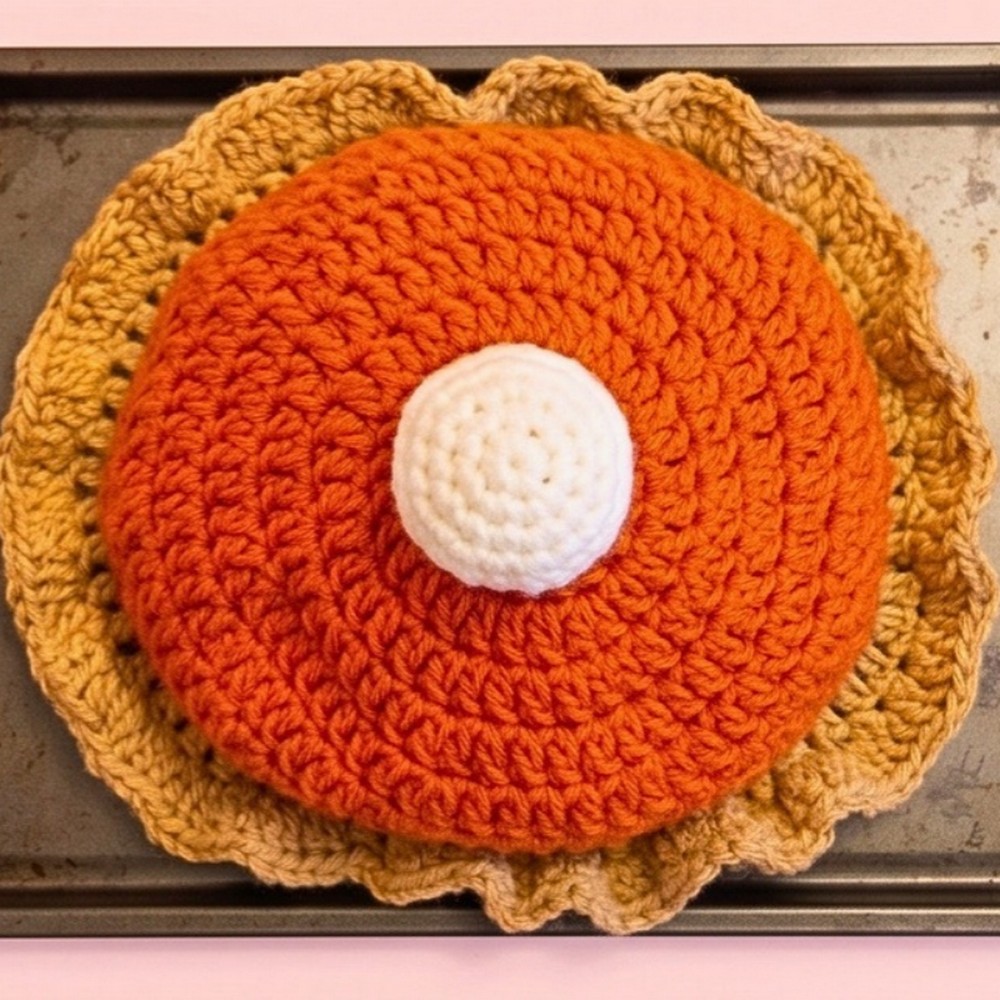
Turn a favorite fall dessert into something wearable with this playful crochet pumpkin pie hat, complete with a ruffled crust and fluffy whipped-cream topping.
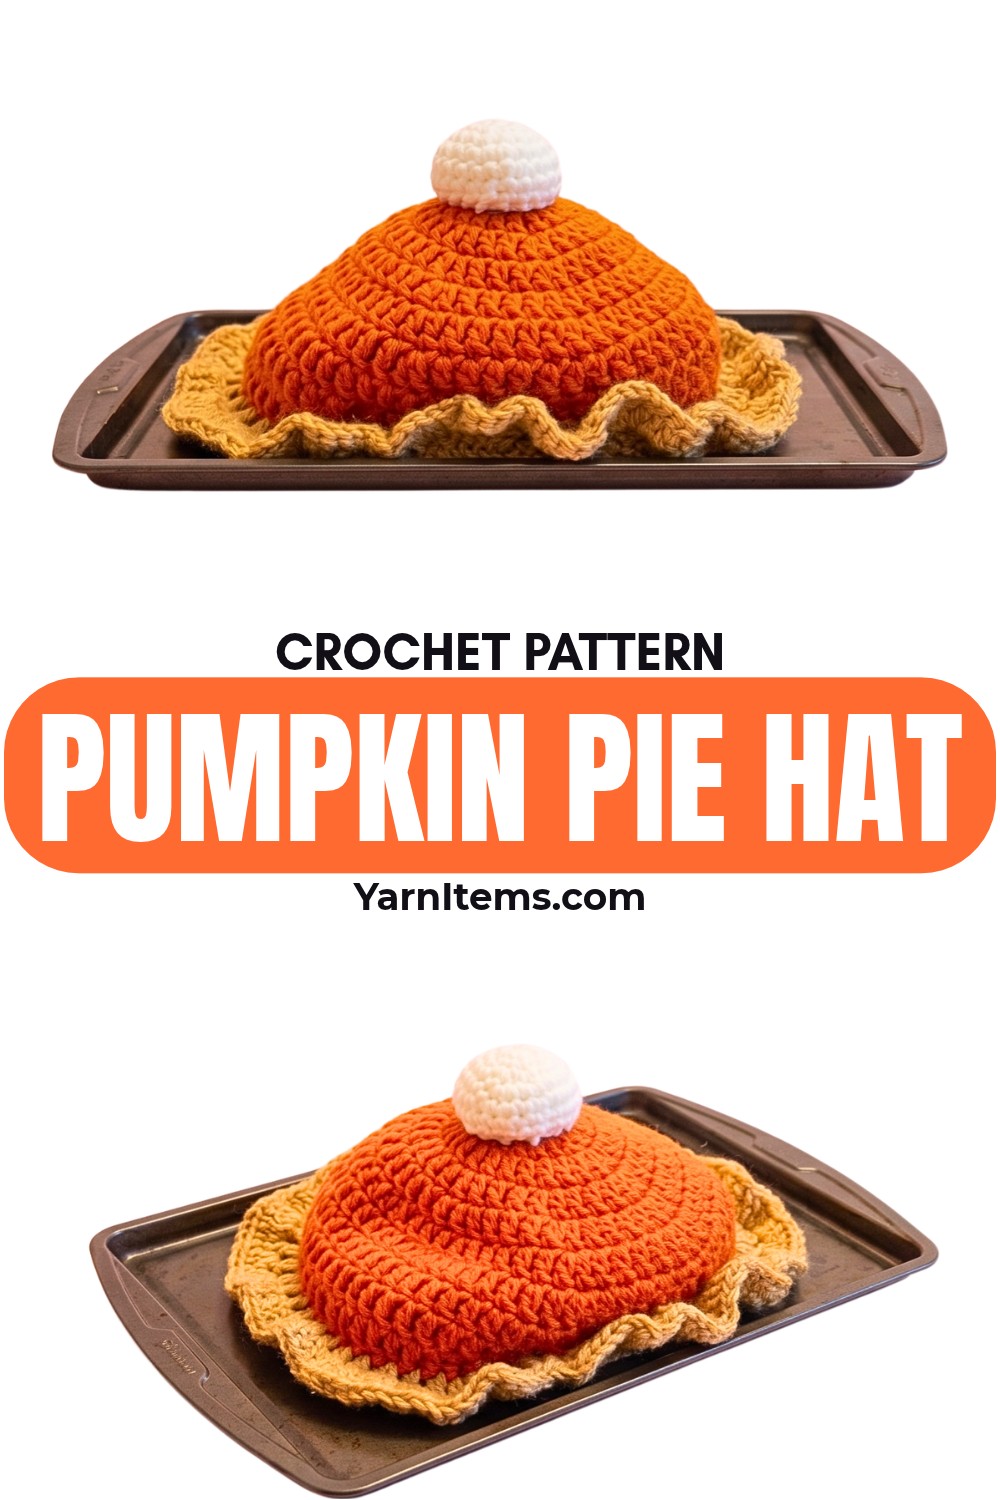
Few handmade accessories can be as playful as a hat inspired by a slice of crochet pumpkin pie. This design uses dark orange yarn for the pie filling, a light brown or tan shade for the ruffled crust, and a separate white piece that becomes the whipped cream on top.
The combination of familiar dessert colors and simple shaping gives the finished crochet hat a fun seasonal character that works especially well for Thanksgiving, autumn events, or a Halloween costume.
Rather than making the whole crochet hat in one uninterrupted sequence, this tutorial takes you through each recognizable part in order.
You’ll first build the orange base with increasing double-crochet rounds, continue with plain rounds to set the depth, then change colors for the wavy crust. After that, the whipped-cream dollop is made separately and sewn onto the center before the remaining ends are secured and trimmed.
Credit Coffee Crochet Repeat
Materials & Tools Needed
- Yarn:
- Dark Orange for the pumpkin pie filling
- Light Brown / Tan for the pie crust
- White for the whipped cream dollop
- Crochet Hook: 5.0 mm. The creator crochets on the looser side, so you may need to size up if you have tight tension.
- Tapestry / Sewing Needle: For light sewing and weaving in ends
- Scissors
Finished Size & Customization Ideas
The tutorial creates a slightly shorter, beret-style hat. If you prefer a deeper, full bucket-hat style, add more rounds of 56 stitches in Dark Orange before switching to the pie-crust color.
The hat can be worn for Thanksgiving dinner, autumn festivals, or as a fun handmade addition to a Halloween costume.
Pattern Abbreviations & Terminology
The pattern uses US terms:
- MR: Magic Ring / Magic Circle
- Ch: Chain
- St(s): Stitch(es)
- SC: Single Crochet
- DC: Double Crochet
- Inc: Increase — placing 2 stitches into the same stitch
- Sl St: Slip Stitch
Before You Start: Keep the Orange Base in Continuous Rounds
The Dark Orange hat base is worked in continuous rounds rather than joined with a slip stitch at the end of every round. A stitch marker is useful here because it identifies the first stitch of each round and makes it easier to keep your place as the circle grows.
The slight curling that can appear during the early increase rounds is also addressed in the tutorial. If the piece begins curling upward, gently stretch it so it stays on the flatter side before continuing.
Crochet Pumpkin Pie Hat Pattern
Pumpkin Pie Hat Base
The orange section starts at the center and expands through regular increases. Once the stitch count reaches 56, the increases stop, and the hat continues with plain double-crochet rounds.
Round 1: Create a Magic Ring, Ch 2, and place 8 DC into the ring. Pull the loose end tightly to close the circle. (8 sts)
Round 2 (Inc by 8): Place 2 DC into each stitch around. (16 sts)
Round 3 (Inc by 8): 1 DC in the first st, 2 DC in the next st. Repeat from * to * around. (24 sts)
Round 4 (Inc by 8): 1 DC in each of the first 2 sts, 2 DC in the next st. Repeat from * to * around. (32 sts)
Round 5 (Inc by 8): 1 DC in each of the first 3 sts, 2 DC in the next st. Repeat from * to * around. (40 sts)
Round 6 (Inc by 8): 1 DC in each of the first 4 sts, 2 DC in the next st. Repeat from * to * around. (48 sts)
Round 7 (Inc by 8): 1 DC in each of the first 5 sts, 2 DC in the next st. Repeat from * to * around. (56 sts)
Rounds 8–11 (or desired length): Place 1 DC in each stitch around. (56 sts) The creator completes 4 plain rounds for a shorter fit. Try the hat on periodically to check the fit and add more rounds here if you want it longer.
Adjusting the Hat Depth
The plain 56-stitch rounds are the intentional adjustment point for the hat’s depth. The tutorial uses four of these rounds for a shorter beret-style fit, but you can continue working additional rounds if you want the hat to sit deeper on the head.
Make this adjustment before changing to the Light Brown / Tan yarn, because the next round begins the pie-crust section.
Pie Crust
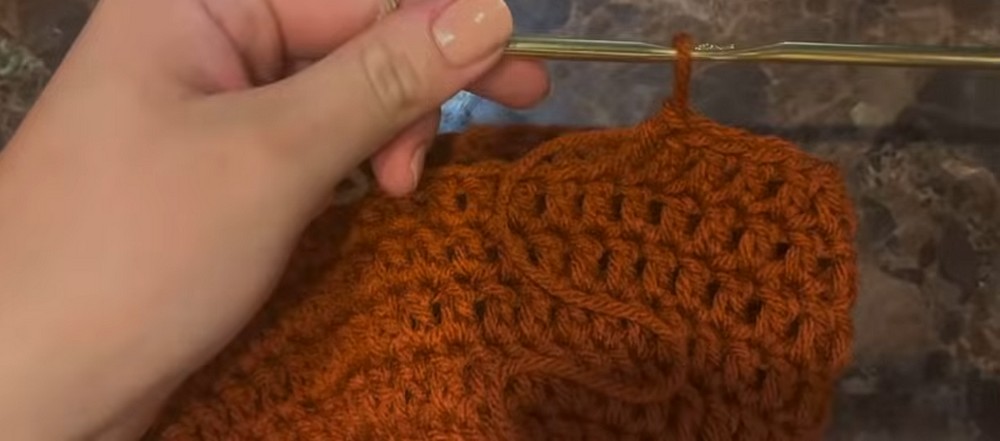
The color change turns the orange hat base into the pumpkin-pie filling and crust. The first brown round stays simple, while the following round creates the characteristic wavy edge.
Round 12 (Color Change): Begin your next DC stitch with the Dark Orange, but before pulling through the final two loops, hook the Pie Crust color and pull it through to complete the stitch. Place 1 DC in each stitch around with the new color. (56 sts) Cut the orange yarn, leaving a short tail, and tie the orange and brown tails together on the inside with 2–3 knots to secure the color change.
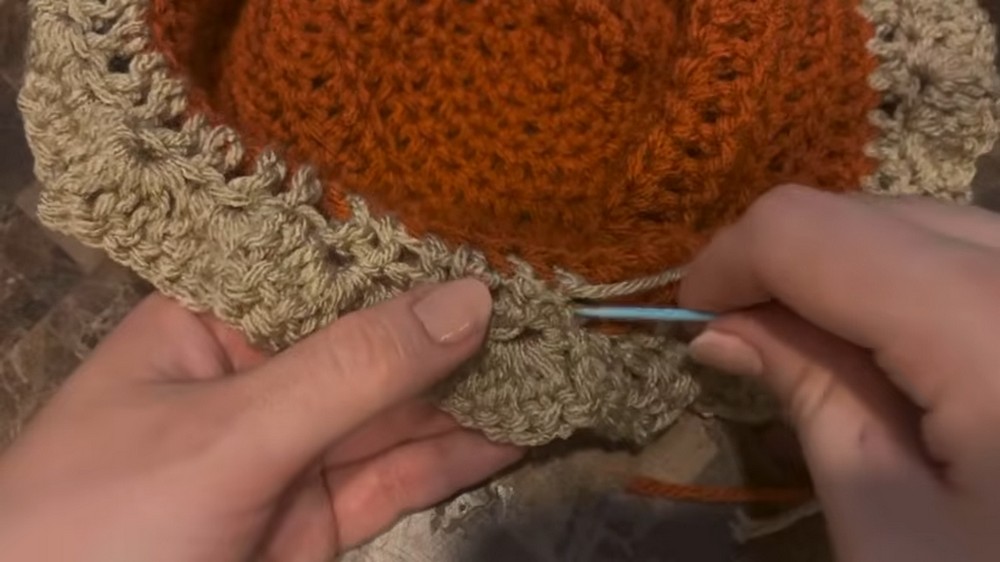
Round 13 (The Crust Ruffle): Sl St into the first stitch of this round, then Ch 2. Place 1 DC in the very first st, place 4 DC into the next st, and repeat (1 DC in next st, 4 DC in next st) all the way around to create a wavy, ripply pie-crust edge. Sl St to the very first stitch to join. Fasten off, leaving a short tail, and weave in all remaining ends on the interior of the hat base.
The alternating single double crochet and group of four double crochets is what creates the repeated wave around the edge, so keep the sequence consistent as you move around the round.
Whipped Cream Dollop
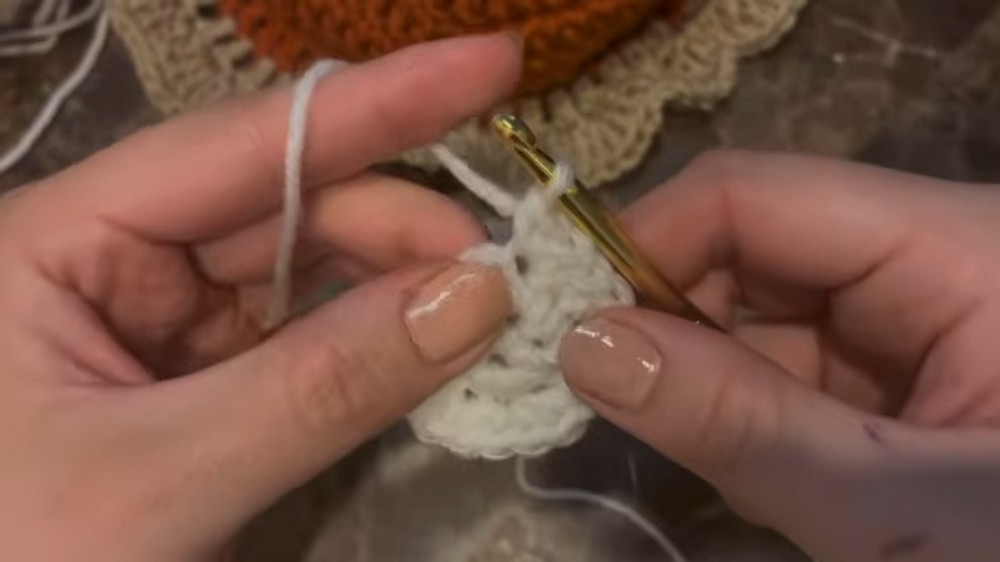
The topping is made separately in White yarn. Unlike the hat base, this small piece uses single crochet, creating a denser circular shape for the whipped-cream detail.
Round 1: Create a Magic Ring, Ch 2, and place 8 SC into the ring. Pull to tighten. (8 sts)
Round 2 (Inc to 16): Place 2 SC into each stitch around. (16 sts)
Round 3 (Inc to 24): 1 SC in the first st, 2 SC in the next st. Repeat from * to * around. (24 sts)
Round 4: Place 1 SC in each stitch around. (24 sts)
Round 5: Place 1 SC in each stitch around. (24 sts)
Finishing: Sl St to the next stitch to finish off. Cut the yarn leaving a very long tail (about 2 feet) for sewing. Do not weave in the center magic ring string yet.
Attaching the Whipped Cream
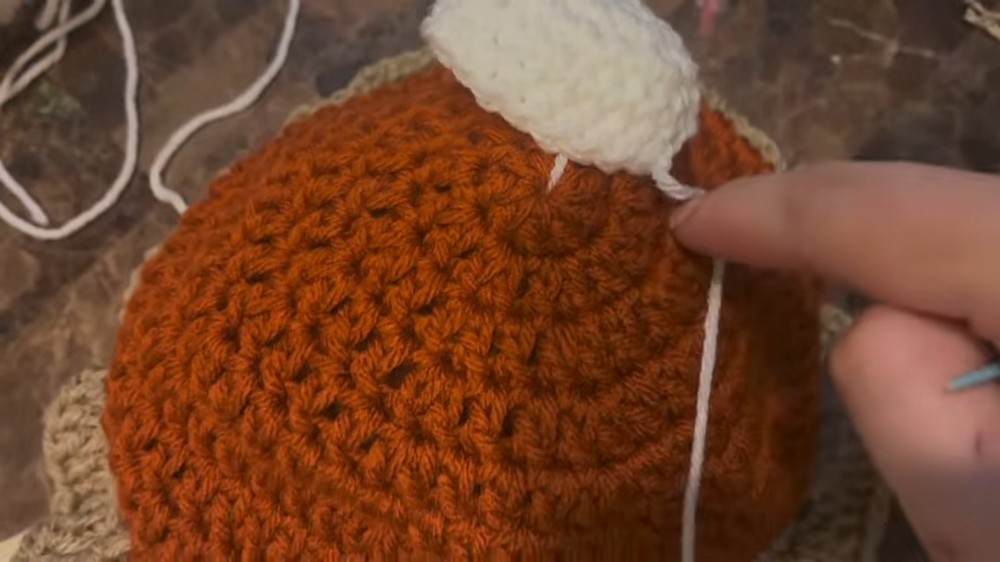
The placement of the white topping is important because it needs to sit directly over the center of the orange hat. Keep both the center string and the long outer sewing tail available until the dollop has been secured.
Positioning: Take the loose center tail from the inside of your whipped cream dollop and poke it directly down through the top center hole of the pumpkin pie hat. This anchors the dollop in the middle.
Sewing: Thread your long outer tail onto a sewing needle. Sew the edges of the white dollop down, aligning the edge perfectly between Round 2 and Round 3 of the orange hat base. Find a stitch under the orange, pass the needle up through the outside of the white, and pull through. Repeat this all the way around the perimeter.
Securing: Once fully sewn, poke the needle and remaining long tail down to the interior of the hat. On the inside, you will now have both the center string and the long outer sewing string. If they are far apart, weave one string under the interior loops to bring it closer to the other, then tie them tightly together in a knot 3 times.
Final Polish: Trim your ends or weave them in for a cleaner, professional finish.
Final Check Before Wearing
Look over the inside of the hat after attaching the whipped cream. The center string and sewing tail should be secured together, while the remaining yarn ends should be trimmed or woven in so nothing is left loose inside the hat.
Once the finishing is complete, the orange base, ruffled brown crust, and white whipped-cream topping come together as the final pumpkin-pie-inspired hat.