Free Crochet Bow Top for Babies 12–18 Months
Ready to dress up little outfits with a handmade touch? This crochet bow top pairs a sweet front bow with a laced back for an adjustable baby fit.
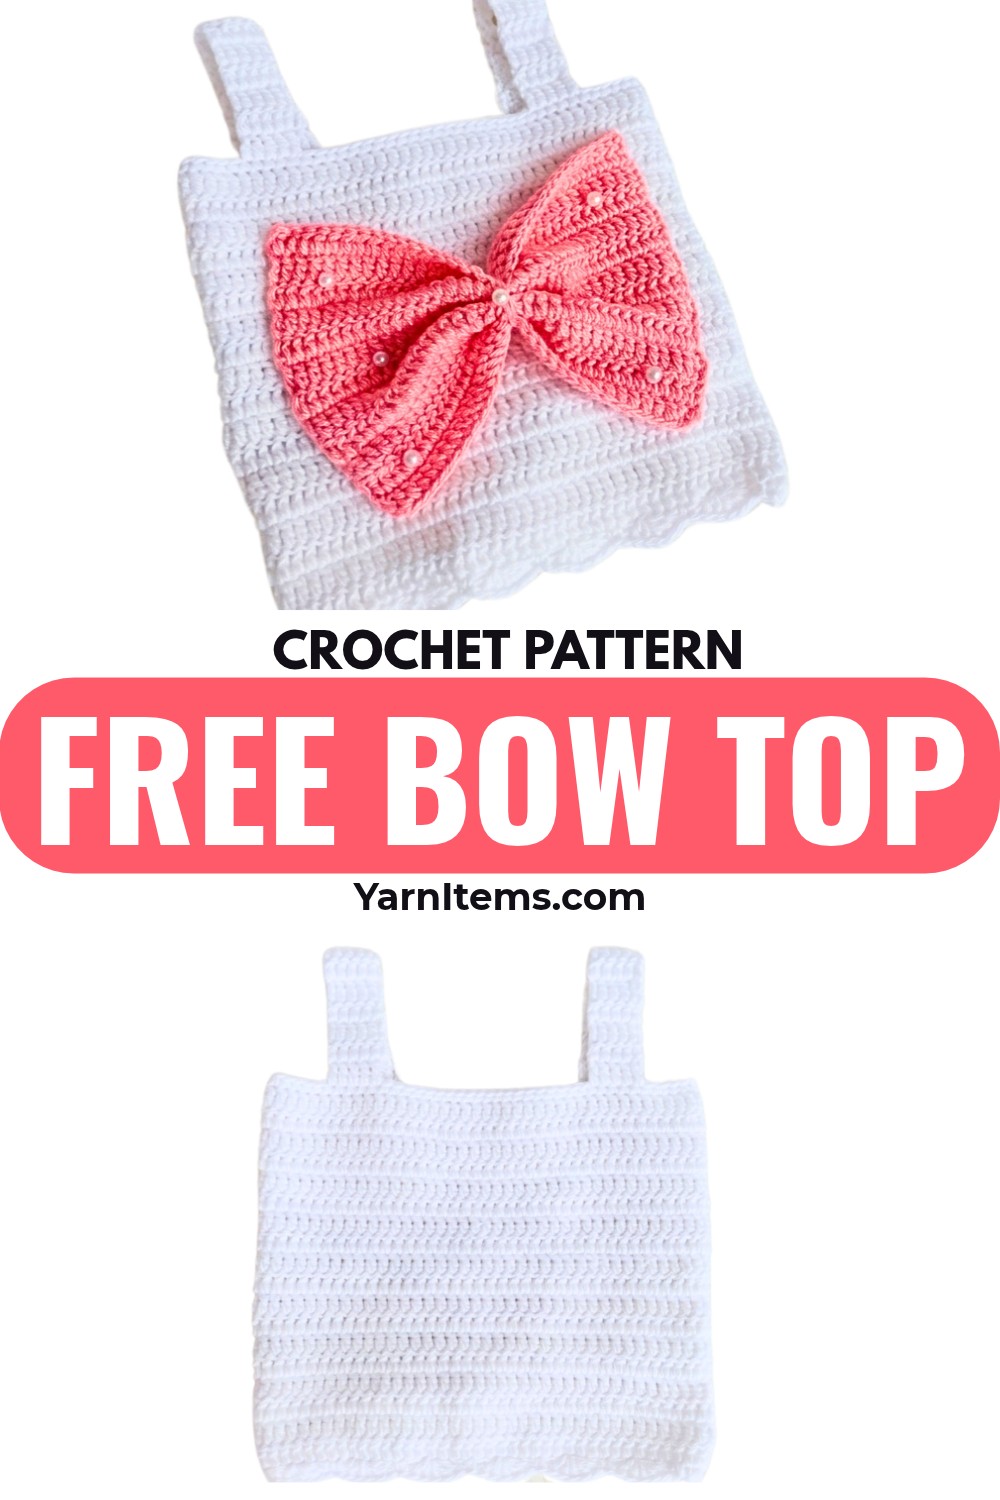
Your little one gets a charming crochet bow top with a soft double-strand fabric, scalloped lower edge, and open laced back. Crochet details stay simple while the bow gives the finished top its standout touch.
Sizing is centered on a 12-18-month fit, with helpful chest and length references for nearby baby sizes. This crochet pattern walks through the body, edging, straps, back lacing, and front bow so each part comes together clearly.
Credit Carino Crochets
Size & Fit
Target size: 12-18 months
- Chest circumference: approximately 19 inches.
- Length from underarm to waist: approximately 8 inches.
- The starting chain is reduced by about 3 inches from the actual chest measurement to allow for the laced back opening and stretch.
- The instructor holds two strands together throughout the project, which affects the fabric thickness and finished fit.
0–3 Months: Actual Chest 19″ – Approx. Chain Measurement ~16″ – Length 6″
3–6 Months: Actual Chest 20″ – Approx. Chain Measurement ~17″ – Length 6.5″
6–12 Months: Actual Chest 21″ – Approx. Chain Measurement ~18″ – Length 7.5″
12–18 Months: Actual Chest 22″ – Approx. Chain Measurement ~19″ – Length 8″
18–24 Months: Actual Chest 23″ – Approx. Chain Measurement ~20″ – Length 8.5″
For smaller sizes, shoulder straps can be narrowed from 5 dc to 4 or 3 stitches wide, and the strap length can be reduced from 14 rows to 10 or 12 rows.
Check the Fit Before Continuing
The body begins with 75 chains for the 12–18-month version and is intended to stretch from roughly 15.5 inches to 19+ inches. Since this is a baby garment, check the finished body length and overall width against the intended size before moving too far into the later sections.
Materials & Tools
- Yarn: Fine/lightweight yarn, approximately 1.5 balls of the main color, such as white, plus a contrasting color such as pink for the bow.
- Crochet hook: 3.5 mm.
- Stitch markers.
- Tapestry needle.
- Tape measure.
- Scissors.
- Optional size-6 pearl beads for embellishment.
Before You Start
Hold two strands of the main yarn together throughout the body unless the instructions specifically change to the contrasting bow color.
For the body, the foundation chain is deliberately shorter than the target chest measurement because the finished top has a laced back and needs room to stretch. Keep the back-bump placement in mind during Row 1; working into these horizontal loops creates the intended first edge and helps keep the foundation neat.
Abbreviations
- ch = Chain
- st / sts = Stitch / Stitches
- sl st = Slip Stitch
- sc = Single Crochet
- dc = Double Crochet
- rep = Repeat
- back bump = Horizontal loop located on the reverse side of a foundation chain

Step-by-Step Crochet Pattern
Part 1: Body
Teaching Guide: Build the Main Fit
This first section creates the rectangular body of the top. The foundation chain establishes the width around the chest, while the repeated double-crochet rows build the length from the underarm toward the waist.
Pay particular attention to the first row because it is worked through the back bumps rather than the usual top loops of the foundation chain. Once Row 1 is established, the following rows become much more repetitive. Keep checking the stitch count so the body stays at 75 stitches across.
Foundation Chain: Using two strands of the main color held together and a 3.5 mm hook, make a slip knot and chain 75 chains. This should measure approximately 15.5 inches unstretched and stretch to 19+ inches.
Row 1: Chain 2 extra stitches for turning, giving 77 chains in your count. Yarn over, skip the 2 turning chains and the first chain stitch, skipping 3 chains in total, then work into the back bumps with 1 dc across. Continue across to make 75 dc.
Row 2: Ch 3, turn. Skip the first stitch at the base of the ch-3, then work 1 dc in the next stitch and 1 dc in each stitch across, finishing with 1 dc in the top of the beginning ch-3. 75 sts.
Rows 3-18: Ch 3, turn, skip the first stitch, work 1 dc in each stitch across, and finish with 1 dc in the top of the turning ch-3. Repeat until 18 rows total are completed, giving a body length of approximately 7.5 inches.

Shape Check
By the end of Row 18, you should have a flat rectangular body measuring approximately 7.5 inches long with 75 stitches across. Keeping the edges straight here matters because the side edges will later become the lacing area.
Part 2: Edging & Lacing Eyelets
Teaching Guide: Create the Back Opening
This edging does more than decorate the top. The side rows create the spaces that the long lacing cord will pass through later, while the bottom shell edge adds the scalloped finish.
Work the side stitches evenly into the row ends so the eyelets remain visually consistent. The extra single crochet at the bottom corner helps the turn sit neatly before the bottom edging begins.
Right Side Lacing Row: Do not fasten off. Ch 1, then work 2 sc evenly into each row-end dc/ch-3 space along the side. At the bottom corner, work 1 extra sc, making 3 sc total in the corner.
Bottom Scallop/Shell Edge: Skip the next 2 dc spaces, work 5 dc in the 3rd stitch, skip the next 2 stitches, and work 1 sc in the 3rd stitch. Repeat the sequence [skip 2 stitches, 5 dc in the next stitch, skip 2 stitches, 1 sc in the next stitch] across the bottom. At the final corner, skip 3 stitches and work 1 sc into the final stitch.
Left Side Lacing Row: Continue up the opposite side and work 2 sc into each row-end space.
Top Edge: Work 1 sc in each stitch across the upper edge.
Joining & Finishing: Slip stitch into the first sc of the round, ch 1, and fasten off, leaving a short tail to weave in.

Check the Eyelets
Look along both side edges before moving on. The single crochet stitches should form an even series of spaces suitable for threading the lacing cord later. The bottom should show the repeated shell/scallop shape rather than a flat edge.
Part 3: Shoulder Straps
Teaching Guide: Set the Neckline First
The straps depend on the center neckline placement, so mark the 20 stitches in the absolute center before attaching either strap. This keeps the two shoulder areas balanced and makes it easier to place the straps symmetrically.
The unusual stacked single-crochet technique at the outer edge is intentional. It creates a straighter edge while keeping the strap from developing a loose gap at the turn.
Stitch Alignment: Lay the top flat with the front facing you. Leave 20 center stitches unworked for the neckline. From the 20th stitch marker, count outward to establish the 5-stitch strap width.
Row 1: Attach the main yarn at the designated starting stitch. Ch 3, which counts as the first dc, then work 1 dc into each of the next 4 stitches for 5 dc total.
Rows 2-14: Turn without chaining. Work 1 sc directly into the first stitch, then work another sc directly into the side of that sc to create the stacked edge. Work 1 dc into each of the remaining 4 stitches across. Repeat until 14 rows are completed for the 12–18-month size.
Finishing: Ch 1 and fasten off, leaving a long enough tail to sew the strap onto the back panel. Repeat for the second strap.
Strap Check
Both straps should have the same width and row count. Before sewing them down, place the top flat and compare their positions so the shoulder placement looks balanced from side to side.
Part 4: Lacing Cord
Teaching Guide: Leave Enough Length to Tie
The cord needs to travel through the side eyelets and still leave enough yarn at the bottom for a comfortable bow. For this reason, the pattern uses a deliberately long foundation chain.
Lacing Cord: Using the main yarn or a contrasting color, make a slip knot and chain 200–220 chains.
Optional Thickness: Yarn over and work a row of dc back down the chain to make a sturdier, wider lacing strap. Fasten off and weave in the ends.
Part 5: Front Bow
Teaching Guide: Shape the Bow Before Sewing
The bow starts as a simple rectangular panel. Its appearance comes from the center pinch rather than from increases or decreases, so keeping the rectangle even makes the finished bow easier to shape.
Bow Foundation: Using the contrasting color and two strands held together, chain 37.
Row 1: Skip the first 3 chains, work 1 dc in the 4th chain from the hook, then work 1 dc in every chain across. 35 dc.
Rows 2-12: Ch 3, turn, skip the first stitch, and work 1 dc in each stitch across for 12 rows. Fasten off, leaving a long sewing tail.
Bow Shaping: Pinch the rectangle tightly at its center. Thread a piece of yarn onto the tapestry needle, wrap it securely around the center several times, and knot it to hold the bow shape.

Assembly
Attach the Shoulder Straps
Fold the top so the front and back align correctly. Position each strap on the back panel approximately 1 inch inward from the outer edge, spanning across 5 stitches.
Use the strap’s long yarn tail and tapestry needle to whip-stitch back and forth securely through the 5 strap stitches and into the back panel. Fasten off and weave in the remaining end.
Lace the Back
Thread the long lacing cord through the side eyelet holes in a criss-cross pattern down the open back. Leave enough cord extending at the bottom to tie a neat bow.
Attach the Front Bow
Place the shaped bow at the exact center front of the top. Sew the left and right sides of its center wrap securely to the body using the long sewing tail.
Add Optional Pearls
If desired, securely sew a few size-6 pearl beads across the front of the top using the tapestry needle.
Final Fit Check
Lay the finished top flat and check three areas before wearing it: both shoulder straps should sit evenly, the back lacing should move freely through the side eyelets, and the bow should remain centered on the front.

Weave in every remaining loose yarn tail securely with the tapestry needle. The finished Easy Crochet Bow Top for Babies (12–18 Months) is ready to wear as part of the matching set.