Crochet Miffy Pouch Pattern – Cute Bunny Earbud Holder
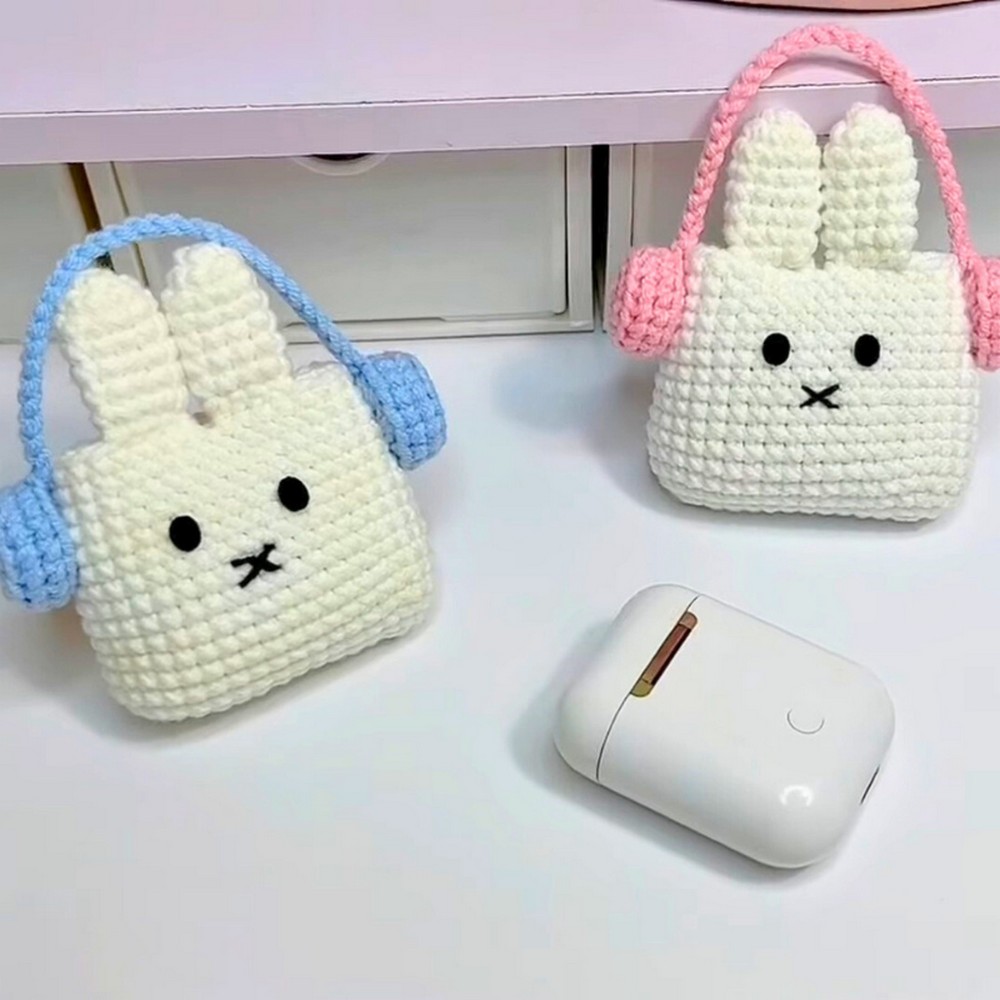
Give your earbuds a cute new home with this crochet Miffy pouch, complete with tiny bunny ears, embroidered facial features, and colorful miniature headphones.
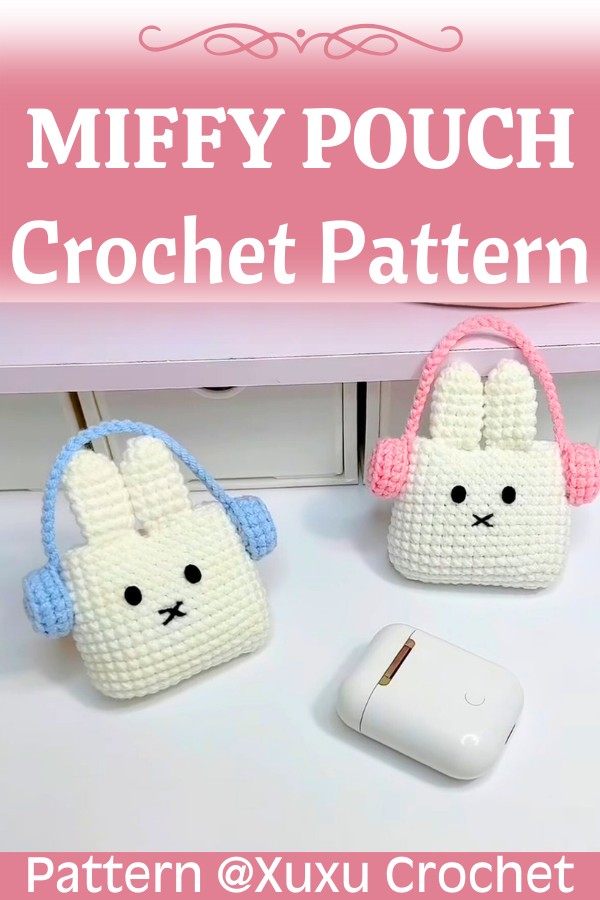
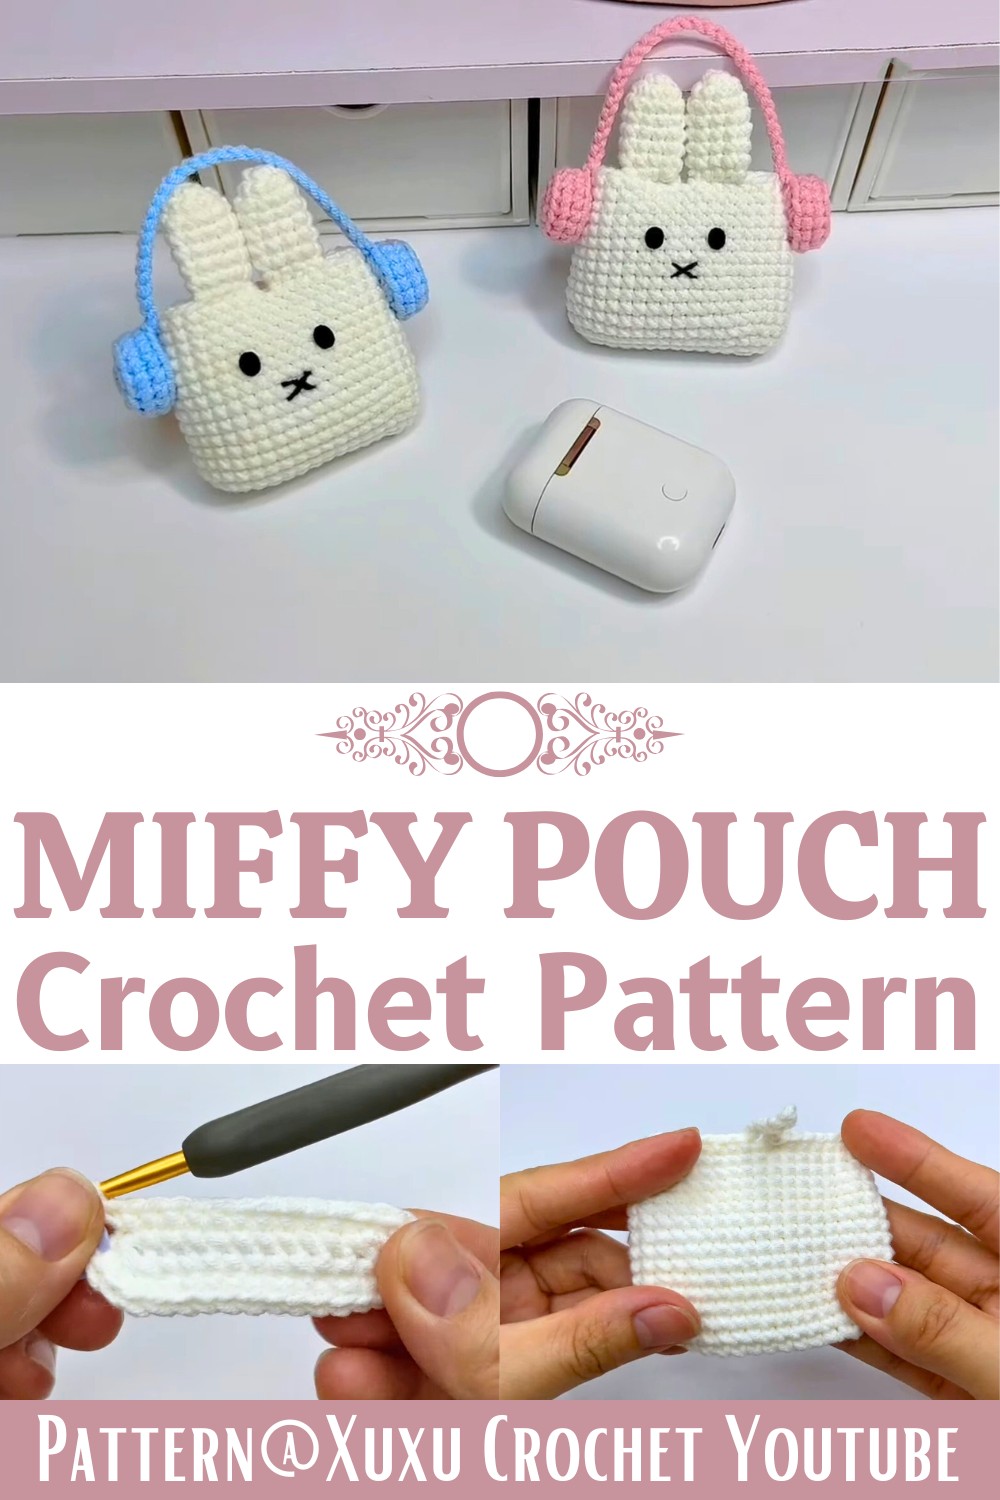
A plain earbud crochet pouch is useful, but a little white bunny with upright ears and tiny headphones makes an everyday essential even more adorable. This crochet Miffy-inspired piece features a rounded white body, small black eyes, a cross-shaped mouth, and blue or pink headphone details.
This pattern walks you through crocheting the pouch body, shaping the ears, creating the miniature headphones, and adding the finishing details. You’ll also learn to attach the button closure and neatly arrange the facial features, turning simple crochet pieces into a charming holder for wireless earbuds or small everyday treasures.
Credit Xuxu Crochet
Materials & Tools Needed
- Yarn: Milk Cotton yarn (approximately 125 g weight category) in the following colors:
- White: Main pouch body and rabbit ears.
- Blue: Miniature headphones.
- Black: Embroidery and felt details.
- Crochet Hook: 3.0 mm.
- Notions:
- Stitch markers.
- Tapestry needle for sewing and weaving in yarn ends.
- Hot glue gun.
- Polyester fiberfill for stuffing the headphones.
- Black felt fabric for the eyes.
- One 1 cm button for the back closure.
- Scissors for cutting yarn and felt.
Safety note: Handle the hot glue gun carefully and allow glued pieces to cool completely. Small buttons and other small components should be kept away from young children.
Finished Size & Customization Ideas
The finished pouch is designed to comfortably fit standard wireless earbuds, such as AirPods, or small everyday trinkets. The exact finished dimensions will depend on your yarn and crochet tension.
- Change the headphone color: Substitute the blue yarn with pink, yellow, or pastel green to match your personal style.
- Choose a different closure: Use a secure snap button or toggle button instead of the standard 1 cm button.
- Keep the bunny face simple: Use small black felt eyes and a cross-shaped embroidered mouth for the clean, cute expression.
- Use it for small essentials: The pouch can hold earbuds, coins, and other small items that fit comfortably inside.
Pattern Abbreviations & Terminology
This pattern uses US crochet terminology.
- ch: Chain
- sc: Single crochet
- inc: Increase; work 2 single crochet stitches in the same stitch.
- dec: Decrease; work 2 stitches together to decrease by 1 stitch.
- sl st: Slip stitch
- BLO: Back loop only
- FLO: Front loop only
- Rnd: Round
- Row: Row
- st(s): Stitch(es)
- Magic ring: An adjustable loop used to begin crocheting in the round.
- Fasten off: Cut the yarn and pull the end through the final loop to secure it.
Step-by-Step Detailed Crochet Instructions
Part 1: Main Body (White Yarn)
The main body forms the rounded pouch. Begin with a foundation chain and crochet around both sides of it to create an oval base. Continue in joined rounds to build the sides and finish with a button loop.
Foundation: Chain 13.
Round 1: Skip the first chain from the hook. Work 2 sc in the second chain, placing a stitch marker in the first of these 2 stitches to mark the beginning of the round. Work 1 sc in each of the next 10 chains. Work 3 sc in the final chain. Working along the opposite side of the foundation chain, work 1 sc in each of the remaining 11 stitches while working over the yarn tail to hide it. Total: 26 stitches.
Round 2: Remove the marker. Slip stitch into the marked stitch to join, pull tight, and chain 1. Work 1 inc in each of the first 2 stitches. Work 1 sc in each of the next 10 stitches. Work 1 inc in each of the next 3 corner stitches. Work 1 sc in each of the next 10 stitches. Work 1 inc in the final stitch. Total: 32 stitches.
Round 3: Slip stitch to join and chain 1. Work (1 sc, 1 inc) x 2. Work 1 sc in each of the next 10 stitches. Work (1 sc, 1 inc) x 3. Work 1 sc in each of the next 11 stitches. Work 1 inc in the final stitch. Total: 38 stitches.
Rounds 4–10: Slip stitch to join and chain 1. Work 1 sc in every stitch around. Total: 38 sc per round.
Round 11: Slip stitch to join and chain 1. Work 1 sc in the first stitch, 1 dec over the next 2 stitches, 1 sc in each of the next 18 stitches, 1 dec over the next 2 stitches, and 1 sc in each of the remaining 15 stitches. Total: 36 stitches.
Rounds 12–13: Slip stitch to join and chain 1. Work 1 sc in every stitch around. Total: 36 sc per round.
Round 14: Slip stitch to join and chain 1. Work 1 sc, 1 dec, 16 sc, 1 dec, and 15 sc. Total: 34 stitches.
Round 15: Slip stitch to join and chain 1. Work 1 sc in every stitch around. Total: 34 sc.
Round 16 and Button Loop: Slip stitch to join and chain 1. Work 1 sc, 1 dec, and 6 sc.
Create the loop: Chain 12. Skip the first chain from the hook and work 1 sc in each of the next 9 chains back down toward the pouch body.
Resume the body: Work 1 dec over the next 2 stitches of the main body, then work 14 sc to finish the round.
Fasten off and use a tapestry needle to weave in all remaining loose ends.
Teaching Guide: Shaping the Main Body
- Keep the foundation oval even: Work around both sides of the original chain, making sure the increases are placed at the ends as instructed.
- Use a stitch marker: Mark the beginning of the round so you can identify where each joined round starts.
- Check the stitch counts: The pattern specifies 26 stitches after Round 1, 32 after Round 2, and 38 after Round 3. Later rounds have their own specified totals, so check them as you work.
- Test the button loop: Before finishing, check that the loop can fit over your chosen button without pulling the pouch opening out of shape.
Part 2: Rabbit Ears (Make 2 – White Yarn)
The rabbit ears give the pouch its recognizable bunny silhouette. Make two matching ears and leave a long yarn tail on each for sewing them onto the body.
Round 1: Create a magic ring, chain 1, and work 6 sc into the ring. Pull the starting tail tightly to close the ring. Slip stitch to join in the first sc, then chain 1. Total: 6 stitches.
Round 2: Work (1 sc, 1 inc) x 3 around. Fasten off the short starting tail. Slip stitch to join and chain 1. Total: 9 stitches.
Rounds 3-7: Work 1 sc in every stitch around. Total: 9 sc per round.
Finishing: Slip stitch into the first stitch to finish. Fasten off, leaving a long tail for sewing. Make a second identical ear.
Teaching Guide: Positioning the Rabbit Ears
Place both ears on the top rim of the pouch before sewing them in place. Position them symmetrically on either side of the back closure loop or strap. Check that both ears have a similar height and angle, then use the long yarn tails to sew them securely to the body.
Part 3: Miniature Headphones (Blue Yarn)
The miniature headphones consist of two rounded earpieces and a connecting chain band. These decorative components give the pouch its distinctive headphone-wearing bunny design.
Earpieces (Make 2)
Round 1: Create a magic ring, chain 1, and work 8 sc into the ring. Pull the ring tightly closed. Slip stitch to join and chain 1. Total: 8 stitches.
Round 2: Work 1 inc in the first stitch, 1 inc in the second stitch, and an increase in every stitch around. Slip stitch to join and chain 1. Total: 16 stitches.
Round 3 (BLO): Working entirely through the back loop only, work 1 sc in each stitch around. Slip stitch to join and chain 1. Total: 16 sc.
Round 4: Working through both loops normally, work 1 sc in each stitch around. Slip stitch to join and chain 1. Total: 16 sc.
Round 5 (BLO): Working entirely through the back loop only, work 8 decreases sequentially (dec x 8). Total: 8 stitches.
Finishing: Lightly stuff the earpiece with polyester fiberfill. Slip stitch to the first stitch and fasten off, leaving a yarn tail. Use a tapestry needle to stitch the remaining small opening completely closed. Make a second identical earpiece.
Headphone Band & Connection
- Take a strand of blue yarn and anchor it to an unused front loop left open on Round 5 of the first earpiece.
- Chain 30 to form the headphone band.
- Connect the chain directly to an unused front loop on Round 5 of the second earpiece using a slip stitch.
- Fasten off and weave in any remaining yarn ends.
Teaching Guide: Making the Headphones Neat
- Stuff lightly: A small amount of polyester fiberfill is enough to give each earpiece a rounded shape.
- Keep both pieces similar: Compare the earpieces before assembly so they look balanced when attached to the pouch.
- Check the connecting band: Lay the chain between both earpieces and make sure it is not twisted.
- Preserve the unused front loops: These loops are used to attach the headphone band, so keep them accessible while finishing the earpieces.
Assembly & Finishing Instructions
Once the body, ears, and headphones are complete, assemble the pieces and add the facial features and button closure.
Step 1: Attach the Ears
Position the two rabbit ears symmetrically on the top rim of the main pouch body, directly on either side of the back closure loop or strap. Use the long yarn tails to sew them securely in place.
Check the placement from the front before completing the sewing so the ears look balanced.
Step 2: Add the Facial Features
Cut two small oval or elliptical shapes from black felt to create the eyes.
Align the eyes centrally between the ears, positioned vertically between Rounds 5 and 6 down from the pouch opening, with approximately 4 stitches between them. Glue them securely in place using hot glue.
Using separated strands of black embroidery yarn, stitch a small cross-shaped mouth directly underneath and between the eyes.
Teaching Guide: Positioning the Face
Place the felt eyes on the pouch temporarily before applying glue. Check that they are at the same height and have an even gap between them. Once their placement looks balanced, attach them carefully and stitch the mouth beneath them. Keeping the mouth centered helps preserve the simple, recognizable bunny expression.
Step 3: Attach the Button
On the back of the pouch, align the 1 cm button directly underneath the foundation-chain line, corresponding vertically with the back closure loop. Sew the button securely in place so the loop pulls snugly over it to fasten.
Test the loop over the button before using the pouch. The closure should hold the opening together without being excessively tight.
Step 4: Attach the Headphones
Place your earbuds inside the pouch to give the base its natural rounded form.
Position the completed blue headphones on the outer left and right sides of the pouch, making sure the connecting chain band stays untwisted across the back. Apply hot glue carefully to fix the headphones in place.
Check the position of both earpieces before allowing the glue to set. Keep the button loop and pouch opening clear so the pouch can still be opened and closed properly.
Step 5: Final Finishing Check
- Make sure both ears are sewn securely to the top of the pouch.
- Check that the felt eyes and embroidered mouth are centered.
- Confirm that the button and closure loop fit together properly.
- Ensure the headphone band is untwisted and both earpieces are attached securely.
- Weave in any remaining yarn ends and trim excess yarn.
Allow the glued details to cool completely before using the pouch.
How to Use Your Miffy Pouch
This little bunny pouch is designed for small essentials that fit comfortably inside its compact body.
- Store wireless earbuds: Keep AirPods or other small wireless earbuds inside when they are not in use.
- Carry small coins: Use the pouch for a few coins or other tiny items you want to keep together.
- Hold little accessories: Store small, lightweight accessories that fit without stretching the crocheted body.
- Give it as a handmade gift: Pair the finished pouch with another small handmade item for a thoughtful gift.
Before placing your items inside, check that they fit comfortably and that the button loop closes securely. The pouch is intended for small essentials rather than bulky objects.