Crochet Hat Hair Ties Pattern – Cute Mini Accessories
Crochet hat hair ties bring a cheerful twist to everyday hairstyles with their tiny handmade charm. These miniature hats are more than simple accessories; they also make thoughtful gifts and delightful decorations for hair bands.
Their playful design gives you endless ways to mix colors, textures, and creative details. One tiny detail hidden in the final crochet design is often. What makes these miniature hats look far more charming than they first appear.

Making these hair ties is quick, relaxing, and satisfying, even if you’re using leftover yarn. With a crochet hook, a small amount of yarn, fiberfill, and a hair band. You can create an adorable miniature hat topped with a cute little bow.
Each round gradually reveals the tiny crochet hat’s shape. Making the finished hair tie look far more detailed and charming than the simple stitches would ever suggest.
Credit Dream Weaver Crochet
Materials & Tools Needed
- Hook: 2.5 mm crochet hook
- Yarn: Two colors of 4-ply cotton yarn (e.g., olive green for the hat and pink for the bow)
- Hair Band: A good-quality elastic hair tie
- Other Tools:
- Tapestry needle
- Stitch marker
- Fiber fill
- Scissors
Finished Size & Customization Ideas
- The finished mini crochet hat will fit snugly onto a hair tie and can be customized:
- Colors: Use your favorite yarn colors (e.g., match with an outfit or occasion).
- Embellishments: Add beads, sequins, or tiny appliqués to the bow or hat brim for extra flair.
- Size Variations: Adjust yarn size and hook size to create a larger or smaller hat.
Pattern Abbreviations & Terminology
- ch: Chain
- sc: Single Crochet
- hdc: Half Double Crochet
- dc: Double Crochet
- sl st: Slip Stitch
- st(s): Stitch(es)
- magic circle: A loop to begin crocheting in the round
- Front Loop: Work only in the front loop of the stitch

Step-by-Step Detailed Crochet Instructions
Main Hat:
Round 1:
- Start with a magic circle.
- Work 6 sc into the magic circle.
- Pull the tail to close the circle and sl st into the first sc to close the round. (6 sts)
Round 2:
- Ch 1.
- Work 2 sc into each st around. (12 sts)
- Sl st into the first sc to finish the round.
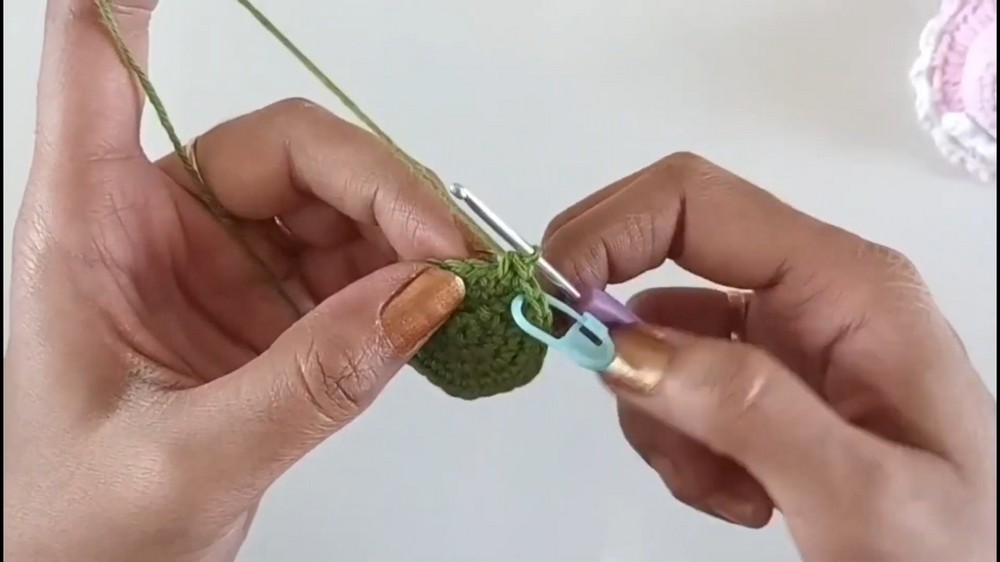
Round 3:
- Ch 1.
- [1 sc in the next st, 2 sc in the following st] – repeat the pattern around. (18 sts)
- Sl st into the first sc to finish the round.
Round 4 (Final Increase Round):
- Ch 1.
- [1 sc in the next 2 sts, 2 sc in the following st] – repeat around. (24 sts)
- Sl st into the first sc to finish the round.
Rounds 5-8 (No Increases):
- Work 1 sc into each st around for 4 rounds.
- Do not sl st at the end of each round – use a stitch marker to mark the beginning of the round for continuous rounds. (24 sts per round)
- After completing Round 8, sl st into the first sc to finish.
Round 9 (Brim of the Hat):
- Work this round in front loops only.
- Start with a sl st into the first front loop, then ch 2.
- Into the same front loop, work 1 hdc, then work 2 hdc into the front loop of each stitch around. (48 hdc)
- Sl st to the top of the ch-2 to finish.

Round 10 (Final Decorative Round):
- Ch 1.
- [1 sc, ch 3, skip 2 sts] – repeat the pattern around. This creates a chain loop border on the brim.
- For the final loop, ch 3, then sl st into the first sc to join.
- Cut the yarn and weave in the ends.
Bow:
- Using the second yarn color (e.g., pink), leave a 5 cm tail before starting and make a slip knot.
- Ch 3.
- Skip the first two chains and work 2 hdc into the last chain.
- Ch 2 and slip stitch into the same chain space (this forms one bow loop).
- Repeat Steps 3-4 once more to form the second bow loop.
- Cut the yarn, leaving a 10 cm tail, and tighten the magic circle.
- Use the 5 cm and 10 cm tails to wrap and cinch the center of the bow, creating its shape.
- Tie a knot at the back and trim the excess yarn.
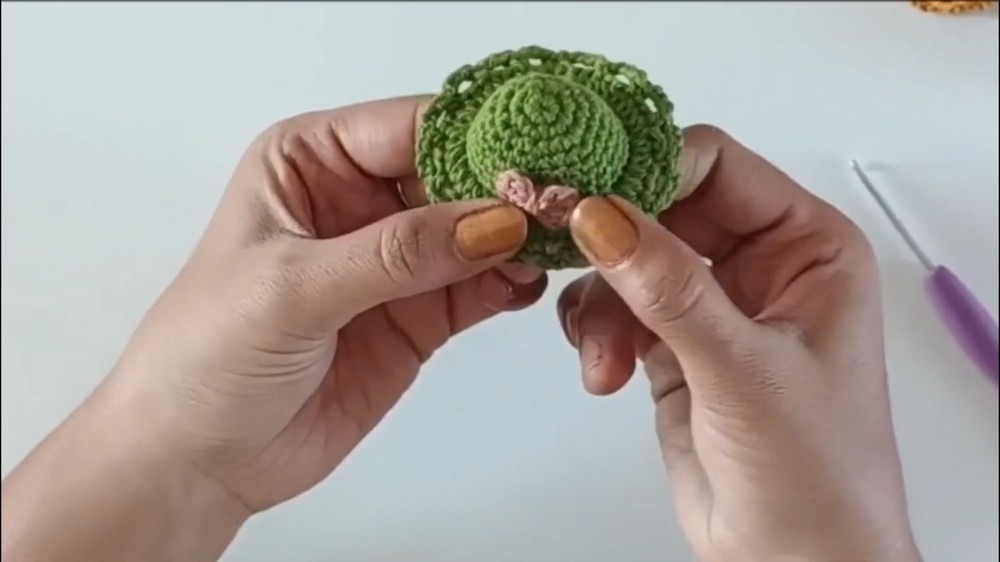
Attaching the Bow to the Hat:
- Position the bow on the seventh round of the hat.
- Use a tapestry needle to thread the bow’s tails through the stitches on the hat and tie securely.
- Optionally, use hot glue to hold the bow firmly in place.
Closure Flap with Hair Tie:
- Using the hat’s main yarn color:
- Start with a magic circle.
- Ch 3 (counts as the first dc).
- Work 5 more dc into the magic circle. (6 dc so far)
- Insert the hair tie into the loop of the magic circle, then continue crocheting over it:
- Work 12 dc over the hair tie into the magic circle. (18 dc total)
- Flip the hair tie to the other side of the magic circle and work 6 more dc. (24 dc total)
- Pull the tail to close the magic circle and sl st into the top of the starting ch-3 to complete the round.
- Cut the yarn, leaving a long tail for sewing.
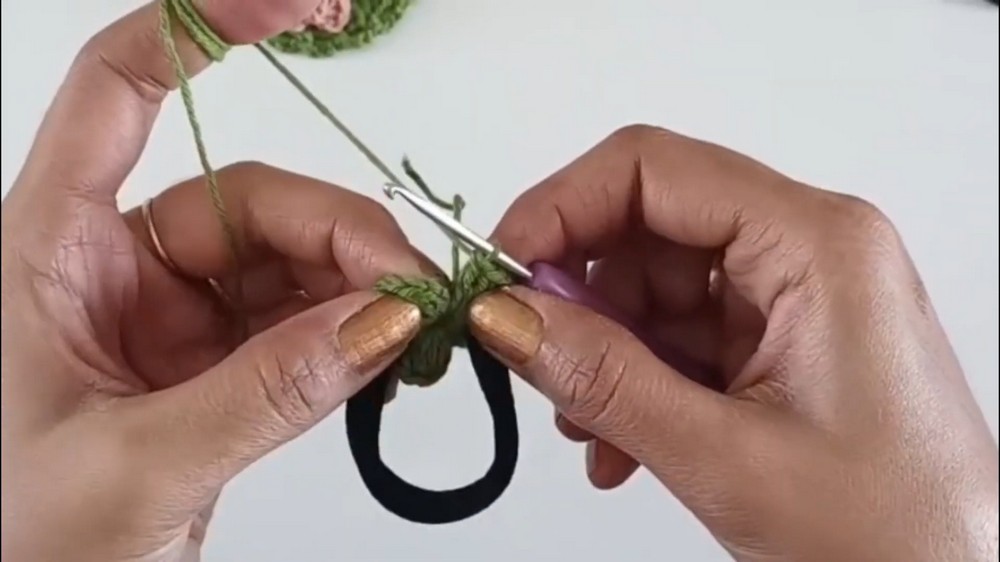
Assembly:
- Position the closure flap (with the hair tie) on the back center of the hat.
- Use a tapestry needle and the closure flap’s yarn tail to sew it onto the back loops of Round 8 of the hat.
- Ensure you pass through both the back loops of the hat and the stitches of the closure flap.
- When halfway through sewing, stuff the hat lightly with fiber fill.
- Complete sewing, tie a knot to secure, and weave in any loose ends.

Customization Tips
- Add embellishments (buttons, appliqués, or decorative stitching) for a more creative and playful look.
- Experiment with different yarn weights and hook sizes to make the hat larger or smaller.