Candy Corn Crochet Pattern – Easy Halloween Amigurumi Tutorial
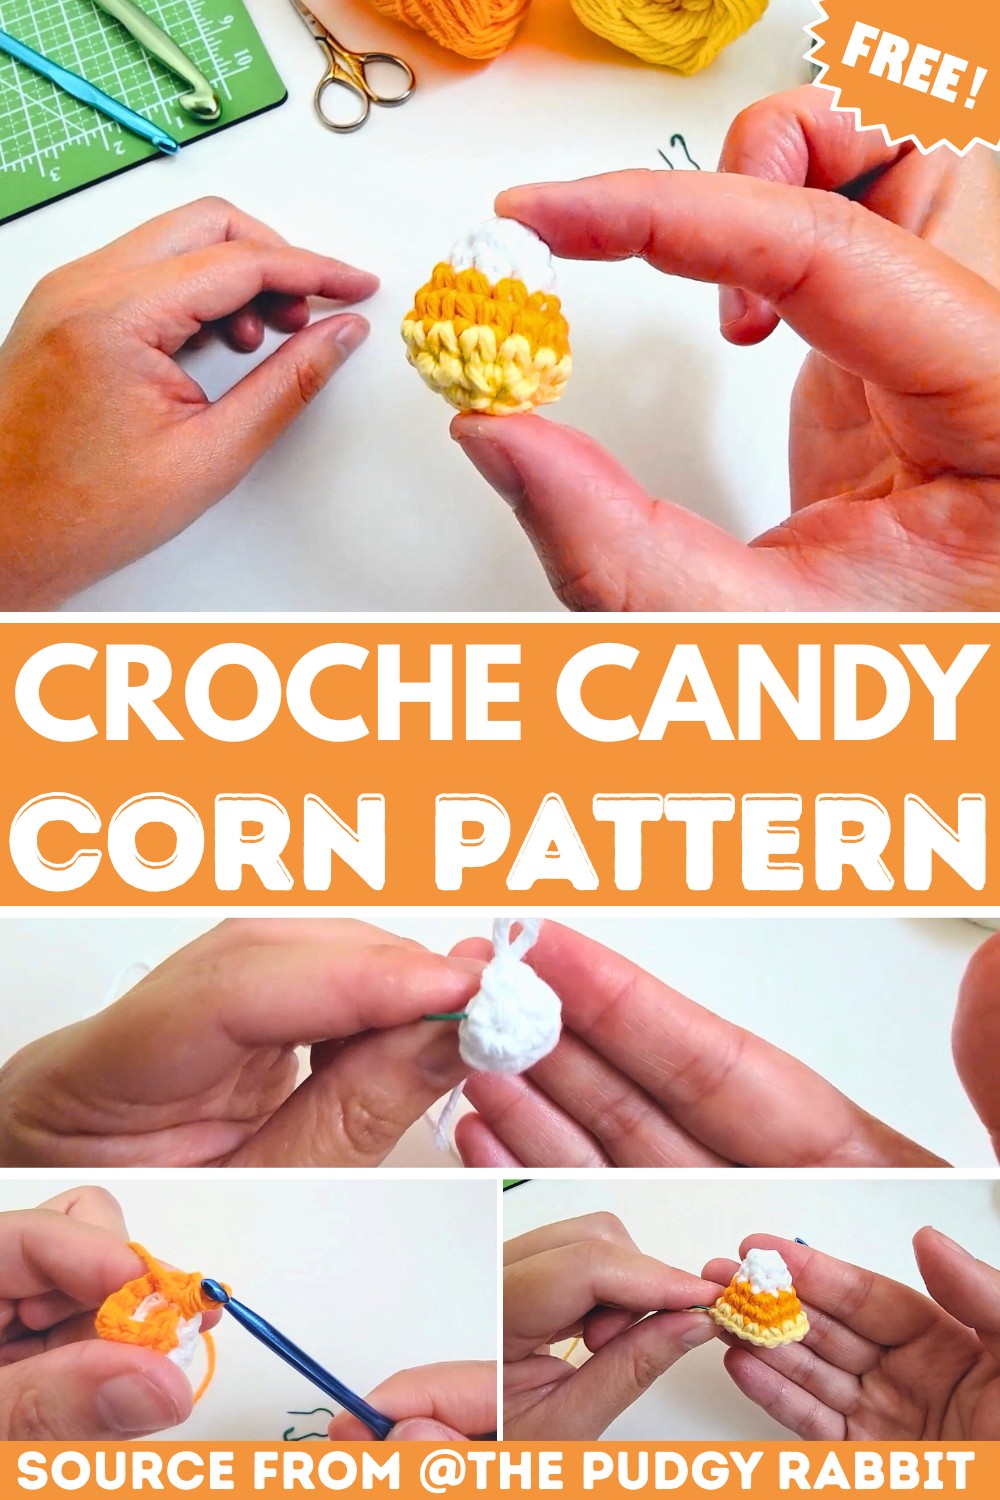
This adorable, bite-sized candy corn is crocheted in one single piece, making it a perfect pattern for beginners or anyone looking for a quick, festive decoration or gift. Its smooth transitions of white, orange, and yellow bring to life the classic Halloween treat.

This tiny crochet candy corn is a soft, colorful treat that never melts. It has the classic white, orange, and yellow stripes, but instead of sugar, it’s made with yarn. You can use it as Halloween decor, a toy for gentle play, a keychain, or a bowl full of “candy” that kids can actually hold and squeeze. It’s small, cute, and perfect for anyone who loves fall and wants a sweet touch around their home.
Candy Corn Crochet Pattern
This crochet candy corn pattern uses simple stitches and just a few basic materials, so it’s friendly for beginners. You start at the top in white, switch to orange, then finish in yellow to build that familiar candy corn shape. The color changes are neat, and the piece is lightly stuffed, so it keeps its shape. Each one works up quickly, which means you can make several in one sitting, great for party favors, classroom treats, or little decorations to tuck onto shelves and desks. Even if you’re new to crochet, this Halloween pattern feels manageable and satisfying, with a clear finish that you can be proud of.
Credit The Pudgy Rabbit
Key Features & Construction Highlights:
- One-Piece Construction: Made as one continuous triangle-shaped piece, starting with white at the top and ending with yellow at the base.
- Smooth Color Changes: Keeps the candy corn stripes clean and bright.
- Beginner-Friendly Stitches: Mainly uses single crochet (sc) with simple increases and decreases to shape the piece.
- Polished Finishing: Weaving in yarn tails and lightly stuffing keeps the candy corn clean, compact, and professional-looking.
- Customization Options: Add a face, hanging loop, or use creative color schemes for variety.
The candy corn starts from the triangular top using white yarn. This section begins with just a few single crochet stitches worked into a circle (using a magic ring or chain method) and incrementally increases each round. A stitch marker is a handy addition here to mark the start of each round as the piece widens and grows.

Once the initial white tip is finished, a seamless color change shifts the pattern into its vibrant orange middle section. To keep the transitions smooth, finish the last single crochet of a round by pulling through the next color. After knotting off the tails of the white and orange yarn to prevent unraveling, simply tuck the tails into the candy corn as you continue crocheting. The orange section introduces larger stitch counts per round and begins to define the wide base of the candy corn.

The pattern then moves to the bottom yellow section, where the progression of the increases brings it to its final width. This section wraps up with decreases that taper the piece flat at the underside. A firm yet soft stuffing with fiberfill at this stage gives the candy corn its signature plush shape while still maintaining the base’s flat, closed look.

The last round uses decreases to close the bottom neatly, leaving only a small gap. This gap is then cinched closed with a quick slip stitch and woven in using a yarn needle, giving the piece a polished finish. You can leave the candy corn as-is or add embellishments like a felt face or embroidered smile to give it personality.
Video Tutorial
Materials & Tools Needed
- Yarn:
- White
- Orange
- Yellow
(Light-weight yarn recommended)
- Crochet Hook:
- Size appropriate to your yarn (suggested: 2.5mm or 3mm)
- Stitch Marker:
- To keep track of rounds
- Scissors
- Yarn Needle:
- For weaving in ends
- Polyfiber/Fiberfill:
- To stuff the candy corn
Finished Size
The finished candy corn size will vary depending on yarn thickness and crochet hook size, but typically it measures approximately 2 to 3 inches tall, making it perfect for keychains, garlands, or decorations.
Customization Ideas
- Use glitter or metallic yarn for a sparkling look.
- Thread some candy corns on yarn to create a Halloween garland.
- Add tiny jump rings for attaching them to keychains or gifts.
Pattern Abbreviations & Terminology
- ch: Chain
- sc: Single Crochet
- inc: Increase (work 2 single crochets into the same stitch)
- dec: Decrease (single crochet two stitches together)
- sl st: Slip Stitch
This pattern is worked in continuous rounds, meaning you won’t join each round with a slip stitch. Use a stitch marker to mark the beginning of each round.

Step-by-Step Instructions
Candy Corn Components
Candy corn is made in a single piece, working from the top (white) to the base (yellow). Follow stitch counts and color changes specified.
Round Breakdown
- Round 1 (White Yarn):
- Start: Chain 2.
- Single crochet 4 into the second chain from the hook.
- Total stitches: 4.
- Round 2:
- Pattern: (sc 1, inc 1). Repeat the set 2 times.
- Total stitches: 6.
- Use a stitch marker to mark the start of the round. Adjust tight stitches using a yarn needle if required.
- Round 3:
- Pattern: (sc 1, inc 1). Repeat the set 3 times.
- Total stitches: 9.
- Color Change:
- Complete the last stitch of the round as: Work the sc until two loops remain on the hook, then yarn over with orange yarn and pull through. This transitions to orange yarn. Trim the white yarn, leaving a little tail.
- Round 4 (Orange Yarn):
- Pattern: (sc 2, inc 1). Repeat the set 3 times.
- Total stitches: 12.
- Finishing: Knot the ends of the white and orange yarn together and tuck them inside the candy corn for a polished look.
- Round 5:
- Pattern: (sc 3, inc 1). Repeat the set 3 times.
- Total stitches: 15.
- Color Change:
- On the last stitch of the round, work until two loops remain, then yarn over with yellow yarn and pull through. Trim the orange yarn, leaving a small tail.
- Round 6 (Yellow Yarn):
- Pattern: (sc 4, inc 1). Repeat the set 3 times.
- Total stitches: 18.
- Knot the orange and yellow yarn tails together and tuck them into the top for neatness.
- Round 7:
- Pattern: (sc 1, dec 1). Repeat the set 6 times.
- Total stitches: 12.
- Round 8 (Final Round):
- Pattern: Decrease 4 stitches in a row.
- Stuff the candy corn with fiberfill/polyfill.
- Proceed to decrease 2 stitches.
- Finishing:
- Skip one stitch and sl st in the next stitch.
- Total stitches: 4.
- Fasten off, leaving a small tail. Use a yarn needle to weave in the end. Draw the tail in and out of the stitches, then tuck it neatly inside.
Finishing Techniques
- After completing Round 8, ensure the candy corn is firmly stuffed but not overfilled.
- Use a yarn needle (or crochet hook) to weave and hide all ends for a clean finish.
- Optional: Add embroidery details or facial expressions with black yarn or embroidery thread for a playful look.
Notes
- This pattern works up quickly, making it suitable for beginners and perfect for bulk production (e.g., Halloween decorations).
- Feel free to add a hanging loop for ornaments or keychains.
Troubleshooting and Suggestions:
- Dealing With Color Changes: When switching colors, always finish the last stitch of the current round by pulling through the new yarn color. This technique creates less visible joins and keeps your stripes neat.
- Tension Consistency: Make sure your crochet tension is even throughout the pattern to avoid lopsided shaping or a distorted triangular appearance.
- Filling the Candy Corn: Stuff firmly but avoid overfilling, which can cause the stitches to stretch unevenly and the fiberfill to poke through.
- Creative Modifications: Play around with sizes! Use smaller hooks and thinner yarn for tiny candy-corn keychains or increase hook and yarn size for chunky, oversized plushies. You can even try different color combos for a unique twist, like pastel ombré for spring decor.
- Extra Embellishments: Add googly eyes, felt accents, or embroidered details. A black embroidered grin can easily make it into a playful Halloween character. Or make it into an ornament or gift tag by affixing a hanging loop or keychain ring.