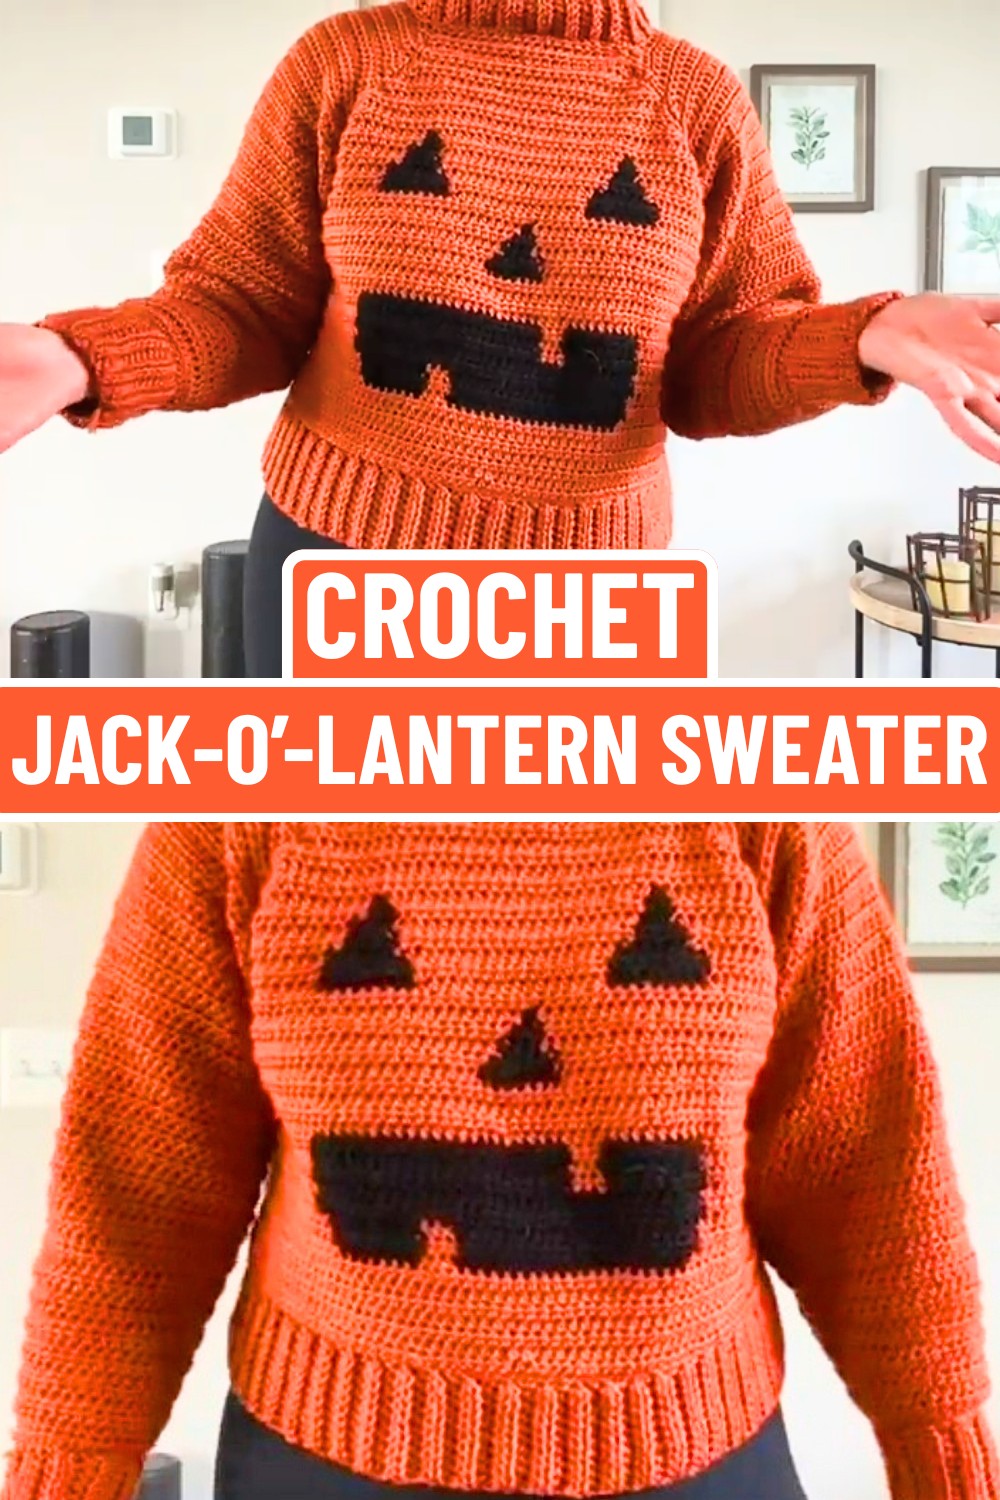
Get in the Halloween spirit with this fun and festive crochet Jack-o’-Lantern sweater—cozy, customizable, and perfect for spooky season vibes.
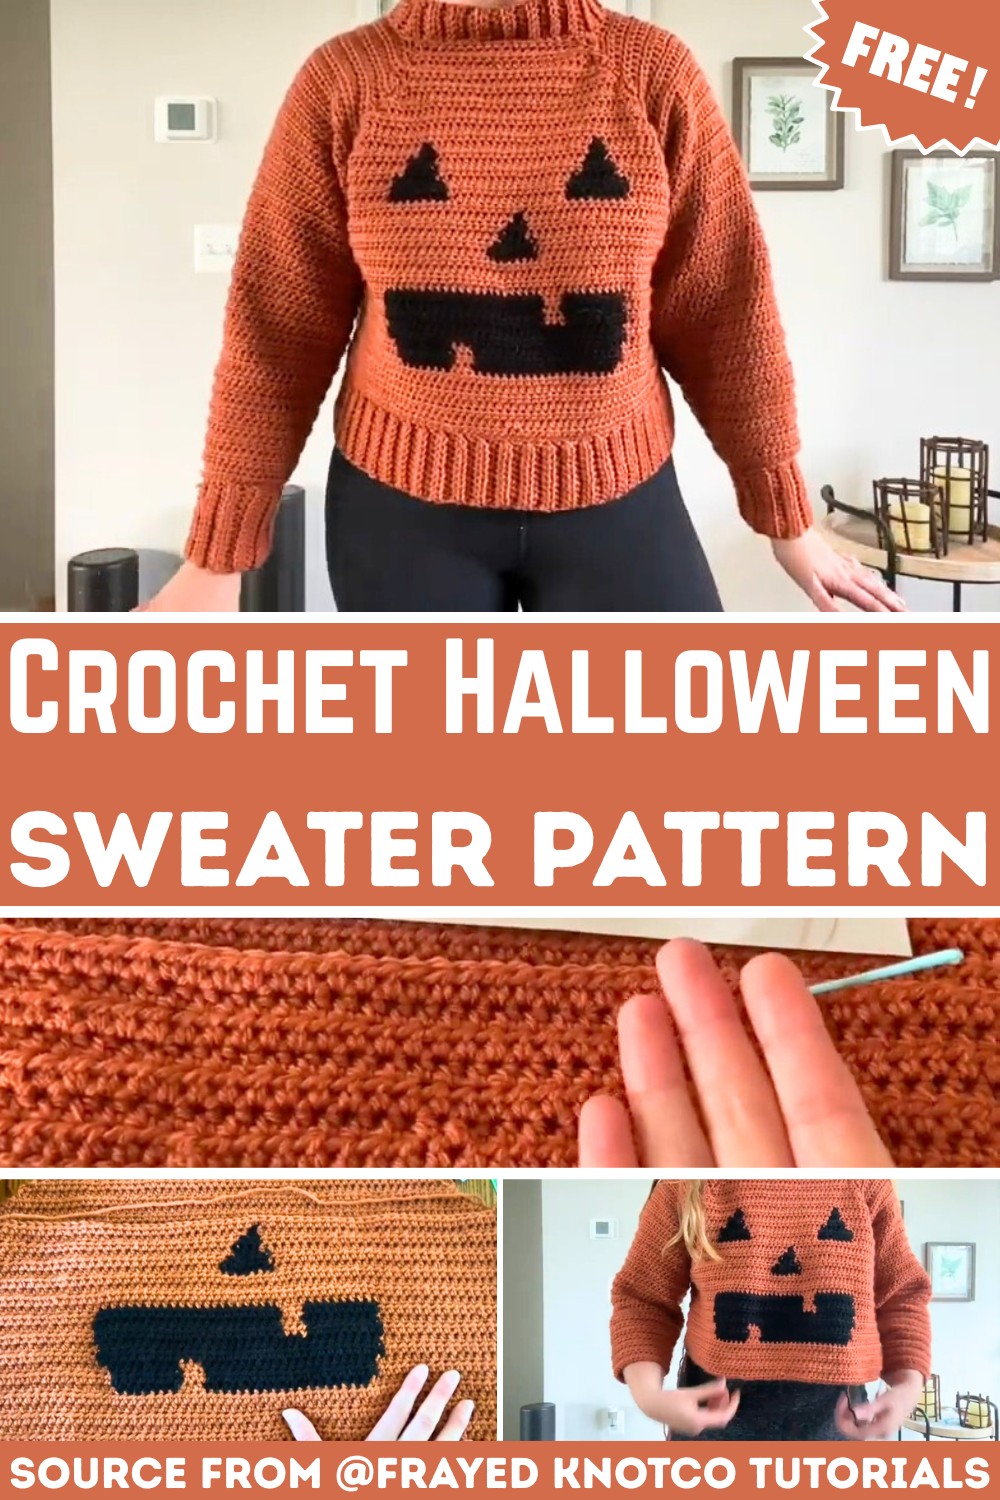
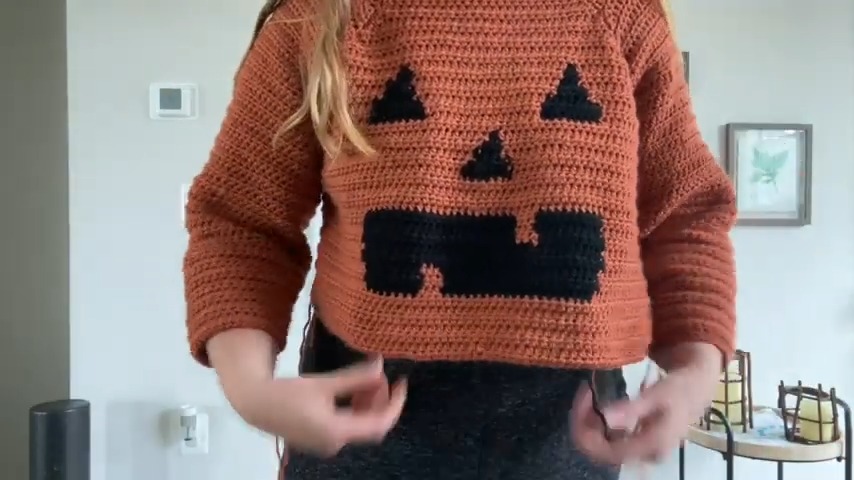
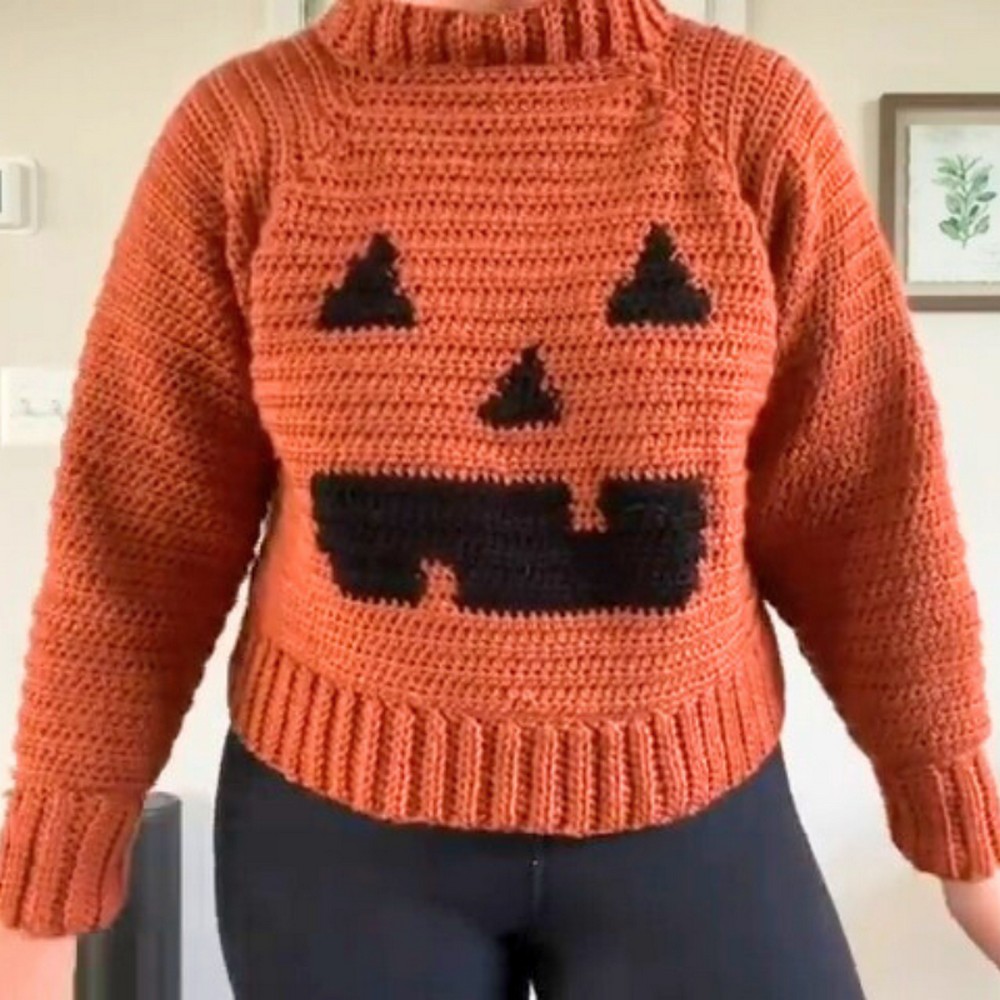
This adorable Halloween sweater is the perfect blend of spooky and stylish. It features a classic jack-o’-lantern face design, making it a cozy, wearable way to celebrate Halloween. If you’re dressing up for a party or just want to show your love for Halloween during chilly days, this sweater has you covered—literally.
Jack-O’-Lantern Crochet Sweater Tutorial
What makes it truly fun is that it’s customizable, from the size of the pumpkin face to the fit of the sweater. You’ll create a cheerful Halloween vibe while practicing creativity and crochet skills. The process is simple: crochet separate panels for the front, back, and sleeves, then stitch everything together. Top it off with ribbed cuffs, a neckline, and a hemline to give it a polished look.
Credit Frayed KnotCo Tutorials
Key Features & Construction Overview
- Materials Used: Loops & Threads Impeccable in “Baked Clay,” Red Heart Super Saver in black, and a medium-sized crochet hook.
- Sizing and Yarn Usage: Designed for a small to medium size; uses approximately 4–5 skeins of yarn.
- Main Stitches and Techniques: Half double crochet (HDC), ribbed edging, free-form color work for Jack-o’-Lantern features.
- Panels: Constructed from four pieces—front, back, and two wide sleeves—then stitched together.
- Design Elements: Cropped sweater with a bold jack-o’-lantern face on the front, featuring adjustable eyes, nose, and grin.
- Finishing Touches: Ribbed cuffs, a rounded neckline, and a ribbed hem for structure and polish.
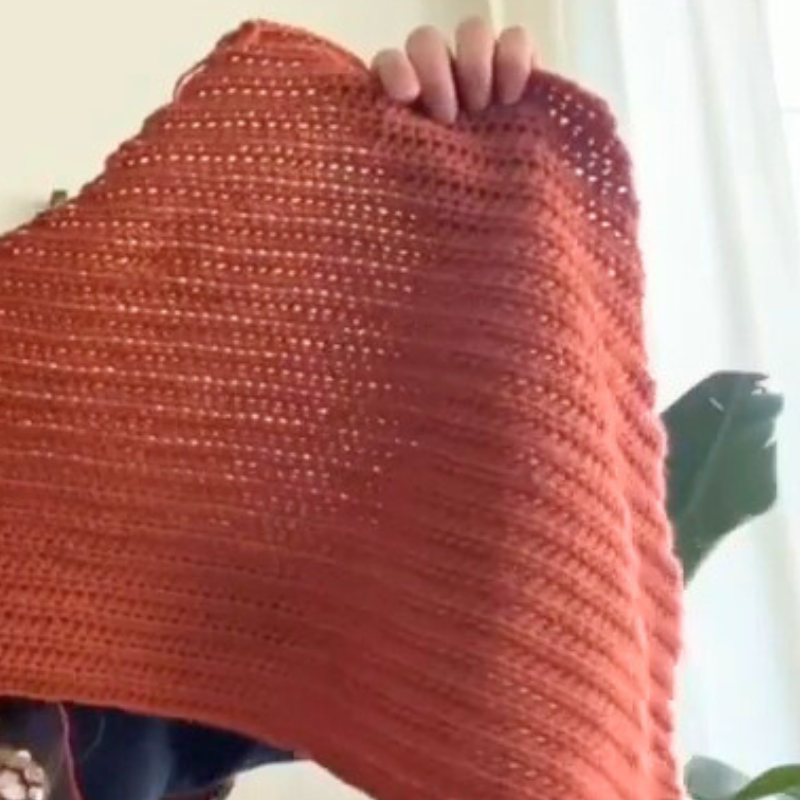
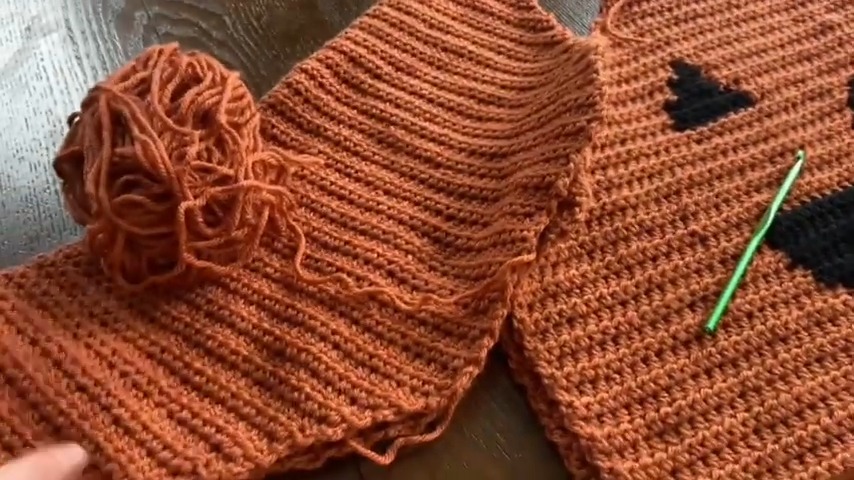
To bring this cozy, customizable Halloween sweater to life, the pattern begins with creating the back panel using half double crochet (HDC), a versatile and relaxing stitch. The creator recommends starting with this panel to serve as a template when laying out your design.
The jack-o’-lantern face, the star of the show, is freehanded on the front panel with black yarn. Simple geometric shapes (a triangle nose, eyes, and a wide smile) are incorporated while working in rows, and color changes are seamlessly added during the crocheting process. The designer suggests folding the panel in half and using markers to ensure symmetry for the facial features. Additional details, like “teeth” in the jack-o’-lantern smile, are added by switching back and forth between orange and black yarn for a playful effect.
Once both panels are completed, it’s time to tackle the sleeves. To achieve a puff or wide-sleeve look, the creator gradually increases the stitch count as the sleeve moves upward, flaring slightly toward the armhole. The sleeves are cleverly constructed as flat pieces to be sewn together.
After assembling the front, back, and sleeves, attention turns to the finishing details. Ribbing is added to the cuffs, hem, and neckline using back loop only (BLO) crochet. This technique gives the sweater a polished texture and structure while helping to round out the neckline for a comfortable fit. The final touch includes weaving in ends and smoothing out any edges to ensure a clean, wearable finish.
Materials & Tools Needed
- Yarn:
- Main Color (Burnt Orange): Impeccable Loops & Threads yarn, shade “Baked Clay” (4 skeins, 285 yards each).
- Accent Color (Black): Red Heart Super Saver yarn (partial skein for design details, such as the Jack-O’-Lantern face).
- Crochet Hook: Size mentioned in the original tutorial (though unspecified in the transcript). Likely a 5mm (H-8) or 5.5mm (I-9) for worsted-weight yarn.
- Tapestry Needle: For weaving in ends and stitching panels together.
- Sweater Template: An existing sweater or sweatshirt slightly smaller than the intended finished sweater to act as a sizing guide.
- Scissors.
- Paper & Marker: For sketching the Jack-O’-Lantern face placement.
Finished Size & Customization Ideas
- Size in Tutorial: Designed for small/medium sizes, with a cropped length. Can be adjusted for larger or smaller sizes by increasing or decreasing stitch counts and length.
- Customization Ideas:
- Make the sweater longer by adding more rows to the front/back panel or extending the hem.
- Add more teeth to the Jack-O’-Lantern mouth for variety.
- Modify the neckline (wide, rounded, or tighter based on preference).
- Use different colors for the pumpkin body or face for a unique look.
Pattern Abbreviations & Terminology
- Ch: Chain
- HDC: Half Double Crochet
- St(s): Stitch(es)
- Sl St: Slip Stitch
- TBL: Through Back Loop
- Terms are written in US crochet terminology.
Step-by-Step Crochet Instructions
1. Back Panel
- Foundation Chain:
- Create a foundation chain slightly shorter than the desired width of the sweater back. (It should stretch to fit when worn.)
- The designer suggests keeping the chain loose to avoid pulling.
- Rows:
- Work Half Double Crochet (HDC) across the foundation chain for each row.
- At the end of each row: Turn, Ch 1, and repeat.
- Continue until the panel covers the desired sweater length (suggested as cropped but customizable).
2. Front Panel (Jack-O’-Lantern Face Side)
- Follow the same process as the back panel, but adjust for the Jack-O’-Lantern design placement.
- Planning the Face:
- Draw out a face on paper and visualize its placement on the front panel.
- Identify where (row and stitch number) to start the eyes, nose, and mouth.
- Jack-O’-Lantern Face:
(Black yarn is used for the eyes, nose, and mouth, while the main burnt-orange yarn forms the pumpkin’s background.)- Mouth (Black Section):
- Identify the central stitches for the mouth and switch to black yarn for those stitches.
- Use color changes by pulling through the new yarn during the final loop of the last stitch before the color switch.
- If creating jagged “teeth,” switch back to orange for small grouped stitches (e.g., 2–3 stitches wide) where teeth are desired.
- Nose (Triangle):
- Begin with a wider row of black in the center and reduce the stitch count in subsequent rows to form a triangle shape.
- Skip 1–2 stitches on each row to taper the triangle up.
- Eyes (Triangle Shapes):
- Use the same technique as the nose but place the triangles symmetrically above the mouth.
- Adjust size and placement for desired results.
- Mouth (Black Section):
- Finishing the Front Panel:
- Complete rows above the Jack-O’-Lantern face until the front panel matches the back panel in size.
3. Sleeves
- Foundation Chain:
- Create a foundation chain to match the desired wrist circumference, adding a bit of looseness for comfort.
- Turn and work HDC for subsequent rows.
- Increasing for Upper Arm:
- Gradually increase stitch counts to make the sleeve wider as you near the upper arm. (Add 1–2 stitches at each side every few rows.)
- Reference the sweater template for guidance on width changes.
- Sleeve Length:
- Continue working until the sleeve length matches your preference, ensuring it aligns with the rest of the sweater.
- Second Sleeve:
- Replicate the process for the second sleeve, ensuring symmetry.
4. Assembly
- Seaming Panels:
- Using the tapestry needle and matching yarn, seam the sides of the front and back panels together (leaving space for the armholes).
- Adding Sleeves:
- Attach each sleeve to the armholes and seam up the sides. Use safety pins or stitch markers to align the pieces while stitching.
5. Ribbing
(Neckline, Sleeve Cuffs, and Hem)
- Neckline:
- Decide on the neckline width. For a rounded or wide neckline:
- Work a foundation chain long enough to stretch around the neckline circumference.
- Use a ribbing technique (HDC through the back loop—TBL) for a textured effect.
- Attach the neckline ribbing to the sweater using a slip stitch or whip stitch.
- Decide on the neckline width. For a rounded or wide neckline:
- Sleeve Cuffs:
- Create smaller ribbed cuffs using the same method as the neckline.
- Attach to the sleeve ends.
- Hem:
- Create a ribbed hem for the base of the sweater, adjusting its width (e.g., 1–2 inches) based on personal preference.
- Stitch the hem ribbing to the bottom of the front and back panels.
6. Finishing Touches
- Weaving in Ends:
- Use a tapestry needle to weave in all loose yarn ends to secure.
- Trim excess yarn.
- Face Touch-Ups:
- Use additional yarn to smooth uneven edges around the Jack-O’-Lantern face or fix missed stitches.
- Blocking (Optional):
- Gently block the sweater to shape and straighten edges.
Final Notes from Tutorial Creator
- Time Commitment: Completing the sweater may take about 1 week with intermittent work.
- Difficulty Level: Suitable for intermediate crocheters or confident beginners with some experience in color changes and shaping.
Customization Recommendations
- Add additional embellishments (e.g., vines, leaves, or pumpkin stems).
- Experiment with variations of the Jack-O’-Lantern face.
Troubleshooting & Suggestions
Common Issues and Fixes:
- Color Changes: Switching between orange and black? Take care not to pull the yarn too tight to avoid puckering, and make sure to securely weave in the ends for a tidy look.
- Uneven Edges: To keep the sides straight and clean, always work into the first and last stitch of each row, and avoid pulling your starting chain too tight.
- Shaping the Face: If you’re worried about uneven shapes for the Jack-o’-Lantern face, use stitch markers or a paper sketch to plan the layout before adding them.
Creative Modifications:
- Experiment with colors! Try a purple base with green features for a unique twist or a traditional orange and black combination for classic Halloween vibes.
- Add more personality to your jack-o’-lantern face! Play with different shapes for the eyes and mouth—think spooky, goofy, or even cute expressions.
- Not into Halloween? Swap the jack-o’-lantern face for another seasonal or personal design, turning this into a year-round favorite.
- Lengthen or shorten the sweater and sleeves for your ideal fit. A cropped look is great for layering, while extra-long sleeves and hems can add cozy drama.