Warm & Easy Crochet Moss Stitch Sweater Tutorial
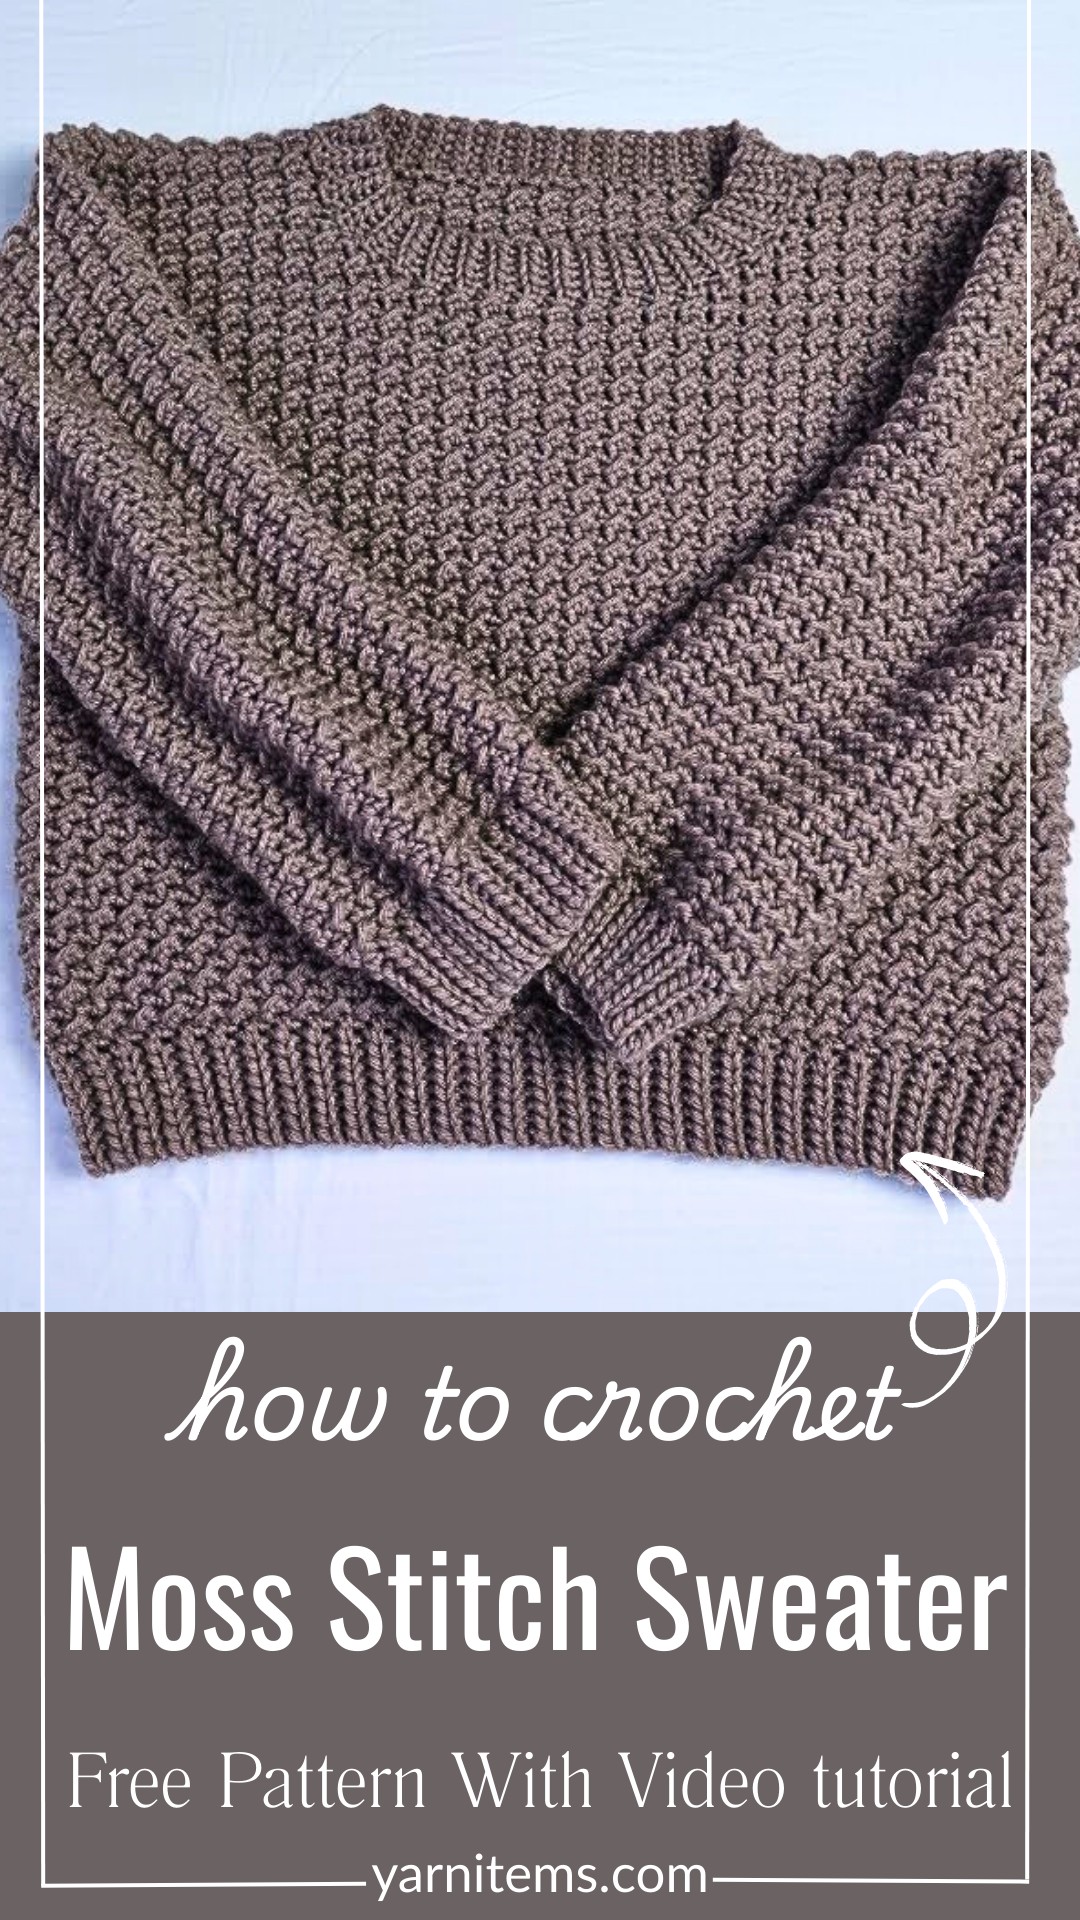
A cozy and textured sweater made using the moss stitch, perfect for staying warm and stylish—crocheted from simple panels with endless customization possibilities.

The Crochet Moss Stitch Sweater is a cozy and stylish handmade garment perfect for everyday wear. With its simple yet visually appealing pattern, this crochet sweater stands out for being warm, comfortable, and lightweight. It’s ideal for chilly days or when you want a relaxed yet fashionable outfit to layer with your favorite accessories.
Crochet Moss Stitch Sweater Pattern
One of the best things about this crochet sweater is how simple it is to make. The moss stitch creates a neat, textured design that looks classy and feels soft to wear. If you’re new to crochet, this sweater pattern offers the perfect way to try a fun, easy technique and create something beautiful at the same time. If you make it for yourself or as a gift, the result is a timeless piece that fits into any wardrobe.
Credit Brenda DIY
Key Features and Construction:
- Panels-Based Design: The sweater is composed of four separate panels—Front, Back, and two Sleeves—that are crocheted individually and assembled.
- Stitch Texture: The moss stitch (single crochet + chain stitch) gives the sweater its signature woven texture and lightweight feel.
- Customization Options: Adjustable sizing through panel width/length changes and neckline choices, with options for tapered sleeves or added ribbing.
- Simple Shaping: The Front Panel includes neckline shaping via stitch decreases, while the Back Panel remains a straightforward rectangle.
- Finishing Details: Includes ribbing and a mock turtleneck or cowl neck for a polished, cozy look.
Crocheting this moss stitch sweater is a satisfying journey from simple shapes to chic wardrobe staples. The pattern centers around creating four flat panels—Front, Back, and two Sleeves—that come together beautifully for a polished finish. Each piece is worked in the moss stitch, a beginner-friendly yet elegant technique that combines single crochets and chains to produce a plush, textured fabric. If you’re looking for a soothing pattern with a consistent flow, this stitch is perfect.

The Front Panel kicks things off. Using a foundation chain (adjustable for your preferred width), the moss stitch is worked row by row. To create a neckline, the last ten rows introduce reduced stitch counts in the center, forming a gentle curve that frames the neck when worn. Meanwhile, the Back Panel is crocheted with the same moss stitch sequence but omits the neckline shaping—a simple rectangle that acts as the sturdy backbone of your sweater.

Next up are the Sleeves, which are worked in the moss stitch and shaped as two long rectangles. Tapering can be added for a more tailored look by decreasing stitches every few rows, though you can stick with straight edges if you prefer a loose, comfy fit. Once all panels are complete, assembly begins! The seams are stitched together using the mattress stitch for a clean and professional finish—first joining the sides of the Front and Back Panels while leaving armhole openings, then adding the Sleeves by aligning them at the shoulder seams.

To put the finishing touches on your sweater, attention shifts to the ribbing. Using a slightly smaller hook, crochet directly onto the hemline, cuffs, or neckline with front and back post double crochet stitches for stretchy, textured edges. For extra flair (and warmth), why not create a mock turtleneck or cowl neck by crocheting additional rows around the neckline? These finishing features elevate your sweater into a truly cozy masterpiece.

Video Tutorial
Step-by-Step Pattern
1. Materials:
To create your Moss Stitch Sweater, gather the following materials:
- Yarn:
- Type: Worsted weight yarn (#4)
- Amount: Approximately 1200–1500 yards (adjust depending on your size).
- Recommended: Acrylic or wool blend for warm but breathable results. Consider yarns like Lion Brand Heartland or Red Heart Soft.
- Crochet Hook:
- Size: 5.5 mm (I/9) or size needed to achieve gauge.
- Additional Tools:
- Tapestry needle (for weaving in ends).
- Stitch markers (helpful for marking seam points or rounds).
- Scissors.
- Measuring tape.
Pattern Instructions:
This sweater is composed of four main panels: Front, Back, and two Sleeves. Each part is crocheted separately and joined at the seams. Follow these steps to recreate the sweater:
Front Panel:
- Foundation Row:
- Chain 70 (or adjust based on your size).
- Turn.
- Row 1:
- Start in the second chain from the hook: 1 sc, ch 1, skip 1 ch.
- Repeat the sequence (1 sc, ch 1, skip 1) across the row until the end.
- Turn.
- Rows 2–50: (adjust row count for length preference)
- Ch 1, 1 sc in the first ch-space, ch 1, skip the next sc.
- Repeat across the row.
- Shape Neck:
- To add a neckline, decrease stitches evenly across the center of your last 10 rows.
- Fasten off and weave in ends.
Back Panel:
- Follow the same steps as the Front Panel, minus the neckline shaping. This will be a simple rectangle.
Sleeves (Make 2):
- Foundation Row:
- Chain 40 (or width required for your arms).
- Turn.
- Row 1:
- Moss stitch pattern: sc, ch 1, skip 1.
- Turn.
- Rows 2–35: (or desired sleeve length)
- Repeat the moss stitch sequence, ensuring each row aligns with the previous.
- To create a tapered sleeve, consider decreasing 1 stitch every 4 rows.
Assembly:
- Lay the Front Panel and Back Panel with the right sides facing inward.
- Use a tapestry needle and mattress stitch to join the sides, leaving space at the top for armholes.
- Attach the sleeves by aligning their centers with the shoulder seams. Sew them into place along the armhole opening.
- Seam the long edges of the sleeves for a clean finish.
Finishing Touches:
- Add a ribbed hem or neckline for a polished look:
- Use a smaller hook (4.5 mm) to crochet ribbing directly onto the hemline. Work rows of front and back post double crochets for a stretchy effect.
- Weave in all ends securely.
- Optional: Create a mock turtleneck or cozy cowl neck by crocheting additional rows around the neckline.
Pattern Question:
Question: Does this pattern work for beginners, or does it require advanced crochet skills?
Answer: This pattern is suitable for intermediate crocheters due to its textured moss stitch design, but confident beginners who are comfortable with basic stitches can tackle it with careful attention to the instructions.
Troubleshooting & Suggestions
- Moss Stitch Mastery: Ensure consistent stitch placement by identifying the chain spaces from the previous row. Use stitch markers if needed, especially when creating decreases for the neckline or tapering the sleeves.
- Edge Alignment: Block your panels before assembly for clean edges that line up smoothly. This step makes sewing easier and ensures a polished silhouette.
- Ribbing: Front and back post stitches can feel tricky at first; practice on scrap yarn to get comfortable before adding ribbing details. Tight ribbing adds elasticity, so choose your hook size carefully for a balance between snug and stretchy.
- Creative Color Play: Experiment with using gradient or ombre yarn for the panels, or crochet contrasting ribbing for a bold pop of color! Stripes or color blocks can also make stunning design features.
- Modifications: Adapt the sweater into a sleeveless vest by omitting the sleeves, or use additional rows to create a dramatic oversized style.