Granny Square Lace Crochet Sweater Pattern
Create a beautiful lace granny square sweater with six crochet motifs, delicate openwork details, shaped shoulders, and ribbed edges, with step-by-step guidance for bringing every section together.
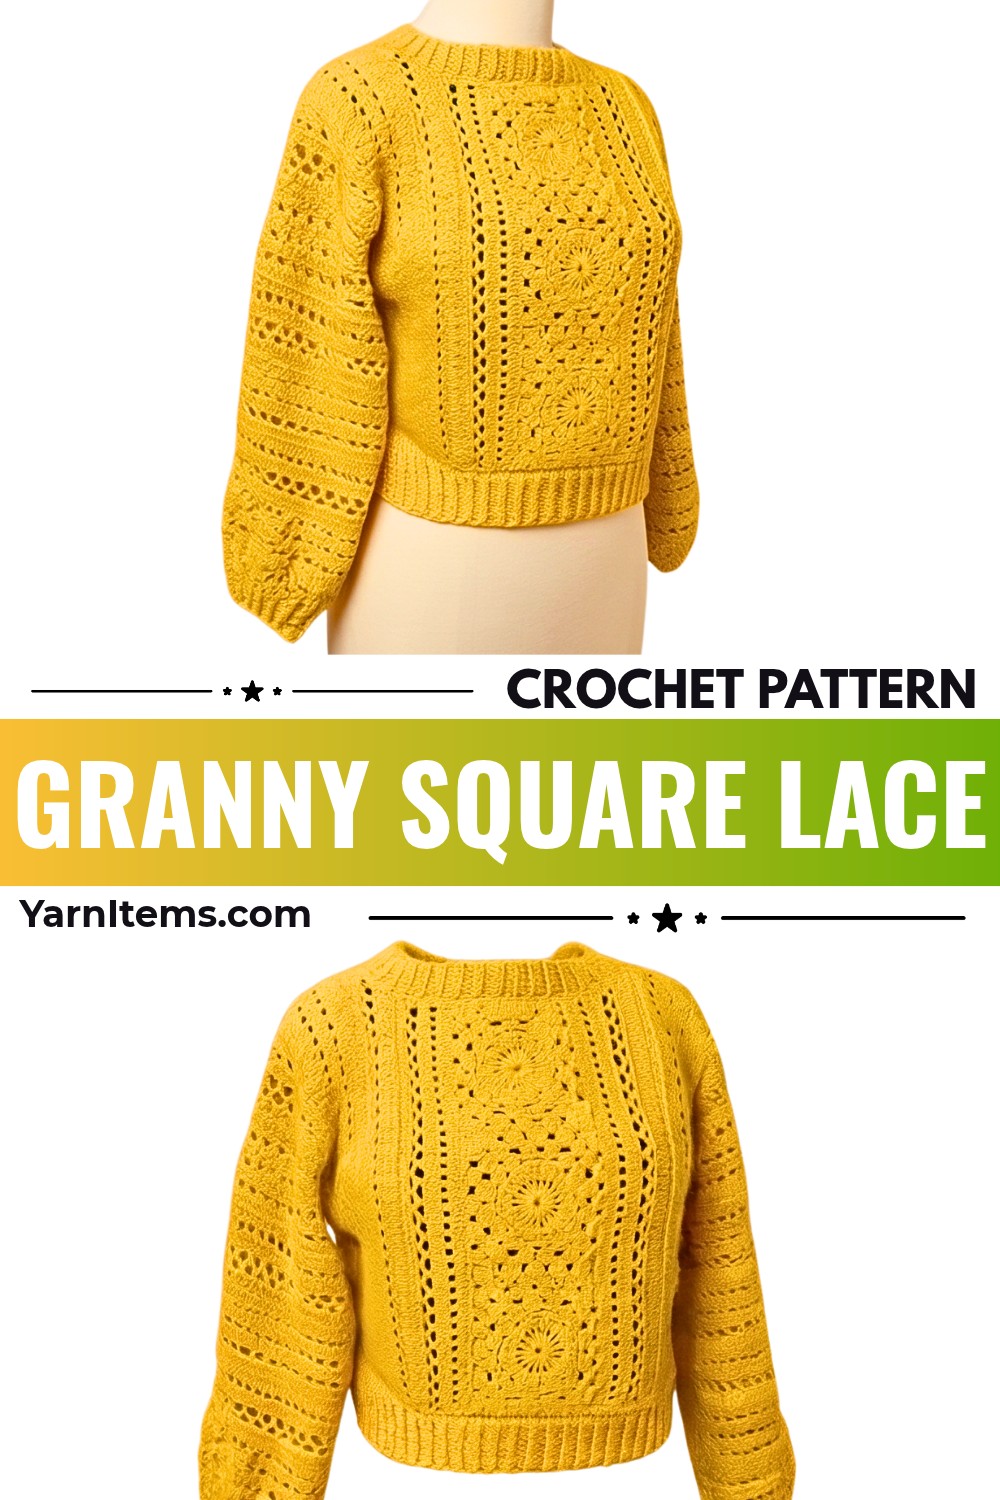
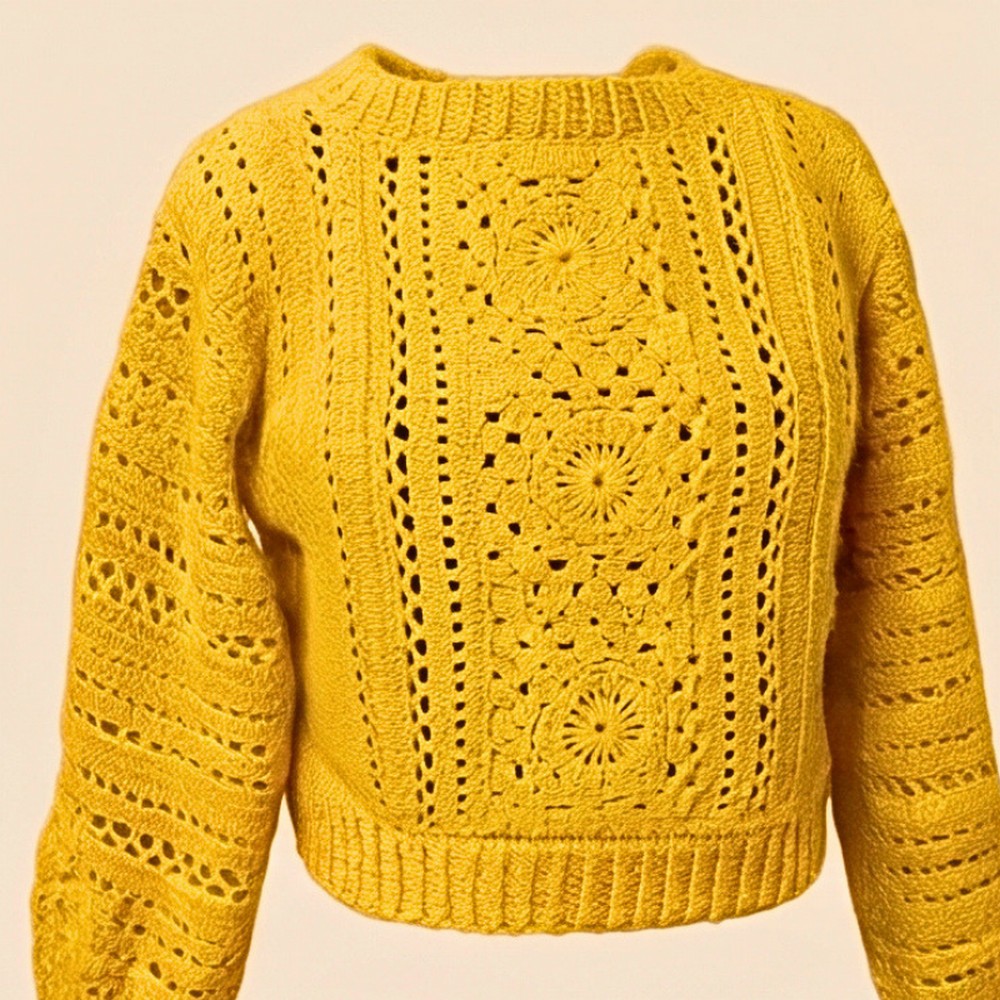
Soft worsted or DK-weight yarn gives this crochet granny-square sweater a comfortable feel, while open mesh sections and fan-shaped lace add a lighter, decorative touch. Three central squares across the front and another three across the back create its main visual feature, with ribbed edges bringing the neckline, cuffs, and crochet hem together.
You’ll start by making six matching motif squares, then join them into front and back bands, shape the shoulders, and extend the body. The remaining instructions cover the lace crochet pattern, sleeves, side seams, and ribbing, with sizing suggestions to help you adjust the sweater’s proportions.
Credit Needle&Crochet Escape
Materials & Tools
Yarn
- Medium worsted or sport/DK-weight wool or acrylic blend suitable for garments, in your main sweater color.
- Contrasting scrap yarn for stitch markers.
Crochet Hook
- 3.5 mm–4.5 mm hook. Select a size according to the yarn label and the drape you want.
Other Supplies
- Tapestry needle for seaming sides, sleeves, and weaving in yarn ends.
- Scissors.
- Tape measure for chest circumference, sleeve length, and neckline depth.
- Locking stitch markers for armhole depths and sleeve positions.
Finished Size
Base Size Shown in Tutorial: Women’s Small/Medium, designed with 3 central squares across the front and 3 across the back.
Customize the Width
- Add or subtract the number of central granny motif squares. For example, use 4 squares across for L/XL.
- Adjust the side panel foundation chain and repeated pattern rows on each side of the central motif band.
Customize the Length
- Add extra rows of the open mesh/fan lace pattern above or below the central squares.
- Extend the bottom ribbing for a longer, tunic-style sweater or a cropped waist.
Adjust the Sleeves
- Work more or fewer rows before beginning the cuff ribbing to change sleeve length.
- Customize cuff tightness by increasing or decreasing how often you work stitches together in the decrease round.
Abbreviations
US crochet terms are used throughout.
- ch: Chain
- sl st: Slip stitch
- sc: Single crochet
- dc: Double crochet
- dtr: Double treble crochet (yarn over 3 times)
- dc-cl / dc-tog: Double crochet cluster / double crochets together
- FPdc: Front post double crochet
- BPdc: Back post double crochet
- st(s): Stitch(es)
- sp: Space
- arch: Chain space loop
Make the Motif Squares
Make 6 matching squares in total: 3 for the front and 3 for the back.
Each square begins with a small foundation ring. The first round creates a spoke-wheel center, the next forms clusters around it, and the final two rounds shape the circular center into a square with four corners.
Foundation Ring
- Chain 6.
- Insert your hook into the first chain and make 1 sl st to form a ring.
Round 1 – Spoke Wheel
- Ch 4 (counts as first leg) + ch 1 (spacer).
- Yarn over 3 times, insert hook into ring, pull up a loop, and work off loops 2 by 2 to complete 1 dtr.
- Repeat: ch 1, 1 dtr into the ring until you have 16 dtr stitches in total, including the starting chain.
- Ch 1, then slip stitch into the 4th chain of the beginning ch-5 to close the round.
Technique guidance: Keep the chain spaces between the dtr stitches open and easy to identify. These spaces are where the clusters will be worked in the next round, so avoid pulling the yarn too tightly around the center ring.
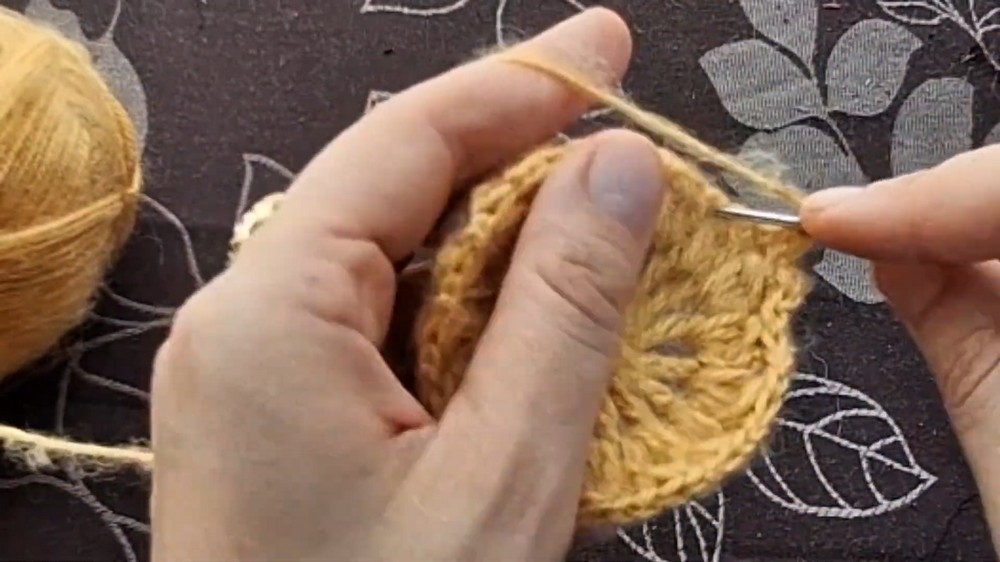
Round 2 – Cluster Petals
- Slip stitch into the first ch-1 space.
- Ch 3, then work 3 dc together into the same space. Hold the last loop of each stitch on your hook, then yarn over and pull through all loops to complete the first 4-dc cluster.
- Ch 2, then work 4 dc together into the next ch-1 space.
- Repeat around, making a cluster in each space for a total of 16 clusters.
- Ch 2 and join with a sl st into the top of the beginning cluster.
Cluster tip: Work all four dc stitches into the same chain space. Keep the final loop of each stitch on the hook until all four have been made, then pull through the collected loops together.
Round 3 – Square the Center
- Slip stitch under the first chain arch.
- Repeat the following twice: ch 3, 1 sc into the next arch. These form the side loops.
- Into the next arch, make the corner: (4 dc, ch 2, 4 dc) all into the same arch.
- Work 1 sc into the next arch.
- Repeat the corner and side-loop sequence 3 more times to create 4 distinct corners and 4 flat sides.
- Join with a sl st to the base of the first chain arch.
Shaping tip: Each corner needs its own ch-2 space between the two groups of 4 dc. Keep these corner spaces visible, since they establish the square shape for the next round.
Round 4 – Outer Border
- Slip stitch into the first arch, ch 3 (counts as 1 dc), and work 3 dc into the same arch.
- Work 4 dc into the next arch.
- Ch 1; into the corner ch-2 arch, work (4 dc, ch 2, 4 dc).
- Ch 1, work 4 dc into the next side arch, ch 1, and work 4 dc into the following side arch.
- Repeat the corner and side groupings around all 4 sides.
- Join with a sl st to the 3rd chain of the beginning ch-3. Fasten off and weave in ends.
Make five more squares using the same instructions.
Finishing tip: Lay all six squares together before joining them. Check that their corners and outer edges sit in the same direction so the front and back bands look even.
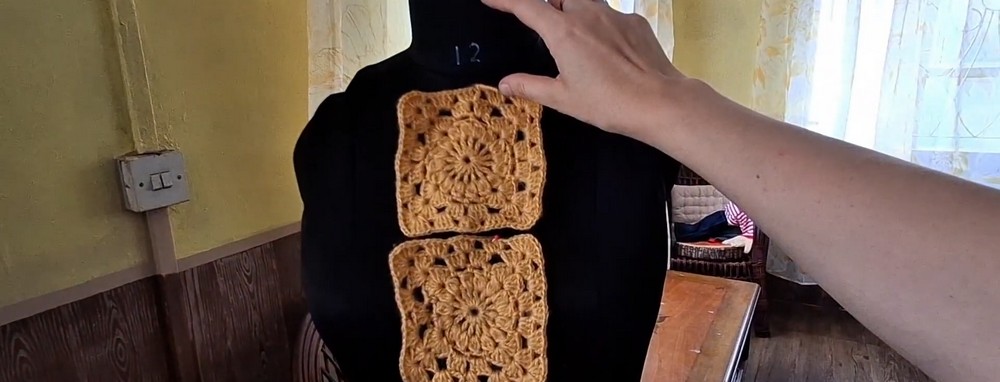
Join the Motif Bands
You will make two separate horizontal bands: one for the front and one for the back.
- Align 3 squares in a straight horizontal row for the Front Panel.
- Arrange the remaining 3 squares in the same way for the Back Panel.
- Join motifs side by side using slip stitches or a flat tapestry seam through corresponding edge stitches.
Joining guidance: Match corresponding stitches along each pair of square edges. Pin the corners and edges before seaming if needed. This helps prevent one square from shifting or stretching farther than the next.
Add Side Edging
Work along the outer side edge of each joined 3-square strip.
Row 1 – Open Filet Mesh
- Ch 4 (counts as 1 dc + ch 1).
- Skip 1 st and make 1 dc in the next st.
- Ch 1, skip 1 st, and make 1 dc in the next st.
- Repeat across to the end of the edge. Turn.
Row 2 – Solid Fill
- Ch 3 (counts as 1 dc).
- Work 1 dc into every stitch and every ch-1 space across the entire row.
- Turn.
Repeat the same side edging instructions for the corresponding panel.
Placement tip: Keep the mesh openings consistent along the side edges. Work into the stitches and chain spaces specified rather than skipping the ch-1 spaces in the solid-fill row.
Shape the Neckline
Work along the top edge of the panels to form the neckline and slanted shoulders.
Row 1 – Foundation Arches
- Ch 5.
- Skip 3 sts and make 1 sc into the 4th st.
- Repeat: ch 5, skip 3 sts, 1 sc into the 4th st.
- Continue across, then turn.
Row 2 – Center Neckline Drop
- Sl st into the center of the first arch.
- Ch 2, then make 1 sc into the next arch.
- Ch 3, then work 2 dc into the same stitch/arch to begin the gentle scoop.
- Work 3 dc into every subsequent arch across to the marked neck point. Turn.
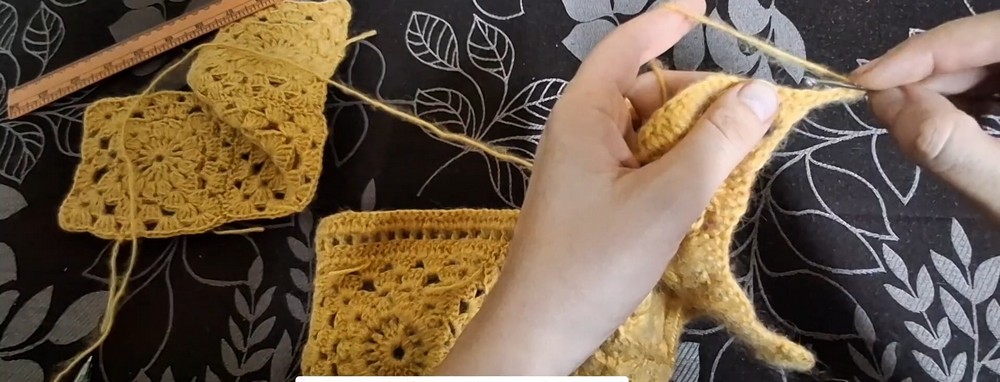
Row 3 – Increases and Shoulder Width
- Ch 3 and work dc in each st across.
- Work an extra dc increase at the outer edges, at the beginning or end of the row, to shape the shoulder slope.
Fasten off yarn.
Repeat the identical steps on the opposite side/shoulder of the front panel, and repeat for the back panel.
Neckline guidance: Mark the intended center neck point before working Row 2. This gives you a reference for where the neckline shaping should stop and helps keep the two shoulder sections balanced.
Extend the Underarms
The front and back panels need additional width beneath the armholes.
- Measure the desired bust/body width.
- Attach yarn at the bottom outer edge of the front panel.
- Chain the required length to span under the arm.
- Join with a sl st to the corresponding edge of the back panel.
Repeat for the other side as required.
Sizing guidance: The foundation-chain length is not specified in the supplied instructions. Measure across the intended underarm area and use the garment width you need rather than assuming a fixed chain count.
Work the Body Lace
Continue across the extended width using the following three-row lace sequence.
Row 1 – Mesh Foundation
- Ch 5 (counts as 1 dc + ch 2).
- Skip 2 sts and make 1 dc in the 3rd st.
- Ch 2, skip 2 sts, and make 1 dc in the next st.
- Repeat across. Turn.
Row 2 – 5-dc Shell Fans
- Ch 1.
- Work 5 dc into the indicated space/arch.
- Make 1 sc into the next dc post.
- Repeat across. Turn.
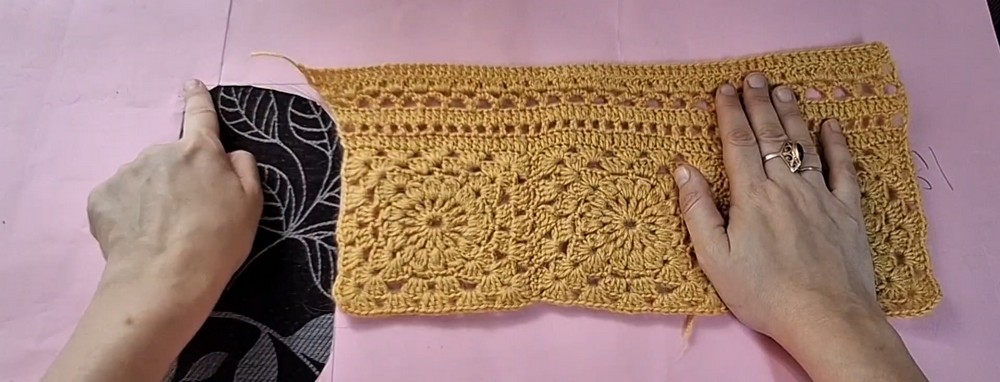
Row 3 – Lace Netting
- Ch 3.
- Make 1 sc into the center (3rd) dc of the fan below.
- Ch 2, then make 1 dc between fan groups.
- Repeat across. Turn.
Repeat Rows 1-3 to build the required shoulder width and body length.
Fan placement tip: In Row 3, identify the middle dc of each 5-dc fan before inserting your hook. Working into the center stitch keeps the lace netting aligned with the shell pattern below.
Work the Sleeves
Use contrasting yarn to mark the designated armhole depth on both sides of the joined torso.
- Place locking stitch markers at the intended armhole depth.
- Work Rows 1–3 of the lace pattern back and forth directly from the armhole edge, or work in the round.
- Continue until reaching the desired wrist length.
Sleeve guidance: Check both sleeve lengths before starting the cuffs. If working back and forth, keep the turning direction consistent. If working in the round, make sure the lace pattern joins neatly without twisting.
Seam the Sweater
Shoulder Seams
- Place Front and Back panels with right sides facing together.
- Align the shoulder slopes.
- Seam across using slip stitches or a tapestry needle.
Sleeve and Side Seams
- Fold the sweater with right sides facing inward.
- Align the sleeve edges and side torso edges down to the waist.
- Seam continuously from cuff to underarm, then down the side body.
- Turn the sweater right side out.
Seaming tip: Match the sleeve and body edges gradually rather than pulling one edge to fit the other. Check the underarm join carefully so the seam does not create a bulky fold.
Add the Ribbing
The final ribbed sections finish the neckline, sleeve cuffs, and bottom hem.
Neckline Ribbing
Foundation Round:
- Join yarn at the shoulder seam.
- Ch 3 and work dc evenly around the neckline opening.
- At inner corner dips, work 3 dc together (dc3tog) to prevent gaping.
- Join with sl st.
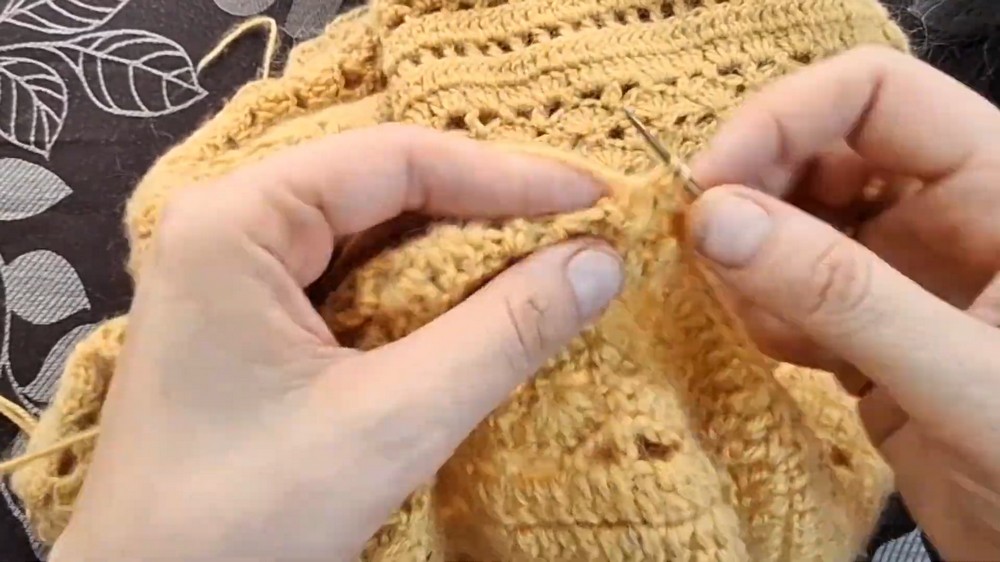
Ribbing Rounds (FPdc / BPdc):
- Ch 3.
- Work 1 FPdc around the post of the next st.
- Work 1 BPdc around the post of the following st.
- Repeat around.
- Join with sl st to the top of ch-3.
- Repeat for 2–3 rounds until desired collar height is reached.
Sleeve Cuffs
Round 1 – Cuff Decreases:
- Ch 3.
- Work 1 dc in each of the next 4 sts.
- Work dc 2 sts together (dc2tog).
- Repeat around the wrist opening to reduce circumference.
- Join with sl st.
Rounds 2-4 – Cuff Ribbing:
- Ch 3.
- Work 1 FPdc, then 1 BPdc.
- Repeat around.
- Join with sl st. Fasten off and weave in ends.
Repeat for the second sleeve.
Waistband Hem
Foundation Round:
- Join yarn at side seam.
- Ch 3 and work dc into each stitch along the bottom hem circumference.
- Join with sl st.
Rounds 2+ – Cinched Ribbing:
- Ch 3.
- Work 1 FPdc, then 1 BPdc.
- Repeat around.
- To create a tighter, cinched waist taper, as demonstrated in the video, skip the back post stitch intermittently, working only into front posts where tighter tension is desired.
- Fasten off.
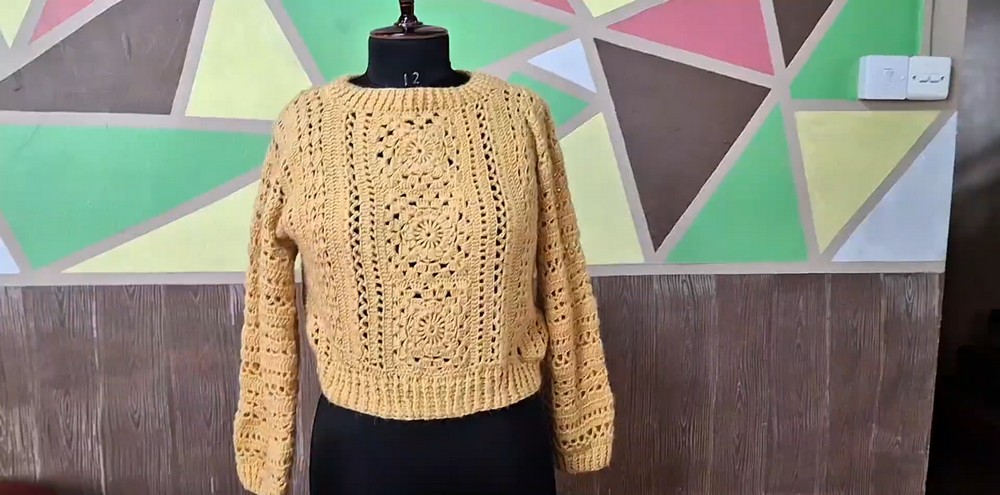
Finishing
- Cut yarn, leaving a 6-inch tail.
- Use a tapestry needle to weave in all loose yarn tails on the wrong side of the fabric through dense stitch posts.
- Lightly steam or wet-block the sweater to open up the lace motif squares and set the ribbed edges flat.
Blocking guidance: Shape the sweater gently while damp, paying attention to the square motifs, open lace sections, and ribbed edges. Allow it to dry in the desired shape before wearing.