Crochet Christmas Dress Ornament Pattern With Red & White Yarn
Dress up your Christmas tree with a tiny red-and-white crochet dress ornament, complete with a flared skirt, white trim, waist cords, bow, and hanging loop.

Tiny handmade decorations can make a Christmas tree feel especially personal, and this miniature dress is a lovely example. Worked in red yarn with white finishing details, the crochet ornament has a fitted upper section, a flared skirt, a contrasting hem, and a small bow at the waist.
The shaping happens quickly, so stitch placement matters from the beginning. Round 2 creates the shoulder and sleeve openings by skipping groups of stitches, while the increases in Round 3 widen the bodice before the skirt continues downward. Once the crocheted dress is finished, two white cords, a bow, and a hanging loop complete the decoration.
Credit Crochet Patterns Free
Materials & Tools Needed
- Yarn: 3-ply yarn in red for the main dress and white for the contrasting details
- Crochet hook: 3 mm
- Scissors
- Glue: For securing components
Pattern Abbreviations & Terminology
- ch: chain
- sl st: slip stitch
- dc: double crochet
- sc: single crochet
- inc: increase; work two stitches in the same stitch
- sk: skip
- st(s): stitch(es)
- nxt: next
How to Crochet Dress Body
The main dress is worked in red yarn from the neckline downward. The first round creates the circular starting point, then the second round introduces the openings that give the upper section its dress-like shape.
Foundation: Make 16 ch and join with a sl st to form a ring.
Teaching Guide: Before beginning Round 1, make sure the chain is not twisted when you join it. This ring becomes the base for the first circular round, so a twist here can affect the shape of the entire dress.
Round 1: 3 ch, work 31 dc around the ring, join with a sl st. (32 sts including turning chain)
Teaching Guide: The stated total is 32 stitches because the beginning 3 ch is included. Keeping this count correct is important because Round 2 divides the stitches into worked and skipped sections.

Shoulders and Sleeves
This round is responsible for creating the openings in the upper part of the dress.
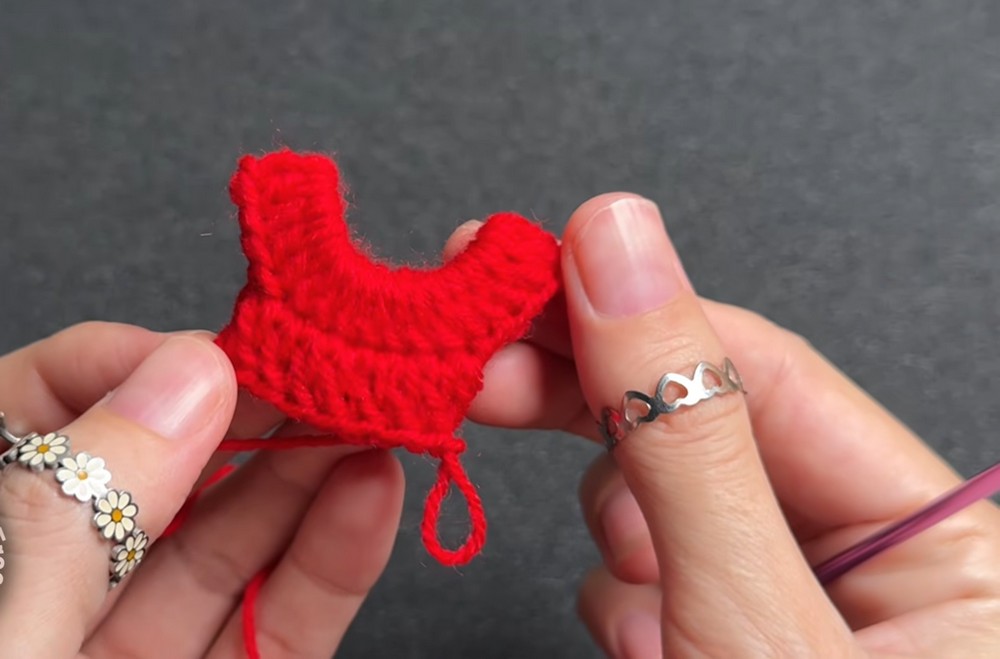
Round 2: 3 ch, 7 dc in the next 7 sts, sk 8 sts, work 8 dc in the next 8 sts, sk 8 sts, work 1 dc in the last remaining st, join with a sl st to end the round.
Teaching Guide: The skipped groups are intentional. They create the open areas that form the shoulder and sleeve shaping. Do not fill these skipped stitches with dc, because doing so would remove the openings and change the shape of the dress.
After completing this round, check the upper section before moving on. The worked sections and skipped spaces should be clearly distinguishable.
Waistline and Bodice
Round 3 increases the width of the dress after the upper shaping has been established.
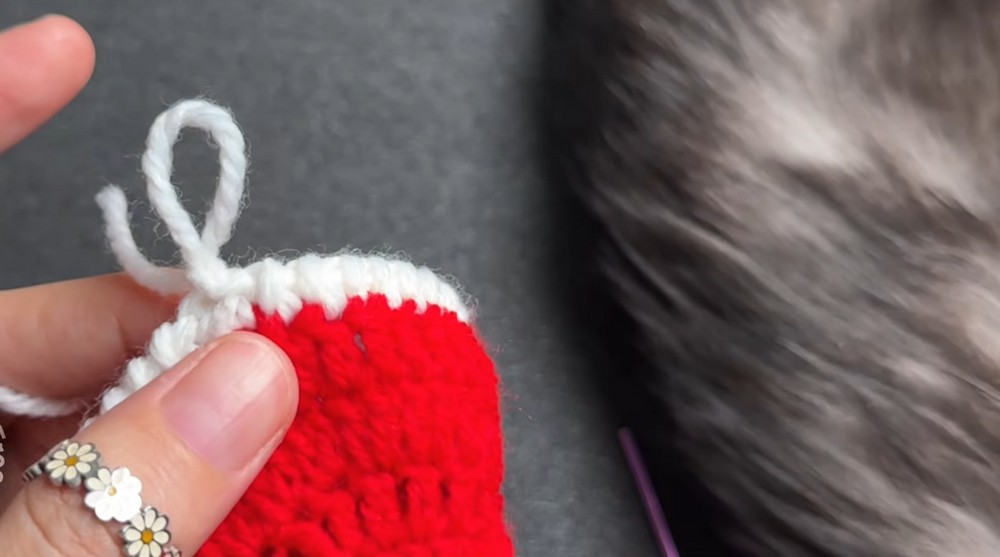
Round 3: 3 ch, 1 dc in the same st, work a dc inc in each next st around, join with a sl st.
Teaching Guide: The increase means working two stitches into the same stitch. These increases are added now because the dress needs to become wider below the shaped upper section. Missing increases can leave the bodice too narrow and affect how the skirt develops in the next round.
Skirt Flare
Round 4: 3 ch, work 1 dc in each st around, join with a sl st to end the round. Fasten off red yarn.
Teaching Guide: There are no additional increases in this round. The extra width has already been created by Round 3, so Round 4 simply continues the skirt downward with one dc in each stitch.
White Hem Trim
The contrasting white edge is added after the red dress body is complete.
Round 5: Join white yarn at the bottom hem of the skirt, work twisted sc in each st across the bottom edge, join with a sl st in the last chain, and fasten off.
Teaching Guide: Keep the twisted sc stitches reasonably even along the hem. The purpose here is to finish the existing skirt edge with a clean white border, not to add another layer of shaping.

White Waistband Cords
Make two matching white cords for the waist.
Cord 1: Make 20 ch. Fasten off.
Cord 2: Make 20 ch. Fasten off.
The length can be adjusted as needed.
Teaching Guide: These cords are added after the dress is crocheted rather than being worked directly into the bodice. This allows you to thread them through the waist area and adjust their placement before the bow is attached.
Decorative Bow
Create a small decorative bow using a length of white yarn or chain strands.
Tie or glue the material into a bow shape.
Keep the bow small and neat so it remains proportional to the miniature dress.
Assembly & Finishing
The finishing stage brings the separate white details together with the red dress. Position each piece before securing it so you can correct the alignment while everything is still movable.
Thread the Waist Cords
Thread the two white 20-chain cords horizontally through the stitches around the waist/bodice section of the dress.
Teaching Guide: Place the cords at the same level so the waist detail looks balanced from the front. Check their position before attaching the bow because the bow will cover the center area once it is secured.
Attach the Bow
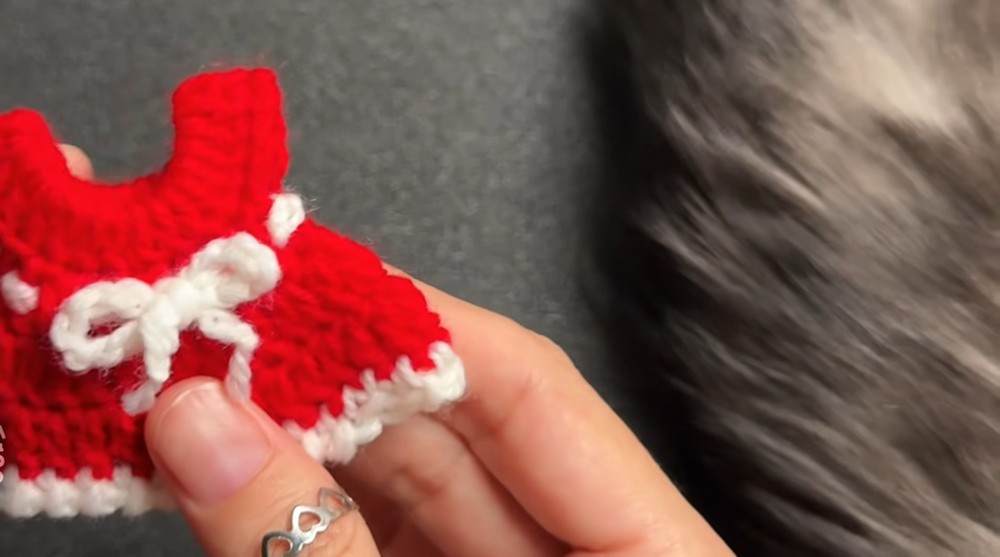
Glue the prepared white bow onto the front center of the dress over the belt area.
Teaching Guide: Use the waist cords as your visual guide for finding the center. If the bow is attached too far to one side, the front of the finished ornament can look uneven even when the crochet itself is correctly worked.
Add the Hanging Loop
Attach a short loop of white yarn securely to the top neckline of the dress.
Teaching Guide: The loop should be positioned at the neckline’s top center. A centered loop helps the finished dress hang upright rather than tipping noticeably to one side.
Troubleshooting
The Upper Dress Shape Looks Wrong
Check Round 2 first. The two groups of 8 skipped stitches are what create the intended shoulder and sleeve openings. If those stitches were accidentally worked, the upper section will not have the same shape.
The Stitch Count Is Incorrect After Round 1
Recount the first round carefully. It should contain 31 dc around the ring, with the starting 3 ch included in the stated total of 32 stitches.
The Bodice Is Too Narrow
Review Round 3 and make sure the dc increases were worked as instructed. The increase is made by working two dc into the same stitch. This round supplies the extra width needed before the skirt continues.
The Skirt Does Not Look Flared
Check that the increases were completed in Round 3. Round 4 itself is worked with 1 dc in each stitch, so adding extra increases there would change the supplied pattern.
The White Hem Looks Uneven
When working the twisted sc along the bottom edge, keep the stitches evenly distributed. If some areas are pulled much tighter than others, the trim may appear irregular.
The Waist Cords Sit Unevenly
Lay the dress flat and reposition both white cords so they run horizontally at the same height. Adjust them before gluing the bow in place.
The Bow Is Not Centered
Use the middle of the waist cords and the dress front as your alignment points. Position the bow first, then glue it once you are satisfied with its placement.
The Ornament Hangs Crooked
Inspect the hanging loop at the neckline. If it is attached too far toward one side, the dress may tilt when suspended. Reposition the loop toward the top center for a more balanced hanging position.