
Crochet Totoro Keychain Pattern Easy to Make
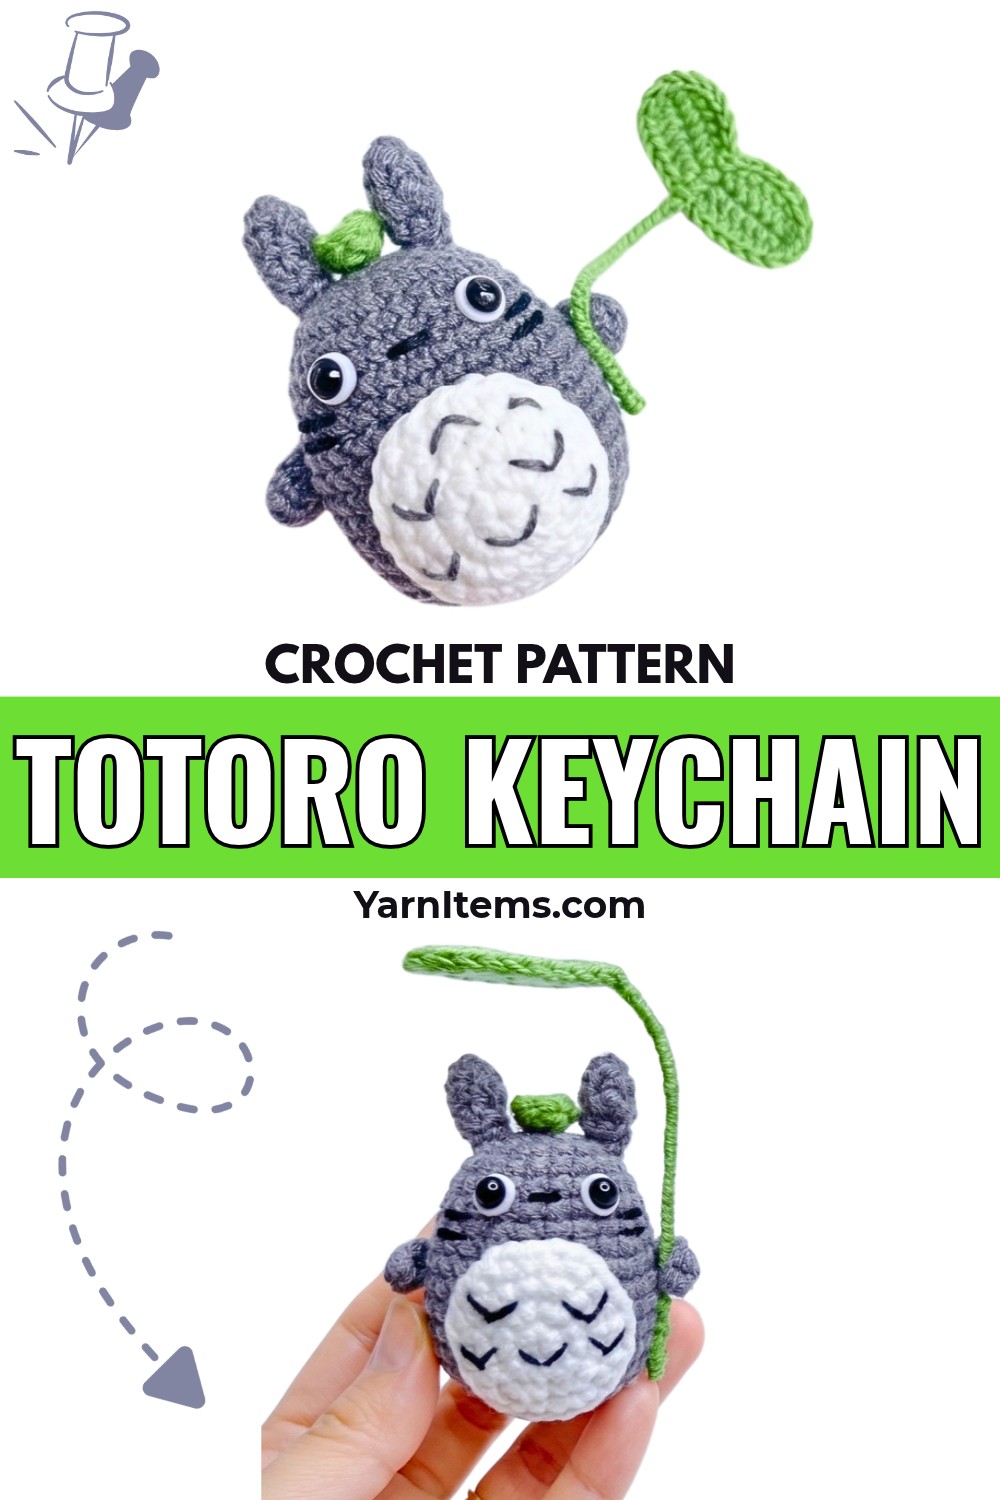
A tiny crochet Totoro can instantly turn an ordinary accessory into something unforgettable. This adorable crochet piece brings the beloved character to life in a compact form that looks charming on keys, backpacks, or handbags.
Its soft details and playful appearance make it a delightful item for everyday use. Fans of cute handmade creations will appreciate how much personality fits into such a small design.
Small handmade pieces often become the ones people treasure the most. This crochet item is beginner-friendly, enjoyable to create, and practical enough to carry wherever you go.
It also makes a thoughtful gift for anime lovers or anyone who enjoys unique handcrafted accessories. The guide below includes everything needed to make this lovable crochet Totoro keychain with ease.
Credit Xuxu Crochet
Meet Your Next Favorite Crochet Piece
Bring a little forest magic wherever you go with this adorable amigurumi Totoro keychain!
This charming pocket-sized companion features:
- A soft grey body and classic white belly
- Signature chevron markings for that instantly recognizable Totoro look
- Tiny ears and arms that add to his cute, chibi-style silhouette
- Secure safety or felt eyes for a sweet, expressive face
- An optional wired leaf accessory, gently posed in his hand for extra whimsy.
Materials You’ll Need
- Yarn:
- Grey: Body, Ears, Arms
- White: Belly
- Green: Big Leaf, Small Leaf
- Black: Embroidering nose, whiskers, and belly chevrons
- Crochet Hook: 2.5 mm
- Fiberfill Stuffing: For plump shaping
- White Felt & Black Safety Eyes/Beads:
- Cut two white felt circles slightly larger than the eyes.
- Glue eyes to the center of the felt circles.
- Craft Wire: ~27 cm length (for shaping the leaf stem)
- Tapestry Needle & Scissors
- Stitch Marker: For tracking spiral rounds
- Hot Glue Gun: Useful for assembling felt eyes securely
Gauge Secrets for the Best Results
- Maintain firm and tight tension to prevent fiberfill from poking through stitches.
- Use a 2.5 mm crochet hook to create dense, even stitches ideal for amigurumi.
Pattern Notes You Shouldn’t Skip
- Working Method:
- Continuous Spiral Rounds: Body, ears, and big leaf.
- Joined Rounds: Belly.
- Marker Usage:
- Place a stitch marker in the first stitch of each round to easily track progress.
Best Yarn Alternatives That Work Perfectly
- Milk Cotton: 4-ply / 5-ply (Highly Recommended)
- Gaddan Yarn: Sport Weight Acrylic Yarn
- DK Weight Cotton Yarn: Produces a slightly larger Totoro.
Helpful Crochet Tips for a Smooth Experience
- Firmly stuff the body before finishing Rounds 17–18 for better shaping.
- During assembly, secure all yarn tails inside the body to achieve a polished, finished look.

Crochet Abbreviations Made Simple
-
MR: Magic Ring
-
ch: Chain
-
sc: Single Crochet
-
hdc: Half Double Crochet
-
dc: Double Crochet
-
inc: Increase (2 sc in same stitch)
-
dec: Decrease (Invisible single crochet decrease)
-
sl st: Slip Stitch
How Big Will It Be?
- Totoro’s finished height is approximately 5–6 cm (2 inches), using a 2.5 mm hook and milk cotton yarn.
Fun Customization Ideas You’ll Love
- Keychain Loops:
- Add a jump ring or loop to Totoro’s head for functional use as a keychain.
- Leaf Placement:
- Attach the small leaf to Totoro’s head for an adorable look.
- Fold and wire the green leaf stem so Totoro can hold it.
Complete Step-by-Step Crochet Instructions
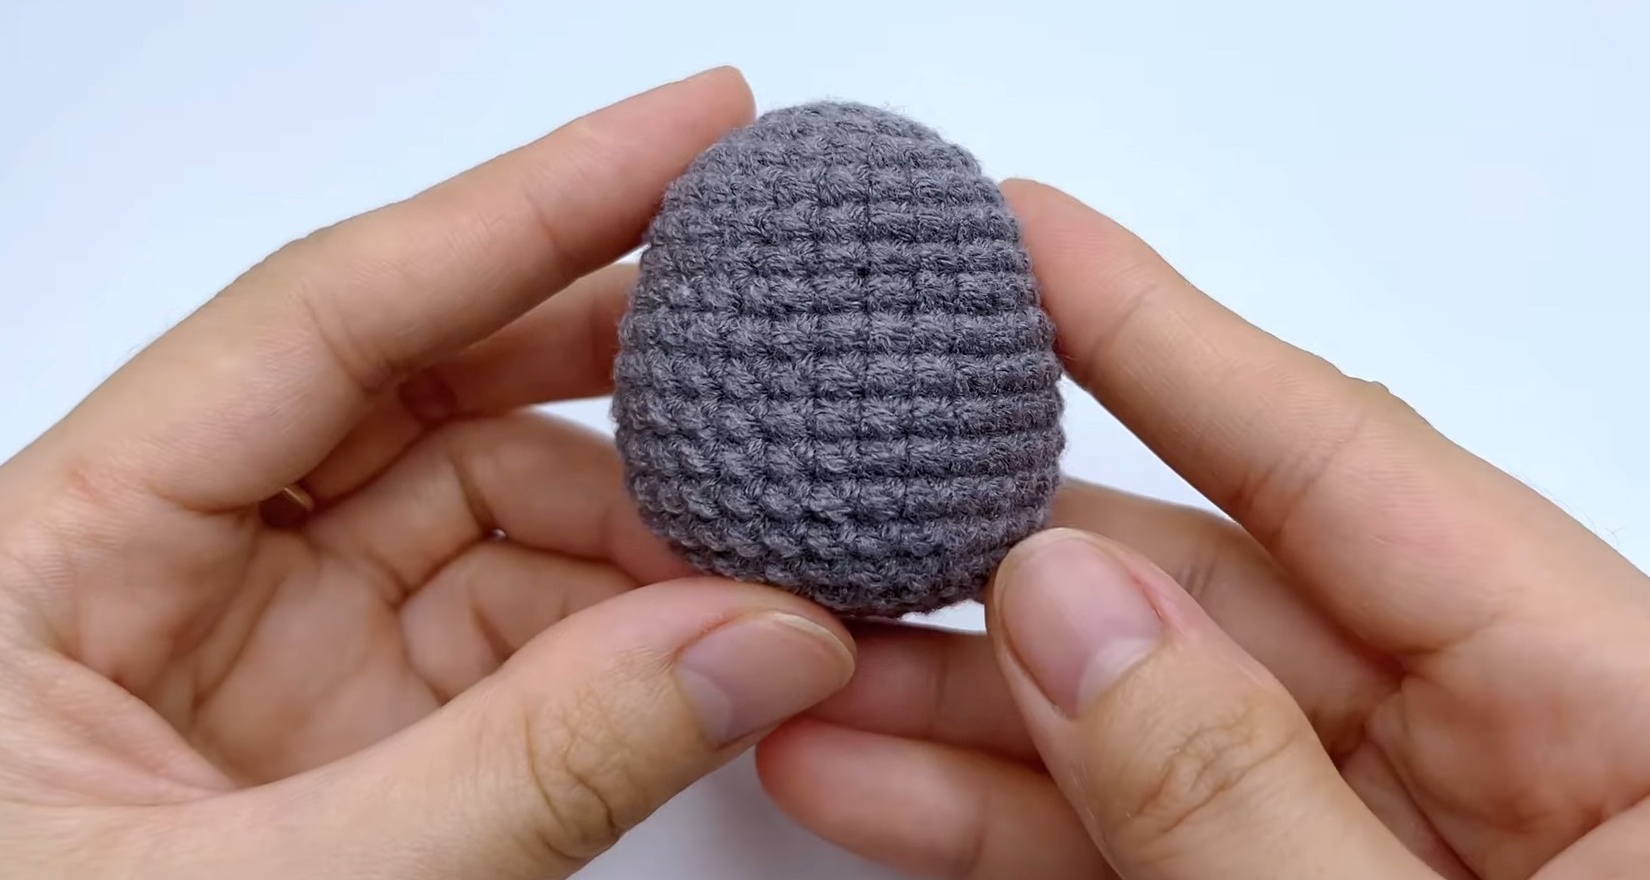
1. Body (Grey Yarn)
Work in spirals (do not join rounds).
R1: 6 sc in MR (6 sts)
R2: 6 inc (12 sts)
R3: (1 sc, inc) × 6 (18 sts)
R4: (1 sc, inc, 1 sc) × 6 (24 sts)
R5–R7: 24 sc around (3 rounds) (24 sts)
R8: (3 sc, inc) × 6 (30 sts)
R9–R14: 30 sc around (6 rounds) (30 sts)
R15: (3 sc, dec) × 6 (24 sts)
R16: (1 sc, dec, 1 sc) × 6 (18 sts)
Stuff the body firmly with fiberfill.
R17: (1 sc, dec) × 6 (12 sts)
R18: 6 dec (6 sts)
Fasten off, weave tail through front loops of remaining 6 stitches, pull tight, and hide end.
2. Ears (Grey Yarn – Make 2)
Work in spirals.
R1: 4 sc in MR (4 sts)
R2: (1 sc, inc) × 2 (6 sts)
R3: 6 sc around (6 sts)
R4: 1 sc, dec, 1 sc, dec (4 sts)
Fasten off, leaving a long tail for sewing.

3. Arms (Grey Yarn – Make 2)
Ch 4.
Skip 1st ch from hook, sc in next 3 ch stitches (3 sts).
Fasten off, leaving a tail for sewing.

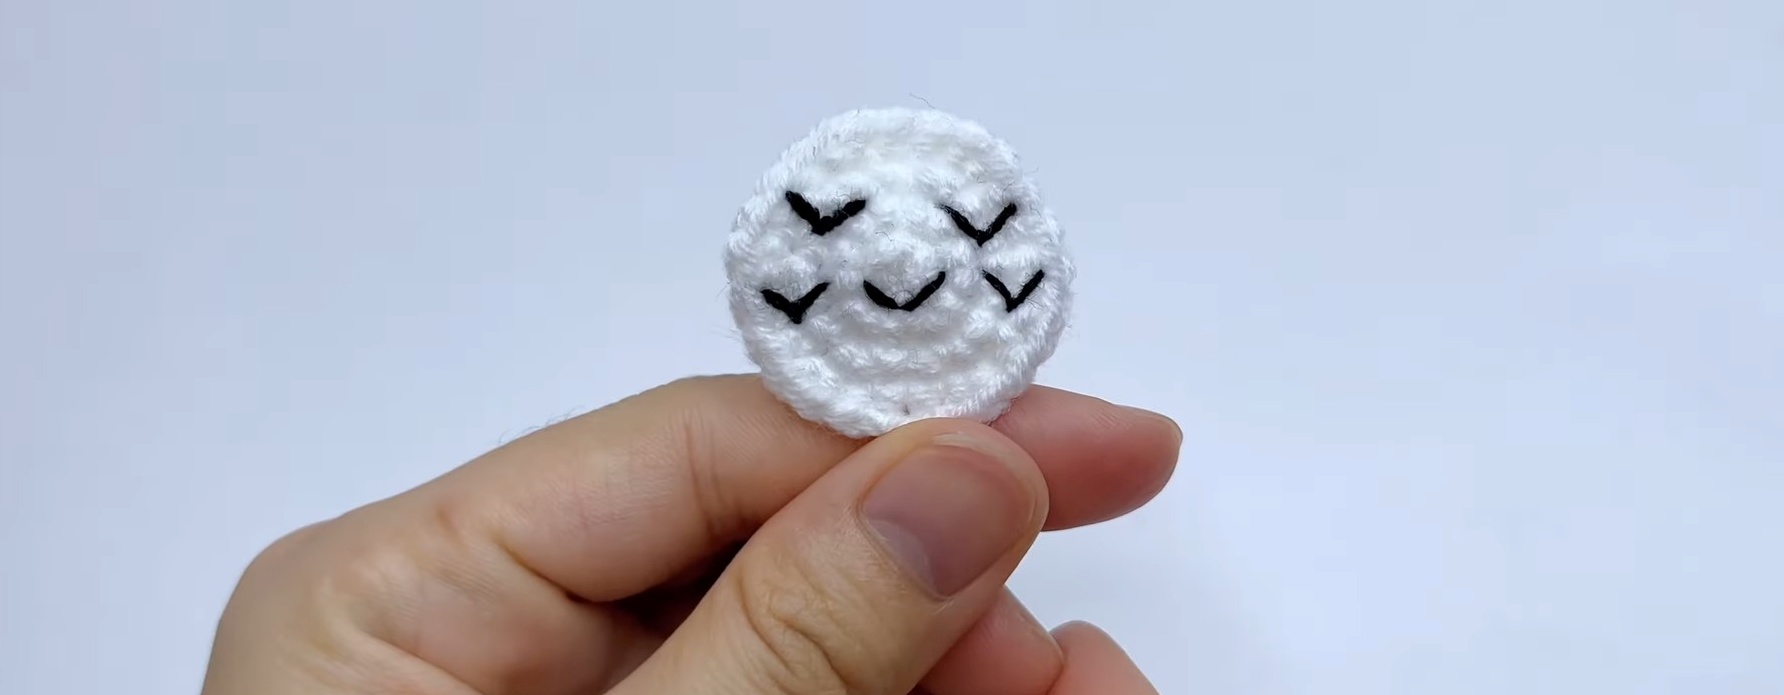
4. White Belly (White Yarn)
Work in joined rounds.
R1: 6 sc in MR, sl st to 1st sc to join, ch 1 (6 sts)
R2: 6 inc, sl st to join, ch 1 (12 sts)
R3: (1 sc, inc) × 6, sl st to join, ch 1 (18 sts)
R4: (1 sc, inc, 1 sc) × 6, sl st to join (24 sts)
Fasten off, leaving a long tail for sewing.
5. Small Leaf (Green Yarn)
Ch 4.
Skip 1st ch, 1 sc in 2nd ch, 1 hdc in 3rd ch, 1 sc in 4th ch.
Ch 1, 1 sc into the same 4th ch (turning corner).
Work along opposite side of foundation chain: 1 hdc in next ch, 1 sc in last ch.
Sl st to 1st sc to join, fasten off and weave in ends.

6. Big Leaf with Wired Stem (Green Yarn)
- Lay ~27 cm craft wire along the chain to enclose it while crocheting.
- Ch 10.
- Skip 1st ch from hook, working around the wire:
- 1 sc in 2nd ch
- 1 hdc in next ch
- 5 dc in next 5 chs
- 1 hdc in next ch
- 1 sc in last ch
- Ch 1, 1 sc in same last ch (turning corner).
- Work along opposite side of chain (still wrapping wire):
- 1 hdc in next ch
- 5 dc in next 5 chs
- 1 hdc in next ch
- 1 sc in last ch
- Sl st into 1st sc, ch 1 around wire to lock, cut yarn leaving a long tail.
Wrap the long yarn tail tightly down the wire stem.

Assemble & Finish Like a Pro
Belly Embroidery:
- Use black yarn to embroider Totoro’s “V” chevron marks onto the white belly circle.
Sewing Ears:
- Attach ears symmetrically on top of the head at Round 3.
Sewing Belly:
- Center and sew the white belly patch to the body, spanning Rounds 7 to 15.
Sewing Arms:
- Attach arms on both sides at Rounds 9–10.
Face Details:
- Attach white felt circles with black center safety eyes/beads between Rounds 5 and 6.
- Embroider the black nose centered between the eyes, and embroider whisker lines on each cheek.
Leaf Attachment:
- Place the wired stem into Totoro’s hand, sewing/gluing it along the side.
- Glue or sew the small leaf directly on top of Totoro’s head.
Add Your Own Creative Touch!
- Add pink blush to Totoro’s cheeks using soft pastel or acrylic paint.
- For a fun touch, attach a metal keychain strap to the top of his head to make your Totoro portable.


One Comment