How to Crochet a Cute Polar Bear Hat Pattern
Give a simple crochet hat a playful finish with rounded bear ears and tiny facial details, while keeping the crown and fit comfortable for little heads.
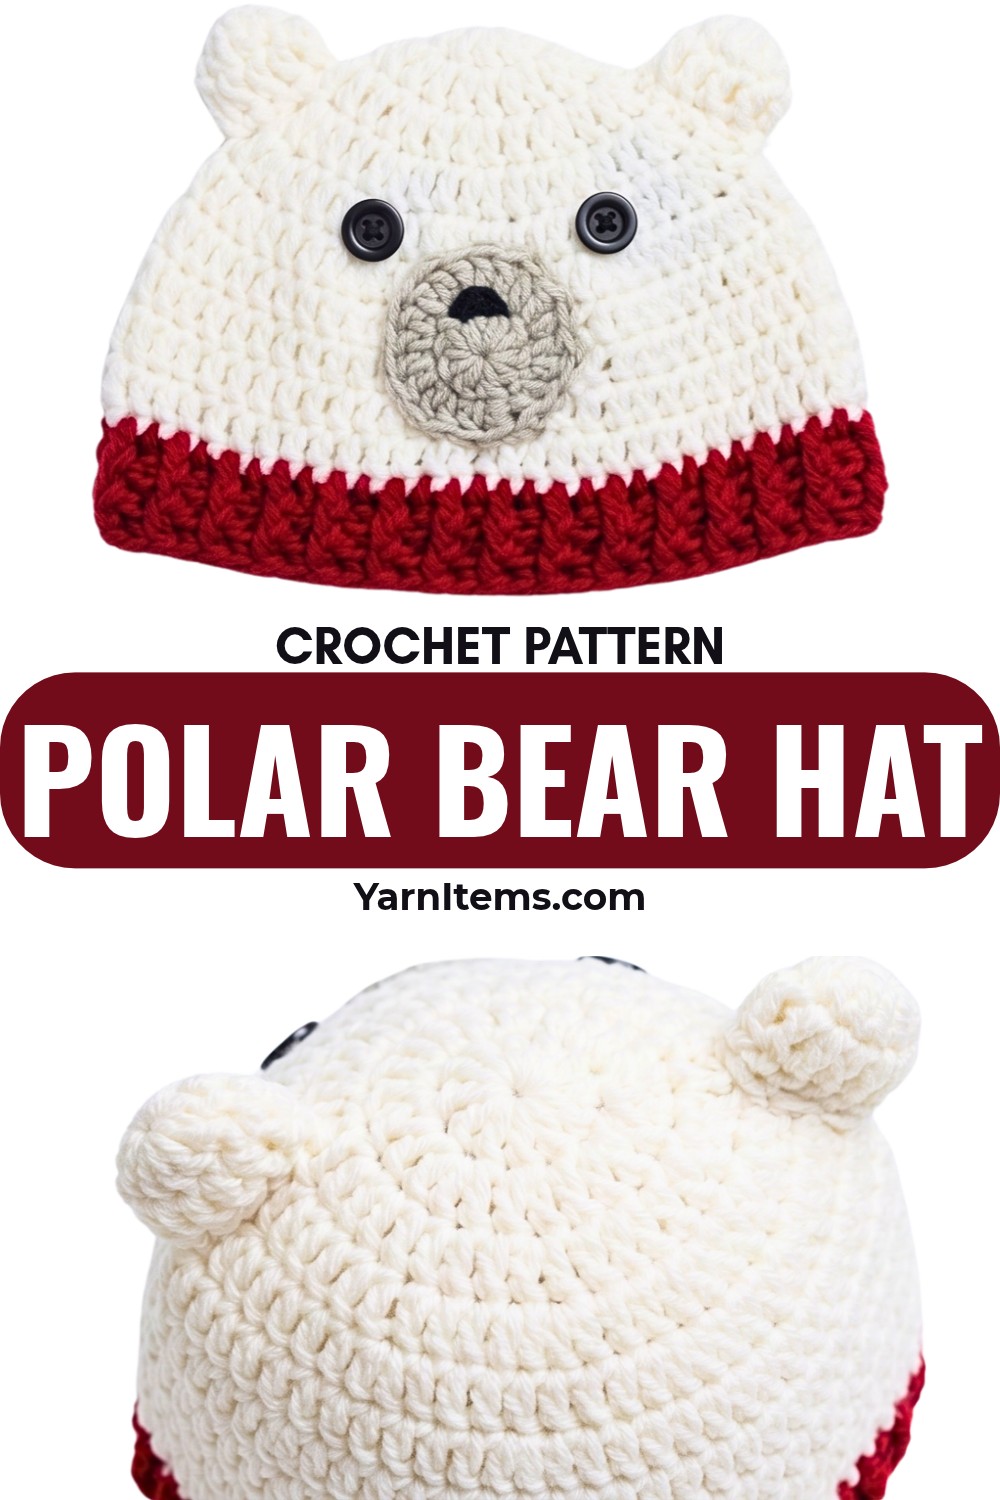
Polar bear crochet hat becomes much easier to make when you treat the crown size and the ear placement as two separate checkpoints. The crown needs to reach the right width before you continue straight down, while the ears need to sit evenly on top so the finished hat does not look tilted. Taking a quick measurement before moving on can save you from having to adjust the crochet hat after all the details are attached.
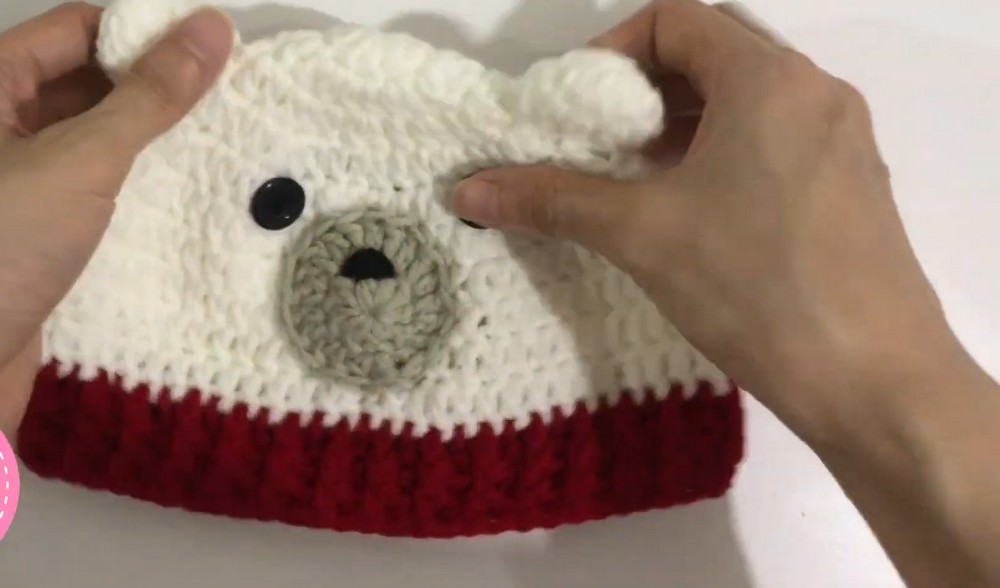
The facial details are small, but they have a big effect on the finished expression. Instead of sewing everything immediately, place the ears and muzzle first and look at the hat from the front. This simple check lets you correct their position while the crochet pieces are still loose and helps keep the final bear face balanced.
Credit Agira Co
Materials & Tools Needed
- Yarn: Soft bulky or milk cotton yarn in white for the hat, plus small amounts of black, dark brown, or pink yarn for the facial details.
- Crochet Hook: Choose a hook appropriate for your yarn weight; a 4.0–5.0 mm hook may work well with suitable baby or child-size yarn.
- Stitch Marker: Useful for keeping track of the beginning of each round.
- Tapestry Needle: For sewing the ears and muzzle and hiding yarn ends.
- Scissors
- Measuring Tape or Ruler: For checking the crown diameter and overall hat length.

Finished Size & Customization Ideas
This design is intended as a cozy winter hat for babies and children, but the sizing can be adjusted as you work.
- Add or reduce increase rounds to change the crown circumference.
- Continue the even rounds for a deeper hat.
- Adjust the ear size by changing the number of rounds.
- Use different facial colors to give the bear a softer, darker, or more playful appearance.
Pattern Abbreviations & Terminology
- MR: Magic Ring
- ch: Chain
- sc: Single Crochet
- hdc: Half Double Crochet
- dc: Double Crochet
- sl st: Slip Stitch
- inc: Increase – work 2 stitches into the same space
- dec: Decrease – work 2 stitches together
- rep: Repeat
- st(s): Stitch(es)

Step-by-Step Crochet Instructions
Crochet the Main Hat
Work the hat in white yarn.
Round 1: Begin the Crown
- Make a Magic Ring.
- Chain 1.
- Work the specified number of sc or hdc into the ring, depending on the version of the pattern you are following.
- Pull the center closed.
- Join with a sl st to the first stitch.
Keep the center firmly closed before starting the next round so the crown begins as a neat circle.
Round 2: Increase Around the Crown
- Chain 1.
- Work 1 increase in every stitch around.
- Join with a sl st.
The stitch count should double from Round 1.
Round 3: Continue Shaping
- Chain 1.
- Repeat (1 sc, 1 inc) around.
- Join with a sl st.
At this point, the crown should still lie relatively flat. If the center begins pulling into a cup too early, check your stitch count before continuing.
Rounds 4-12: Establish the Hat Length
Continue the increase pattern as needed until the crown reaches the diameter required for the intended wearer.
Once the crown is wide enough, stop increasing and work even rounds:
- Chain 1.
- Work 1 sc or hdc in each stitch around.
- Join with a sl st.
- Repeat until the hat reaches the desired depth and comfortably covers the ears.
Fasten off the white yarn and leave a tail for weaving in.

Make the Polar Bear Ears
Make 2 ears in white yarn.
Round 1
- Make a magic ring.
- Chain 1.
- Work 6 sc into the ring.
- Pull the ring closed.
- Join with a sl st.
Round 2
- Chain 1.
- Work 1 increase in each stitch around.
- Join with a sl st.
Stitch count: 12
Round 3
- Chain 1.
- Repeat (1 sc, 1 inc) around.
- Join with a sl st.
Stitch count: 18
Fasten off, leaving a long sewing tail.

Make the Muzzle
The muzzle is optional, but it gives the hat a more recognizable polar-bear face.
- Using white or a light cream yarn, make a magic ring.
- Chain 1.
- Work 6–8 sc into the ring.
- Join with a sl st.
- In the next round, work an increase in each stitch to enlarge the piece into a small round or slightly oval pad.
- Fasten off, leaving a sewing tail.

Position the Bear Ears
Before sewing anything permanently, place both ears on the hat.
- Position them on opposite sides of the crown.
- Keep them approximately between Rounds 3-6 from the top center, depending on the hat’s proportions.
- Use pins or stitch markers to hold them temporarily.
- View the hat straight from the front and compare the two sides.
Placement check: The ears should sit at matching heights. If one is even slightly lower, correct it now rather than after sewing.
Once the placement looks balanced, use the tapestry needle and the long yarn tails to whip-stitch each ear securely to the hat.

Add the Muzzle and Face
- Place the muzzle below the crown center.
- Check its position from the front before sewing.
- Stitch it securely to the hat using the remaining yarn tail.
- With black or dark yarn, embroider a small triangular nose.
- Add a short curved or straight line below it for the mouth.
- Add the eyes above the muzzle using small straight stitches or French knots.
Keep the facial stitches small and firm. On a children’s hat, oversized embroidered details can quickly change the proportions of the face.
Finishing
Weave in the Ends
Thread each remaining yarn tail onto the tapestry needle and weave it securely through the wrong side of the stitches. Trim only after the ends are properly anchored.
Light Blocking
If the hat has uneven edges or the stitches need a little smoothing, lightly block or steam it according to the yarn manufacturer’s care instructions. Avoid excessive heat, particularly with synthetic yarn.
Final Fit Check
Before wearing or gifting the hat, check that:
- The crown fits comfortably.
- The hat reaches the intended depth.
- Both ears are level.
- The muzzle is centered.
- The embroidered features are firmly secured.
- All loose ends are hidden inside the hat.