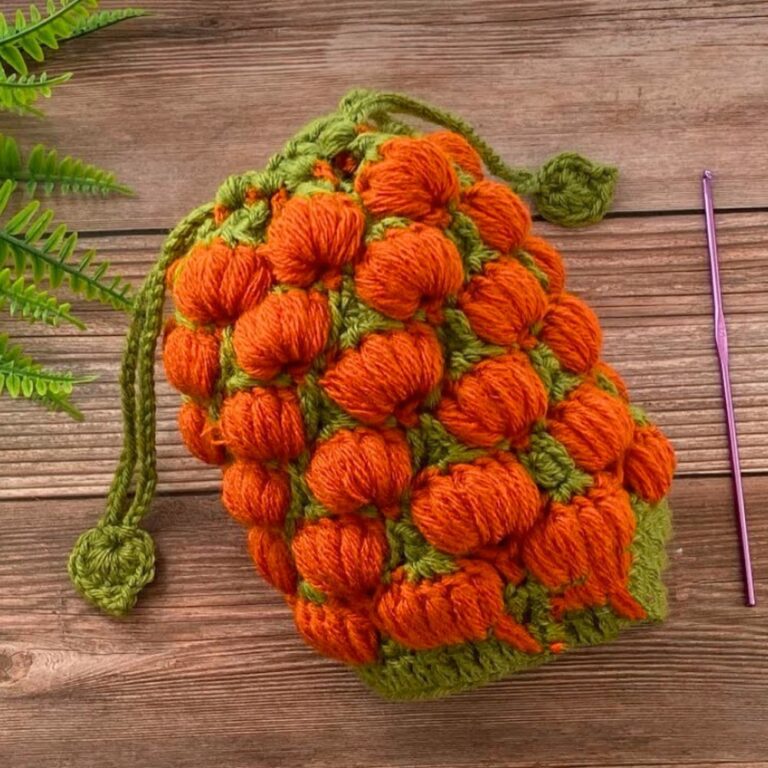
This adorable Crochet Pumpkin Granny Square combines seasonal charm with classic techniques, making it the perfect addition to fall-themed décor or larger patterns like blankets, table runners, or pillows.

A pumpkin granny square is a delightful crochet pattern that combines autumn’s charm with creativity. It’s shaped like a square with a cute pumpkin design in the middle. This fun and cozy pattern can be turned into many things, blankets, table mats, pillow covers, or even seasonal wall art. Its cheerful look makes it perfect for your home or gifting a handmade touch to someone you care about.
Crochet a Pumpkin Granny Square
This Crochet Pumpkin Granny Square design is versatile, it can be part of larger pieces like bags or blankets, or stand alone as coasters or ornaments. Making the square is all about enjoyably combining basic skills. You’ll start with easy shapes, and by the end, you’ll have a neat pumpkin sitting inside a lovely frame. It’s an inviting way for beginners to build confidence while creating something colorful and fun.
Credit Vivi Crochet
Key Features of the Pattern
- Pumpkin Foundation: Worked in the round using a magic ring to form a sturdy, textured base.
- Pumpkin Texture: Defined with an optional mix of puff or cluster stitches for a dimensional look.
- Stem Construction: A simple yet effective chain technique forms the pumpkin’s stem, with options for customization.
- Granny Square Base: Classic granny square rows frame the pumpkin, giving it a timeless and versatile edge.
- Finishing Touches: Optional embellishments like embroidered vines or leaves add a touch of personality.
Crochet the Pumpkin
The pattern starts with a magic ring, a versatile technique that allows for a tightly closed center—perfect for creating the base of the pumpkin. Once the ring is formed, double crochet stitches are worked into a compact circle. The next round increases the stitch count, giving the pumpkin its signature rounded shape. For added texture and visual interest, you can include puff stitches or clusters, as suggested in the video, giving the pumpkin a plump, harvest-ready appearance.

Adding the Stem
Once the pumpkin is complete, switch to a contrasting yarn in green or brown to create the stem. By working a simple chain from the top of the pumpkin and slip stitching back down, you can form a clean and minimalist stem. For those who want a bolder look, single crochet (sc) or half-double crochet (hdc) stitches can be used to widen the stem—it’s a quick customization that makes each square unique.

Creating the Granny Square Base
With the pumpkin finished, attach a neutral-colored yarn to transition into the granny square portion. Using traditional granny square techniques, you’ll crochet clusters of three double crochets with chain spaces for the corners, shaping the square around the pumpkin. Continue adding rounds of clusters until the square reaches your desired size, whether that’s small for a coaster or large for a blanket.

Finishing Touches
Once the square is complete, weave in all loose ends with a tapestry needle for a clean finish. Lightly blocking the square will help it lay flat and achieve the perfect shape. If you’d like to go the extra mile, add embroidered details like swirly vines or leaf shapes around the pumpkin for a whimsical touch. These little additions can make your square stand out, especially if you’re connecting multiple squares for a larger pattern!
Video Tutorial
Step-by-Step Pattern
Materials
To create this pumpkin granny square, you’ll need the following materials:
- Yarn:
- Pumpkin (Orange): Worsted weight yarn.
- Stem (Green/Brown): Worsted weight yarn for the pumpkin stem.
- Background Color (Neutral): Worsted weight yarn, such as beige, cream, or gray for granny square edges.
- Hook: Size 4.0mm (G) or 5.0mm (H) crochet hook (adjust depending on gauge and yarn thickness).
- Optional tools:
- Scissors.
- Tapestry needle for weaving in ends.
- Stitch markers (optional for beginners).

Pattern Instructio ns
Step 1: Start with the Pumpkin Foundation
- Magic Ring:
- Begin by creating a magic ring (or chain 4 and join into a ring).
- Work ch 3 to count as the first double crochet.
- Form the Circle:
- Work 12 dc into the ring for the pumpkin base. Slip stitch into the first stitch to close the round. You should now have a circle.
Step 2: Build Pumpkin Texture
- Increase Round:
- Work 2 dc in each stitch around to increase. This creates a rounded pumpkin base. Once finished, slip stitch to close the round.
- Define Shape:
- Optional: Work a mix of puff stitches or clusters (if instructed by video) to give the pumpkin body added dimensional texture.
Step 3: Add the Stem
- Change to Stem Yarn:
- Attach green or brown yarn at the top of the pumpkin with a slip stitch.
- Stem Shape:
- Work ch 6 (or desired height) and slip stitch down the chain for a simple, neat stem
- Alternatively, you can work other stitches (like sc or hdc) for a wider stem.
Step 4: Crochet Granny Square Base
- Change Background Color Yarn:
- Attach a neutral yarn like beige for the granny square edges.
- Granny Square Rounds:
- Work traditional granny square rows around the pumpkin, alternating between clusters of 3 dc and chains to form corners.
- Continue building your granny square until it reaches your desired size.
Step 5: Finishing Touches
- Weave Ends:
- Use a tapestry needle to weave in any loose ends neatly.
- Block Your Square:
- Lightly block your finished square if needed to adjust its shape.
- Optional Decorations:
- Add embroidered vines or leaves for extra detail.
- You can connect multiple squares for larger patterns like blankets or tablecloths.

Troubleshooting and Suggestions
- Handling Color Changes: To avoid bulky joins or unraveling, secure yarn changes with a firm knot or weave the ends into the back for clean transitions.
- Consistent Stitching: To ensure your pumpkin remains evenly shaped, count your stitches at the end of each round. Increases can sometimes cause slight warping if skipped or added unevenly.
- Creative Modifications: Experiment with bold or unexpected background colors to make the pumpkin pop, or mix up your yarn textures for a rustic look. You could also use metallic or glittery yarn for a festive touch.
- Adapt for Other Uses: Turn a single square into a potholder, wall hanging, or even a decorative coaster by backing it with felt or fabric.