Step-by-Step Knitted Stylish Sweater Vest Tutorial
Creating a cozy, stylish sweater vest has never been simpler! This Tutorial walks you through a beginner-friendly process for crafting an elegant vest from start to finish. Using chunky yarn, circular needles, and a straightforward pattern, you’ll learn practical techniques to knit a piece that’s both fashionable and functional. Perfect for layering in colder months, this project highlights versatility, making it a wardrobe staple that works for casual or dressy occasions.

Knitted Sweater Vest
A remarkable aspect of this Sweater tutorial is the attention to detail in crafting perfect armholes and a neat neckline using ribbing techniques. The creator thoughtfully explains decreasing methods such as the left-leaning “slip, slip, knit” and right-leaning “knit two together.” These techniques ensure a polished fit while contouring the vest to sit perfectly on your shoulders. With just one 200 g ball of chunky yarn and some careful measuring, you can create a sweater vest that is entirely customizable to your size and style preferences.
Pattern Highlights:
- Yarn Recommendation: Sirdar Jewelspun chunky yarn in “Precious” for a soft texture and bold design.
- Technique Highlight: Expert step-by-step guidance on creating left- and right-leaning armhole decreases for professional finishes.
Credit Kenikse Crochet
Step-by-Step Pattern
Materials
To knit this vest, you’ll need the following:
- Chunky Yarn:
- Recommended: Sirdar Jewelspun in “Precious” (200g ball).
- Feel free to substitute any bulky (#5) yarn that meets the required gauge.
- Knitting Needles:
- 5.5 mm needles – Use these for ribbing (both bottom hem and edges).
- 8 mm circular needles (60 cm cable suggested) – For the main body worked in the round.
- Other Tools:
- Scissors
- Stitch marker (or a small piece of contrasting yarn)
- Tapestry needle (for sewing seams and weaving in ends)
- Tape measure

Stitch Guide
Here’s an overview of the basic stitches and techniques used in this project:
- Knit Stitch (K):
- Insert the needle from left to right through the front of the stitch. Wrap the yarn around, pull through, and slide the old stitch off.
- Purl Stitch (P):
- Insert the needle from right to left through the front of the stitch. Wrap the yarn around, pull it through, and slide the old stitch off.
- Knit 2 Together (K2tog):
- Insert your needle into two stitches at once as if to knit. Wrap the yarn around, knit them together as one stitch, and slide off. Creates a right-leaning decrease.
- Slip, Slip, Knit (SSK):
- Slip one stitch as if to knit, slip the next stitch the same way. Insert the left needle into the front of both stitches and knit them together. Creates a left-leaning decrease.
- 1×1 Ribbing (K1, P1):
- Alternate between knit and purl stitches to create a stretchier, textured edge.
Notes
- Gauge Swatch:
Before starting, measure your gauge using 8 mm needles and your chosen yarn. Ensure your swatch matches the provided pattern gauge or adjust your needle size accordingly. - Customizations:
- Adjust the length of the ribbing or body to create a cropped or more extended version.
- Modify the armhole or neckband ribbing width to your personal preference.
Pattern Instructions
Step 1: Ribbed Hem (Bottom-Up Construction)
- Start by casting on an even number of stitches on your 5.5 mm circular needles.
- For a medium/large size, cast on 130 stitches + 1 extra stitch (to join the round).
- Use the long-tail cast-on method for a stretchy edge.
- Join to Work in the Round:
- Pull one needle out and align the stitches, ensuring they are not twisted. Slip the first stitch from your right needle onto the left needle. Using the left needle, pull the second stitch over the first to create your joined round.
- Place a stitch marker to mark the beginning of the round.
- Work 1×1 ribbing (K1, P1) for 10 rounds or approximately 6 cm.
- Tip: Knit “knit” stitches and purl “purl” stitches to maintain the ribbing pattern.

Step 2: Knitting the Main Body
- Switch to 8 mm circular needles for the main section.
- Knit every stitch in the round for 32 rows (or longer/shorter depending on your desired vest length).
- Total length from cast-on edge to this point should be about 22–23 cm, or just under your armpit.
- Separate Front and Back:
- At the start of a new round, knit half the stitches (e.g., 65 stitches) for the front. Place the remaining stitches on a stitch holder or spare cable for the back.
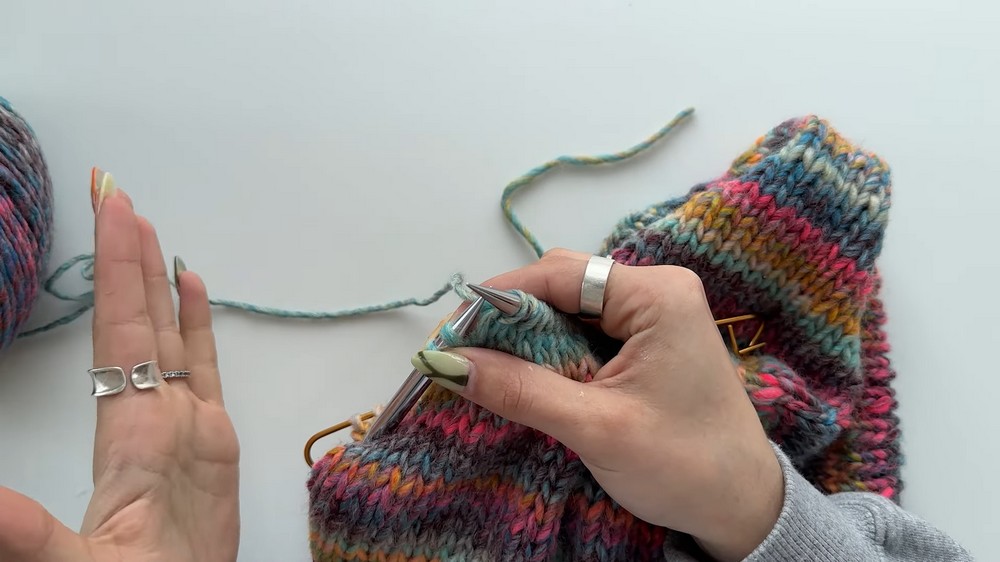
Step 3: Shaping the Neckline and Armholes (Front)
Armhole Shaping:
- Work the front flat (back-and-forth rows). Begin with a purl row.
- Starting on the next knit row, work 2 decreases:
- Knit the first two stitches.
- SSK the next two stitches to create a left-leaning decrease.
- Continue knitting until four stitches remain.
- K2tog the 2nd-to-last stitches for a right-leaning decrease. Knit the last two stitches.
- Repeat the decrease rows every knit row until you have 37 stitches remaining.
Neckline Shaping:
- Divide the remaining front stitches into two sets for the left and right shoulders.
- For medium/large size, work 10 stitches per shoulder.
- Work decreases along the neckline edge:
- On the knit row, knit to the last three stitches, work K2tog, and knit the last stitch.
- Purl back every wrong side row.
- Repeat until eight stitches remain on each shoulder.
- Bind off.
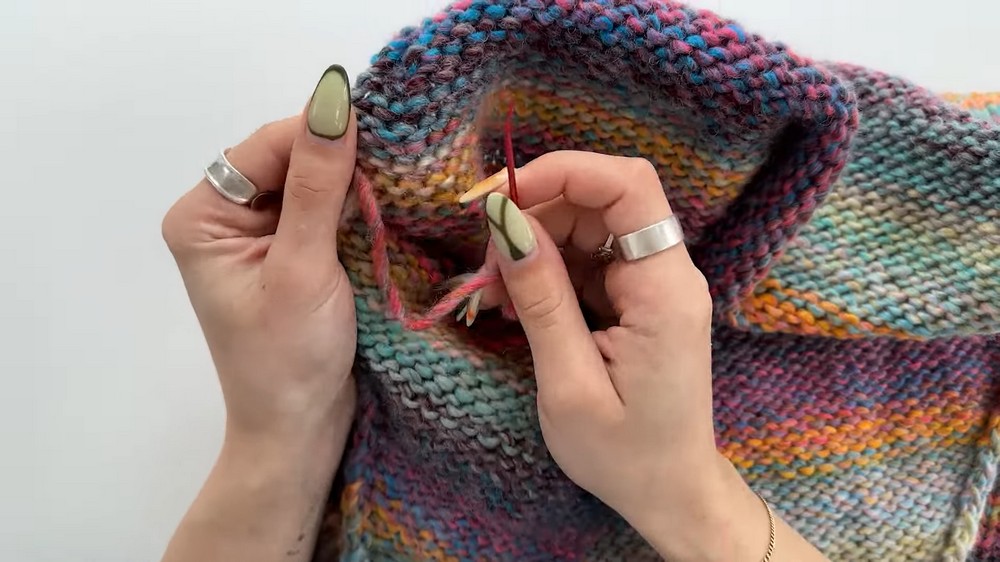
Step 4: Back Panel
- Place the back panel stitches onto the needles.
- Work precisely as the front panel, but do not shape the neckline so profoundly (or skip the neckline shaping altogether for a straight back).
- Bind off, ensuring both shoulders match the width of the front.
Step 5: Joining Shoulders
- Use the tails from the bind-off edges to sew the front and back shoulders together.
- Work with the right side facing up, and secure stitches using the mattress or whip stitch method.
- Once joined, weave in and secure any loose ends.

Step 6: Armholes and Collar
- Pick up stitches around each armhole using the 5.5 mm needles.
- Ensure the total number of stitches is even (e.g., 84 stitches) for ribbing.
- Work 1×1 ribbing (K1, P1) in the round for 5 rounds (or as many as you prefer).
- Bind off loosely in pattern by knitting the knits and purling the purls.
- Repeat for the second armhole.
- For the neckline, pick up stitches in the same way, adjusting the number of stitches to achieve your desired collar ribbing depth.
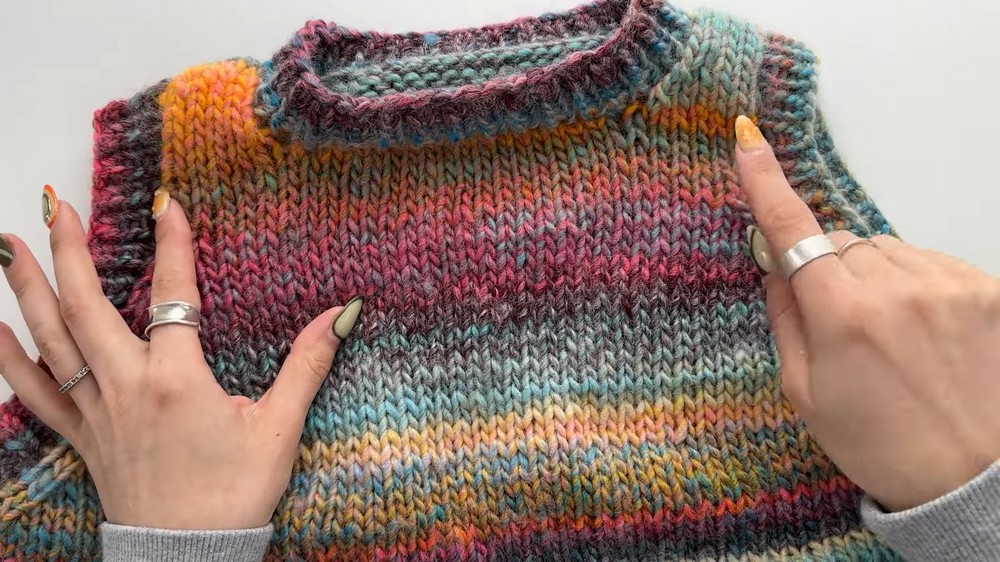
Step 7: Final Touches
- Weave in all loose ends, ensuring all tails are hidden securely.
- Block the vest by soaking it in lukewarm water with a mild detergent, then pin it to size. Let it dry flat to shape edges evenly.
Pattern Question
Question: What should I do if my cast-on ends up too tight?
Answer: Use the long-tail cast-on method with two needles instead of one, as shown in the video, to ensure your cast-on edge remains stretchy and flexible.