Baby Blanket Tutorial – Striped Knit Design with Crochet Border
This easy-to-follow tutorial by Shelly from Koala Knits & Knacks walks you through crafting a beautiful striped baby blanket with a delicate square lace crochet border. Perfect for beginners and seasoned crafters alike, this blanket design is both versatile and timeless. Using an Addi 22-needle knitting machine and soft Bernat Premium yarn, Shelly ensures the project works up quickly while maintaining a polished, professional finish ideal for gifting or personal use.
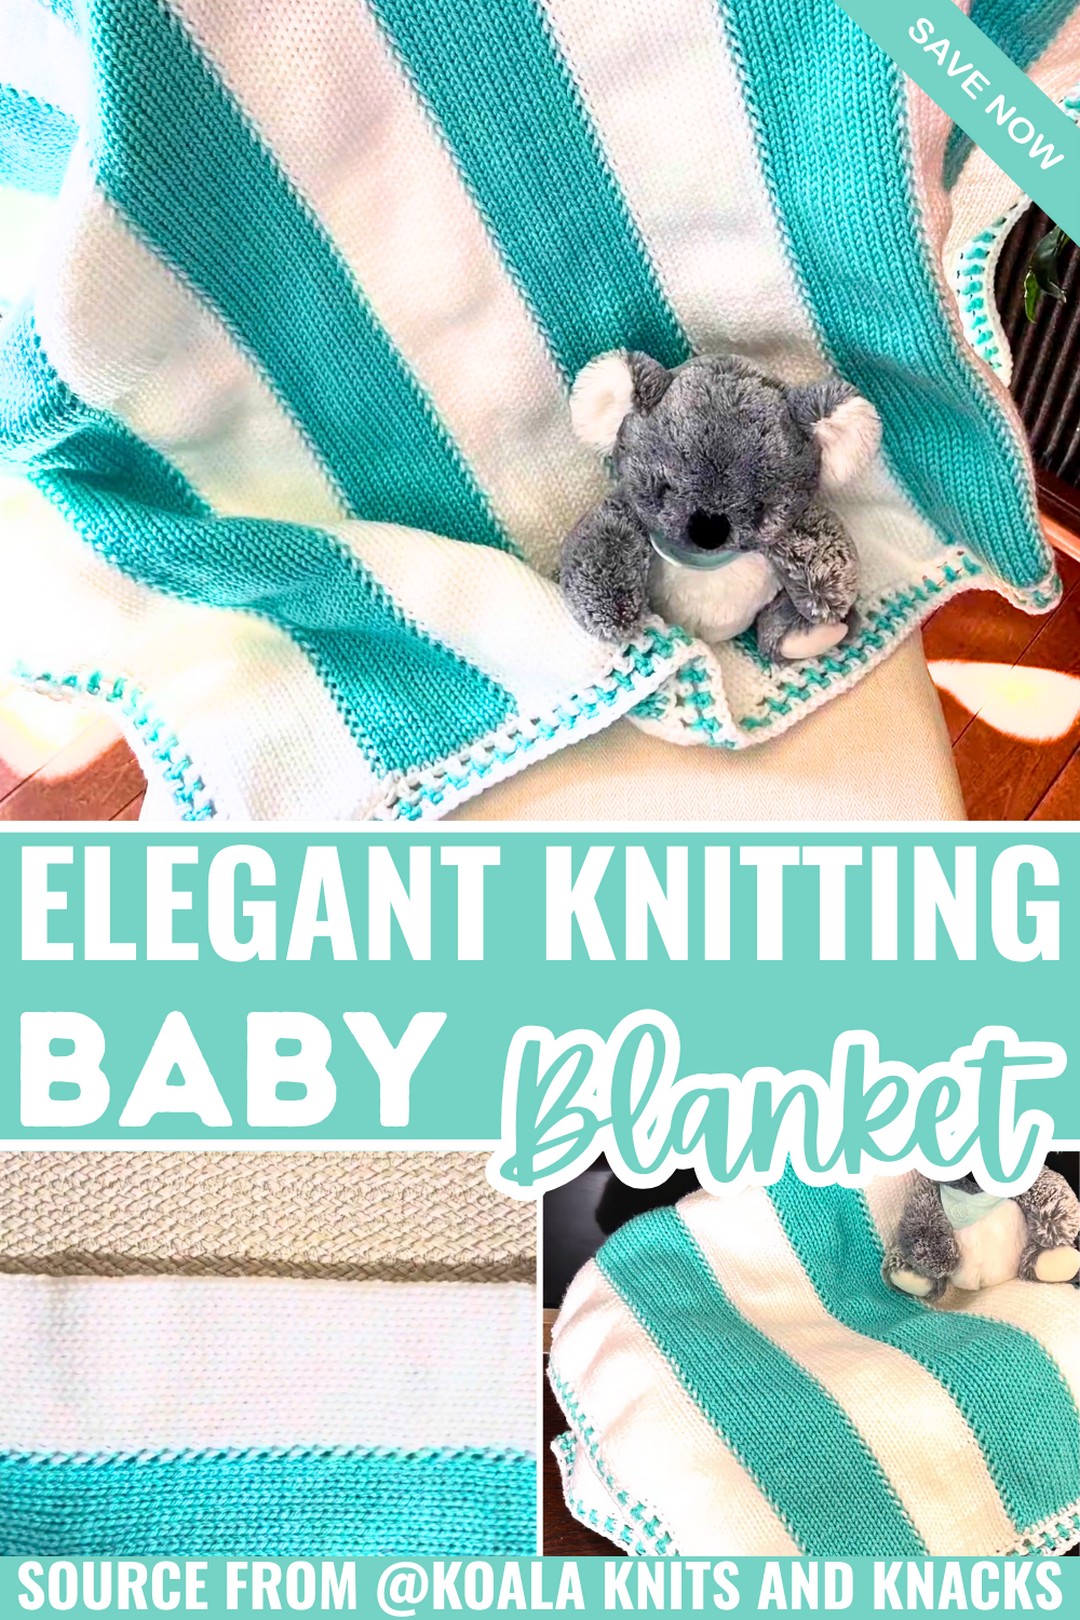
A notable feature of this project is Shelly’s original square lace border, which was designed spontaneously as she worked on the blanket. The unique combination of single and half-double crochet stitches creates a lacy yet sturdy edge. Additionally, the ability to customize the blanket using different colorways, such as Shelly’s suggested Robin’s Egg and white, further elevates the design. This blanket tutorial also addresses methods for achieving even tension and clean panel joins for a seamless appearance.
Highlights:
- Creative Invention: The “square lace border” was a personal innovation developed during the project for an eye-catching yet simple accent.
- Custom Yarn Tips: Shelly recommends soft, machine-friendly Bernat Premium yarn in neutral tones or multi-colors for versatility and luxury.
Credit Koala Knits and Knacks
Step-by-Step Pattern
Materials:
To create this project, you’ll need the following:
- Yarn:
- Bernat Premium Yarn in Robin’s Egg (198 grams x 2 balls)
- Bernat Premium Yarn in White (198 grams x 3 balls, though you’ll have leftover yarn)
- Feel free to adjust your colors to include more variety!
- Addi 22-needle knitting machine
(This is essential for crafting the panels.) - 4.0mm crochet hook – This will help you close the tube ends and knit the border.
- 5.0mm crochet hook – For creating the lace border.
- Stitch markers or bobby pins (to secure ends and mark your work).
- Yarn needle for sewing and weaving in ends.
- Scissors.
- Optional: Permanent marker (for marking machine indicator points).
Stitch Guide:
Here’s a quick overview of the key stitches and techniques used:
1. Waste Yarn
- Waste yarn acts as a placeholder on the ends of your machine-knitted panels, making it easier to finish later. Simply alternate wrapping the yarn behind the machine needles, then in front of them to load it.
2. Half-Double Crochet:
- Yarn over, insert the hook into the stitch, pull up a loop. You’ll have three loops on your hook. Yarn over and pull through all three loops.
3. Single Crochet:
- Insert your hook into the stitch, yarn over, and pull up a loop. Yarn over and pull through the two loops on the hook.

Notes:
- Customizations:
- This blanket is designed with 11 machine-knitted panels (5 Robin’s Egg, 6 White). Use more colors if you wish—each panel is 200 rows. You can adjust the total number of panels and the row count based on the size you want. You could even use 11 different colors!
- Gauge Adjustments:
- Stretch the panels to even out tension before sewing. If your blanket appears distorted, stretching and aligning each row will resolve this.
- Borders:
- If you’d like a different look, consider skipping the lace border for something simpler, like fringe or pom-poms.
- Tension Tips:
- When crocheting, avoid overly tight tension to prevent the blanket border from warping. Balance is key!
Pattern Instructions:
1. Knit the Panels
- Prepare Your Addi Machine:
- Ensure your machine is ready to use. You can mark the first black needle and the last white needle for more straightforward navigation. If your machine is dusty, clean it before starting.
- Load Waste Yarn:
- With your waste yarn, alternate wrapping the yarn behind and in front of the needles. Knit 7 rows (or more as needed).
- Switch to Main Yarn (Robin’s Egg or White):
- Knit 200 rows. When finished, cut the yarn to about 8–10 inches for later seaming.
- Add Waste Yarn:
- Switch back to the waste yarn at the end of your knitting. Knit at least seven rows before removing your project from the machine.
- Repeat the Process:
- Knit 11 panels in total: 5 in Robin’s Egg and 6 in White (or your chosen design). Ensure all panels are evenly stretched and tensioned.

2. Close the Panel Ends
Each panel must be closed before joining. Use your 4.0mm crochet hook.
- Locate the Loops:
- Carefully pull the waste yarn row to reveal loops. Use bobby pins or stitch markers to secure them in place.
- Pick up the Loops:
- Pick up all 22 loops from the panel using your crochet hook. Make sure every stitch is captured to avoid unraveling (missed stitches can ruin the project!).
- Join the Loops:
- Use your yarn tail to pull through all loops, locking the end. Stretch the panel lengthwise and widthwise to settle the stitches.
- Remove the Waste Yarn:
- Remove waste yarn from each end after closing, leaving a neat finished edge.

3. Join the Panels
- Align the Panels:
- Lay two panels side by side, ensuring both are right-side up—Mark the first row on the “right side” to guide you as you seam.
- Seam with a Mattress Stitch:
- Using a yarn needle and the panel tail, sew the panels together, row by row. Count 1–2 bars as you stitch to ensure even tension.
- Add Panels:
- Repeat this process, joining all 11 panels into one cohesive blanket. Adjust any tension irregularities by stretching.
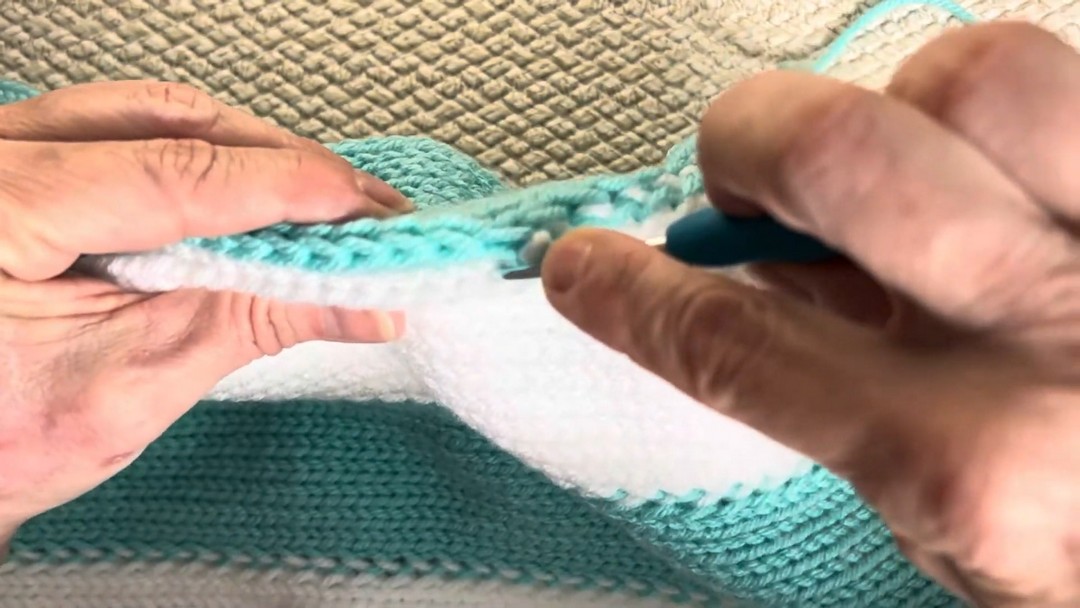
4. Add the Square Lace Border
Once all panels are joined, it’s time to add the crochet border for a polished look!
- Start the First Row (Single Crochet):
- With a 5.0mm crochet hook and white yarn, join the yarn along the side (not in the corner).
- Single crochet in every second stitch (on the length) and every row (on the top and bottom rows) of the blanket. In the corner, single crochet, chain 1, single crochet to create a neat turn.
- Second Row (Half-Double Crochet):
- Chain 2, then start half-double crochet in the first stitch. Chain 1, skip one stitch, half-double crochet in the next stitch. Continue this all around the blanket. For the corners, work half-double crochet, chain 1, half-double crochet in the corner spaces.
- Final Row (Square Lace Finish):
- Switch to Robin’s Egg yarn (or your second color)—half-double crochet in each chain space from the previous row. Optionally, add a final row in white yarn for a clean edge.

Final Touches:
- Weave in all ends securely using a yarn needle.
- Stretch and block your blanket, if necessary, to shape the corners and achieve a polished look.
Pattern Question:
Question: Can I use more than two colors for this pattern?
Answer: Absolutely! You can use multiple colors to create unique panels and customize the blanket to suit personal preferences or a specific theme.