Crochet Halloween Granny Square Tutorial with Sally Design
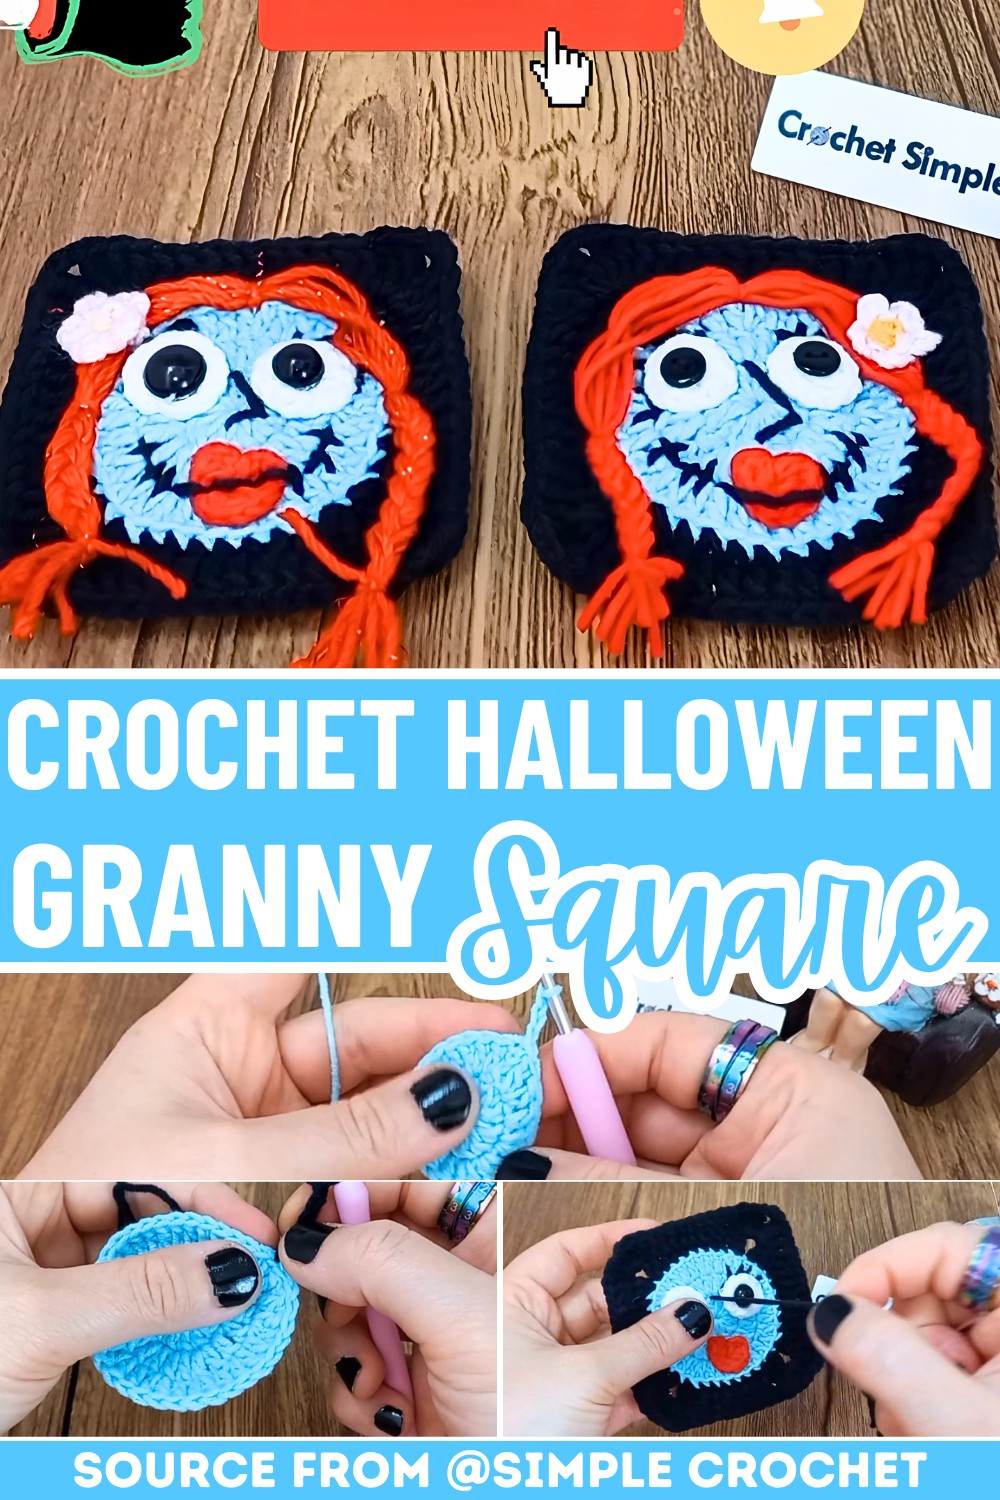
Crocheting a Halloween granny square is exciting and simple! This Granny Square design features adorable details like Sally’s stitched face, braids, and a flower in her hair, perfect for festive crochet.
The granny square is easy to adjust, so you can use it for jackets, blankets, pillows, or anything you love. Since all crochet squares match in size, blending them into larger designs is effortless.
How to Crochet a Halloween Granny Square

This Halloween Pattern is fun because it uses creative techniques like magic rings, double crochets, and adding layers for hair, eyes, a smile, and a flower. Each step is explained clearly, making it suitable for beginners. You can easily customize colors to match different moods or occasions, such as soft pastels for a subtle look or bright shades for a bold style. Add doll eyes or buttons as finishing touches for uniqueness.
To bring Crochet Sally’s granny square to life, follow techniques like braiding yarn for hair or sewing facial features with simple stitches. Attention to detail, like sewing her smile and crocheting the flower, makes the square special. With practice, you’ll create stunning Halloween-themed designs and enjoy the journey every step of the way!
Credit Simple Crochet
Materials & Tools Needed
-
Medium Weight Yarn (Category 4):
-
Pale Teal/Mint Green (for Sally’s skin)
-
Black or Dark Charcoal (for the squaring rows and embroidered details)
-
White (for the crochet eyes)
-
Red (for the lips)
-
Orange/Red-Brown (for her braided hair)
-
Yellow & Pink/Purple (optional, for her hair flower)
-
-
Crochet Hook: 2.5 mm crochet hook
-
Yarn Needle: Essential for weaving in ends and embroidering facial details.
-
Scissors: For clean yarn cuts.
-
Optional: Small black buttons, doll safety eyes, or craft glue if you prefer not to embroider the pupils.
Key Features & Construction
-
Circular to Square Transition: The pattern builds a flawless flat circle over three rounds before dropping into short and tall stitches (single, half-double, and double crochets) to build clean 90-degree corners.
-
3D Texturing: Uses specialized loop placement (working into the back loop and third loop simultaneously) to create a beautiful raised ridge around Sally’s face, giving the square an inset, framed appearance.
-
Mixed-Media Embellishments: Combines classic crochet elements with freehand surface embroidery and yarn braiding to perfectly capture her ragdoll aesthetic.

Step-by-Step Round Pattern
Part 1: The Face Base (In the Round)
-
Round 1: Start with a magic ring. Chain 3 (counts as your first double crochet), then place 11 double crochets into the ring. Pull the tail tight and join to the top of your starting chain with a slip stitch (12 stitches).
-
Round 2: Chain 3 and double crochet into the same stitch. Place 2 double crochets into every remaining stitch around. Join with a slip stitch (24 stitches).
-
Round 3: Chain 3 and double crochet into the same stitch, then place 1 double crochet in the next stitch. Repeat the pattern
[2 dc, 1 dc]all the way around. Join with a slip stitch, fasten off, and weave in your ends (36 stitches).

Part 2: Squaring It Off
-
Round 4: Attach your background yarn to any stitch. To create a defined edge, work this entire round only into the back loop and third loop together. Chain 5 (counts as 1 dc + chain-2 space). Place 2 double crochets into the next stitch. Work 1 half double crochet in each of the next 2 stitches, followed by 1 single crochet in each of the next 3 stitches. Work 1 half double crochet in each of the next 2 stitches. To form the next corner: Place 2 double crochets in the next stitch, chain 2, and 2 double crochets in the following stitch. Repeat this sequence around to square off the circle. Join with a slip stitch.
-
Round 5: Slip stitch into your corner space. Chain 6 (counts as 1 triple stitch + chain-2 space), then work 2 triple stitches into that same corner space. Work 1 double crochet across the next 11 stitches along the side. In the corners: Work
[2 triple stitches, chain 2, 2 triple stitches]into each corner chain space. Complete the round, join with a slip stitch, and fasten off.
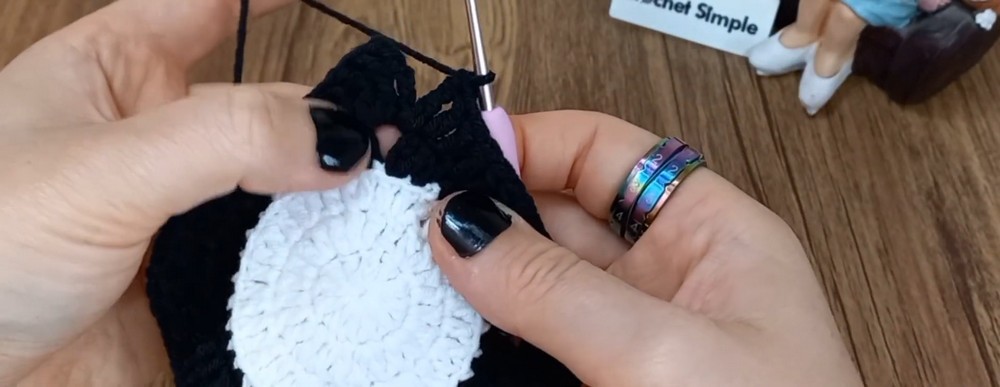
Part 3: Character Features & Finishing Touches
-
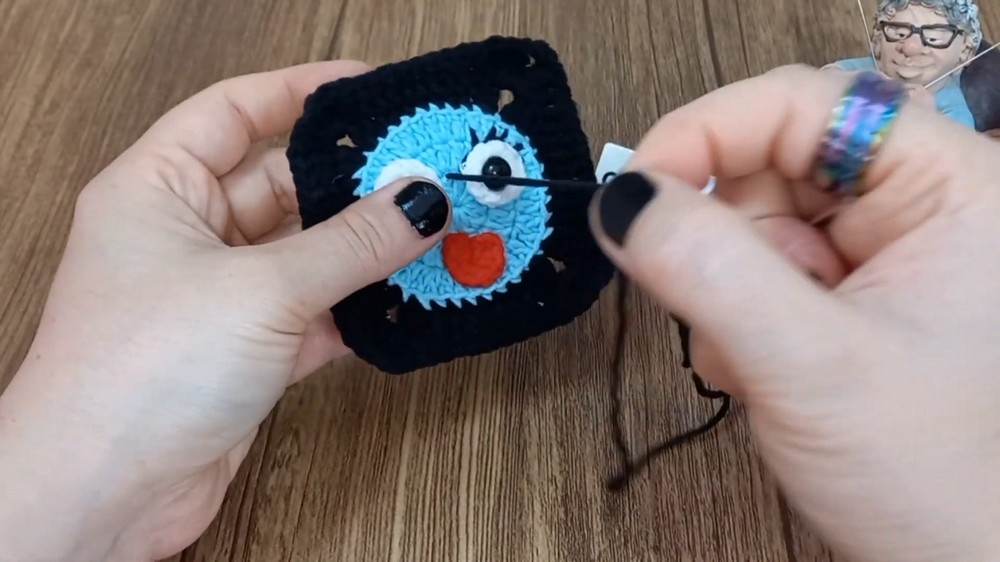
The Eyes: Crochet two small circles using a magic ring and 12 half double crochets, or swap them out for black buttons or doll eyes.
-
The Lips: Create a small heart-like shape by working a tiny sequence of half double crochets and single crochets directly into a magic ring, then sew or glue it below the eyes.
-
The Details: Use a tapestry needle and black yarn to embroider her iconic eyelashes, nose lines, and the iconic “stitches” running across her face and smile line.
-
The Hair & Flower: Attach strands of bright red yarn to the top corners of the square and braid them down the sides. Complete her look by crocheting a tiny yellow chain-loop flower and securing it onto her hair.
Troubleshooting & Suggestions
-
Mind the “Hidden” Corner Stitch: When transition-stitching the sides of your square in Round 5, the first double crochet immediately following a corner can easily get buried underneath your bulky triple stitches. Make sure to pull those stitches slightly to the side so you don’t accidentally skip it and throw off your stitch count!
-
Tackling the Third Loop: Working into the back loop and the third loop simultaneously can feel a bit awkward at first. Keep your tension slightly relaxed on Round 3 so those extra loops are easier to slide your hook under.
-
Creative Mix & Match: Don’t stop at Sally! Because this framework creates a uniform size, you can easily alter the face colors and facial embroidery to build matching squares for Jack Skellington, Oogie Boogie, or even classic monsters like Frankenstein’s creature.