Crochet Watermelon Bag Keychain Pattern Free
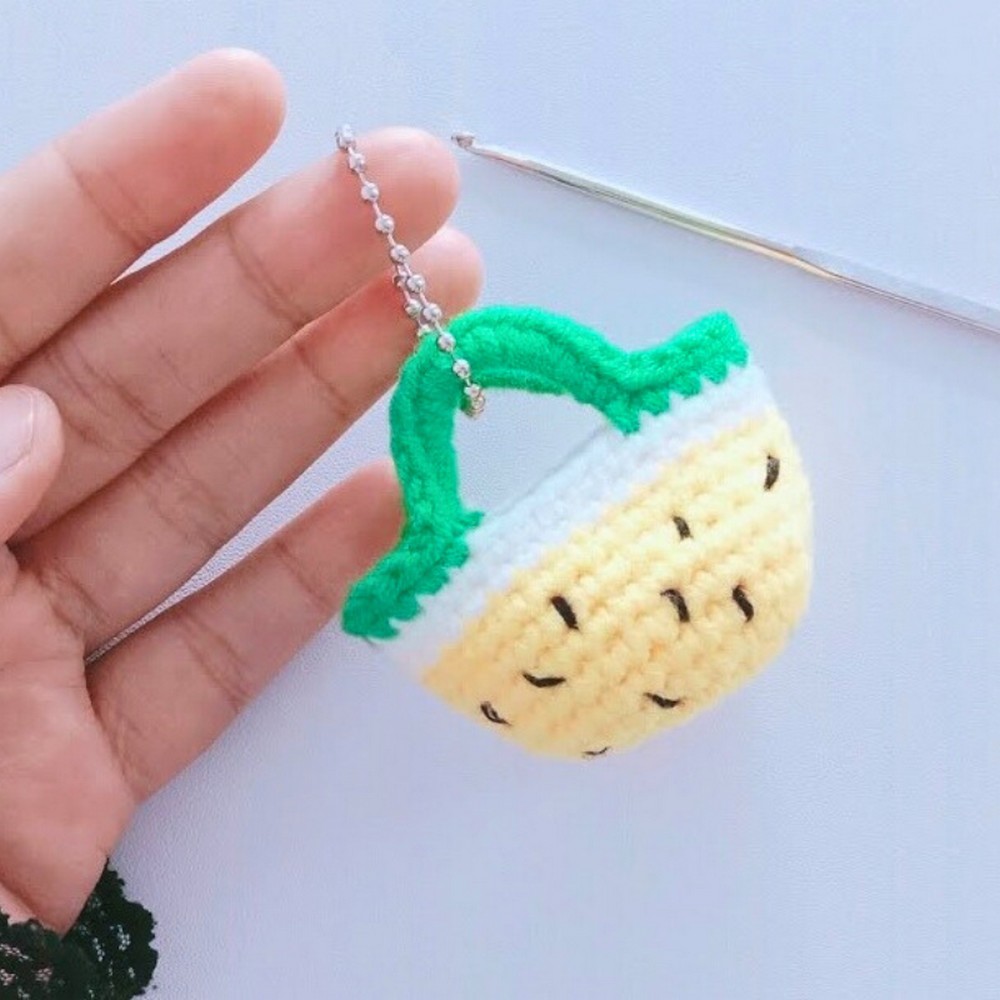
A tiny slice of watermelon can bring an instant burst of color to your everyday essentials. This crochet watermelon bag keychain combines a cheerful fruit-inspired shape with a compact design that is easy to carry wherever you go.
Attach it to your keys, backpack, or favorite bag for a playful handmade accent that stands out without adding bulk.
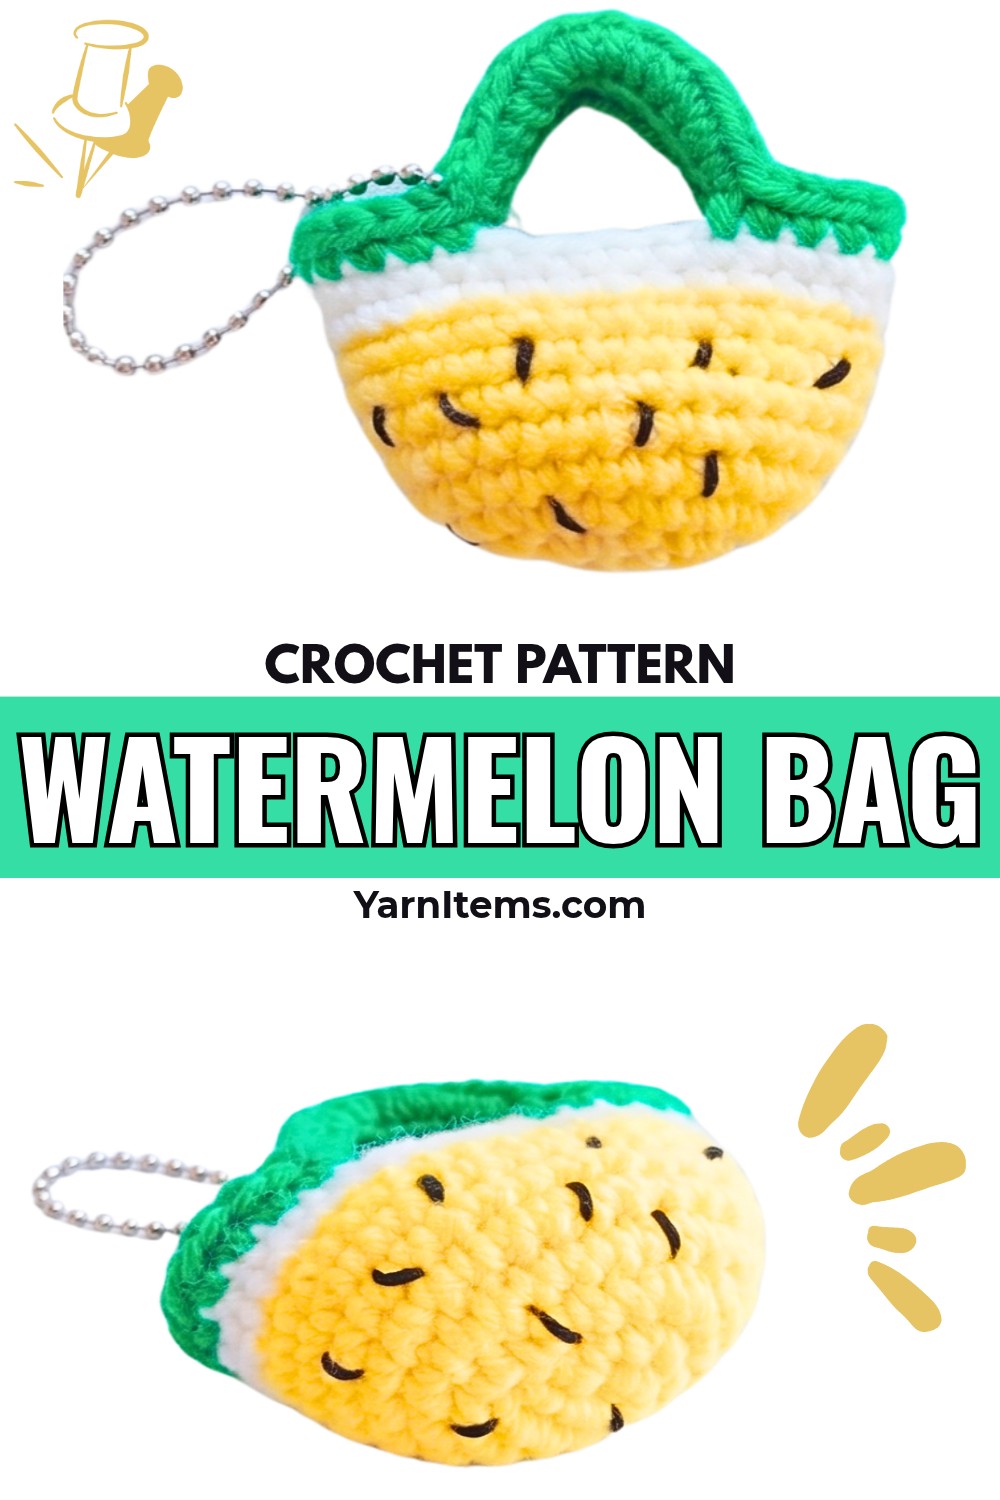
Small details make this little crochet accessory surprisingly useful. Its lightweight design can hold tiny essentials such as coins or lip balm, or simply add a bright touch to personalize your belongings.
With its simple construction and beginner-friendly appeal, this crochet watermelon piece is a fun choice for creating a practical accessory or a sweet handmade gift.
Credit Cahaya Crochet
Materials & Tools Needed
- Yarn: 5-ply Milk Cotton Yarn in:
- Yellow (flesh)
- White (inner rind)
- Green (outer rind)
- Small amount of Black (seeds)
- Crochet Hook: Size 5/0 (3.0 mm)
- Accessories: Ball chain or keychain hardware
- Notions: Stitch marker, yarn needle, and scissors
Finished Size & Customization Ideas
- Finished Size: Approximately 2 inches (5 cm) tall and 2.25 inches (6 cm) wide
- Customization Ideas:
- Use Red or Pink yarn for a traditional watermelon look
- Adjust chain length for use as a tote bag for small plushies or dolls
Pattern Notes
- The body is worked in continuous spiral rounds; do not join with a slip stitch unless changing color.
- Use a stitch marker to keep track of rounds.
- Make color changes in the final yarn-over of the last stitch of the previous round.
Pattern Abbreviations & Terminology (US Terms)
- MR: Magic Ring
- ch: Chain stitch
- sc: Single crochet
- inc: Single crochet increase (2 sc in the same stitch)
- sl st: Slip stitch
- st(s): Stitch(es)
Tips Before You Start
- Maintain consistent, tight tension for a firm shape.
- Weave in yarn ends as you go.
Step-by-Step Crochet Instructions
Round 1: Main Flesh (Yellow)
- Starting Stitch Count: 8 sts
- Using Yellow yarn, make a Magic Ring (MR).
- Chain 1.
- Work 8 single crochet (sc) into the ring.
- Pull the tail tightly to close the ring. (Total: 8 sts)
Round 2: Increase
- Stitch Count: 16 sts
- Work 2 sc into each stitch around. (inc × 8, Total: 16 sts)

Round 3: Expand Base
- Stitch Count: 24 sts
- Work (1 sc, inc) × 8 around. (Total: 24 sts)
Round 4: Final Expansion
- Stitch Count: 30 sts
- Work (3 sc, inc) × 6 around. (Total: 30 sts)
Rounds 5–9: Shape the Body
- Work 30 sc in each round for a total of 5 rounds (Rounds 5-9).
- On the last stitch of Round 9, stop before the final yarn-over, leaving 2 loops on the hook to prepare for color change.
Rounds 10–11: Inner Rind (White)
- Color Change to White:
- Pull White yarn through the last 2 loops of the 30th stitch in Round 9.
- Fasten off Yellow yarn.
- Work 30 sc for both Round 10 and Round 11 (2 rounds total).
- At the final stitch of Round 11, stop with 2 loops on the hook for the next color change.
Round 12: Outer Rind and Handles (Green)
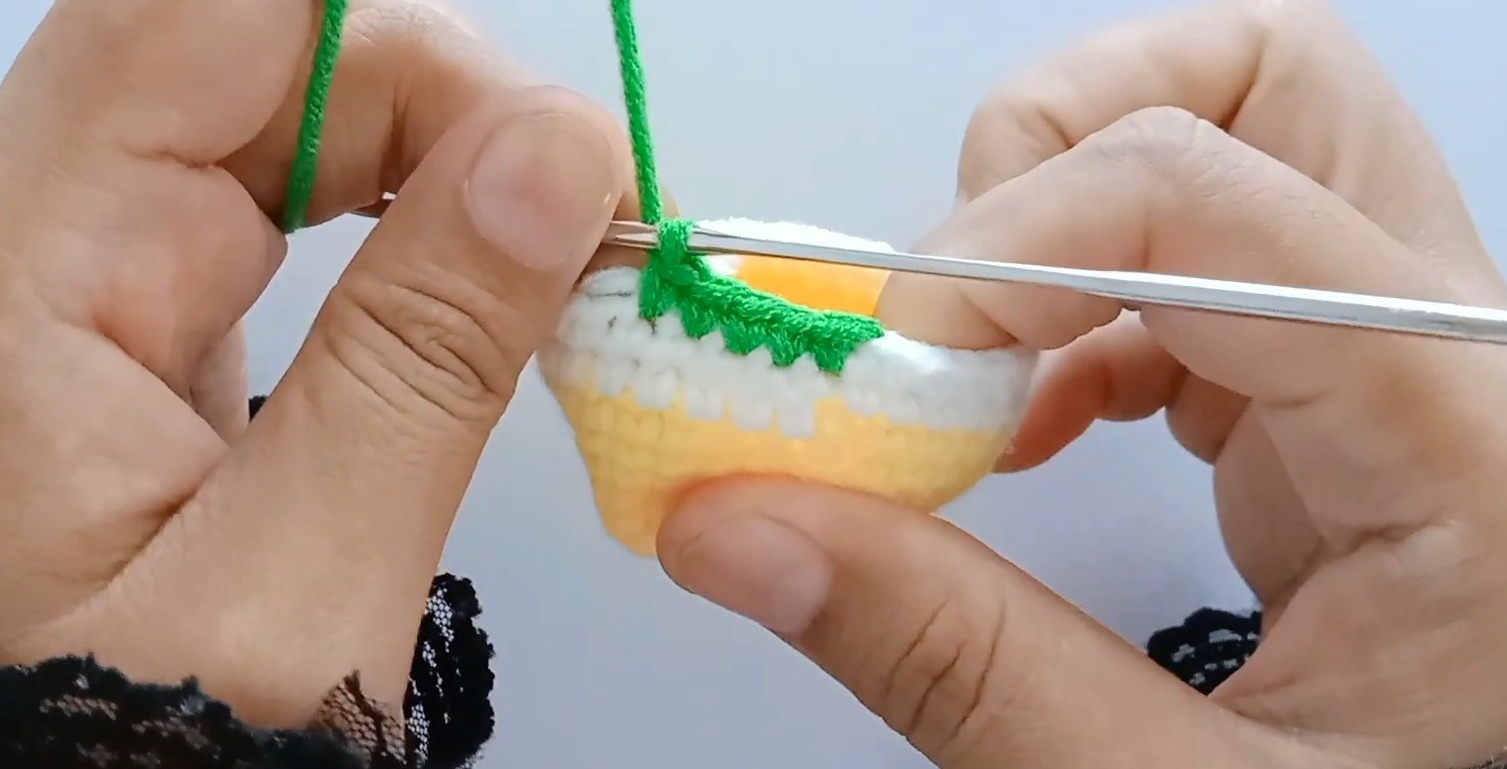
- Color Change to Green:
- Pull Green yarn through the loops of the last stitch from Round 11.
- Fasten off White yarn.
Creating the Handles and Outer Rim:
- Work 5 sc.
- Chain 10, then skip 5 stitches on the body to create the first handle space.
- Work 10 sc across the next 10 stitches.
- Chain 10, skip the next 5 stitches (creates the second handle space).
- Work 5 sc to finish the round.
Round 13: Border and Reinforced Handles
- Work 5 slip stitches (sl st) across the rim stitches leading to the first handle.
- Encasing the first handle chain: Work 12 sc around the chain-10 loop space.
- Work 10 sl st along the rim stitches between the two handles.
- Encasing the second handle chain: Work 12 sc around the second chain-10 loop space.
- Work 5 sl st to complete the rim.
- Fasten off, leaving a tail for finishing.

Final Assembly
Finishing the Rim & Weaving in Loose Ends:
- Thread the Green yarn tail onto a tapestry needle.
- Using an invisible stitch, pass the needle under the first stitch of the round, then secure the end inside the bag.
- Weave in all loose yarn ends and trim excess.
Embroider Watermelon Seeds:
- Thread Black yarn onto a needle.
- Stitch small vertical “seed” shapes across the Yellow body of the bag evenly.
- On the inside, secure each stitch with a small knot and trim excess Black yarn.
Attach Keychain Hardware:
- Using keyring or ball chain hardware, attach it to one Green handle.
Tips
- Adjust the size of the bag by using a smaller or larger hook and yarn weight.
- For added durability, double up the yarn for the handles.
Conclusion
Your mini crochet watermelon bag keychain is complete! It’s a quick and fun project, perfect for using leftover yarn and making cute, handmade gifts. Enjoy your crafting!