Easy Crochet Pumpkin Coaster Pattern for Fall Décor
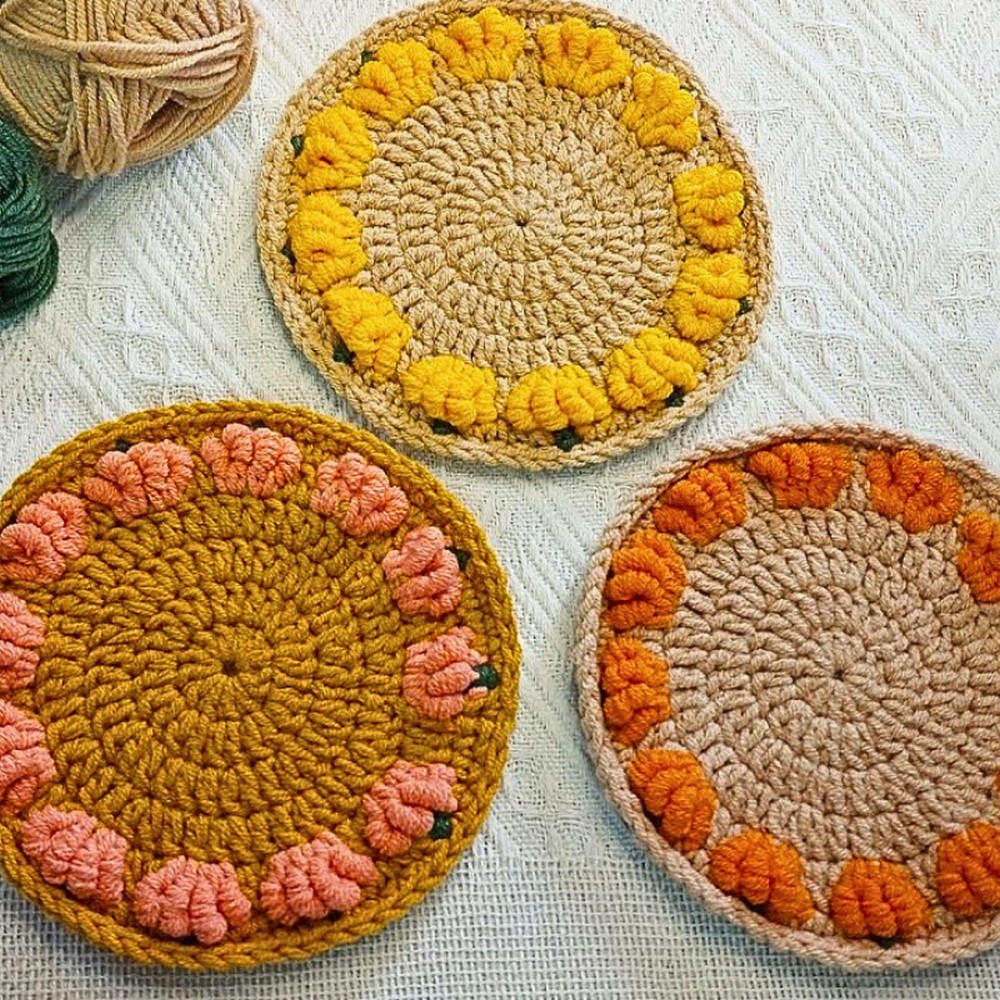
Not every fall crochet piece becomes a seasonal favorite, but this pumpkin coaster easily earns its place. Shaped like a plump pumpkin with softly defined ridges, it brings a warm handmade touch to coffee breaks, family meals, and autumn décor. The final detail that completes its crochet pumpkin look is simpler than it first appears.
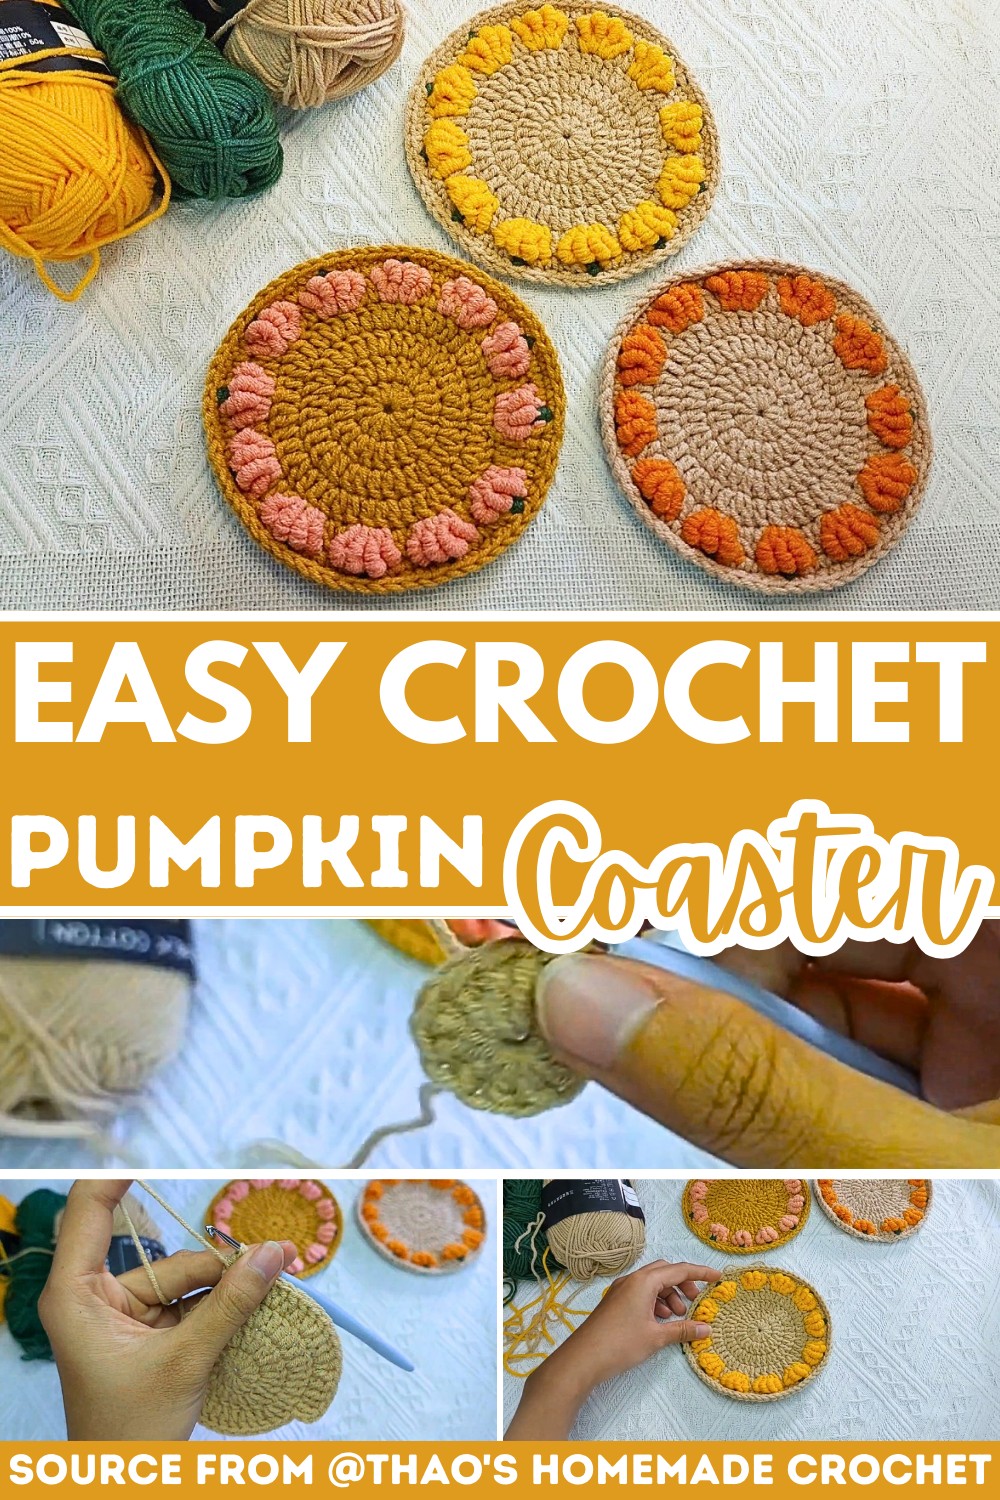
Designed with beginners in mind, this pattern is enjoyable for crocheters of any skill level. It creates practical coasters that help protect surfaces while adding a handmade fall accent to your home.
Stitch them in classic orange or warm fall colors to suit your décor. They look lovely under mugs and glasses or as thoughtful handmade gifts. The finishing details are what give each crochet pumpkin its own distinctive character.
Credit Thao’s Homemade Crochet
Materials & Tools Needed
- Yarn: Milk Cotton Yarn in three colors:
- Light Brown / Beige (Main coaster body base)
- Yellow / Orange (For the pumpkin stitchwork)
- Green (For the pumpkin stem detail)
- Crochet Hook: 3.5 mm
- Other Tools:
- Scissors
- Yarn needle for weaving in ends
Finished Size & Customization Ideas
- Approximate Size: 4 to 4.5 inches in diameter—perfect for standard mugs and glasses.
- Customization:
- Use alternative colors for each section. For example:
- Main base in mustard yellow
- Pumpkins in pink
- Border edge in dark brown
- You can experiment with different color combinations to fit your autumn-themed décor or personal preferences.
- Use alternative colors for each section. For example:
Pattern Abbreviations & Terminology (US Terms)
- MR: Magic Ring
- ch: Chain
- st / sts: Stitch / Stitches
- dc: Double Crochet
- sl st: Slip Stitch
- sc: Single Crochet
- sc2tog: Single crochet two together (decrease)
Step-by-Step Detailed Crochet Instructions
Coaster Base (Light Brown Yarn)
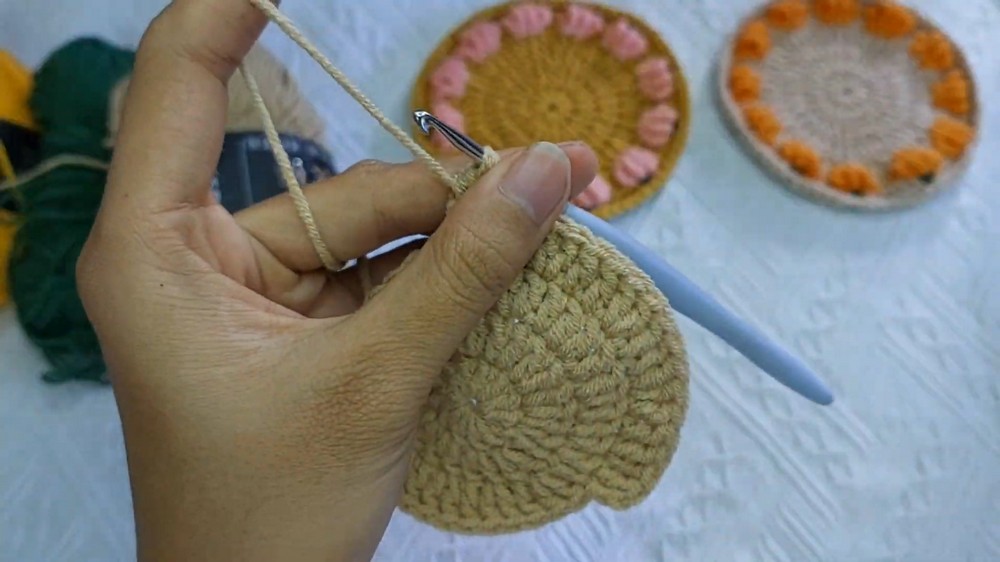
Round 1
- Create a magic ring.
- ch 2 (this counts as the first dc).
- Work 12 dc into the magic ring.
- Pull the tail tight to close the ring.
- Join with a sl st to the top of the first dc stitch.
(Total stitches: 12)
Round 2
- ch 2 (again counts as the first dc).
- Work 2 dc into each stitch around (increase in every stitch).
- Join with a sl st to the first dc stitch.
(Total stitches: 24)
Round 3
- ch 2.
- Alternate 1 dc in the next stitch and 2 dc in the following stitch (increase every second stitch).
- Repeat this pattern around.
- Join with a sl st to the first dc stitch.
(Total stitches: 36)
Round 4
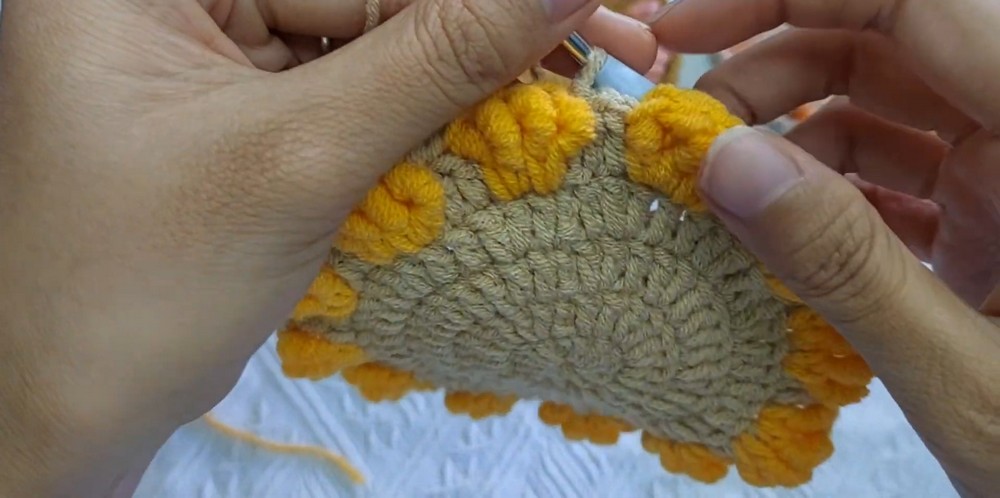
- ch 2.
- Alternate 1 dc in each of the next 2 stitches and 2 dc in the following stitch (increase every third stitch).
- Repeat this pattern around.
- Join with a sl st to the first dc stitch.
(Total stitches: 48)
The Pumpkin Stitch Border
Switch to Yellow Yarn for creating the pumpkin design.
Round 5: Pumpkin Stitch (Yellow Yarn)
- ch 1, pull up a loop of your yellow yarn.
- In the first stitch, work:
- 1 bullion stitch (wrap yarn around hook 5 times, insert into stitch, pull up a loop, yarn over and pull through all loops on hook).
- ch 1 to secure the bullion stitch.
- Work a second bullion stitch in the same stitch space.
- ch 1, skip 1 stitch, then work 2 bullion stitches in the next stitch space.
- Repeat this pattern around to form pumpkin clusters.
- Switch back to brown yarn when finishing the final stitch loop.
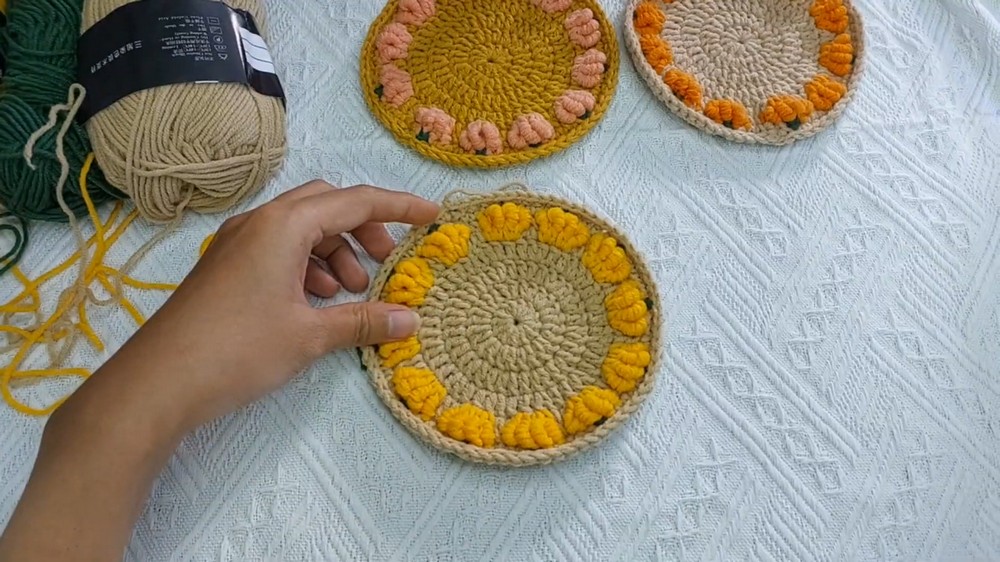
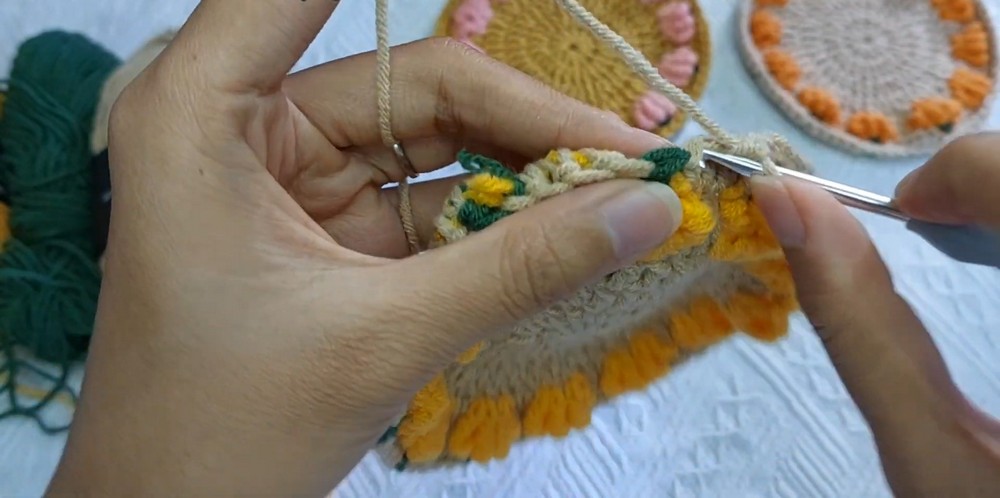
Round 6: Pumpkin Stem (Green Yarn)
- ch 1, pull through with your green yarn.
- Work 1 sc into the top space between the two yellow bullion stitches.
- In the skipped stitch spaces from the previous row, work sc2tog (single crochet two stitches together in the decrease method), creating a clean stem boundary.
- Switch back to brown yarn at the top of the loops.
Round 7: Final Border Edge (Brown Yarn)
- ch 1, work 1 sc into each stitch space around the border edge.
- Ensure the stitches are cleanly matched to frame the pumpkin design.
- Join with a sl st to the first stitch of the round.
- Fasten off and clip your yarn.
Finishing
- Thread any remaining yarn tails onto a yarn needle.
- Neatly weave them through the back stitches of the coaster to secure the ends.
- Trim off any leftover excess yarn.