Crochet Flower Headband Pattern With Puff Stitch Flowers
Those little crochet flowers can become a delicate wearable band as you join them petal by petal, then finish both ends with simple adjustable tie straps.
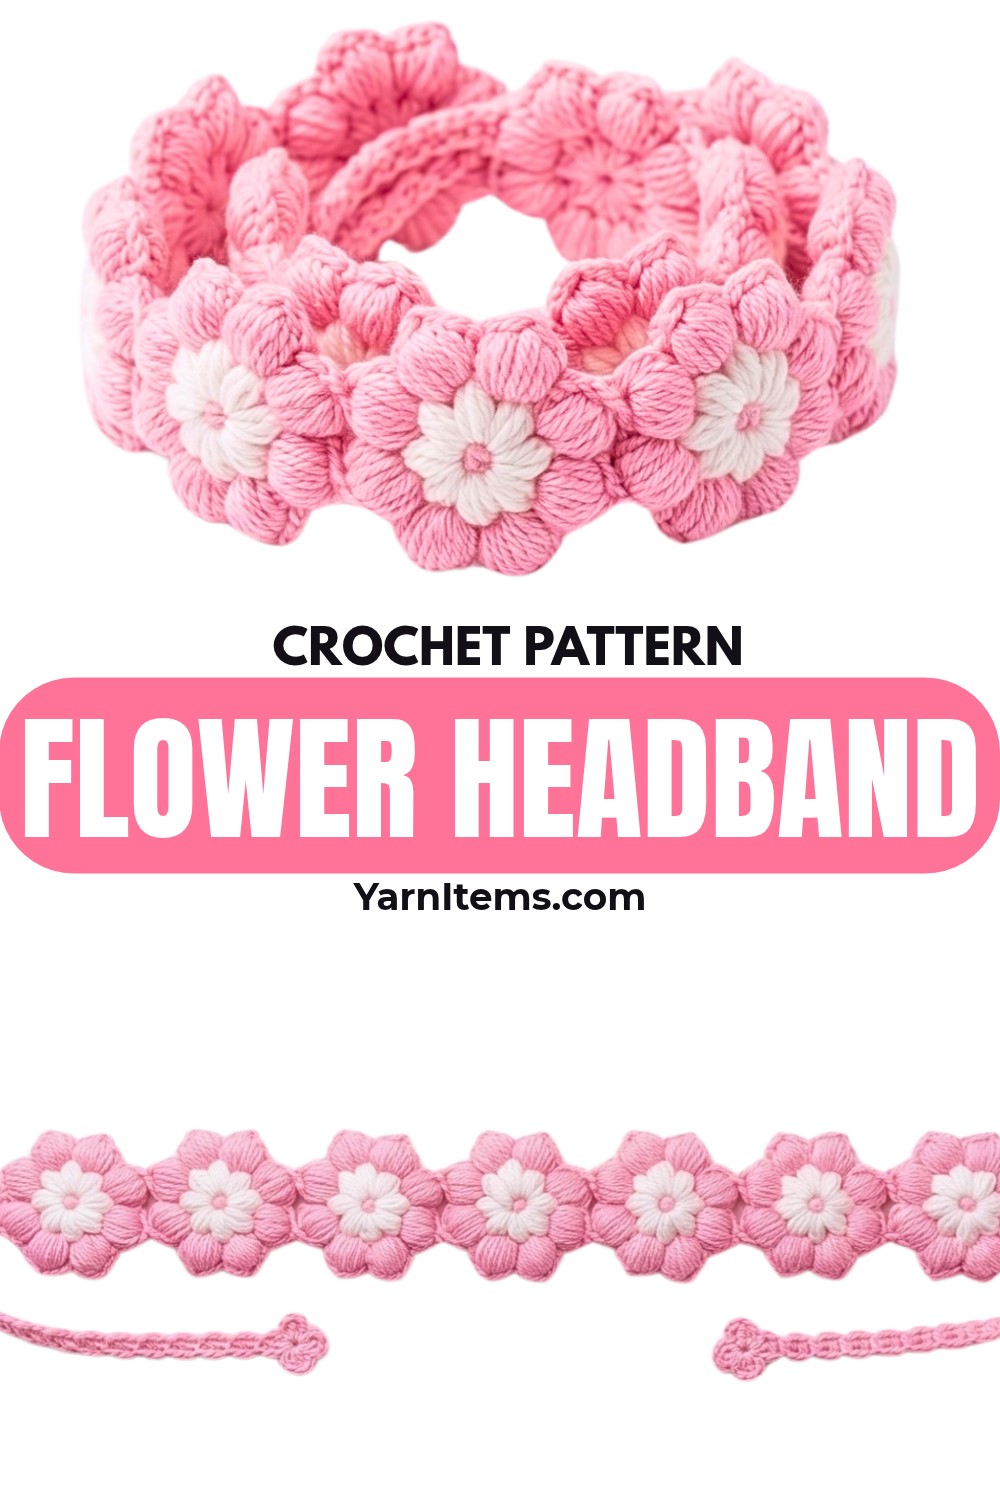
Clusters of soft puff stitches give these crochet flowers a rounded, dimensional look, while tiny picot tips add a pretty detail to every petal. Joined side by side, the blossoms form a flexible floral strip that can be worn as a crochet headband or adapted into other decorative bands.
The pattern is suitable for crocheters who are comfortable with magic rings, puff stitches, and basic chain-and-slip-stitch work. Each new flower is attached to the previous one during Round 2, with two neighboring petals sharing joins before the remaining petals are completed normally; tie straps at both ends make the finished length easy to adjust.
Credit Daily Crochet & Knit Free Patterns
Materials & Tools Needed
- Yarn: Medium-weight worsted/DK yarn in two colors:
- Color A: Flower centers
- Color B: Petals and straps
- Crochet Hook: 3.5–4.5 mm hook appropriate for your yarn
- Scissors
- Yarn Needle: For weaving in ends
Finished Size & Customization
There is no fixed finished measurement because the floral strip grows according to the number of flowers you join.
You can adapt the design in several ways:
- Headband: Join enough flowers to comfortably span the desired area around the head, then use the straps to tie it securely.
- Pet Collar: Add flowers until the strip reaches the required length, leaving the straps long enough to tie comfortably.
- Belt or Decorative Ribbon: Continue adding flowers for a longer floral strip.
- Color changes: Keep the centers and petals contrasting for a defined flower shape, or switch either color for a completely different look.
Because each new flower connects directly to the previous flower, you can decide whether to stop after any completed flower rather than committing to a fixed number from the beginning.
Pattern Abbreviations
- MR – Magic Ring
- ch – Chain
- sl st – Slip Stitch
- yo – Yarn Over
- sp – Space
- dc – Double Crochet
- st(s) – Stitch(es)
Puff Stitch: [Yo, insert hook into the designated space, pull up a loop] 4 times; 9 loops are on the hook, then yo and pull through all loops.
Incomplete Puff Stitch: Work the same 4 yarn-over/pull-up sequence but leave all loops on the hook without closing the stitch.
Cluster Puff (Petal): Two incomplete puff stitches worked in neighboring spaces and then closed together by pulling the yarn through all loops at once.

Before You Start
Each flower begins with an eight-puff center in Color A. Round 2 turns those eight center spaces into 8 petals, with each petal built from two incomplete puff stitches.
The joining technique happens only when you add a flower to an existing strip. The first two petals are made normally; Petals 3 and 4 are connected to two neighboring petals of the previous flower, and Petals 5–8 are completed normally.
When making a join, the loop is temporarily dropped from the hook so it can be pulled through the picot of the previous flower. Keep the dropped loop secure while positioning your hook, and check that you are joining to the adjacent petal picot rather than skipping over one.
Step-by-Step Crochet Pattern
Flower Center – Round 1
Make one center for every flower you plan to add.
Round 1: Using Color A, make an MR, ch 2, work 1 Puff St into the MR, ch 1, then repeat [1 Puff St into the MR, ch 1] 7 more times for 8 Puff Sts and 8 ch-1 spaces, pull the magic ring tight, sl st into the top of the first Puff St to join, then fasten off.
Count the center spaces before moving on. You need 8 ch-1 spaces because each space provides the working point for one of the eight petals in the next round.

First Flower Petals – Round 2
Attach Color B to any ch-1 space between the puff stitches.
Round 2: Ch 3, work an Incomplete Puff St in the same ch-1 space, work a second Incomplete Puff St in the next ch-1 space, yo and pull through all loops to close the cluster, ch 3 and sl st into the first chain to form a picot, ch 3 and sl st into the same ch-1 space; repeat this petal sequence around until 8 petals are complete, with the final petal anchoring back into the first ch-1 space.
Each petal uses two neighboring center spaces. After the cluster is closed, the ch-3/sl-st section creates the small picot at the tip, while the final ch-3/sl-st anchors the petal to its second working space.
Before fastening off, gently spread the petals around the center. They should form a complete eight-petal flower rather than bunching together.
Fasten off and weave in the ends.

Join the Next Flower
Make another flower center using Round 1, then attach Color B for Round 2.
Complete Petals 1 and 2 normally using the regular cluster-puff and picot sequence.
Join Petal 3
Work Petal 3 through the cluster closure, but after pulling the yarn through all loops, ch 1 and remove your hook from the loop.
Insert the hook into the picot space of a completed petal on the previous flower. Pick up the dropped loop and pull it through that picot.
Then ch 1 and sl st into the bottom of the chain to complete the joined picot. Finish the petal with ch 3 and sl st into the same ch-1 space on the new flower’s center.
Check the connection before continuing. The two flowers should sit next to each other without one petal being pulled tightly out of shape.

Join Petal 4
Work Petal 4 up to the cluster closure, then ch 1 and remove your hook from the loop.
Insert the hook into the adjacent petal’s picot on the previous flower, pull the dropped loop through, then ch 1 and sl st to finish the picot. Complete the petal with ch 3 and sl st into the same ch-1 space on the new flower.
The two joins should now connect two neighboring petals of the new flower to two neighboring petals of the previous flower.
Complete the Flower
Crochet Petals 5, 6, 7, and 8 normally, following the same cluster-puff, picot, and anchoring sequence used for the first flower.
Once the flower is complete, fasten off and weave in the ends.
Continue the Floral Strip
Repeat the same join-as-you-go process for every additional flower:
New flower: Complete Petals 1–2 normally, join Petals 3–4 to two adjacent petal picots of the previous flower, then complete Petals 5–8 normally.
Continue until the floral strip reaches the length you want.
At each new flower, check the direction of the petals before making the joins. Keeping the blossoms oriented consistently will give the finished strip a neat repeating floral arrangement.
Add the Tie Straps
Once the desired number of flowers has been joined, add a strap to one end of the floral strip.
Attach Color B with a sl st in the dip between the two outermost unjoined petals at the end.
Strap: Ch 3, work 1 dc into the first chain made to create an oval-shaped loop, then repeat [ch 3, dc into the first chain] continuously until the strap reaches your desired tying length.
The repeated chain-and-dc combination creates a flexible decorative cord rather than a solid flat strap.
Small Clover End
At the end of the strap, create the small three-petal finish:
End Motif: Ch 3, work a 2-dc cluster (or small puff) into the first chain, ch 2, sl st into the same space, then repeat [ch 2, 2-dc cluster, ch 2, sl st] two more times in the same space to create a 3-petal clover.
Fasten off, pull the yarn through to secure it, and hide the remaining tail.

Add the Second Strap
Attach Color B to the opposite end of the floral strip in the corresponding dip between the two outermost unjoined petals.
Repeat the same strap and three-petal clover sequence, adjusting the length so both ties provide enough room to secure the finished band comfortably.
Before weaving in the final ends, lay the floral strip flat and check that the two straps extend naturally from opposite ends without twisting the flowers.