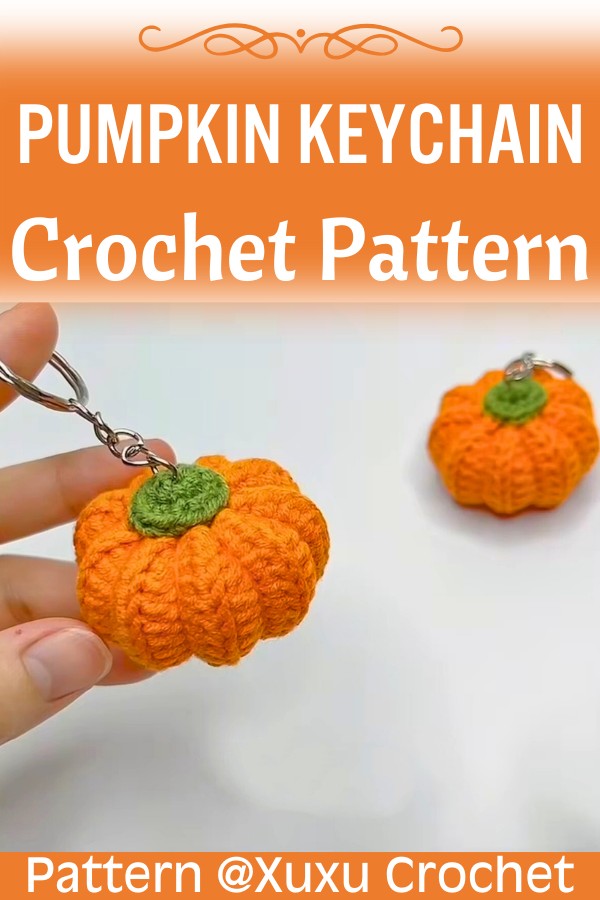
Easy and Adorable Crochet a Cute Pumpkin Keychain
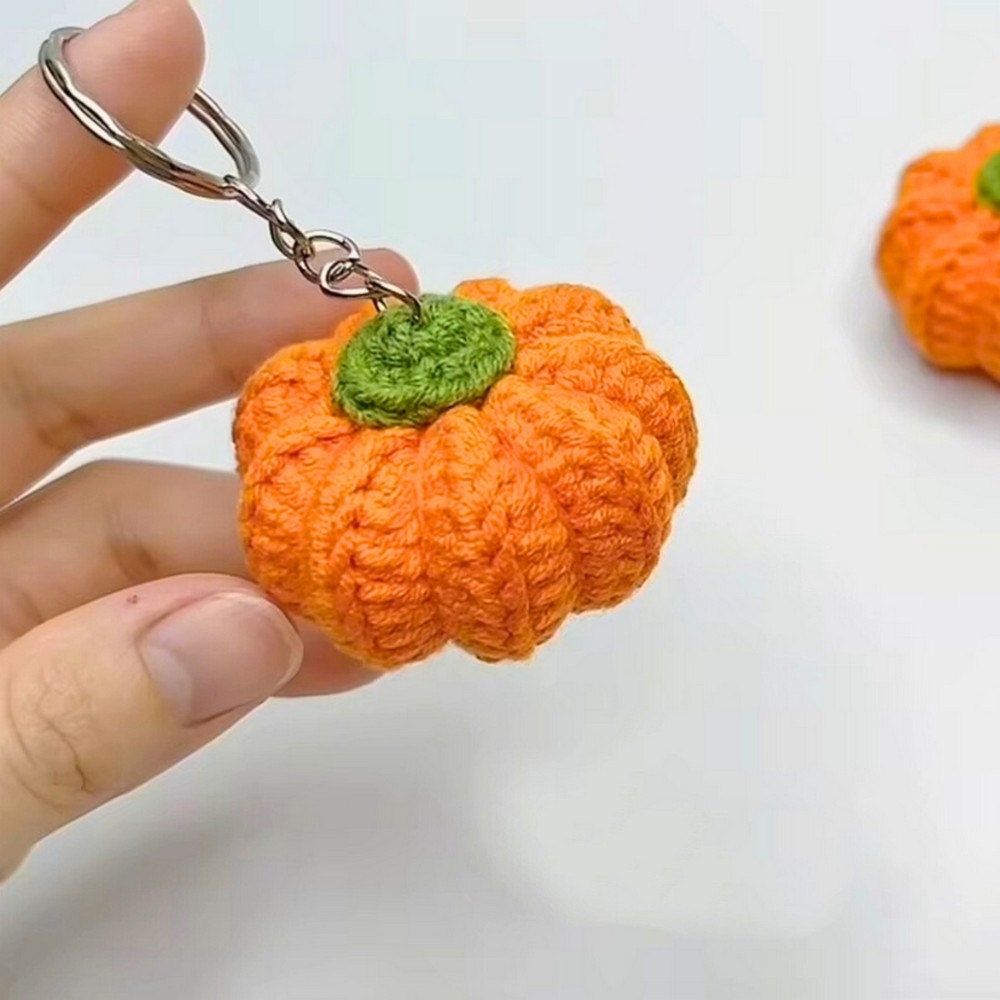
Nothing captures the cozy feeling of fall quite like a tiny handmade pumpkin. This charming crochet piece may be small, but it adds a cheerful touch wherever you carry it.
Attached to a keyring, backpack, or handbag, it becomes a delightful item that stands out without taking up space. Its warm colors and playful design make it a lovely choice for everyday use or seasonal decorating.
Crochet a Cute Pumpkin Keychain

A simple crochet design can sometimes leave the biggest impression. This adorable crochet piece is beginner-friendly while still offering a polished and eye-catching finish. It also makes a thoughtful handmade gift that feels personal and full of seasonal charm. The brochure below shares everything needed to create this cozy pumpkin keychain with confidence.
Credit Xuxu Crochet
Why You’ll Love This Crochet Pattern
- Quick & Beginner-Friendly: Uses basic stitches (hdc & sc) to achieve a textured ribbed pumpkin design.
- Minimal Materials: Perfect for using up scrap yarn.
- Versatile Use: Ideal as a bag charm, key ring, or fall decor.
Materials Needed
- Yarn: Milk Cotton Yarn (4-ply/5-ply) in Orange (pumpkin) and Green (stem/topper).
- Weight: 125g class.
- Crochet Hook: 2.5 mm.
- Stuffing: Polyester Fiberfill.
- Keychain Hardware: Key ring with chain/jump ring.
- Additional Notions: Tapestry/yarn needle and scissors.
Quick Tips for Success
- Tension Control: Ensure even hdc stitches for uniform ribbing.
- Size Adjustments:
- Taller/Broader Pumpkin: Increase starting chain length (e.g., 17–19 ch).
- Wider Pumpkin: Add more row repeats (e.g., 20–22 rows).
- Pattern Notes:
- Work BLO (Back Loop Only) for textured ribbing.
- Anchor the final stitch of every row through both loops for clean edges.
- Chain-1 turning does not count as a stitch.
Helpful Techniques
- Inside Out Finish:
- Once you’ve sewn the side seam of the pumpkin, use a slip stitch to join the edges and create a smooth, sturdy seam.
- After stitching, turn the pumpkin inside out.
- This hides the ridge of the seam, giving your pumpkin a clean and professional appearance.
- Generous Yarn Tails:
- When cutting your yarn, leave a long tail (12–15 inches or more) at both the top and bottom of your pumpkin.
- These yarn tails are essential for cinching:
- Cinching the Top and Bottom: Use the tails to gather and close each end of the pumpkin securely.
- Defining Pumpkin Sections: You can also thread the tail through the pumpkin vertically to create indented sections (like pumpkin ridges), giving it a realistic, sculpted look.
Skill Level & Time Estimate
- Skill Level: Easy/Advanced Beginner.
- Time Requirement: ~30–45 minutes.
Abbreviation Guide
- Ch: Chain
- St/Sts: Stitch/Stitches
- Sl st: Slip Stitch
- Sc: Single Crochet
- Hdc: Half Double Crochet
- BLO: Back Loop Only
- Inc: Increase (2 single crochets in same stitch)
- MR: Magic Ring / Magic Circle
Step-By-Step Pattern
Component 1: Pumpkin Body (Orange Yarn)
Foundation
- Start with a slip knot and chain 15
Row-by-Row Instructions
- Row 1: Skip the 1st chain from the hook. Work 1 hdc (half double crochet) into the 2nd chain from the hook and into each chain across
- Total stitches: 14 hdc
- Row 2: Chain 1, turn. Work 13 hdc into the back loops only (BLO) in the first 13 stitches. Work 1 hdc through both loops in the last stitch
- Total stitches: 14 hdc
- Row 3: Chain 1, turn. Repeat the same as Row 2: 13 BLO hdc, then 1 hdc through both loops in the last stitch
- Total stitches: 14 hdc.
- Rows 4–18: Repeat Row 3 (working 13 BLO hdc and 1 hdc through both loops) in each row. This will create a total of 18 ribbed rows for the pumpkin body
Seaming the Tube
- Fold the rectangular panel in half (right sides inside) so the short ends meet
- Join the two short ends using 15 slip stitches (Sl st)
- Insert the hook into the BLO of the current edge stitch and the matching foundation chain loop on the opposite side
- Total slip stitches: 15
- Finish the seam by chaining 1, cutting the orange yarn, and leaving a long tail of 15-20 inches for sewing later. Pull the yarn through
- Turn the tube inside out so the seam is hidden on the inside

Component 2: Pumpkin Stem / Topper (Green Yarn)
Stem Rounds
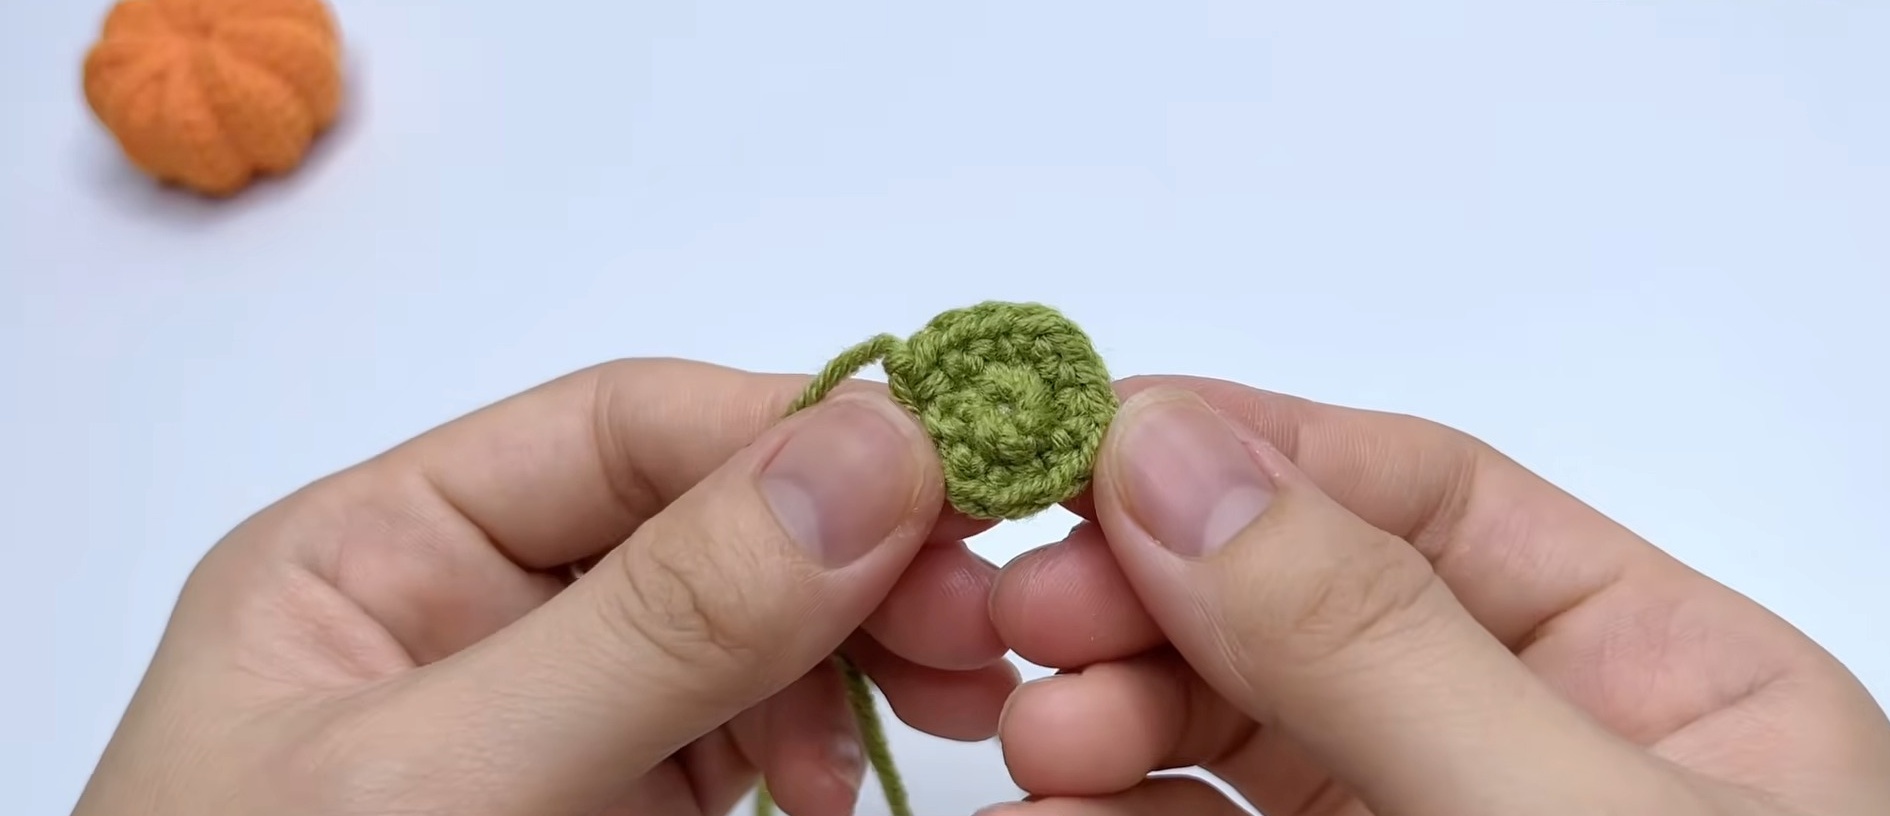
- Round 1: Create a Magic Ring (MR). Chain 1 and work 8 single crochets (sc) into the ring
- Pull the tail to close the ring snugly. Slip stitch into the 1st sc to join
- Total stitches: 8 sc.
- Round 2: Chain 1. Work the following pattern 4 times total: (1 sc in the next stitch, 2 sc in the next)
- Result: 12 sc. Slip stitch into the 1st sc to join
- Fasten off, leaving a long green tail for assembly. Weave in and secure the starting magic ring tail
Final Assembly & Finishing
Closing the Bottom
- Thread the orange yarn tail onto a tapestry needle
- Weave the needle in and out around the edge loops of the bottom opening
- Pull the yarn tightly to cinch it closed [12:17], then secure it with a few locking stitches.
- Pass the needle up through the pumpkin center to the top opening
Stuffing
- Fill the pumpkin firmly with polyester fiberfill stuffing

Closing the Top & Shaping the Ribs
- To close the top opening:
- Weave the needle in and out around the top edge loops and pull tight to cinch the opening closed
- To shape the pumpkin’s 9 grooves (ribs):
- Insert the needle down through the top center, pass through the middle of the pumpkin, and exit out the bottom center
- Wrap the yarn over the outside of the pumpkin along a rib valley, then re-enter through the bottom center
- Repeat this process to create 9 evenly spaced grooves
- Secure with locking stitches and weave the yarn tail inside the pumpkin body
Attaching the Stem
- Position the green stem on top of the pumpkin, centering it
- Using the green yarn tail, whip stitch around the stem’s base, sewing it to the pumpkin’s top
Adding Keychain Hardware
- Place the metal keychain ring directly over the center of the green stem.
- Use the remaining green yarn to securely sew the keychain ring into place.
- Fasten off, knot tightly, and weave all remaining tails inside the pumpkin body

Creative Personalization Ideas
- Scented Fill – Add dried lavender or spice-scented scraps for a cozy aroma.
- Decorative Dangles – Attach beads, charms, or seasonal embellishments like leaves.
- Monogram Embroidery – Stitch initials or names for a personal touch.
- Glow-in-the-Dark Threads – Add luminous designs for nighttime fun.
- Secret Pocket – Include a tiny pouch to hold notes or keepsakes.
- Layered Textures – Combine fabrics like felt, leather, or burlap for depth.
- Photo Keepsake – Add a clear charm with a picture or quote inside.
Congratulations!
You’ve completed your adorable crochet pumpkin keychain! Use it to accessorize zippers, keys, or gift it to friends. Why not create a matching set in different fall colors?