How to Crochet a Rose Bouquet Shawl – 2-in-1 Gift
Looking for a gift that feels romantic and practical? This crochet rose bouquet opens into a cozy shawl, combining beautiful flowers with something you can wear.
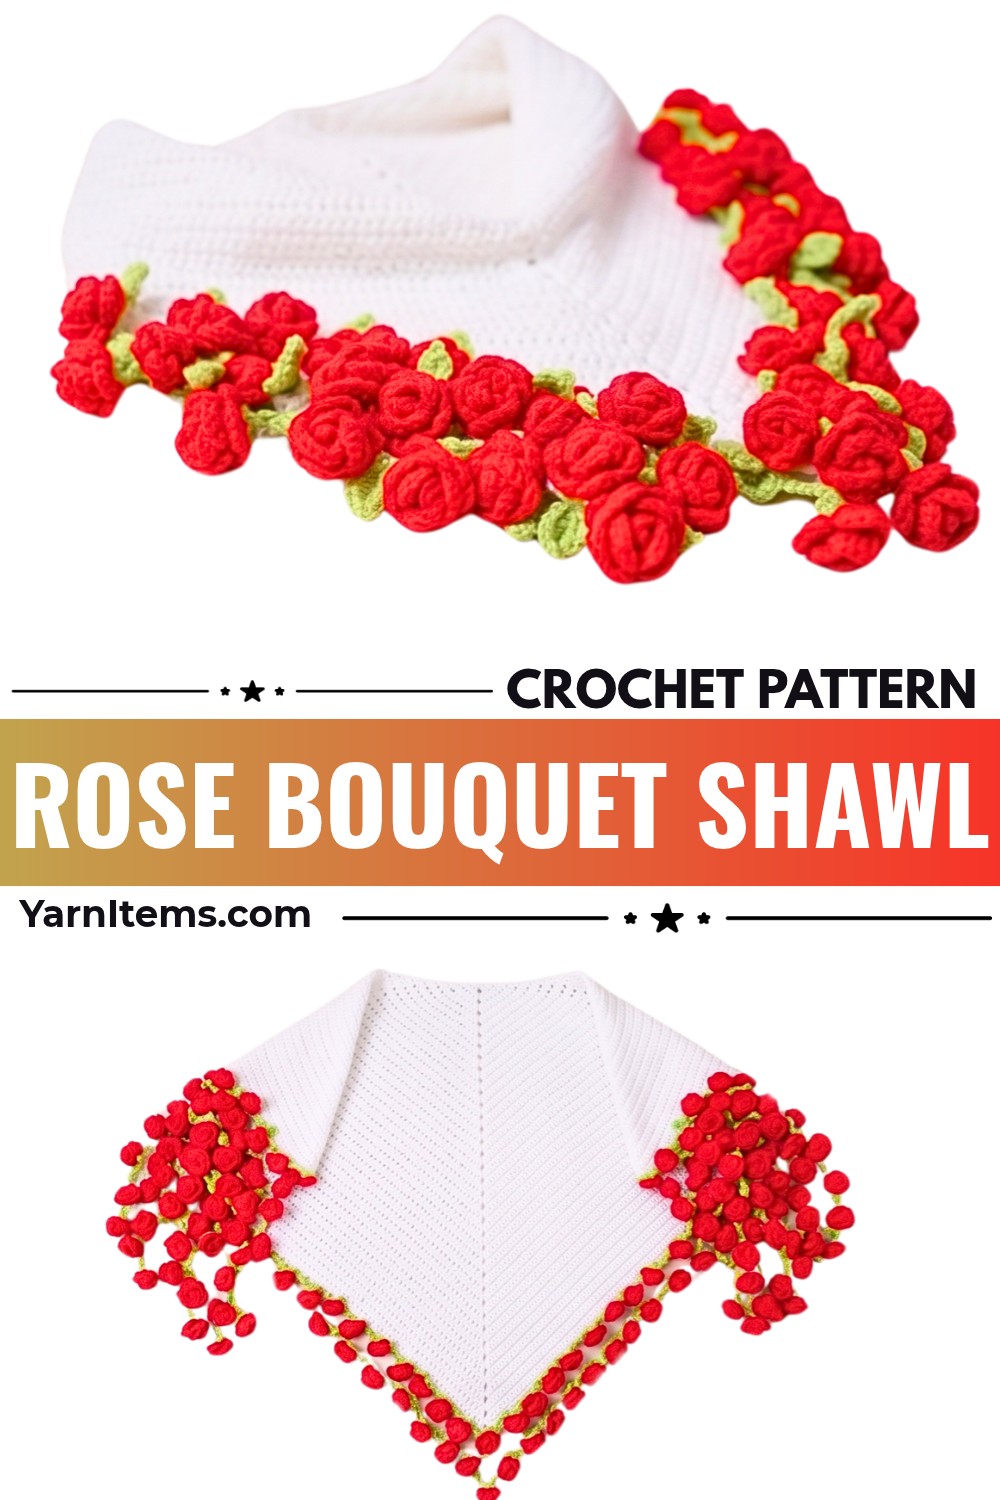
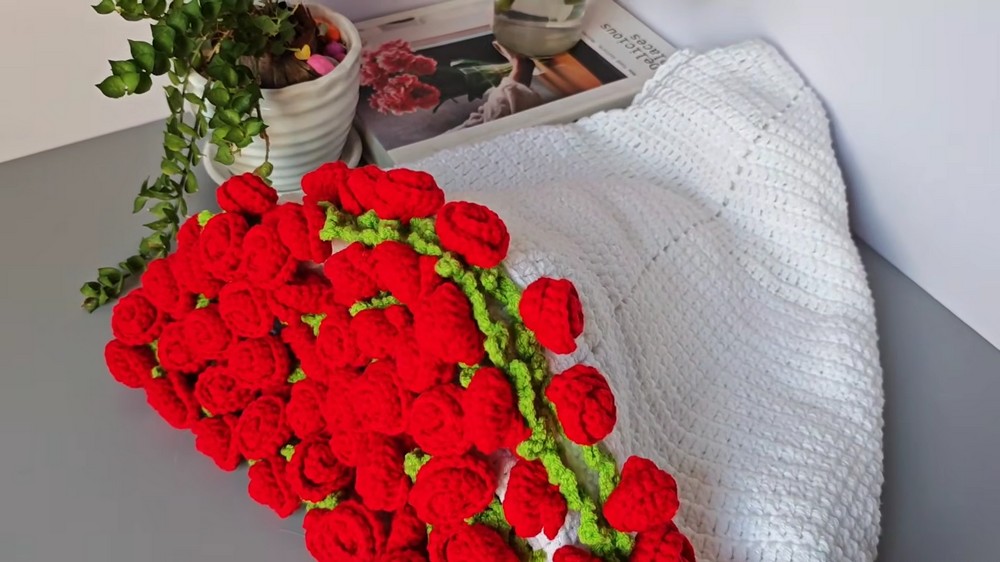
These days, the rose bouquet shawl design is becoming a favorite for its clever two-in-one style. The picture shows a large bouquet of red crochet roses on one side and a girl wearing the same piece as a white shawl on the other.
This is one of my favorite ideas because it combines the beauty of a romantic crochet flower arrangement with the comfort of something cozy to wear. It feels like a bouquet made with love that can stay useful long after the special occasion.
This triangular crochet shawl is decorated with small roses along its border, transforming from a wearable wrap into a giant rose bouquet when rolled and arranged. It suits confident beginners who are comfortable repeating simple stitches and making individual crochet roses before attaching them. You can use it as a shawl, cozy wrap, blanket, or decorative bouquet for Valentine’s Day, Mother’s Day, or a bridal shower. It also makes a thoughtful handmade gift that combines floral beauty with everyday comfort.
Credit Cozy Craft
Materials & Tools Needed
- Main shawl yarn: Milk Cotton yarn, about 10 balls (50 g each), with black accent trim, as desired.
- Rose yarn: Red or rose-colored yarn, approximately 3–4 balls.
- Green yarn: 1 ball for leaves or rosebud bases; you may not use the entire ball.
- Crochet hook: 3.0 mm.
- Yarn needle: For securing rosebuds and weaving in yarn ends.
- Scissors: For cutting the yarn.
Before you begin: The sample uses 42 rows for a center width of approximately 4 feet when folded in half. Your final size will depend on your yarn, tension, and stitch placement, so use this measurement as a guide rather than a guarantee.
Finished Size & Customization Ideas
The demonstrator’s shawl is worked for 42 rows and measures approximately 4 feet across the center when folded in half. You can stop earlier for a smaller wrap or continue beyond 42 rows for a larger piece, as long as you maintain the increase pattern consistently.
Here are a few ways to use your finished project:
- Wearable shawl: Fold it into a triangle and drape it around your shoulders.
- Cozy wrap or blanket: Open it out to show the full triangular fabric.
- Rose bouquet: Roll and arrange the shawl into a bouquet-like shape, with the roses displayed at the top.
- Decorative gift: Present it as a special handmade arrangement for Valentine’s Day, Mother’s Day, or a bridal shower.
You can also choose a different rose color to match the recipient’s favorite flowers or the occasion.
Pattern Abbreviations & Terminology
These instructions use standard US crochet terminology.
- Ch: Chain
- St / Sts: Stitch / Stitches
- Sl St: Slip stitch
- Sc: Single crochet
- Dc: Double crochet
- V: Increase — work 2 double crochets into the same stitch
- Rnd / Row: Round or row of work
Part 1: Crochet the Main Shawl Body
The shawl begins with a magic ring and expands through repeated double crochet stitches and increases. The increase pattern is important because it helps the fabric grow evenly instead of curling into a bowl shape.
Row 1: Make the Center
- Wrap the yarn around your index and middle fingers to form a cross.
- Insert the hook under the first strand, pull the second strand through, twist the loop, and yarn over to secure the magic ring.
- Chain 2. These starting chains do not count as a stitch.
- Work 12 double crochets directly into the magic ring.
- Pull the yarn tail to close the center.
- Join with a slip stitch into the top of the first double crochet, not into the starting chain.
Check your work: You should have 12 double crochet stitches in the center. If you count the starting chain as a stitch, your stitch count will be different from the pattern.
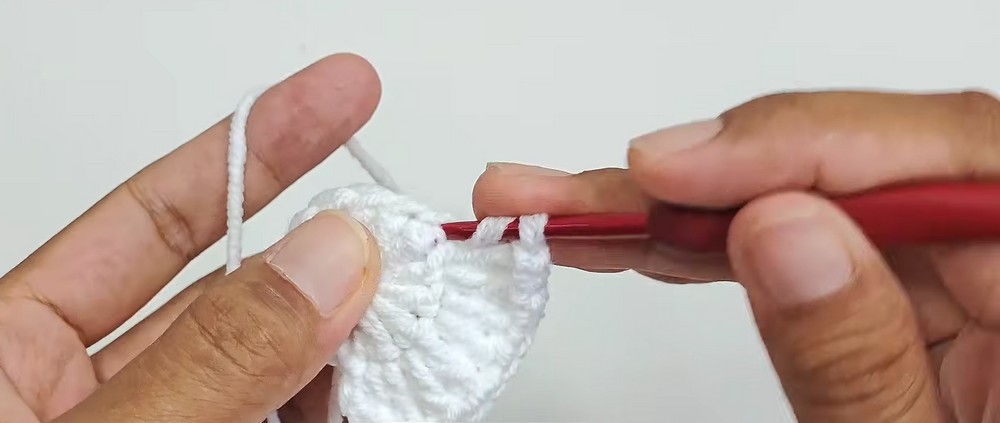
Row 2: Add the First Increase Round
- Chain 2.
- Work 2 double crochets into the next stitch to make a V-increase.
- Chain 1 to create a small space.
- Repeat the V-increase followed by chain 1 in every stitch around.
- Join with a slip stitch to the first double crochet.
You should make 12 V-increases in this round, with a chain-1 space after each increase.
Row 3: Increase the Space Between V-Stitches
- Chain 2.
- Work 1 double crochet in the first stitch.
- Work 2 double crochets into the next stitch to make a V-increase.
- Chain 1.
- Repeat this sequence around the round.
- Join with a slip stitch.
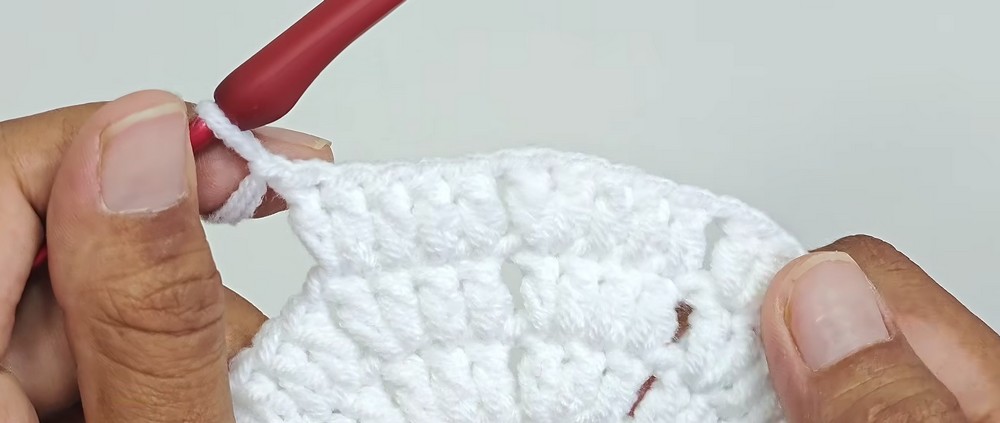
Row 4: Continue Expanding
- Chain 2.
- Work 1 double crochet in each of the next 2 stitches.
- Work a V-increase in the next stitch.
- Chain 1.
- Repeat around and join with a slip stitch.
Row 5: Add Another Double Crochet Between Increases
- Chain 2.
- Work 1 double crochet in each of the next 3 stitches.
- Work a V-increase in the next stitch.
- Chain 1.
- Repeat around and join with a slip stitch.
Continue the Shawl to Row 42
For each new row, add one more plain double crochet before the V-increase. For example, Row 6 has 4 double crochets before the V-increase, and Row 7 has 5.
Keep the V-increase in the correct position immediately before the chain-1 space in every repeating section.
Helpful shaping guide: Lay the shawl flat after every few rows. The fabric should spread out rather than curl upward. If it starts to cup or ruffle unexpectedly, pause and check that you have repeated the increase and chain-1 space consistently throughout the round. Missing an increase in a section can affect how the fabric lies.

Continue until you reach your preferred size. The demonstrator’s sample uses 42 rows.
To finish the shawl base, join with a slip stitch, chain 1, cut the yarn, and pull the tail through. Weave the end securely into the back of the stitches.
Part 2: Make the Decorative Leaf Border
The border creates small arches around the outer edge. These arches provide the base for the leaf-like loops that frame the shawl.
Create the Border Arches
- Join the border yarn along the outer perimeter of the shawl.
- Chain 1 and work 1 single crochet into the same stitch.
- Chain 4.
- Skip 2 stitches or spaces, then work 1 single crochet into the third stitch.
- Repeat the chain-4 and single-crochet sequence around the entire outer border.
- Join with a slip stitch at the end of the round.
Add the Leaf-Like Loops
- Chain 1 and work 1 single crochet in the next stitch.
- Chain 4, then turn your work slightly so you can access the back of the chain.
- Slip stitch into the back loop or arch of the second chain.
- Chain 3 and anchor with 1 single crochet into the same base arch space.
- Repeat the chain-3 and single-crochet sequence two more times in that same arch. Each arch should contain 3 small loops.
- Move to the next arch base, anchor with a single crochet, and repeat the leaf-loop sequence.
- Continue around the border, then fasten off and weave in the ends.
At this stage: Check that the arches are spaced evenly and the loops face outward. This decorative edge helps frame the shawl and gives the finished piece a more floral appearance.

Part 3: Crochet the Rosebuds
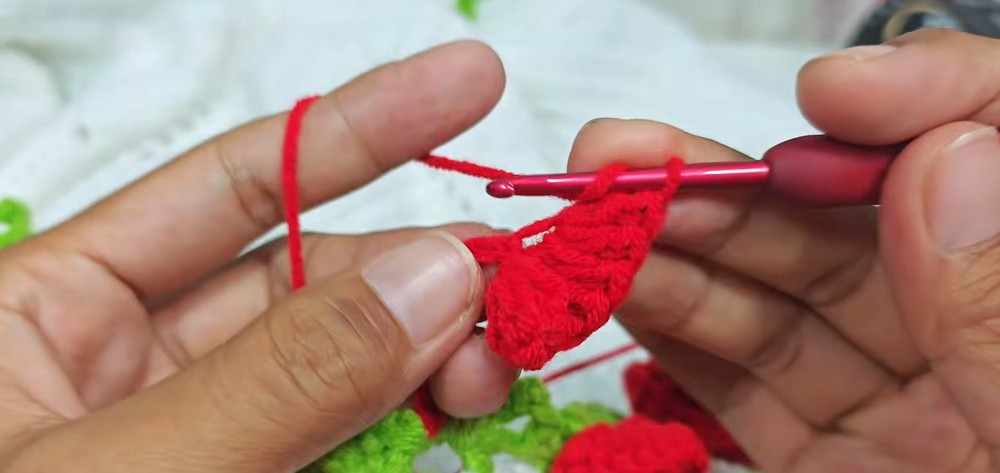
Each rosebud begins as a narrow, ruffled strip. The repeated increases make the strip curl naturally, allowing you to roll it into a small three-dimensional rose.
Make the Ruffled Petal Strip
- With red or rose-colored yarn, make a slip knot.
- Chain 13.
- Yarn over and insert the hook into the third chain from the hook.
- Work 3 double crochets into that same chain.
- Continue working 3 double crochets into every chain across the foundation chain.
The strip will become full and ruffled as you work. This extra fullness is what allows it to form the layered look of a rose when rolled.
Shape the Rosebud
- When you reach the end of the strip, chain 3.
- Slip stitch back into the base stitch to anchor the end.
- Roll the ruffled strip tightly from one end to the other, shaping it into a spiral rosebud.
- Thread the yarn needle and sew through the bottom layers of the rolled petals to hold the shape securely.
- Fasten off, leaving a yarn tail if you need it to attach the rose to the shawl or bouquet arrangement.
Make as many rosebuds as your design requires. A fuller bouquet appearance will need more flowers, while a lighter border can use fewer.
Assembly & Finishing
Finish the Shawl
Check the shawl body, leaf border, and individual roses before assembling everything. Weave in loose yarn ends and make sure the rosebuds hold their shape.
Close and Secure Each Rosebud
Use the yarn needle to stitch through the base layers of each rolled flower. Secure the stitches firmly enough to keep the petals from unrolling, but avoid pulling so tightly that the rose loses its shape.
Arrange the Bouquet
To display the project as a bouquet, roll the shawl into a large conical arrangement and position the crochet roses at the top. Cluster the flowers closely for a fuller look, and secure them to the arrangement where needed.
The exact placement and attachment method will depend on how you want the bouquet to hold its shape. Arrange the shawl and roses before permanently securing the pieces so you can adjust the overall silhouette.

Wear It as a Shawl or Wrap
When you want to wear the piece, open the rolled arrangement and fold the triangular shawl into a comfortable shape. Let the leaf border frame the outer edge and arrange the fabric around your shoulders.
Before gifting it, inspect the magic-ring center, color transitions, border attachments, and rosebud bases. Trim only excess yarn after weaving the ends securely into the reverse side of the stitches.
A Handmade Gift with Two Uses
The appeal of this design is that it combines the visual charm of a rose bouquet with the usefulness of a crochet wrap. The triangular base, decorative border, and spiral rosebuds each contribute to the final look, whether you display the project as flowers or wear it as a shawl.
Choose a rose color that suits the occasion, allow enough time to make and secure the individual flowers, and check the shaping as the shawl grows. The finished piece can become a memorable handmade gift for someone who loves flowers and cozy accessories.