Crochet Granny and Net Stitch Bandana Pattern
Looking for a wearable crochet accessory with texture and airy detail? This easy bandana combines Granny stitch and Net stitch into a 20-row design with adjustable sizing and simple tie straps.
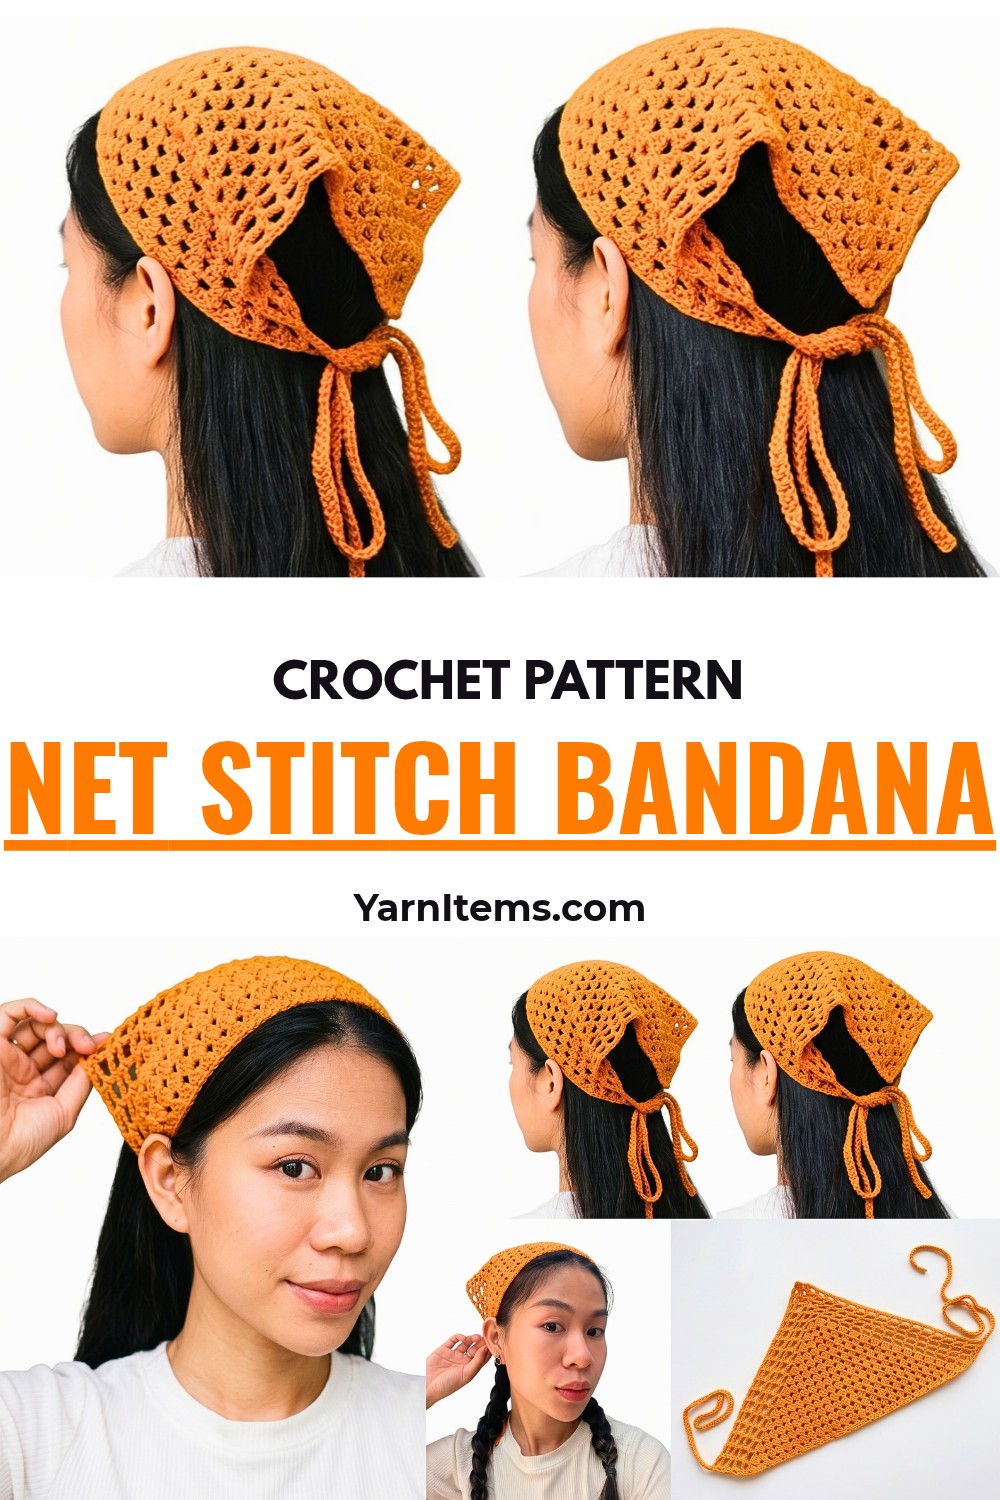
Crochet accessories can become difficult when row shaping and stitch placement start changing from one section to another. This crochet bandana keeps construction organized by dividing work into a solid Granny section followed by an open Net section.
You’ll learn how crochet grows from a small center ring through 14 Granny rows, then shifts into crochet mesh for 6 more rows before straps complete the design. This crochet tutorial also explains turning, center-corner increases, strap construction, and clean finishing. Let’s begin.
Credit Molina.D DIY
Materials & Tools
- Yarn: Milk Cotton Yarn, 5-ply, approximately 125 g
- Crochet Hook: 3.5 mm
- Yarn Needle: For weaving in ends
- Scissors: For finishing
Finished Size & Customization
This design uses 14 Granny stitch rows plus 6 Net stitch rows, giving 20 total rows for a standard adult head size.
To customize fit, add or subtract rows from either Granny stitch section or Net stitch section before working final edge and straps. Adjusting row count lets you change overall coverage without changing basic construction.
Pattern Abbreviations
- Ch: Chain
- DC: Double crochet
- Sl St: Slip stitch
- St/Sts: Stitch / Stitches
- TYW: Turn Your Work

Step-by-Step Crochet Instructions
Step 1: Create Center of Granny Stitch Section
Begin with Milk Cotton Yarn and form a magic ring.
Chain 3, counting this as your first DC. Work 3 DC into magic ring, chain 3, then work another 3 DC into ring.
Pull yarn tail firmly to close center.
You should now have two 3-DC groups separated by central chain space. Keep center opening closed before moving into Row 2 so starting shape stays neat.
Step 2: Build Second Granny Row
Chain 3 and TYW.
Work 3 DC into very first stitch. Chain 1, then work (3 DC, Ch 3, 3 DC) into center Ch-3 space.
Chain 1 and finish by working 3 DC into top of turning chain.
The center Ch-3 space becomes important because it forms growing point of bandana. Keep this corner easy to identify as rows expand.
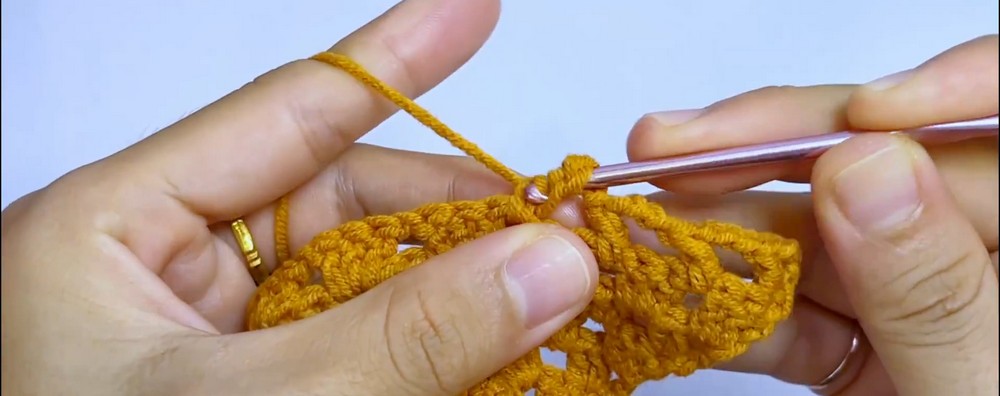
Step 3: Expand Granny Triangle Through Row 14
For Rows 3-14, begin each row with Ch 3 and TYW.
Work 3 DC into first stitch. Across first side, repeat (Ch 1, 3 DC) in each Ch-1 space until reaching center peak.
At center Ch-3 space, work: (3 DC, Ch 3, 3 DC)
Continue down opposite side using (Ch 1, 3 DC) in each remaining space.
End each row with 3 DC in turning-chain space.
Repeat this symmetrical expansion through Row 14.
Keep center corner clearly defined as you work. Consistent corner increases are what allow triangular shape to widen evenly from row to row.
Step 4: Check Granny Section Before Changing Stitch Pattern
After completing Row 14, pause briefly to inspect triangle.
Granny section should have grown evenly from small center opening into broad triangular shape, with center peak remaining aligned.
This is useful point to check stitch placement before moving into more open Net stitch section. Any uneven center increase can affect shape of remaining rows.
Step 5: Begin Net Stitch Section With Row 15
Chain 3 and TYW. Work 2 DC into first stitch.
Chain 3, skip first cluster, and work 1 DC into Ch-1 space.
Continue across using (Ch 3, 1 DC) in each space until reaching center corner.
At center Ch-3 space, work: (Ch 3, 1 DC, Ch 4, 1 DC)
This Ch-4 space creates expanded center corner needed for Net stitch section.
Mirror same sequence down second side and finish with (Ch 3, 2 DC) in final turning chain.
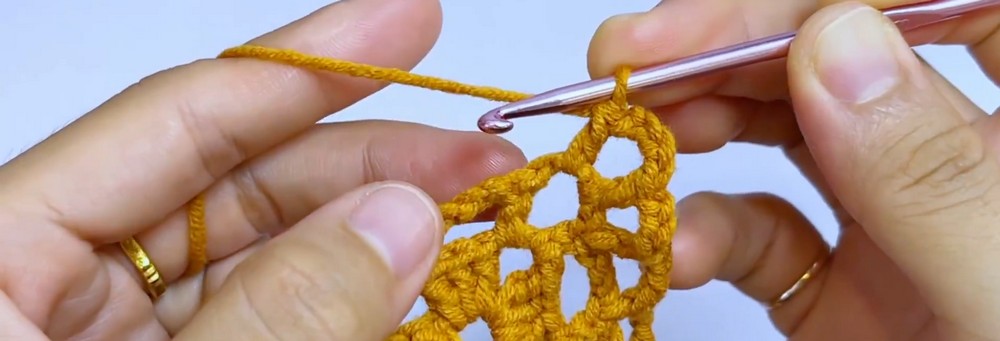
Step 6: Establish Net Stitch Grid in Row 16
Chain 3 and TYW, then work 2 DC in first stitch.
Across row, work (Ch 3, 1 DC) into each DC stitch.
When reaching center Ch-4 corner space, work: (Ch 3, 1 DC, Ch 4, 1 DC)
Continue along opposite side with (Ch 3, 1 DC) in each DC.
Finish with (Ch 3, 2 DC) in final turning chain.
Keep chain spaces loose enough to form an open mesh without pulling surrounding DC stitches out of shape.
Step 7: Repeat Net Stitch Through Row 20
For Rows 17–20, repeat same Net stitch sequence used for Row 16.
Maintain the repeating mesh grid across both sides and continue making the center corner increase: (Ch 3, 1 DC, Ch 4, 1 DC)
Finish each row with (Ch 3, 2 DC) in final turning chain.
Continue until Row 20 is complete.
At this stage, bandana consists of 14 Granny stitch rows followed by 6 Net stitch rows, creating contrast between denser lower section and more open upper section.
Step 8: Create First Tie
Once Row 20 is complete, begin first strap directly from corner.
Chain 70 stitches.
Skip first chain from hook, then work a slip stitch back along every chain across the full strap length.
Working into back bumps of chain can help create a cleaner, more consistent-looking strap.
When you reach bandana edge again, securely anchor slip stitch to corner.
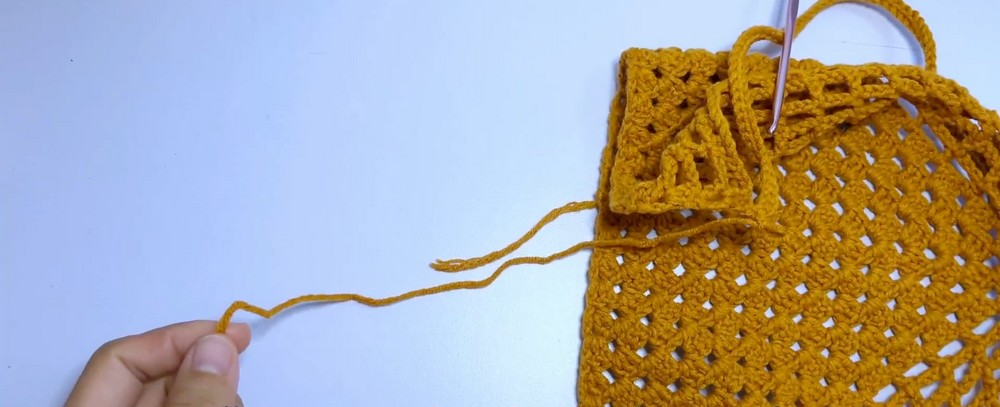
Step 9: Secure First Strap and Add Second
Fasten off first strap while leaving a yarn tail.
Create second strap using same method: chain 70 stitches, skip first chain, then work slip stitches back across each chain.
Anchor second strap securely at opposite corner.
Matching chain counts keep both ties balanced and provide consistent length for wearing.
Step 10: Weave In Ends and Finish Bandana
Thread remaining yarn tails onto yarn needle.
Weave each tail neatly through back of crochet stitches, changing direction through several stitches so ends stay secure. Trim excess yarn only after each tail is firmly woven in.

Check both straps and corner attachments once more before wearing. Finished bandana should have secure ties, clean edges, and clearly defined Granny and Net stitch sections.