Free Crochet Christmas Triangle Bandana Pattern
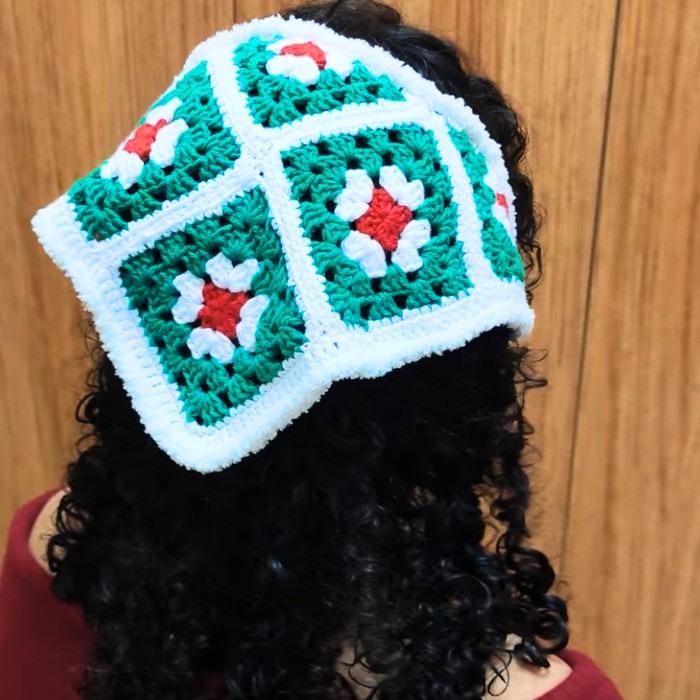
A crochet Christmas triangle bandana is a simple way to bring festive color into your winter wardrobe without making a bulky accessory.
The mix of red, white, and green creates a cheerful holiday look. The triangle shape sits comfortably around your neck or shoulders. Whether you’re dressing for a Christmas gathering or looking for a handmade gift, this design adds a cozy seasonal touch. Keep reading to see how each section comes together into one beautiful holiday crochet piece.
Crochet Christmas Triangle Bandana
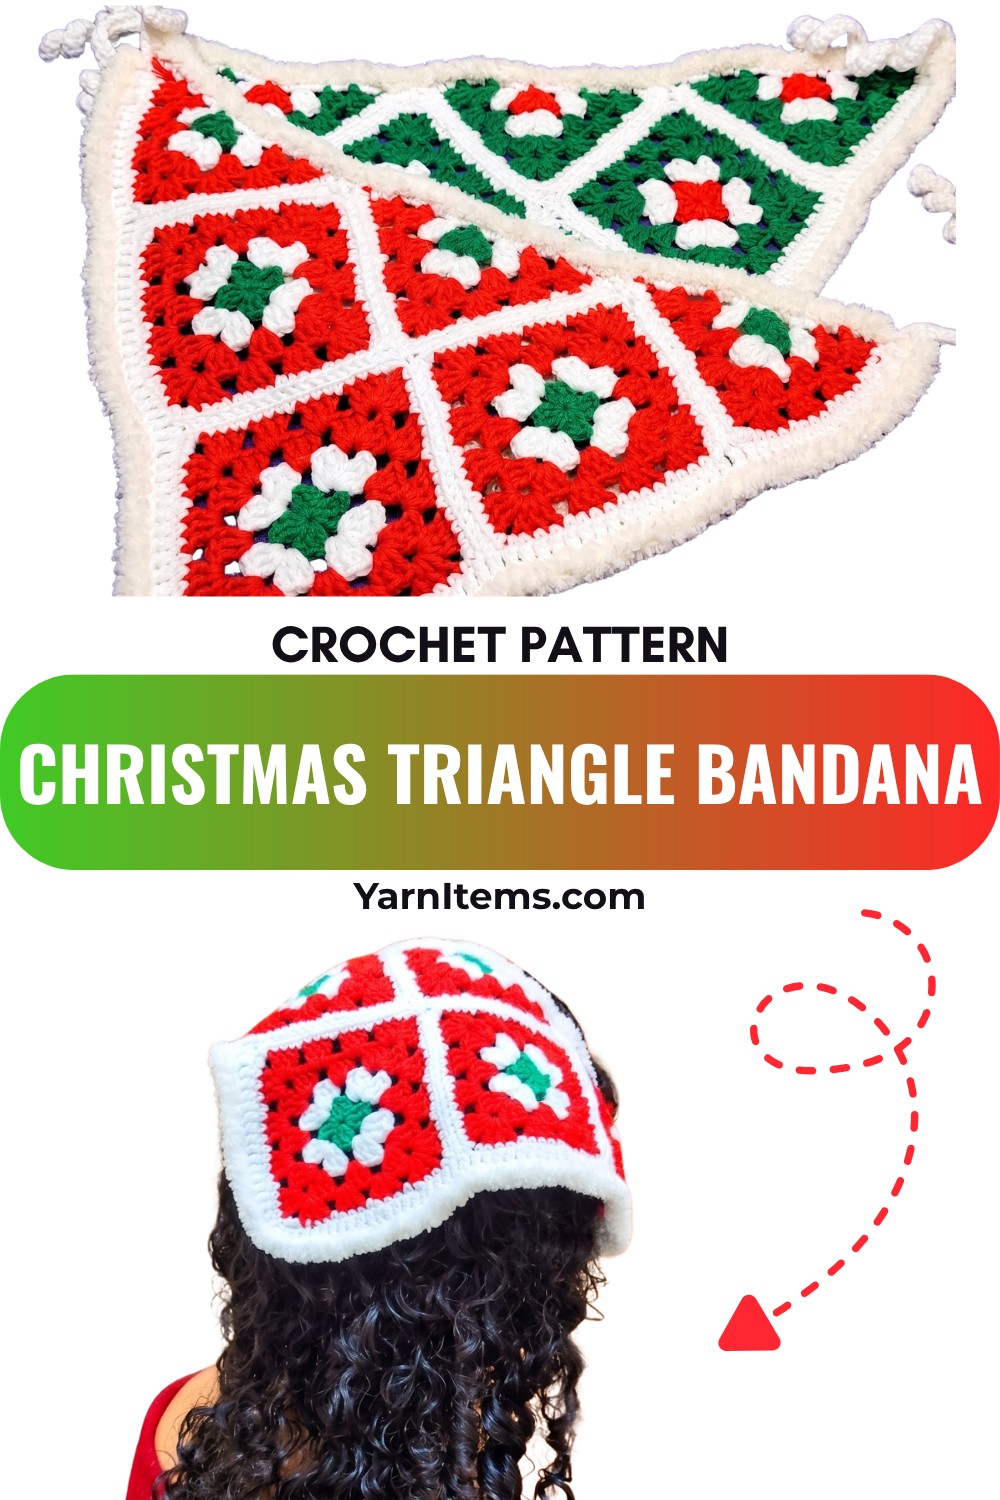
This pattern combines crochet triangles and squares before finishing the edges with fluffy yarn for a soft, snow-inspired border. The construction is easy to follow, and you can adjust the size to create either a classic bandana or a larger wrap. The step-by-step instructions make it beginner-friendly while leaving plenty of room to customize the colors and final look for your own holiday crochet style.
Credit Vima’s Crochet
Materials & Tools Needed
- Cotton Yarn (Christmas-themed colors: red, white, green; commonly used for amigurumi).
- Fluffy Yarn for the snow-effect border (white or preferred festive colors).
- 3 mm Crochet Hook for the cotton yarn.
- 1-2 mm Crochet Hook (optional, for tucking in yarn ends neatly).
- Darning Needle for securing yarn ends and sewing.
- Scissors for cutting the yarn.
- Steam Iron (optional, for pressing/blocking).
Finished Size & Customization Ideas
- Finished Size: Dimensions depend on the number of squares and triangles used, and the subsequent joining edge length.
- Customization Ideas:
- Colors: Use non-traditional holiday color combinations such as gold and silver or pastel tones for a playful twist.
- Size: Add more squares and triangles to create larger bandanas or even a shawl.
- Border: Use different fluffy yarn colors (e.g., red or green) depending on your preference.
Pattern Abbreviations & Terminology
- Ch: Chain
- St: Stitch
- Sl St: Slip Stitch
- Dc: Double Crochet
- Sc: Single Crochet
- Magic Ring: Circular start technique for creating a closed-center foundation
- Cluster: A group of 3 double crochets worked into the same space
- Rep: Repeat
Step-by-Step Detailed Crochet Instructions
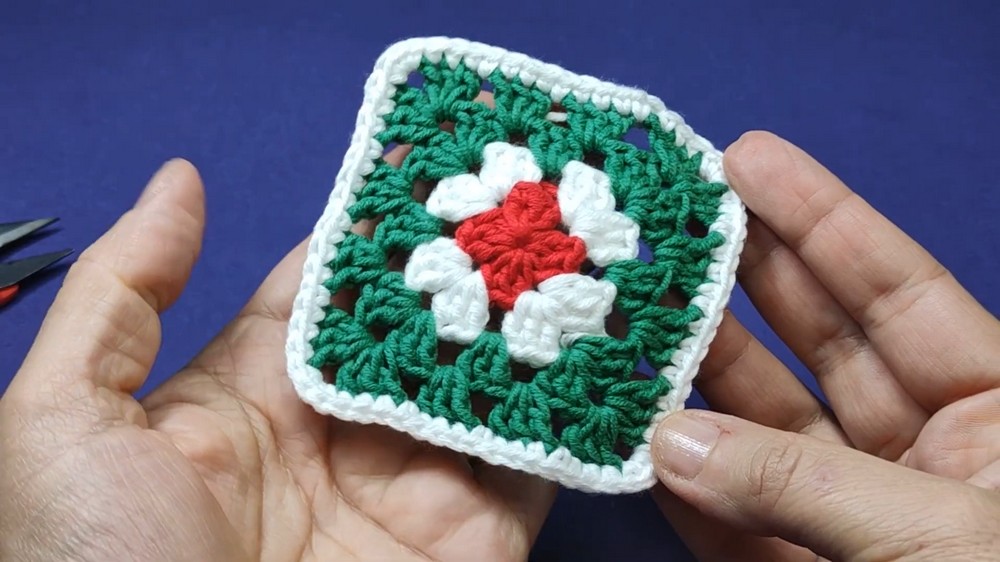
Part 1: Granny Square
Round 1:
- Start with a magic ring. Make 3 chains (counts as the first dc).
- Dc 2 into the ring (forming the first cluster).
- Ch 2, then Dc 3 to form the second cluster.
- Ch 2, repeat Dc 3 twice more to create the third and fourth clusters.
- Make 2 more chains for the fourth corner space, and pull the magic ring tight to close.
- Join with a sl st on top of the initial 3 chains.
- Fasten off and secure the yarn end tightly using a darning needle.
Round 2:
- Attach white yarn with a slip knot at any corner.
- Start with 3 chains (count as 1 dc). Then Dc 2 in the same space.
- Ch 1. In the next corner: Dc 3, Ch 2, Dc 3.
- Ch 1, continue the same pattern into the remaining corners.
- To complete, finish the first half of the initial corner you started: Dc 3, Ch 2, then join to the first stitch with a sl st.
- Fasten off.
Rounds 3 and 4:
- Attach green yarn at any corner. Repeat the method above, creating 3 dc clusters in the corners with Ch 2 spaces.
- Between corner spaces (on the sides), make Ch 1 after every cluster.
- Finish the round with a sl st, fasten off for Round 3.
- Repeat this pattern for Round 4, but do not fasten off.
Final Round (Single Crochet Border):
- Switch back to white yarn. Insert hook at a corner.
- Sc evenly across the edge, making 3 Sc in corner spaces, 1 Sc in chain spaces, and 1 Sc in each dc of clusters.
- Join with a sl st at the end and fasten off.
Part 2: Triangles
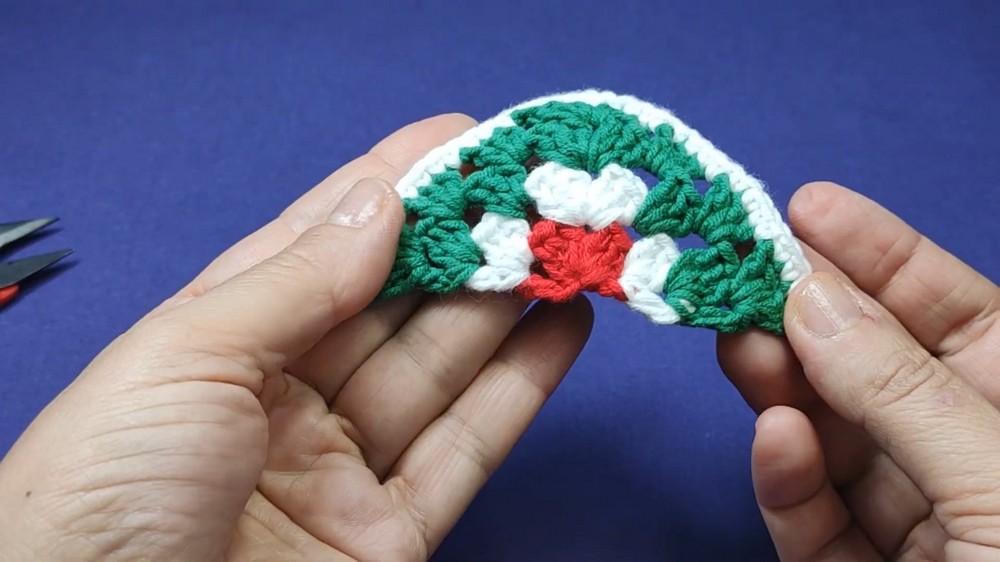
Round 1:
- Start with a magic ring and Ch 4.
- Make Dc 3, then Ch 2 for one corner space.
- Dc 3, then Ch 1. Finish with a triple crochet before fastening off.
Round 2:
- Attach white yarn via slip knot. At the first chain space, make a triple crochet, Ch 1, and then Dc 3.
- At the corner space: Dc 3, Ch 2, Dc 3.
- Rep this pattern around, finishing the initial space with a triple crochet, then fasten off.
Rounds 3 and 4:
- Switch to green yarn via slip knot.
- Begin at the chain space (next to a triple crochet) with a triple crochet, Ch 1, Dc 3.
- Continue with Dc 3 in chain spaces, and Dc 3, Ch 2, Dc 3 in corner spaces.
- Repeat for Round 4, mirroring Round 3’s pattern.
- Join and fasten off.
Final Round:
- Switch back to white yarn. Work an Sc border, adding 2 Sc in triple crochet spaces, 1 Sc in chains, and 3 Sc in corners.
- Join and fasten off.
Part 3: Joining Squares and Triangles
- Use a darning needle and white yarn for sewing.
- Carefully align the back loops of single stitches from adjacent motifs, ensuring all corners meet neatly.
- Finish each seam with a secure knot and tuck in yarn ends.
Part 4: Border and Laces
- Use white yarn to Dc around the entire bandana for a clean edge.
- In joining spaces, adjust stitch counts to avoid gaps.
- Make two laces by chaining 55 chains at the edges.
- Work Sc evenly back across these chains.
- Finish by attaching the laces neatly to the bandana.

Part 5: Fluffy Yarn Border
- Switch to fluffy yarn and work Sc evenly around the bandana’s edges (including the laces).
- In corner spaces, work additional stitches to avoid stretching.
- Fasten off and hide yarn ends for a clean finish.

Finishing Techniques
- Steam-block the bandana with a steam iron on the wrong side, ensuring all seams and motifs are shaped neatly.
- Tuck in all yarn ends using a small crochet hook and secure them with knots.

Customization for Gifting
You can gift this bandana as-is or pair it with matching handmade accessories like fingerless gloves or a headband. A larger version can serve as a cozy shawl perfect for the holiday season.