A crochet blanket full of seasonal charm, the Fall Into Autumn Blanket uses the stunning Jacobs Ladder technique to create texture and elegance.

The Fall Into Autumn Blanket is a beautiful crochet creation perfect for cozying up during the cooler months. With its soft texture, warm seasonal colors, and an eye-catching design, it adds both comfort and a stylish touch to your space. This crochet blanket makes a wonderful addition as home décor, a thoughtful handmade gift, or something snug to wrap yourself in on chilly evenings.
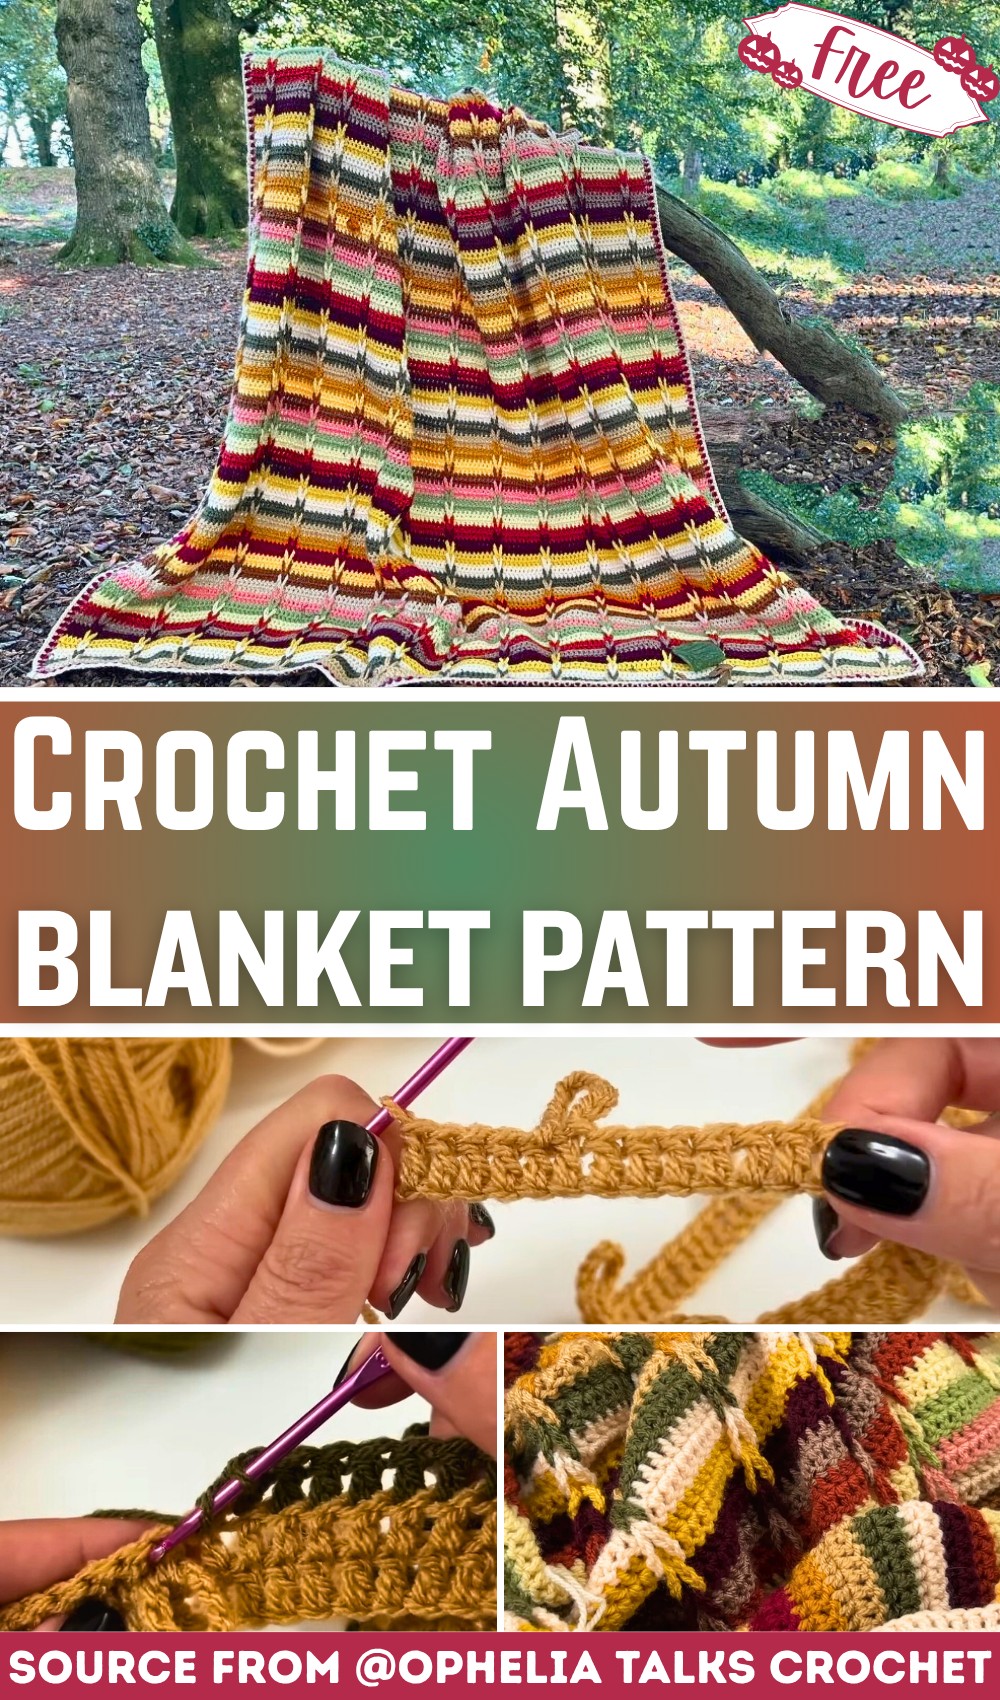
Crochet Fall Into Autumn Blanket
What makes this crochet blanket special is the Jacob’s Ladder technique, which creates a stunning braided effect throughout the design. It’s not just about looks; this textured feature adds depth and elegance to the blanket. Plus, the loops and braids are fun to work with, making crocheting this blanket both creative and satisfying.
Beginners can enjoy the process as the steps are simple to follow, and experienced crocheters will appreciate the unique effect of the laddered loops. If you’re making it in the same colors shown or picking your own palette, the result will be a gorgeous blanket you’ll love to show off or use.
Credit Ophelia Talks Crochet
Key Features and Construction Summary:
- Jacob’s Ladder technique: 17 loops create striking braided designs along the blanket.
- Detailed rows and color changes: Alternating double crochet rows with loop-making rows for contrast and texture.
- Simple but impactful border design: A three-layer border using single crochet with chain spaces.
- Materials: Double-knit yarn, a 3.5mm hook, and stitch markers for gauging and managing loops.
- Helpful resources: Includes tutorials on fixing missed loops and creating loops correctly.
The Fall Into Autumn Blanket is a pattern that celebrates texture and movement through the Jacob’s Ladder technique, an ingenious method that transforms functional loops into elegant braided panels. Designed with seasonal hues, it’s perfect for cozy living spaces and doubles as a layered stash-buster pattern for creative use of yarn scraps.

To begin, you’ll need to chain 187 stitches — a slightly time-consuming foundation, but one that ensures stitch accuracy and sets up rows perfectly. Using stitch markers every 50 stitches makes this process much simpler, offering peace of mind as you work through this first step. Once the base is in place, the first row introduces double crochet stitches alongside chains that form loops. These loops are crucial for achieving the signature braided effects and must be correctly placed.

Each subsequent row alternates between rows of solid double crochet and loop-making rows, with color changes carefully timed to enhance the visual impact of the ladder technique. Changing colors on the final pull-through of a double crochet stitch prevents gaps, keeping transitions clean and professional. With 135 rows in total, the blanket achieves its lush, braided texture by simply looping the loops — a soothing post-crocheting task that ties the design together.

What sets this pattern apart is how the loops function. To create the Jacob’s Ladder braids, each loop from the bottom row is interwoven upwards through the previous loops to form the signature textured panels. While adding elegance, stitching the final row anchors the loops, ensuring a durable and secure finish.

Finally, the border rounds off the design with understated simplicity. Beginning with mocha, then moving to claret and stone, single crochet stitches surround the edges with a chain-space technique, making a crisp, neat finish that complements the blanket’s rich middle.

Video Tutorial
Step-by-Step Pattern
Materials
To make the Fall into Autumn Blanket, gather the following:
Mandatory Materials:
- Yarn: DK (Double Knit) weight yarn (specific colors are available in packs on Ana’s website; or use your own stash for customization).
- Crochet Hook: 3.5mm hook (or your preferred hook size for DK yarn).
- Stitch Markers: You’ll need plenty to help count chains and keep track of loop locations.
Optional Tools:
- Printed pattern (available on Ana’s website for exact color order).
- Scissors.
- Yarn needle (for sewing in ends).

Pattern Instructions
Step 1: Create the Foundation
- Make a slip knot.
- Chain 187. Use stitch markers every 50 chains to organize counting.
Step 2: Begin Row 1 (Base of Jacobs Ladder Loops)
- Chain 1 (turning chain, not counted as a stitch).
- Double crochet (dc) into the 187th chain.
- Place a dc in the next 4 chains, for a total of 5 double crochets.
- Make a loop:
- Chain 10, slip stitch into the last double crochet.
- Begin another set of 10 double crochets in the next chains.
- Repeat the sequence:
- dc → chain 10 (loop) → slip stitch into last dc → 10 dc until the end of the row.
- At the end, you should have 17 loops.
Step 3: Row 2 (Securing Loops)
- Stay with the same color yarn.
- Chain 1 (turning chain) and turn your work.
- Place one double crochet into every double crochet of Row 1 (total 187 dc).
- For loop locations, insert your double crochet into the hidden “V” inside the loops (without tangling them).
Step 4: Row 3 and Color Change
- On Row 3, you’ll need to repeat Row 1’s pattern entirely (dc, loop, slip stitch, 10 dc across).
- Change yarn color:
- Stop at final pull-through of the last dc.
- Attach new yarn color.
- Chain 1 and turn your work.
Step 5: Follow the Color Pattern
- Repeat Row 2 and Row 1 alternately using the color table provided in the printed pattern (or your own custom order).
- Continue crocheting until the blanket measures 135 rows.
Step 6: Loop the Jacobs Ladder Braids
- Lay out the blanket with all loops visible.
- Begin at the bottom of the blanket:
- Take the first loop and insert it into the second loop.
- Continue inserting each next loop into the previous until reaching the top.
- Secure the last loop with a stitch marker for anchoring while attaching the border.
Step 7: Attach the Loops
- Begin a new row of double crochets in a contrasting color.
- As you crochet along this row, attach each loop as follows:
- Remove the stitch marker.
- Pull the loop and insert it into the stitch.
- Complete a double crochet as usual while anchoring the loop into the stitch top.
Step 8: Creating the Border
- You’ll need three contrasting colors for the border (Ana suggests Mocha, Claret, and Stone).
- First Round:
- Begin with Mocha.
- Single crochet around the blanket, skipping every alternate stitch.
- Corner stitches: 2 sc, 2 ch, 2 sc in one corner space.
- Second Round:
- Switch to Claret yarn.
- Chain 1 and single crochet around the previous row, working around each chain space from the first border row.
- Third Round:
- Use Stone yarn and repeat the second round process for a polished finish.
Step 9: Final Touches
- Sew in all loose ends using a yarn needle.
- Double-check the loops to ensure they’re secure throughout.
- Lay out the blanket to admire the vibrant contrasting loops and braided pattern.
Troubleshooting and Suggestions
Common Issues and Fixes:
- Counting chain stitches: Use stitch markers every 50 chains to avoid losing track or miscounting during the lengthy foundation process.
- Missed loops: If you accidentally skip a loop, don’t panic! A supplementary tutorial teaches how to insert loops without undoing rows of hard work.
- Twisted loops: Looping flat and proper alignment are key when creating the braid effect; untwist loops promptly.
Creative Modifications:
- Color customization: Swap out autumn tones for more seasonal palettes — icy blues and greys for winter, vibrant florals for spring.
- Expand or shrink the size: Adjust the chain count and number of rows to create a throw, scarf, or even placemats inspired by the pattern.
- Adding flair: Mix up the border design with picot edging or scalloped stitches to add extra character to the finished piece.