Crochet Flower Bouquet Cat Ear Beanie Pattern
This crochet cat ear beanie gets its charm from a colorful rose-covered brim, making it a playful accessory you can customize to your favorite flower shades.
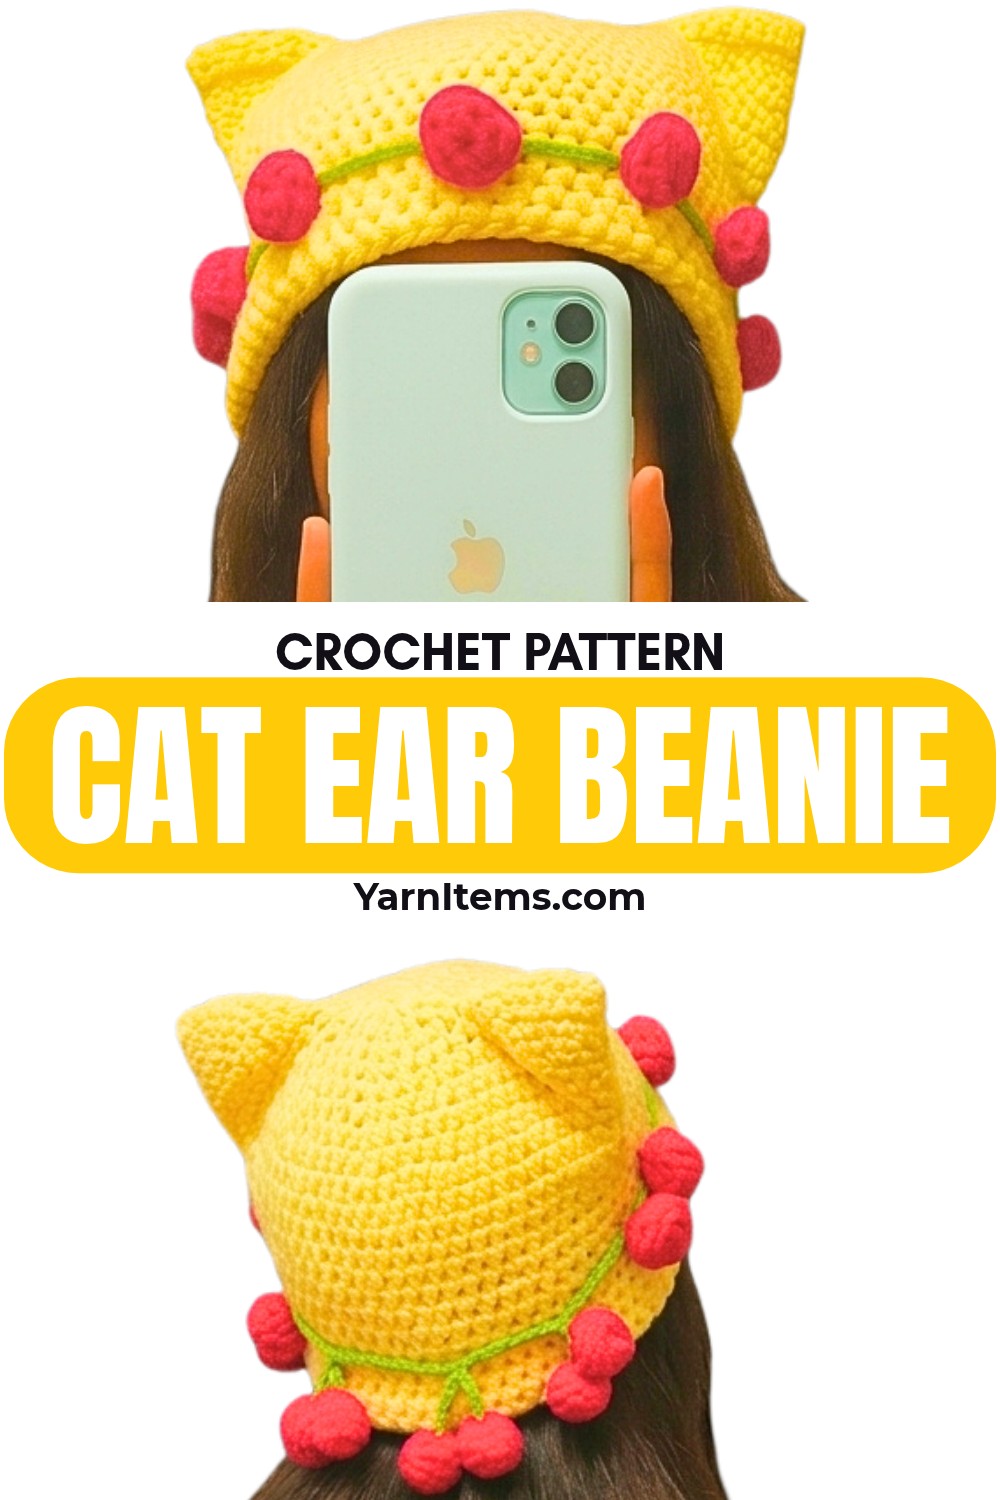
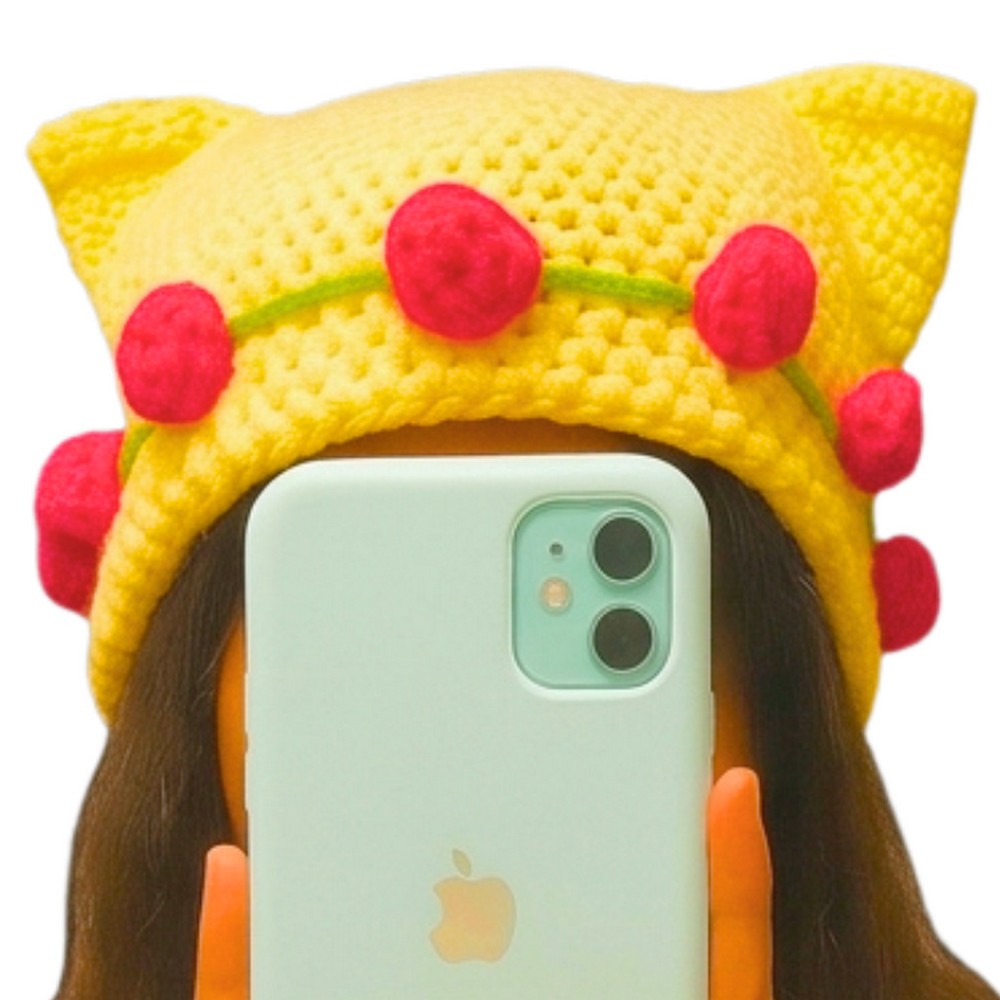
A bright yellow crochet beanie takes on a completely different personality when its top seam forms two playful cat ears, and its white brim becomes a miniature flower border. The green vine detail and curled pink or red roses give the finished hat a cheerful bouquet effect without requiring complicated crochet stitches.
The beanie is worked from a 78-chain foundation in half double crochet, then finished with a white brim and green chain spaces for the flowers. You can change the foundation chain for a different head circumference, alter the height with additional hdc rounds, or switch the flower colors to suit the season or outfit.
Credit The Crochet noire
Materials & Tools Needed
- Yarn: Worsted weight, or your preferred gauge, in Yellow for the main body, White for the brim, Green for the vines and leaves, and Pink or Red for the roses
- Crochet Hook: Appropriate size for your chosen yarn; a 4.0 mm or 4.5 mm hook is standard for this style
- Yarn Needle: For sewing the top seam and weaving in ends
- Scissors
- Adhesive: Fabric glue or hot glue for securing the rolled roses
Finished Size & Customization Ideas
The finished size is highly customizable. The foundation chain should equal the circumference of the wearer’s head, and the tutorial sample uses a base of 78 chains.
You can change the slouch and height of the beanie by adding or reducing the number of half double crochet rounds before switching to the white brim.
For a child-safe variation, sew the rolled roses into place with a needle and thread instead of using glue.
Pattern Abbreviations & Terminology
- ch: Chain
- st(s): Stitch(es)
- sl st: Slip stitch
- sc: Single crochet
- hdc: Half double crochet
- dc: Double crochet
- inc: Increase – in the rose petals, this means placing 3 stitches into the same chain space to create a curl
- Rnd: Round
Crochet the Beanie Body
Use Yellow yarn.
Before beginning, keep the foundation chain slightly relaxed rather than pulling each chain tightly. This helps the finished hat stretch comfortably around the head.
Form the Foundation
Make a slip knot and ch 78, or make a chain long enough to fit the desired head size. Sl st into the first chain to form a ring, being extremely careful not to twist the chain.
Work the Yellow Body
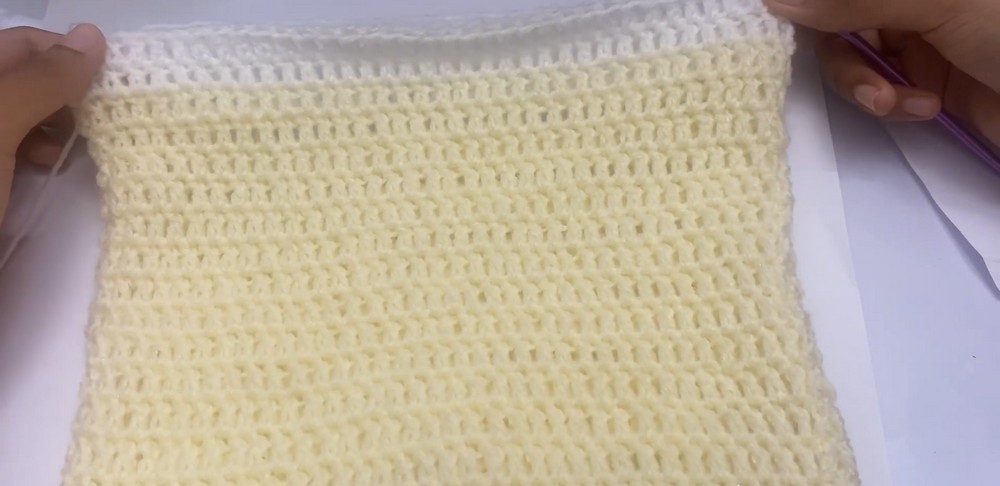
Rnd 1: Ch 3. Crochet 1 hdc into the back bump (behind part) of each chain around. (77 hdc) Sl st to the top of the beginning ch-3 to join.
Rnd 2-15: Ch 3. Hdc in each st around. (77 hdc) Sl st to the first st at the end of every rnd.
Add the White Brim
Rnd 16-17: Change to White yarn for the brim. Ch 3. Hdc in each st around. (77 hdc) Sl st to the first st at the end of the rnd. At the end of Rnd 17, sl st and cut the white thread.
Crochet the Green Vine Border
Use Green yarn.
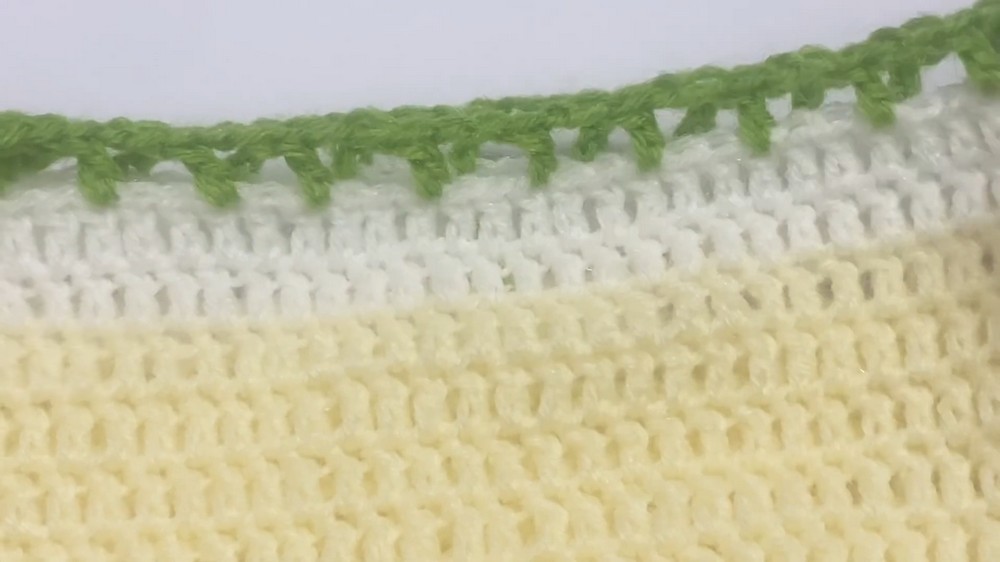
Rnd 18: Attach Green yarn with a sl st to the edge of Rnd 17. Ch 2. Crochet 1 dc, ch 2, and skip 2 stitches. Repeat the sequence (1 dc, ch 2, skip 2 sts) all the way around the brim to the end of the round. Sl st to join, cut the green thread, and weave in the end.
The chain-2 spaces created here are important because the roses will be attached directly to them in the next section.
Crochet the Rose Border
Use Pink or Red yarn.
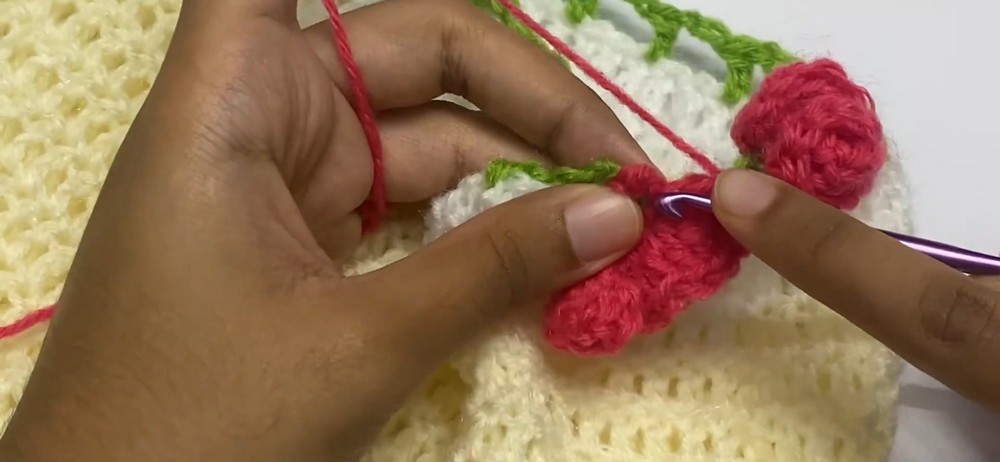
The roses are crocheted directly onto the green chain spaces.
- Attach Pink/Red yarn with a sl st or sc into one of the green chain-2 spaces.
- Ch 8.
- Starting in the 2nd chain from the hook, place 3 stitches (inc) into each of the 7 chains. Placing multiple stitches in each chain will cause the piece to naturally curl into a tight spiral.
- Sl st into the last stitch and cut the thread, leaving a small tail.
- Skip the next green chain space and attach your pink yarn in the following chain space to make the next rose.
- Repeat this process all the way around the brim, resulting in a rose in every other chain space.
Close the Top to Form the Cat Ears
Turn the hat inside out.
Thread your yarn needle with a length of Yellow yarn. Align the top edges of the initial foundation chain so the fabric sits perfectly flat. Sew the opening completely shut straight across the top. Fasten off and weave in your ends.
Turn the hat right-side out. The flat, square seam at the top will naturally poke up to form the cat ears when the hat stretches over a round head.
The foundation-chain length controls the overall head fit, while the completed top seam determines the characteristic square ear shape. For that reason, keep the top edges aligned evenly before sewing rather than gathering or bunching the fabric.
Secure the Crochet Roses
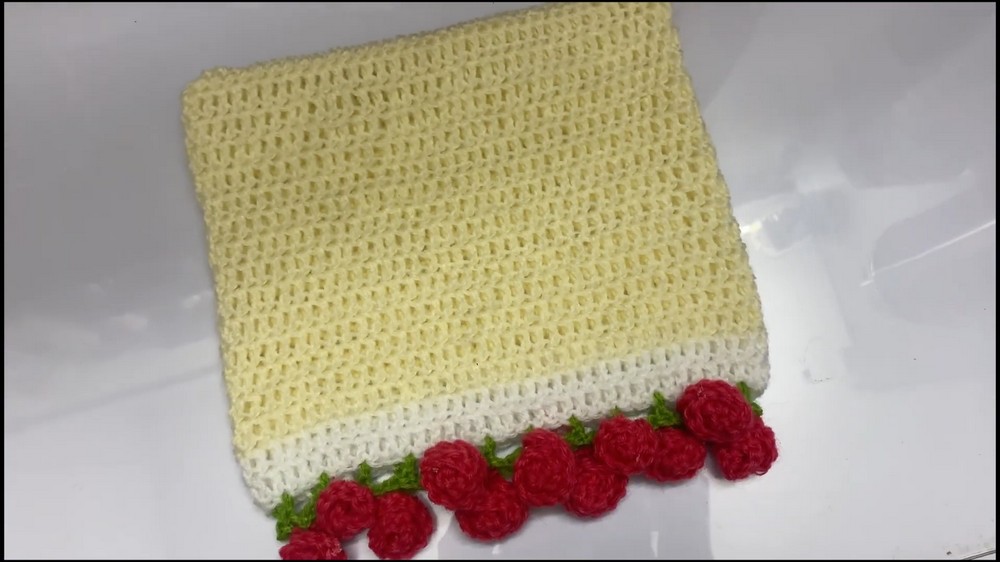
Take each curling pink or red strand on the brim and gently roll it into a neat rose shape.
Apply a dab of glue to the base of each rose to secure it so it does not unroll.
For a child-safe version, sew the roses securely into place with a needle and thread instead of using glue.
The finished beanie combines the playful cat-ear silhouette with a bright floral border, giving the simple hdc body a much more decorative finish. Try pink roses for a soft spring look, red for a bolder bouquet, or experiment with yellow, purple, or other flower shades to make the brim your own.