3D Kiwi Slice Crochet Keychain Pattern
Looking for a playful handmade fruit charm? This kiwi crochet keychain combines bright green stitches, tiny embroidered seeds, and a plump folded shape for a fun bag or backpack accessory.
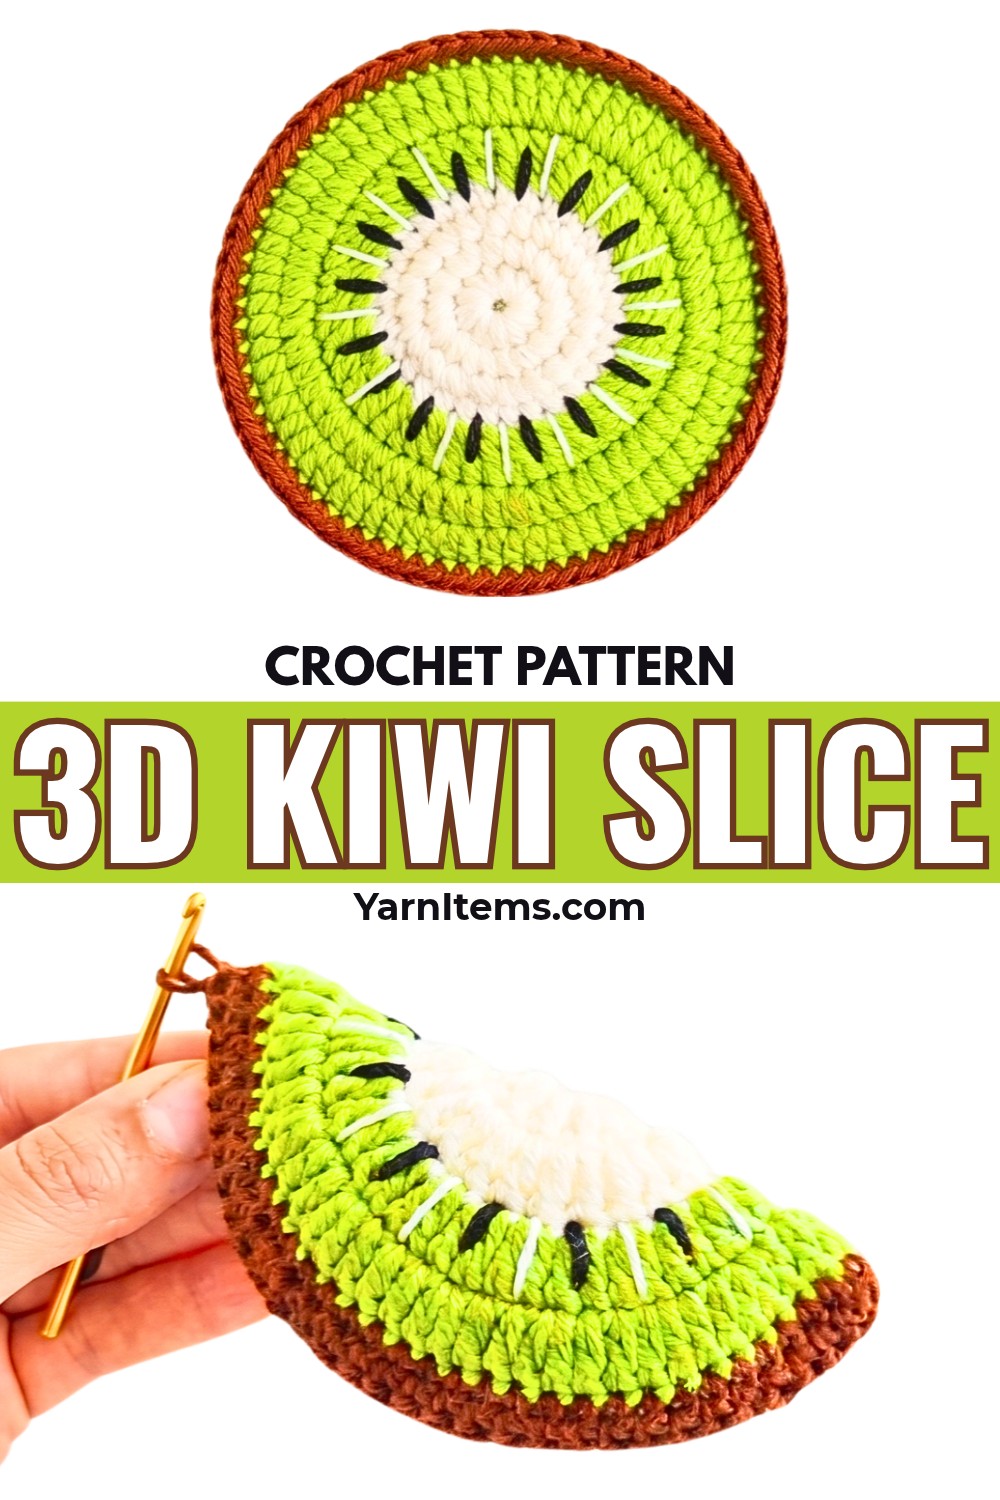
Kiwi slices have a distinctive look, and recreating their colors in crochet makes this little accessory especially charming. Working in rounds creates the fruit’s circular shape, while simple embroidery adds the details that bring the crochet design to life.
Inside this crochet tutorial, you’ll build the white center, expand the green flesh, and finish the brown rind before adding seeds and delicate pulp rays. Then you’ll fold, lightly stuff, and close the slice to create a crochet keychain, with ideas for adapting the same design into other fruit charms or flat coasters.
Credit Knitting Home
Materials & Tools
-
Yarn: DK or light-worsted-weight acrylic or milk cotton yarn in four colors:
-
White or off-white for the kiwi core and pulp rays
-
Light or bright green for the fruit flesh
-
Medium brown for the rind
-
Black for the seeds
-
-
Crochet hook: Size 4/0, approximately 2.5 mm
-
Tapestry or yarn embroidery needle: For stitching the seeds and rays and weaving in ends
-
Polyester fiberfill stuffing
-
Sharp scissors
-
Metal keychain ring: With a jump ring or chain link
Finished Size & Customization Ideas
-
Flat coaster: Approximately 3.75-4 inches (9.5–10 cm) in diameter.
-
Folded 3D keychain wedge: Approximately 4 inches wide × 2 inches tall (10 × 5 cm).
Fruit-Inspired Variations
-
Watermelon slice: Replace the green yarn with pink or red for the fruit flesh.
-
Lemon or orange wedge: Use yellow or orange yarn to create a citrus-inspired design.
-
Fruit coaster set: Leave the circle flat and skip folding and stuffing to make a set of four to six fruit-slice coasters.
-
Bag charm or rattle: You can add a mini rattle insert or squeaker inside the stuffing before closing the rind. For items intended for babies or young children, use only securely enclosed, age-appropriate components and follow applicable toy-safety guidance.
Pattern Abbreviations & Terminology
US crochet terms
-
MR: Magic ring
-
ch: Chain stitch
-
sl st: Slip stitch
-
sc: Single crochet
-
dc: Double crochet
-
inc: Increase; work 2 stitches into the same stitch
-
st(s): Stitch(es)
-
[ ]: Repeat instructions within brackets as indicated
-
( ): Total stitch count at the end of the round

Step-by-Step Kiwi Slice Crochet Instructions
The fruit is worked as a flat circle in three color sections. Once the brown rind is complete, embroidery adds the characteristic kiwi seeds and pulp rays. Folding and stuffing come last, allowing you to position the details while the piece is still flat.
Step 1: Create the White Kiwi Core
Start with white or off-white yarn to form the small circle at the center of the fruit.
Round 1
-
Make a magic ring.
-
Ch 2; this counts as the first dc.
-
Work 12 dc into the ring.
-
Pull the magic ring tight to close the center.
-
Join with a sl st into the second chain of the beginning ch-2.
Stitch count: 13 dc.
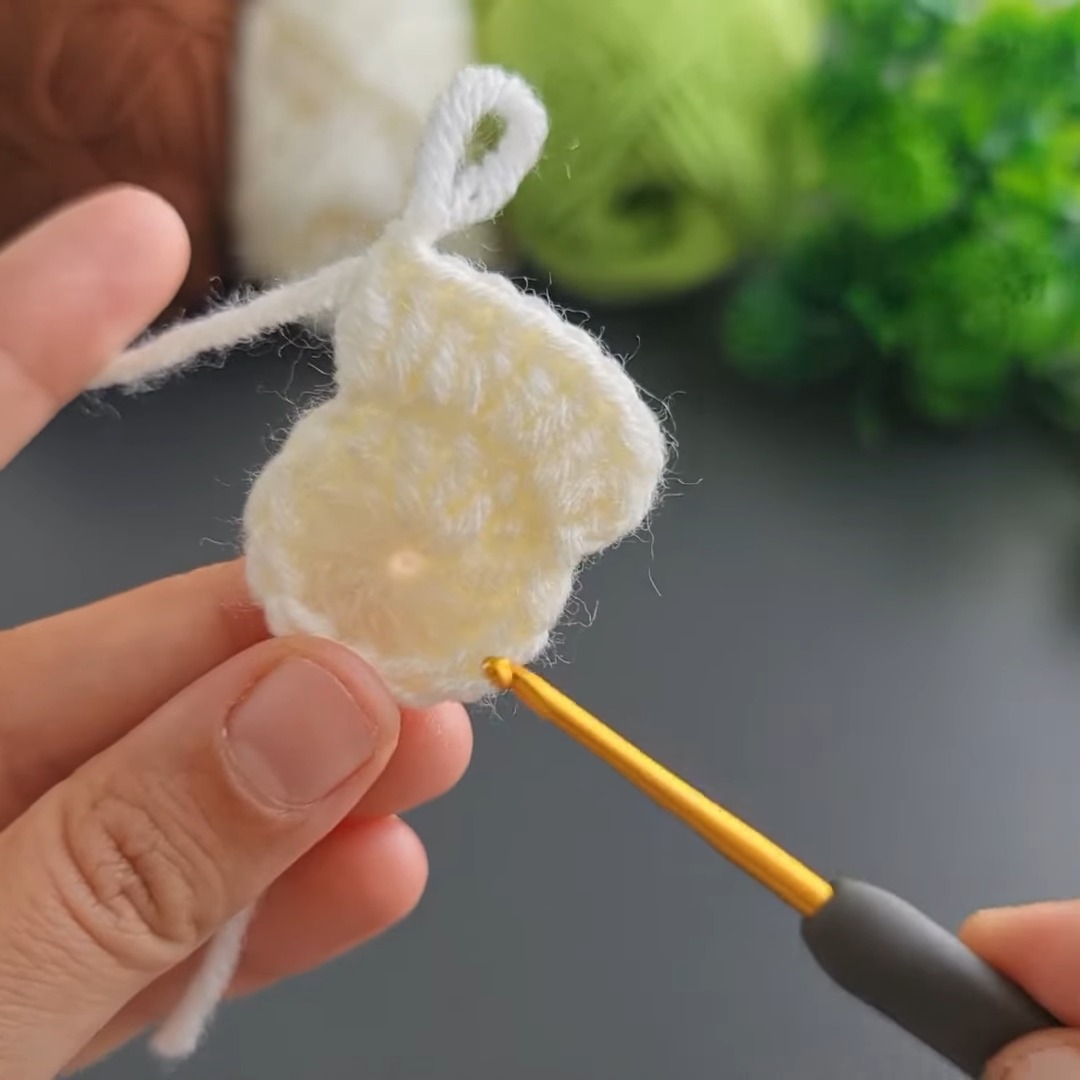
Round 2
-
Ch 2, counting as the first dc.
-
Work 1 dc into the same base stitch to create the first increase.
-
Work 2 dc in every remaining stitch around.
-
Join with a sl st into the second chain of the beginning ch-2.
-
Cut the white yarn and pull the end through to secure it.
Stitch count: 26 dc.
Keep the center closed firmly so stuffing won’t show through later. The white section forms the small core from which the green fruit flesh will grow.
Step 2: Expand the Green Kiwi Flesh
Join the green yarn where you made the previous slip-stitch join. The next two rounds widen the circle and create the main colored area of the slice.
Round 3
-
Fasten the green yarn onto the stitch where you slip-stitched.
-
Ch 2, counting as the first dc.
-
Work 1 dc into the same stitch.
-
Work 2 dc in each stitch around.
-
Join with a sl st into the second chain of the beginning ch-2.
Stitch count: 52 dc.
Round 4
-
Ch 2, counting as the first dc.
-
Work 1 dc into the same stitch.
-
Repeat this sequence around: 1 dc in each of the next 2 stitches, then 2 dc in the next stitch.
-
Join with a sl st into the beginning ch-2.
-
Cut the green yarn and fasten off.
Stitch count: 69 dc.
Spread the circle gently on a flat surface to check its shape. If the edge ruffles or curls significantly, check that you have followed the increase sequence and placed stitches in the intended base stitches.
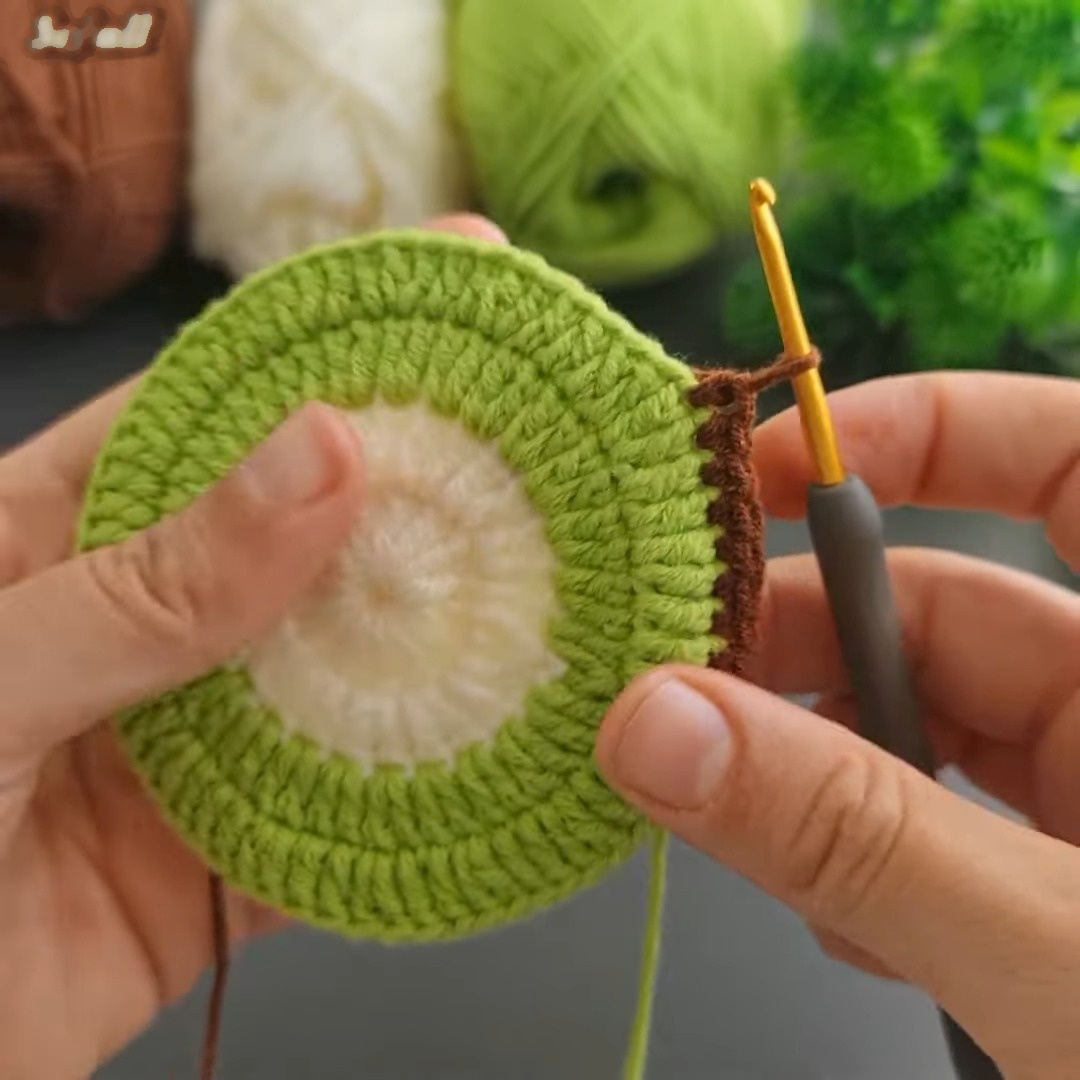
Step 3: Work the Brown Rind
The brown outer round gives the kiwi its rind and creates the edge used to join the folded slice.
-
Join brown yarn into any stitch around the edge.
-
Ch 1, counting as the first sc.
-
Work 1 sc in each stitch around.
-
Join with a sl st to the beginning ch-1.
-
If you plan to assemble the wedge next, keep the working yarn attached. Pull up a tall loop and secure it temporarily while you embroider.
Stitch count: 69 sc.
Try to maintain even tension around the rim. A consistent edge makes it easier to match both sides when the circle is folded and seamed.
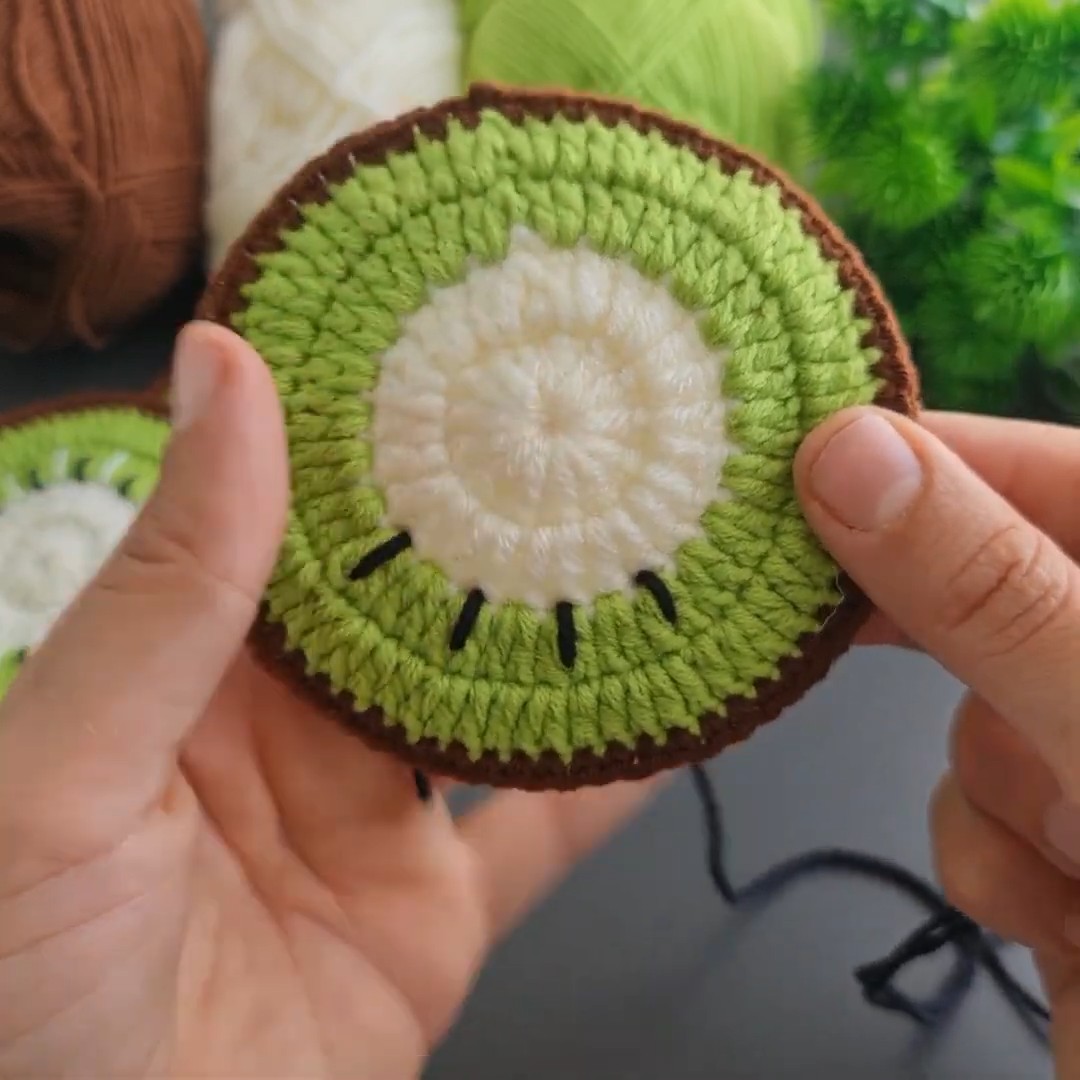
Step 4: Embroider the Black Kiwi Seeds
Add the seeds before folding the circle. Working on a flat surface makes it easier to control their length and distribute them evenly.
-
Thread the tapestry needle with black yarn.
-
Insert the needle from the back to the front at the boundary between the white core and green section.
-
Make a short straight stitch outward across the green section, extending approximately one-third of the green width.
-
Repeat around the circumference, spacing the seed stitches evenly.
-
Aim for approximately 20-24 seeds around the circle.
-
Tie off the black yarn and weave in the ends on the wrong side.
Keep the stitches short and similar in size. Even spacing helps the kiwi pattern look balanced without making the seeds appear crowded.
Step 5: Add the White Pulp Rays
Fine white lines between the seeds create the radiating pattern found in kiwi flesh.
-
Thread the tapestry needle with white yarn.
-
Stitch thin, straight lines radiating outward from the boundary between the white core and green section.
-
Position each ray between neighboring black seeds.
-
Make each white ray slightly longer than the black seed beside it.
-
Secure the yarn and weave in the ends at the back.
Before moving on, check that the rays remain visible against the green yarn and that the embroidery looks balanced around the circle. Small adjustments are easier now than after the piece is folded.
Step 6: Fold the Circle in Half
With the embroidery complete, shape the flat kiwi into a wedge.
-
Lay the circle with its right side facing outward.
-
Fold it in half down the center.
-
Align the curved brown edges carefully.
-
Check that the embroidered seeds and white rays line up attractively on both visible sides.
-
Smooth the layers together so neither side bunches or twists.
Take time to align the two halves before starting the seam. This helps the finished fruit slice retain a clean, even outline.
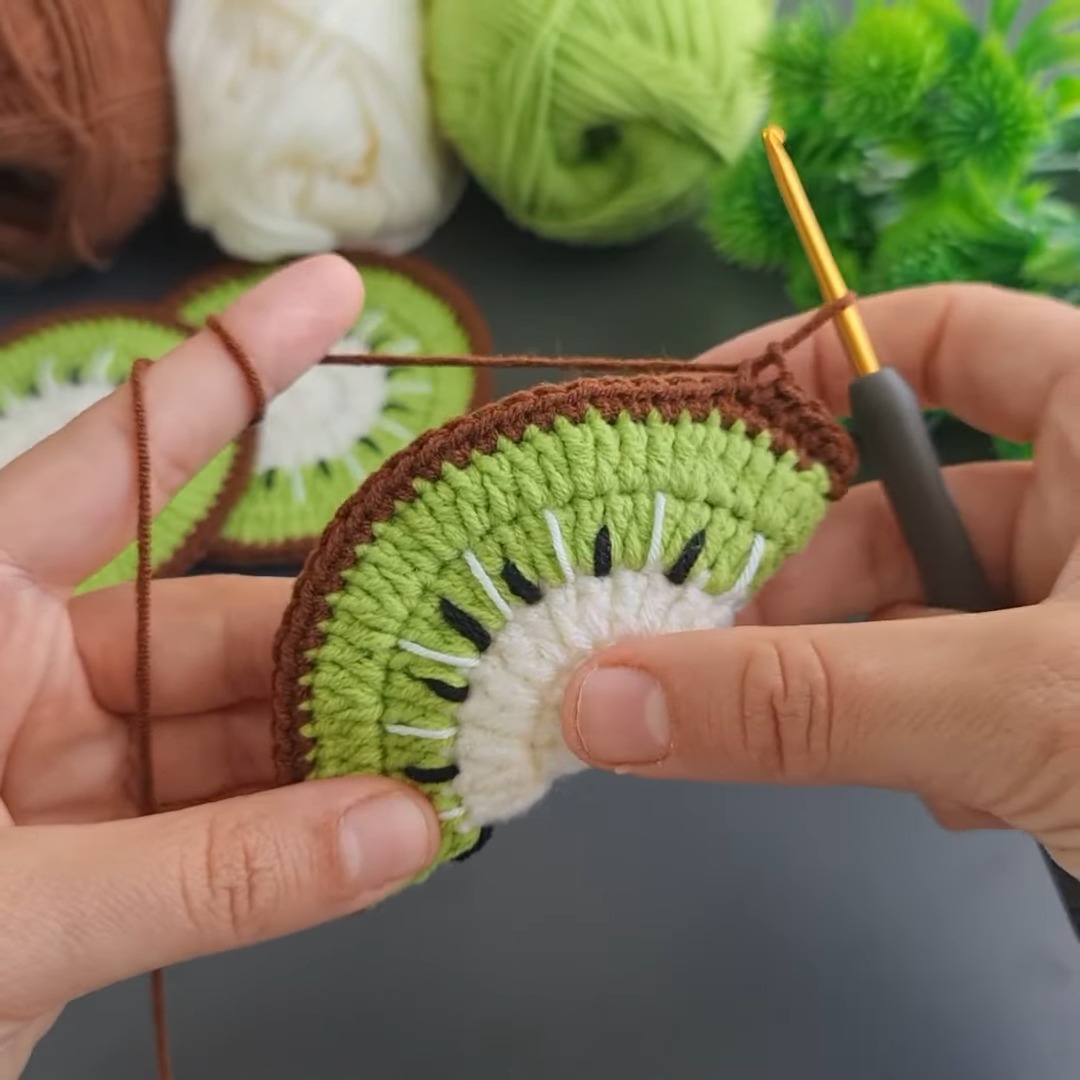
Step 7: Join the Curved Brown Edge
Use the brown working yarn to seam both layers together with single crochet stitches.
-
Pick up the brown working loop on your hook.
-
Insert the hook through both thicknesses along the outer curved brown edge.
-
Work 1 sc through both layers in each stitch across the curved edge.
-
Continue joining evenly, keeping the stitches close to the edge.
Avoid pulling the seam too tightly, as this can make the curved rind pucker. Keep the remaining opening accessible so you can add stuffing before closing the wedge completely.
Step 8: Stuff the Kiwi Wedge
A small amount of fiberfill gives the folded slice its three-dimensional shape.
-
Stop seaming when approximately 1-1.5 inches remain unworked.
-
Insert polyester fiberfill through the opening.
-
Distribute the stuffing evenly until the slice feels lightly plump.
-
Shape the wedge with your fingers, smoothing the curved edge and keeping the overall silhouette semicircular.
Use enough stuffing to give the slice body without stretching the stitches. Overfilling can distort the shape and make the final seam difficult to close.
Step 9: Finish the Seam and Attach the Keychain Ring
Close the remaining opening and secure the hardware at the corner tip.
-
Continue working sc through both layers until you reach the top corner tip.
-
At the tip, make a sl st directly through the chain link of the metal keychain ring.
If you prefer a fabric-free attachment point, work ch 3-4 to create a hanging loop instead.
-
Ch 1 and cut the brown yarn, leaving a short tail.
-
Pull the end through to secure it.
-
Weave the tail securely inside the slice.
Gently check the attachment before using the keychain. The ring or loop should be firmly secured to the joined stitches so it does not pull free during everyday handling.
Step 10: Check the Finished Kiwi Slice
Give the wedge a final inspection before attaching it to your bag or keys.
-
Check that the brown seam is closed completely.
-
Redistribute any stuffing that has collected in one spot.
-
Confirm that the seeds and white rays are visible on both sides.
-
Secure any loose yarn tails inside the slice.
-
Make sure the keychain ring or hanging loop is firmly attached.
Your 3D kiwi slice is now ready to use as a colorful keychain or backpack charm. The contrast between the white center, green flesh, black seeds, and brown rind gives it a recognizable fruit-inspired finish.
More Ways to Use the Kiwi Pattern
The same circular design can inspire several fruit-themed accessories. Change the green flesh to pink or red for watermelon, or yellow and orange for citrus-inspired slices.
For drink coasters, leave the finished circle flat and skip the folding, stuffing, and keychain attachment. Making four to six circles in coordinated fruit colors creates a cheerful matching set.