Crochet Shell Stitch Blanket Pattern – Center-Out & Square Finish
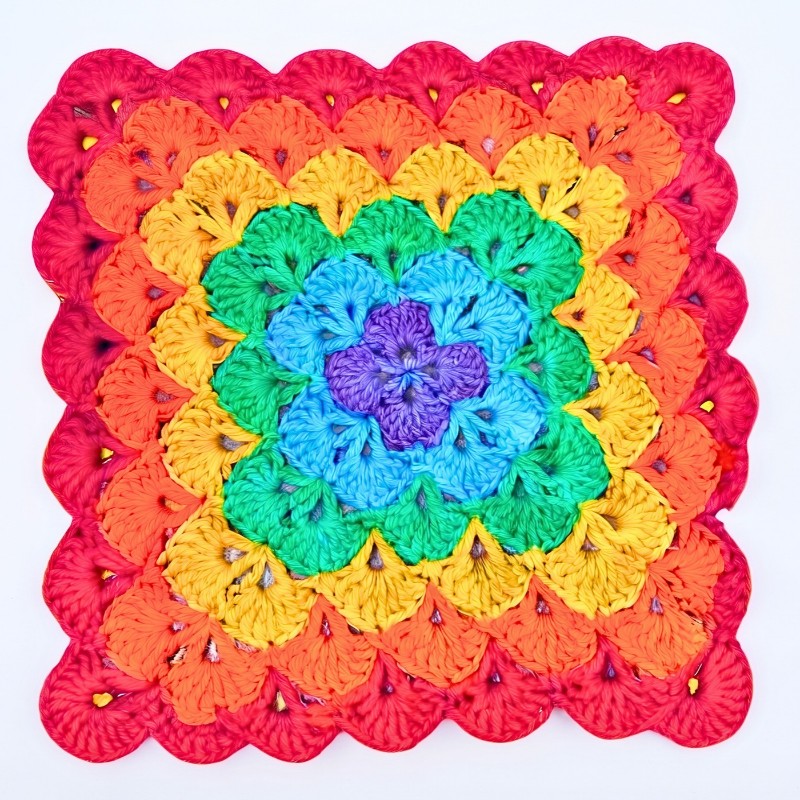
Looking for a blanket that can keep growing? This crochet shell design starts in the center, builds four corners, and can be finished with a scalloped or squared edge.
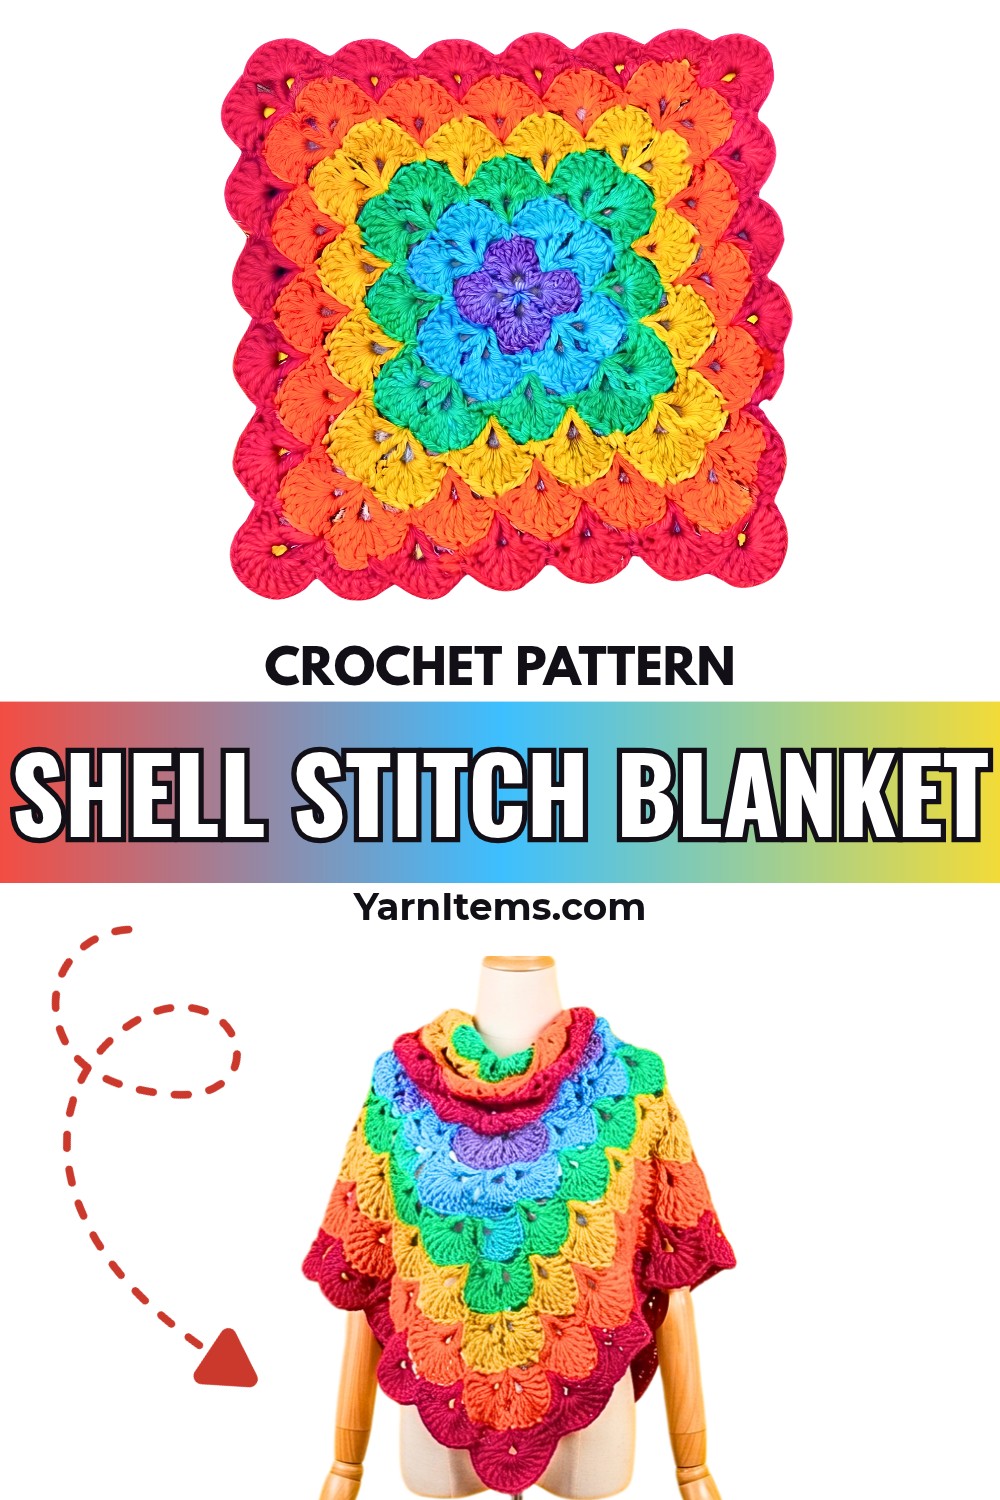
Starting from a tiny center, this crochet blanket gradually opens into a four-cornered shell pattern with layers of full 7-dc shells and open V-stitch spaces. Its biggest advantage is its flexibility: repeat the rounds for a baby blanket, sofa throw, or much larger bedspread.
You can crochet the blanket in one color or switch shades after each shell round to make the pattern more defined. The tutorial also shows how to leave the same shell design with its decorative scalloped edge or transform it into straight, squared-off edges for uses such as cardigans, pillows, cushions, tablet covers, and tote bags. The instructions below keep the corner placement and repeat logic clear so you can continue the crochet blanket confidently.
Credit Simple Crochet
Know the Two Ways to Finish the Blanket
The main blanket grows outward from a Magic Ring and alternates between two types of rounds: a V-stitch round that establishes the spaces and corners, followed by a shell round that fills those spaces with groups of 7 dc.
You can repeat those two rounds as many times as you want. If you stop there, the blanket keeps its decorative scalloped shell edge. For straight sides, work the supplied squaring-off rounds after the blanket reaches your desired size.
Decide this before the final rounds because the basic repeating pattern and the squared finish serve different purposes. A straight-edged version is especially useful when you want to adapt the shell fabric for garments or smaller accessories.
Materials & Tools
- Yarn: Multiple colors of your choice, or a single color if preferred
- Crochet Hook: A hook size appropriate for your chosen yarn weight
- Scissors
- Yarn Needle: For invisible joins and weaving in ends
Pattern Abbreviations
- MR: Magic Ring
- ch: Chain
- st(s): Stitch(es)
- sl st: Slip Stitch
- sc: Single Crochet
- dc: Double Crochet
- hdc: Half Double Crochet
- sp: Space
- ch-sp: Chain Space
Establish the Four-Corner Foundation
The first two rounds create the small shell-based center. Round 3 is where the piece changes character: the four corner clusters establish the square shape, while the ch-5 spaces create the sides between those corners.
The corner cluster is important enough to identify separately because it will return throughout the blanket. Each corner uses: 1 dc, ch 1, 1 dc, ch 3, 1 dc, ch 1, 1 dc
The ch-3 space marks the actual corner point, while the two ch-1 spaces on either side will later hold shell groups.
Round 1 – Center Ring
- Create a Magic Ring.
- Ch 3 (counts as 1 dc), ch 1.
- Make 1 dc into the ring, ch 1. Repeat this * 7 times.
- Pull the tail to close the ring tightly.
- Stitch Count: 8 dc and 8 ch-1 spaces.
- Join with a sl st to the 3rd chain of the starting ch-3.
You should now have eight dc separated by eight small chain spaces around a closed center. These spaces are what the next round uses to place the first shells.
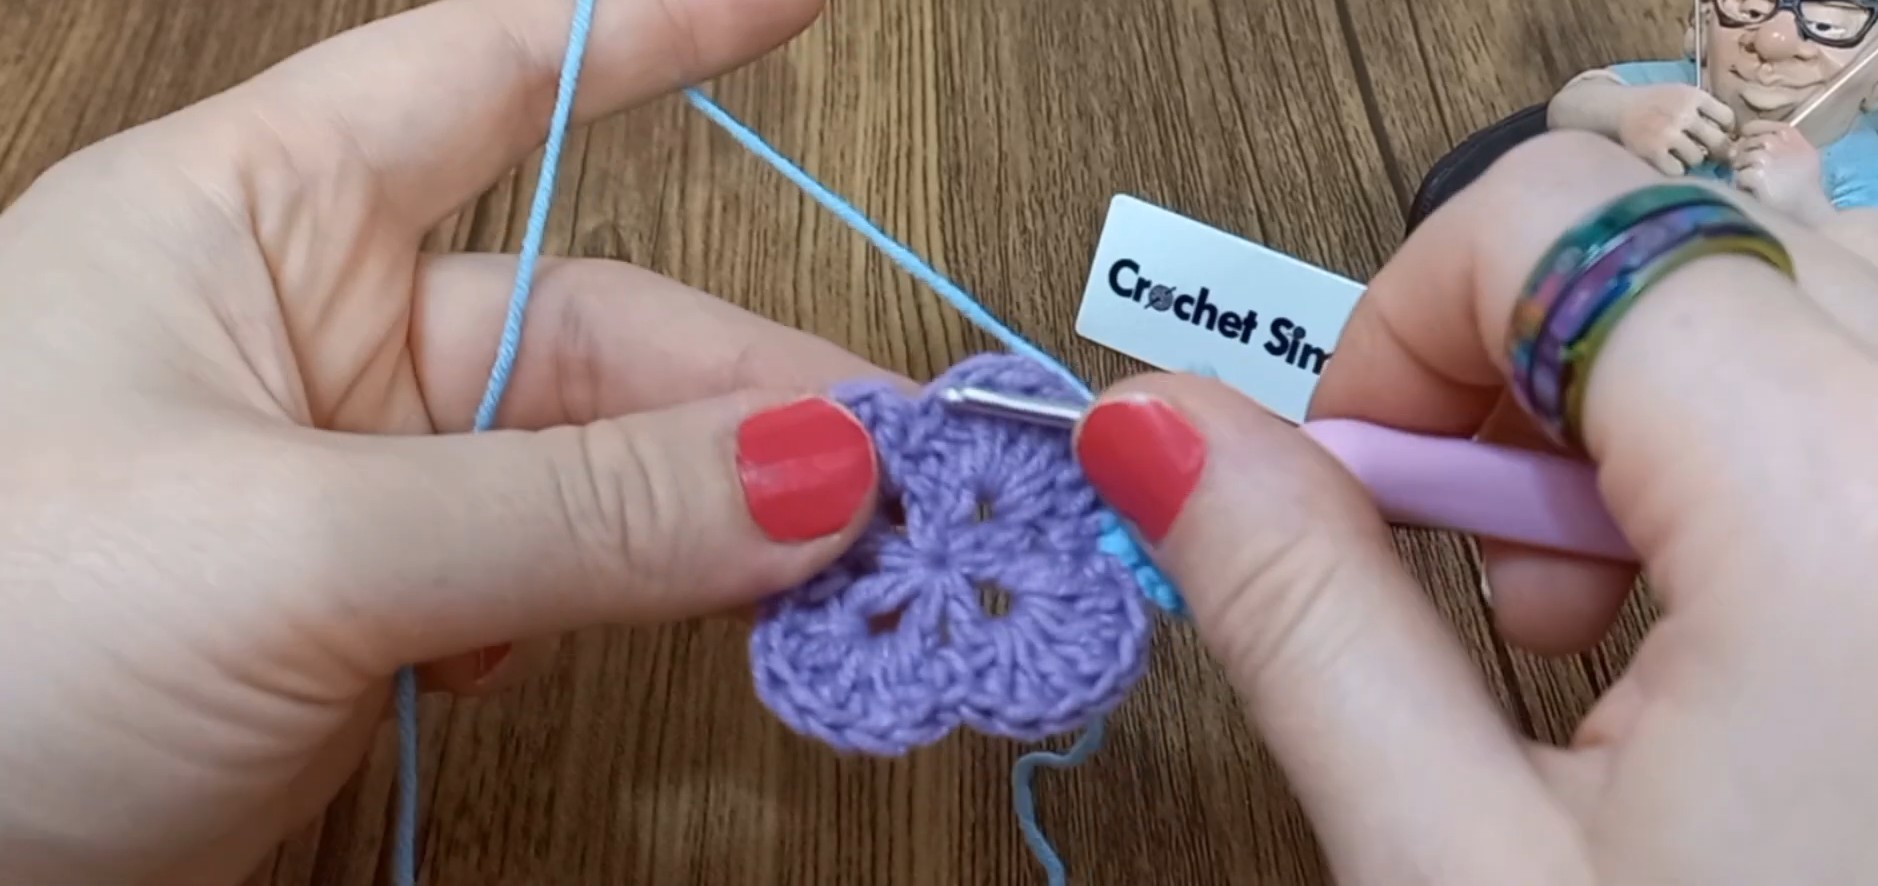
Round 2 – First Shells
- Sl st into the first ch-1 sp. Make 1 sc into the same sp.
- In the next ch-1 sp, make 7 dc (this forms your first shell).
- Make 1 sc in the next ch-1 sp, 7 dc in the following ch-1 sp. Repeat this from * around.
- Stitch Count: 4 shells (of 7 dc each) and 4 sc.
- Cut the yarn and fasten off using an invisible needle join to the first sc. Hide the tail.
At the end of this round, the four 7-dc shells are separated by four sc stitches. Those four sc positions become the corner locations in the next round.
Turn the Shell Center Into a Square
Round 3 introduces the V-stitch framework and the four corners. The shells from Round 2 are skipped completely; the new color travels between the sc positions instead.
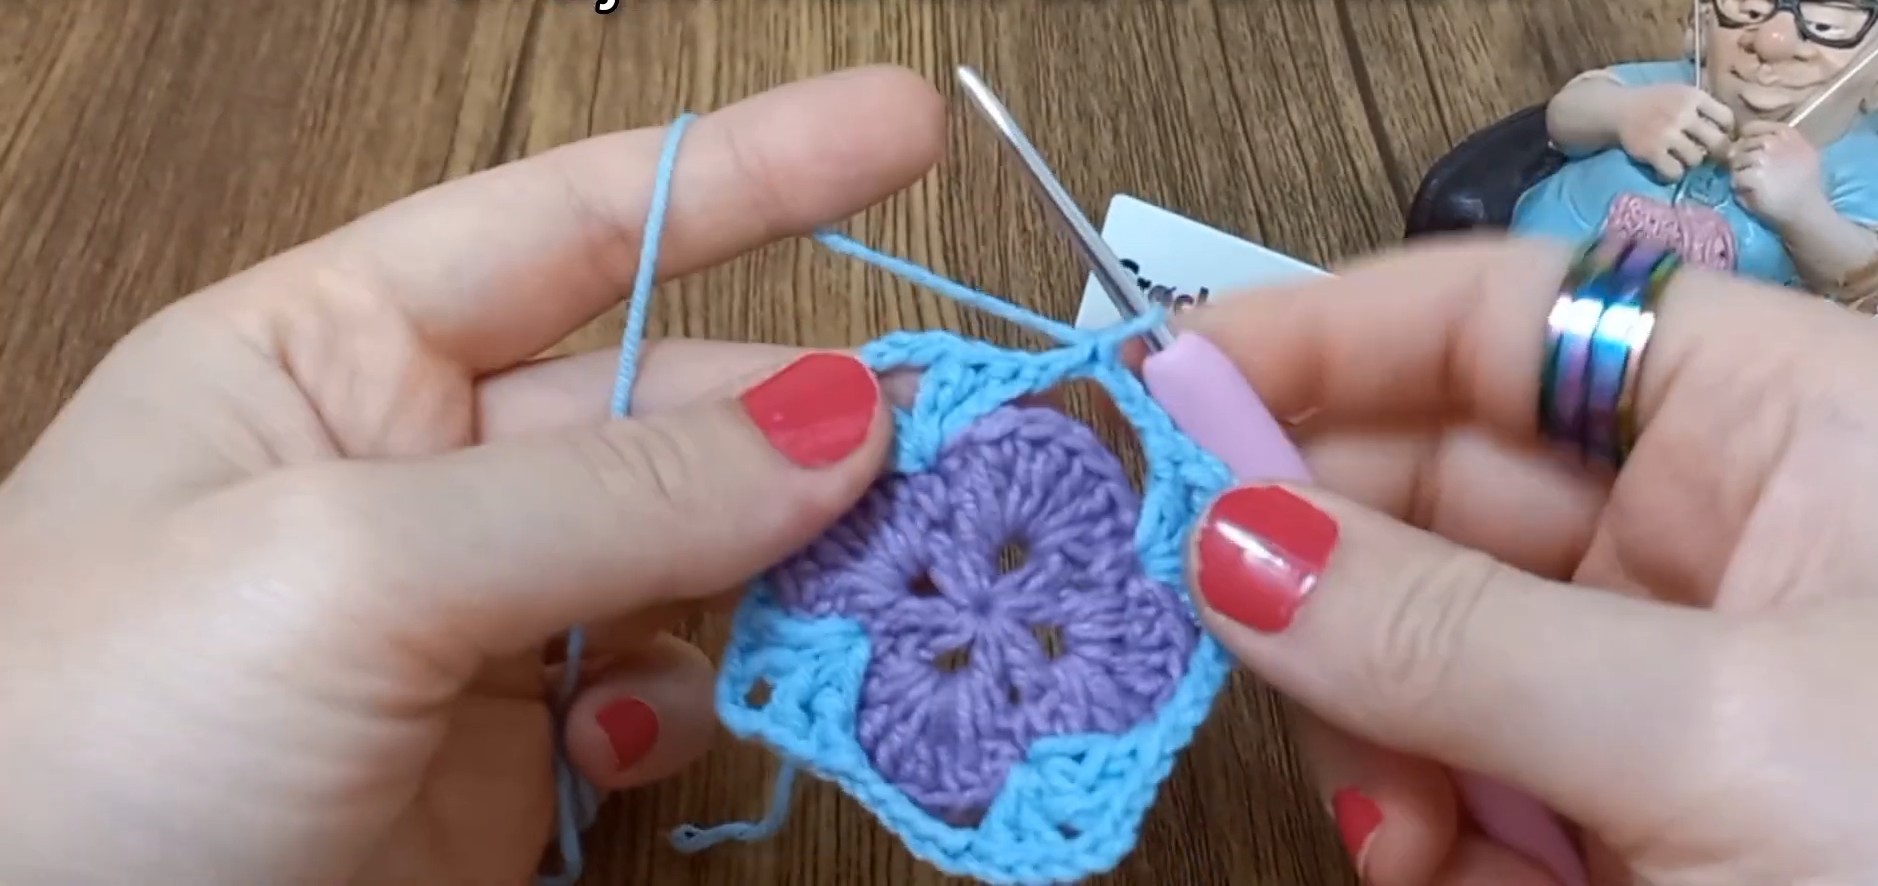
Round 3 – V-Stitch Base for Corners
- Attach your 2nd color with a slip knot to any sc from the previous round.
- Corner Cluster: Ch 4 (counts as 1 dc + ch 1), 1 dc in same sc, ch 3, 1 dc, ch 1, 1 dc in the same sc space.
- Ch 5. Skip the next shell entirely. In the next sc, create another Corner Cluster (1 dc, ch 1, 1 dc, ch 3, 1 dc, ch 1, 1 dc). Repeat from * around to create the 4 corners.
- To finish the round: Instead of chaining 5 at the very end, ch 2 and join with a dc into the 3rd chain of your starting ch-4. This technique keeps your hook centered in the loop for the next round.
The four ch-3 spaces are now your corners. Between them, the ch-5 spaces form the four sides of the emerging square.
That last joining technique is also worth keeping intact: ending with ch 2 and a dc into the third chain of the starting ch-4 positions the work for the next round rather than leaving the hook in an awkward place.
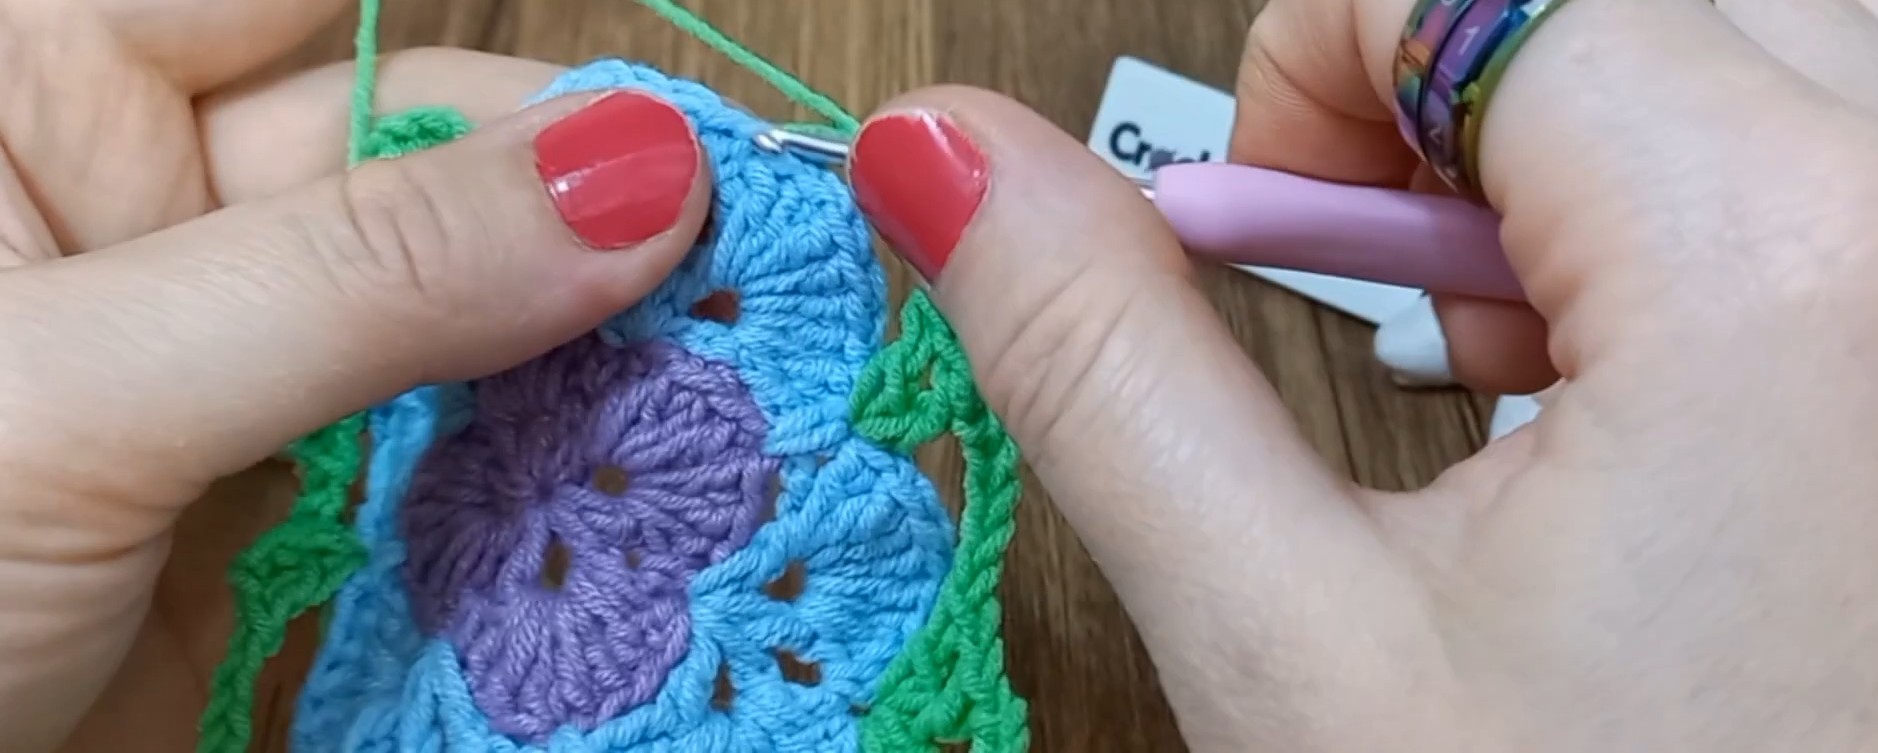
Put Shells Back Into the Open Spaces
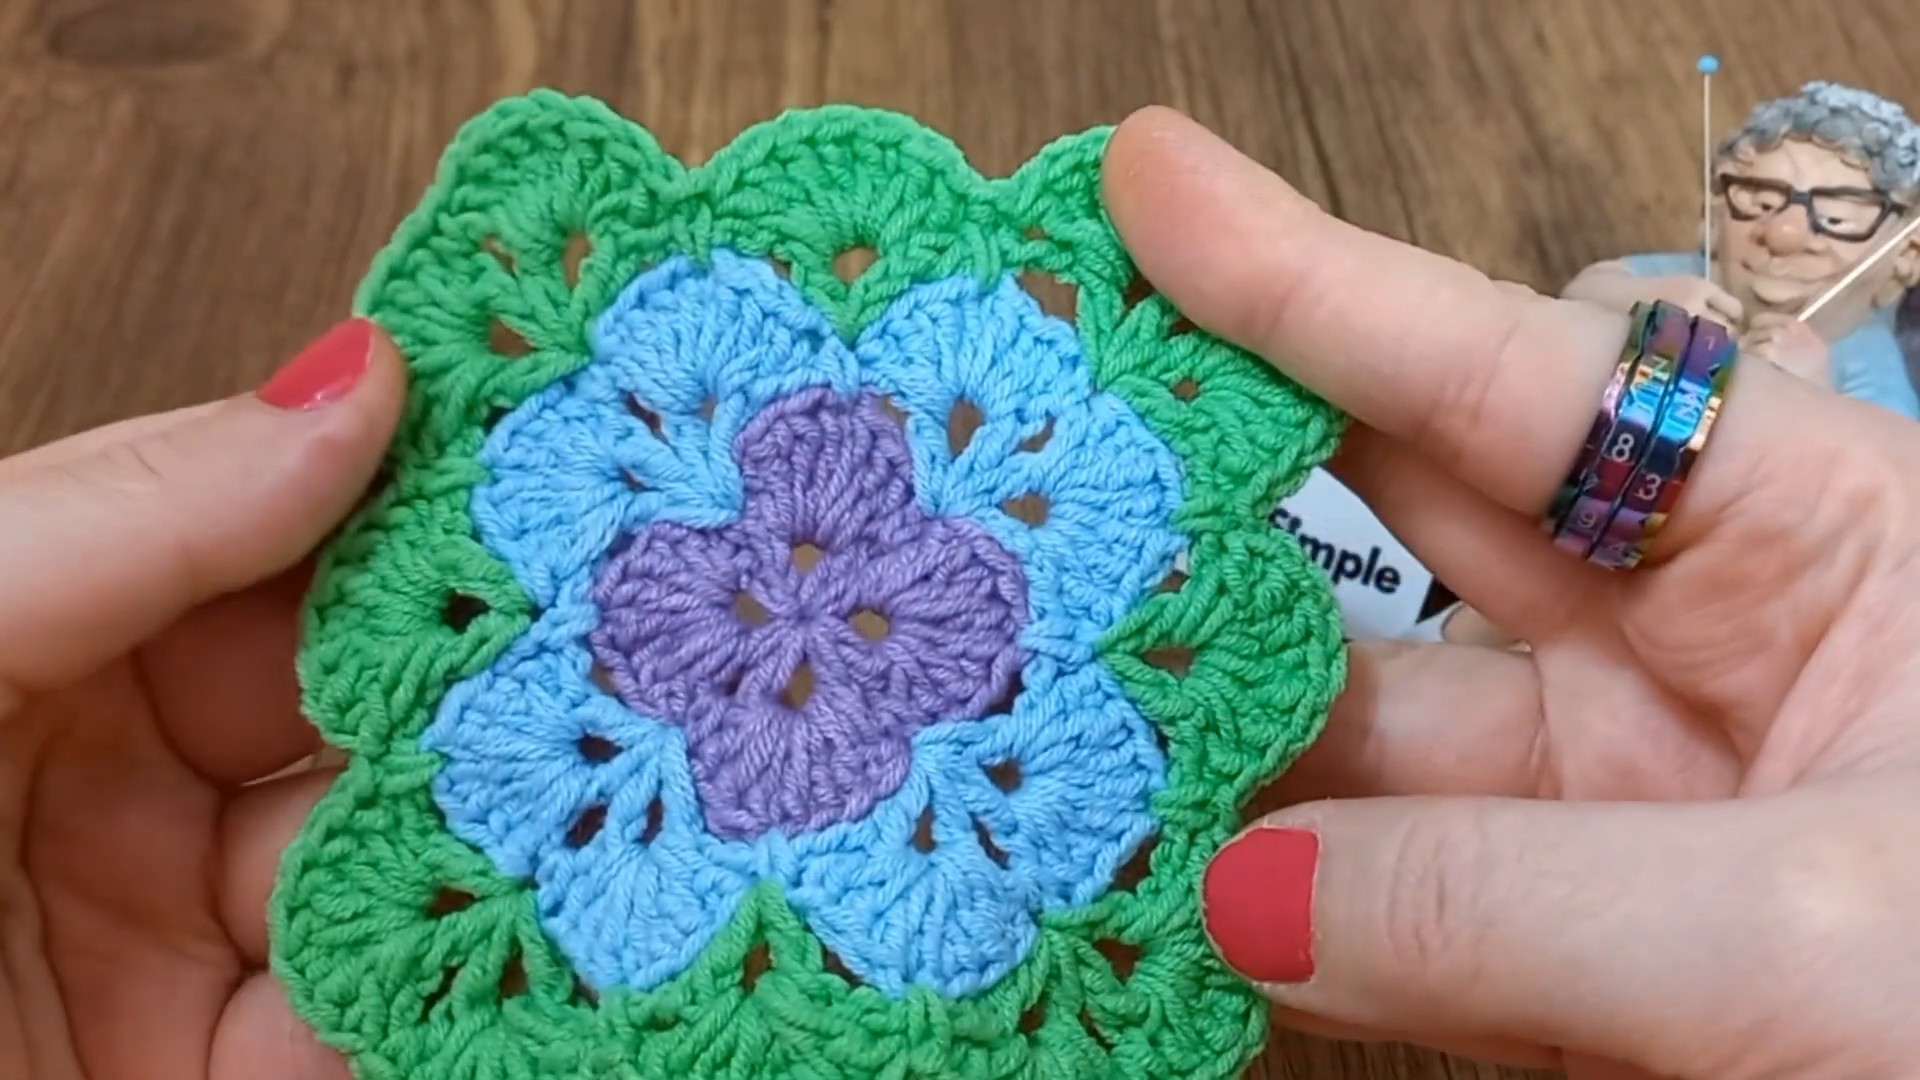
Round 4 fills the framework you just created. The corners receive two 7-dc shells with a sc between them, while each side receives one shell placement through the middle of its ch-5 space.
Round 4 – Second Shells
- Make 1 sc around the joining dc you just made (treating it as the center of the ch-5 space/4th chain of the previous row).
- First Corner Shells: Make 7 dc into the first ch-1 sp of the corner cluster. Make 1 sc into the ch-3 corner space. Make 7 dc into the second ch-1 sp of the corner cluster.
- Side: Make 1 sc into the middle of the ch-5 space (into the 4th chain).
- Repeat Steps 2 and 3 around all four sides.
- Join with a sl st to the first sc. Cut yarn, fasten off with an invisible needle join, and hide the tail.
The visual check here is simple: every corner should have a shell, a central sc, and another shell, while each side has its sc sitting in the middle of the ch-5 space.
Continue Growing the Square
From this point, the blanket follows a repeating rhythm. A V-stitch round opens the sides and preserves the corners; the following shell round fills those new spaces.
Round 5 – Expanding the V-Stitch Base
- Attach your 3rd color with a slip knot in any side sc (the sc between two side shells).
- Ch 4 (counts as 1 dc + ch 1), 1 dc in same sp.
- Ch 5.
- Corner: In the corner sc (the sc in the ch-3 point of the shell), make the Corner Cluster (1 dc, ch 1, 1 dc, ch 3, 1 dc, ch 1, 1 dc).
- Ch 5.
- Side: In the next side sc, make 1 dc, ch 1, 1 dc.
- Repeat this pattern around the square. Finish the round by chaining 2 and joining with 1 dc to the 3rd chain of the starting ch-4.
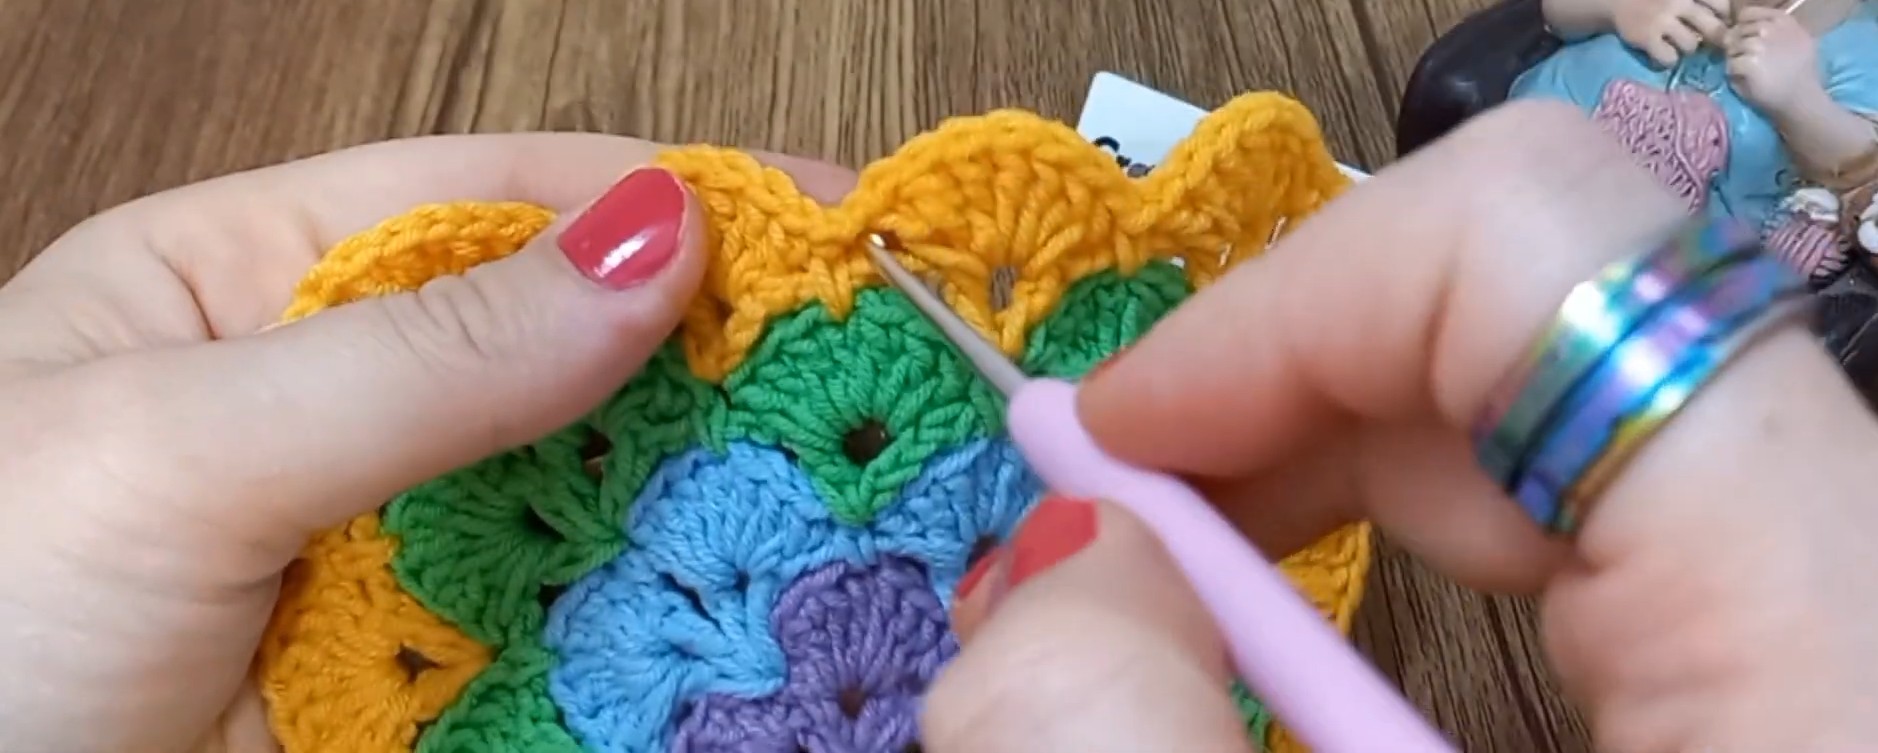
The side V-stitches are now positioned between the corners. The corners themselves remain easy to recognize by their ch-3 center.
Round 6 – Expanding Shells
- Make 1 sc around the joining dc.
- Side Shell: Make 7 dc into the side ch-1 sp. Make 1 sc into the ch-5 space.
- Corner Shells: Make 7 dc into the first corner ch-1 sp, 1 sc into the corner ch-3 sp, and 7 dc into the second corner ch-1 sp. Make 1 sc into the next ch-5 sp.
- Repeat this sequence around. Join with a sl st to the first sc, fasten off invisibly, and weave in ends.
The shell round restores the dense decorative sections after the open V-stitch round. At the corners, look for the familiar arrangement of 7 dc, sc, 7 dc.
The Repeat That Makes the Blanket Any Size
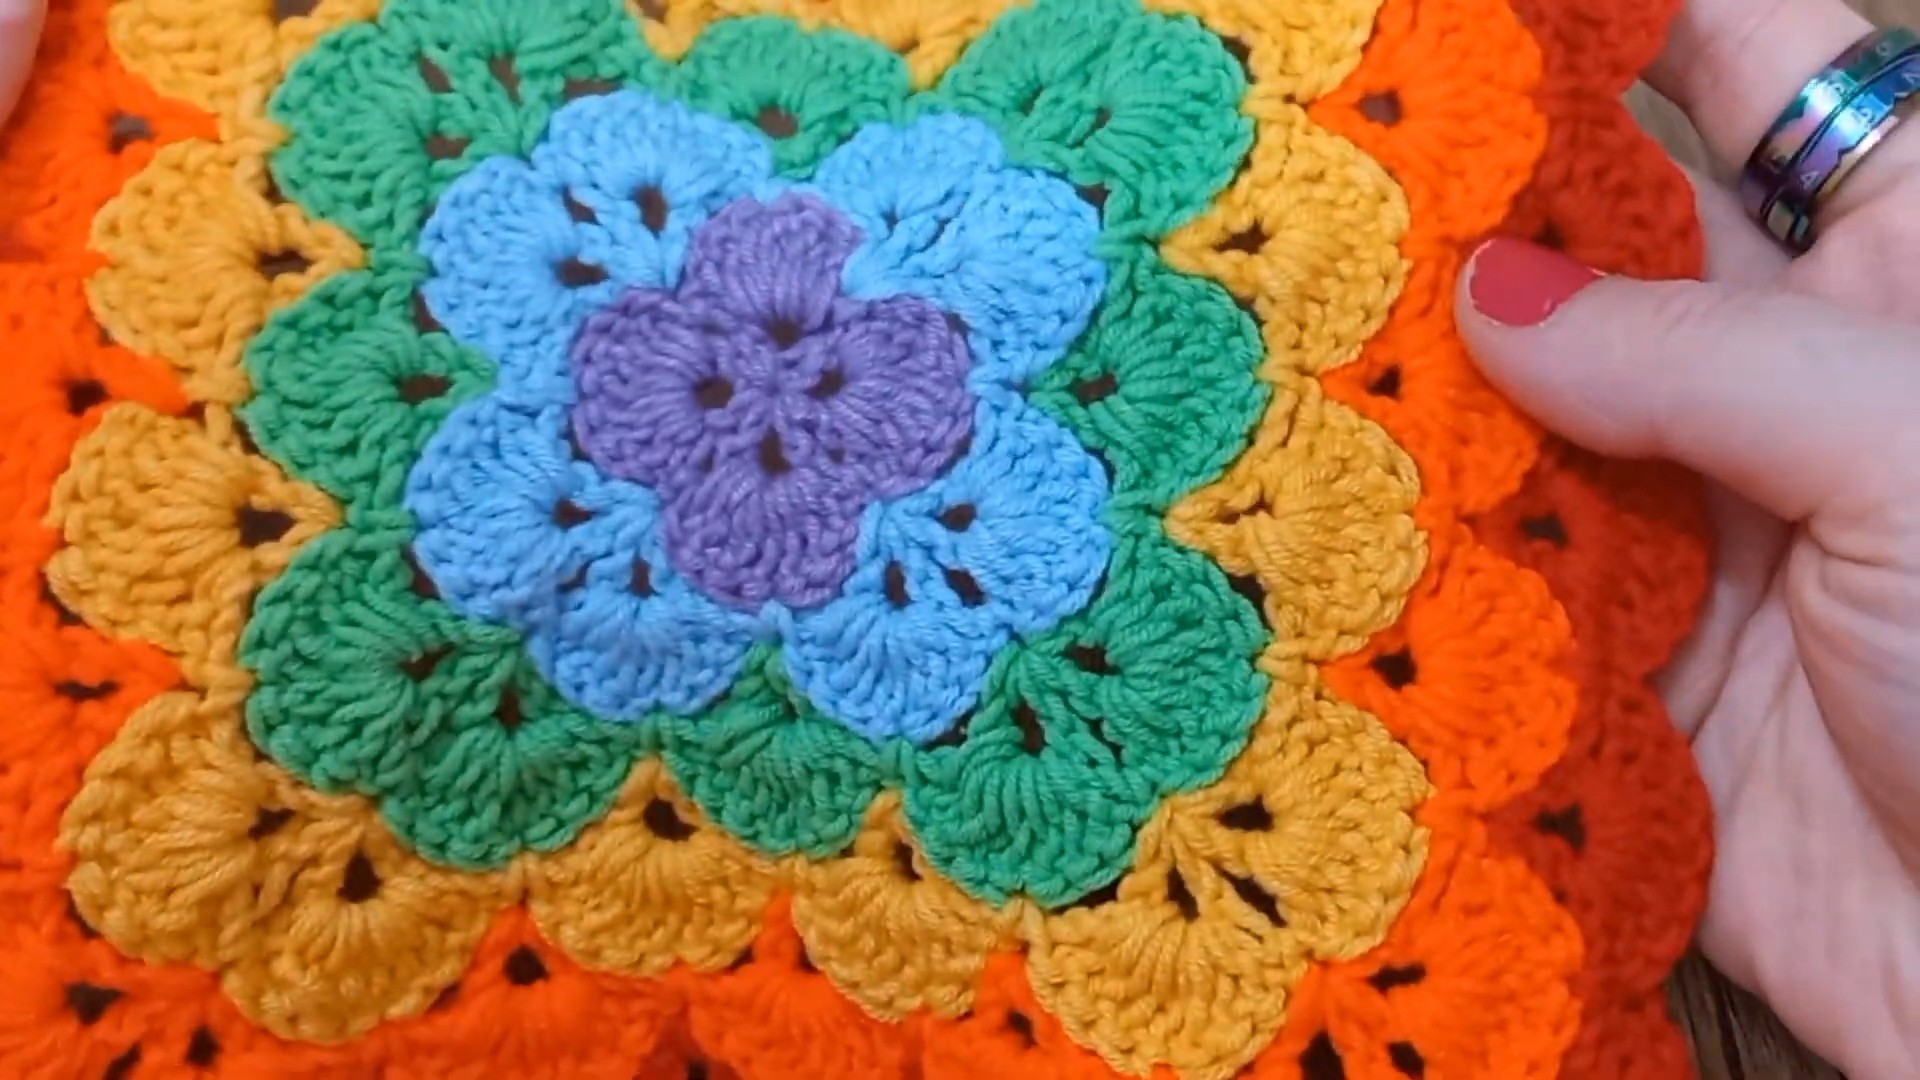
Once Rounds 5 and 6 are complete, you no longer need a new stitch sequence for every round. Continue alternating the two established round types until the blanket reaches the size you want.
Every V-Stitch Round
- Make a standard V-stitch (1 dc, ch 1, 1 dc) into every side sc.
- Make a Corner Cluster (1 dc, ch 1, 1 dc, ch 3, 1 dc, ch 1, 1 dc) into every corner sc.
- Always separate your V-stitch groups with a ch 5.
Every Shells Round
- Make 1 sc in the center of every ch-5 space.
- Make 7 dc in every ch-1 space.
- Make 1 sc in every corner ch-3 space.
Color Tip: Always change colors after finishing a Shells round.
Because the blanket grows by repeating these two rounds, you can stop whenever the dimensions suit your intended use. Keep repeating for a larger blanket, or stop earlier for a smaller baby blanket or sofa throw.
If You Want Straight Edges Instead
The repeating shell pattern naturally gives a decorative scalloped edge. If your goal is a squared-off blanket, wait until the main blanket has reached the desired size, then use the following rounds.
These rounds do not replace the main repeat. They are the optional finishing sequence that converts the scalloped outer edge into a straighter border.
Squaring Base Round – Chains & V-Stitches
- Attach yarn with a slip knot to any corner sc.
- Ch 4 (counts as 1 dc + ch 1), 1 dc in same sp, ch 3, 1 dc, ch 1, 1 dc in the same corner sp.
- Ch 2. Make 1 sc into the 4th st (center) of the next shell. Ch 2. In the sc between shells, make 1 dc, ch 1, 1 dc.
- Repeat Step 3 across the side of the blanket.
- In the corner sc, make the corner cluster (1 dc, ch 1, 1 dc, ch 3, 1 dc, ch 1, 1 dc).
- Repeat around all four sides. To finish the round, ch 1 and join with an hdc to the 3rd chain of the starting ch-4.
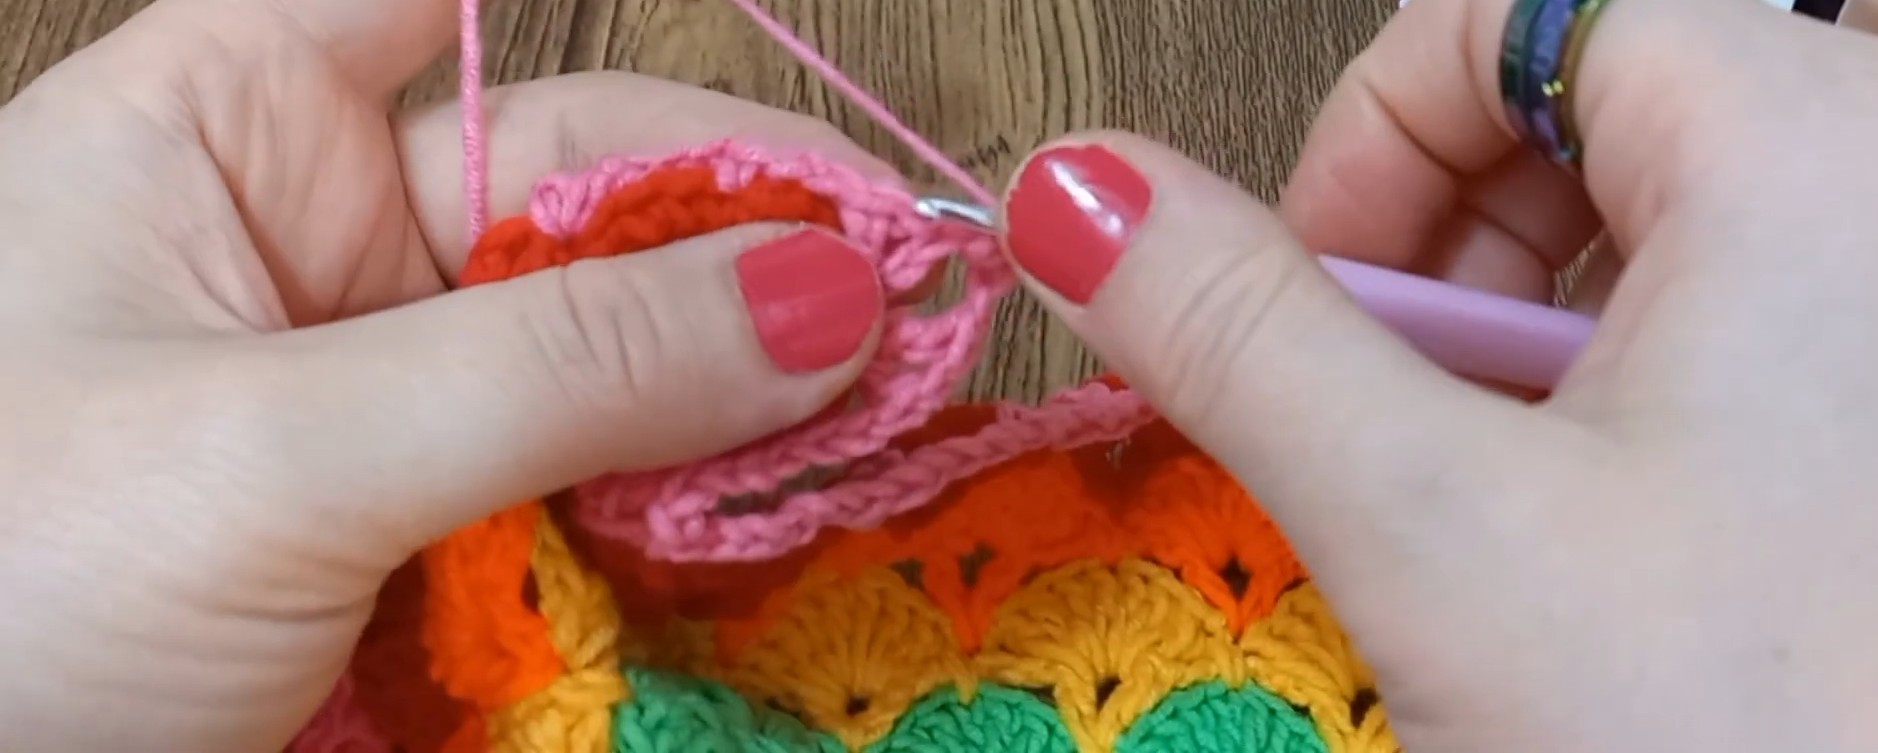
This round creates a new chain-and-V-stitch framework over the scalloped edge. The ch-3 spaces remain the turning points, so they should stay easy to identify as you work around each side.
Straightening Round – Single Crochets
- In the Corners: Make 5 sc into the corner ch-3 spaces.
- Along the Sides:
- Skip the first dc of the V-stitch, make 1 sc into the ch-1 sp, and 1 sc into the second dc of the V-stitch.
- Make 2 sc into the next ch-2 sp.
- Skip the sc stitch on top of the shell.
- Make 2 sc into the next ch-2 sp.
- Repeat this side sequence across, skipping the correct stitches to pull the scalloped edges flat. Join with a sl st to the first sc.
The purpose of this round is to pull the previously scalloped sides into a straighter line. At each corner, the 5-sc group will provide the center stitch needed for the final turning round.
Finish With a Solid Square Border
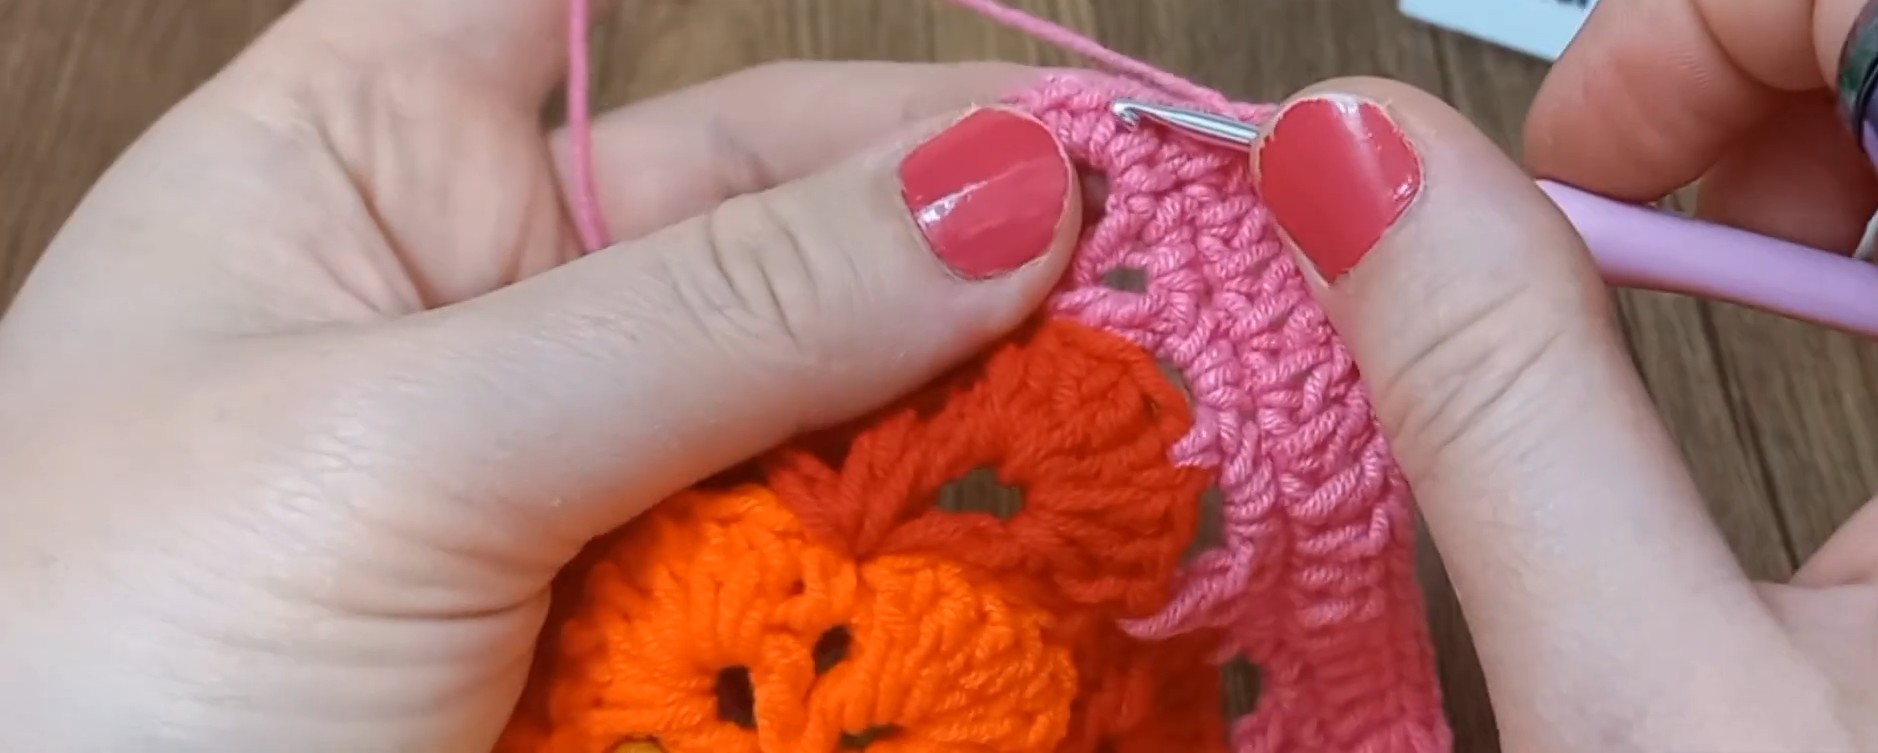
The last supplied round turns the straightened edge into a solid double-crochet border. The key placement is at each corner: all five dc are worked into the third sc, which is the exact center of the five-sc corner group.
Final Border Round – Double Crochets
- Ch 3 (counts as first dc).
- Make 1 dc into every stitch across the sides.
- In the Corners: When you reach the 3rd sc (the exact center) of the 5-sc corner group, make 5 dc all into that single stitch to turn the corner sharply.
- Repeat around the entire blanket. (Optional: You can add more continuous rounds of solid double crochet if you want a thicker border).
- Join with a sl st to the top of the beginning ch-3.
The result is a straight-edged blanket with a solid dc border. If you prefer the original decorative shell edge, simply stop after the repeating shell rounds instead of using the squaring sequence.
Invisible Final Join
Cut your yarn and fasten off for the final time. Thread your tail onto a yarn needle, insert it under both loops of the second stitch, run it back down through the center of the first stitch, and weave it securely into the back of your work for a seamless, invisible finish.
With the blanket complete, the same center-out shell fabric can remain a soft scalloped square or be given the straight border described above, depending on the shape you need.