
Crochet 3D Rose Bouquet Blanket Pattern with Leaves
This crochet rose bouquet blanket pairs a round 90 cm center with raised green leaves and rolled roses for a richly textured floral border.
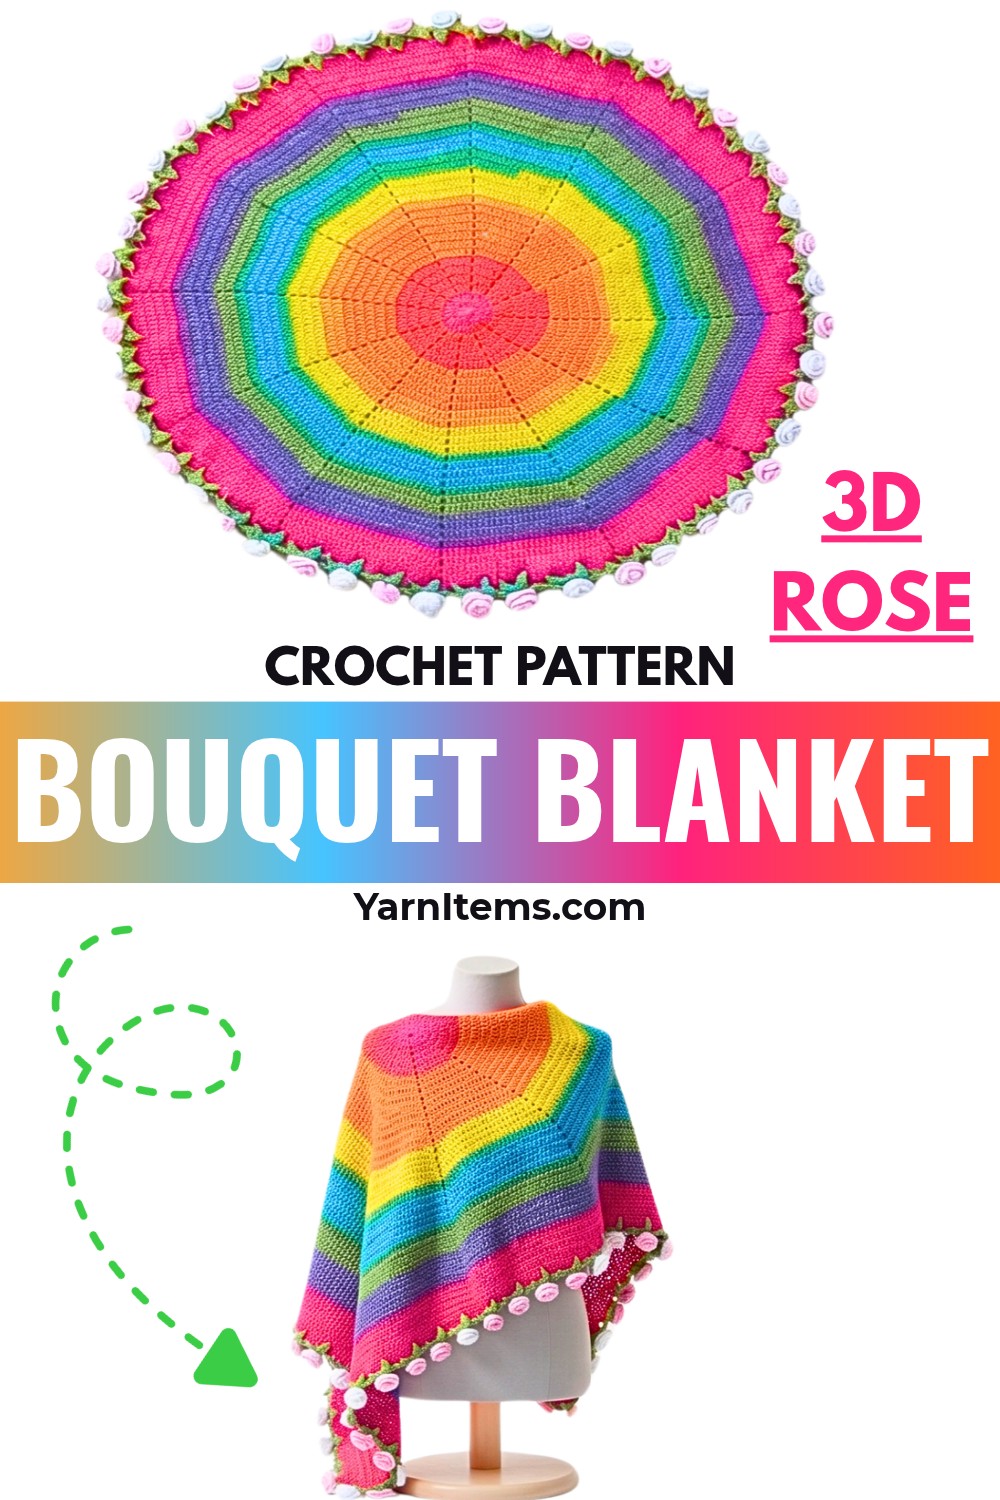
Give a simple round crochet blanket a garden-inspired finish with leaves that lift off the edge and roses that curl into small, three-dimensional blooms. The floral border makes the outer edge the main decorative feature, while the circular center keeps the blanket practical for everyday use or seasonal display.
Using Papatya Cake yarn and a 4.0 mm hook, you will first grow the round center through a repeating double-crochet increase pattern, then build the green border and add the raised leaf pairs. The tutorial creates a 90 cm crochet blanket, but you can stop earlier or continue farther, and you can change the rose colors to suit different occasions and decor.
Credit Simple Crochet
Start With the Shape You Want
The tutorial produces a blanket with a 90 cm (approximately 35.5 inch) diameter. You do not have to treat that measurement as a fixed stopping point, though. The circular base is designed to keep expanding through the established increase pattern, so you can stop sooner for a much smaller piece or continue the repeats for a larger blanket.
This also makes the pattern useful for different purposes. A small version can work as a coaster-sized accent, while continuing the base can take you toward a full-sized bed throw. If you want the floral edge to suit a particular season, change the rose colors rather than the base—orange and black create a spooky, Halloween-inspired look, while red and pink give the border a Valentine’s Day feel.
What You Need
- Main Yarn: Papatya Cake yarn (Weight: 150g, Length: 540m) for the blanket base.
- Contrast Yarn: Green yarn for the leaves, and any color(s) you choose for the roses.
- Crochet Hook: 4.0 mm hook.
- Other Tools: Tapestry/yarn needle, scissors.
Crochet Terms
- MR: Magic Ring
- ch: Chain
- sl st: Slip Stitch
- sc: Single Crochet
- hdc: Half Double Crochet
- dc: Double Crochet
- sp: Space
- st(s): Stitch(es)
Build the Circular Center Pattern
The first four rounds establish the increase rhythm that controls the entire shape. Rather than treating each round as an unrelated set of stitches, watch how the 12 sections separated by ch-1 spaces gradually become wider.
That pattern is what lets you continue beyond Round 4 without needing a completely new sequence for every round. The key is to keep the increase at the end of each section and skip the chain space between sections.
Round 1: Start with a Magic Ring (or ch 4-5 and sl st to the 1st ch to form a ring). Ch 2 (does not count as a stitch). Work 12 dc into the ring. Pull the tail to close the ring tightly. Join with a sl st to the first dc. (12 dc)
You should have a tightly closed center with 12 dc around it. Keep the center pulled closed before moving on so the starting point does not leave a noticeable hole.
Round 2: Ch 2. In the same stitch, work 2 dc, then ch 1. Work 2 dc in the next stitch, ch 1. Repeat from * to * in each stitch around. Join with a sl st to the first dc. (24 dc, 12 ch-1 spaces)
This creates the first set of spaces around the center. There are now 24 dc and 12 ch-1 spaces, with each space separating one growing section from the next.
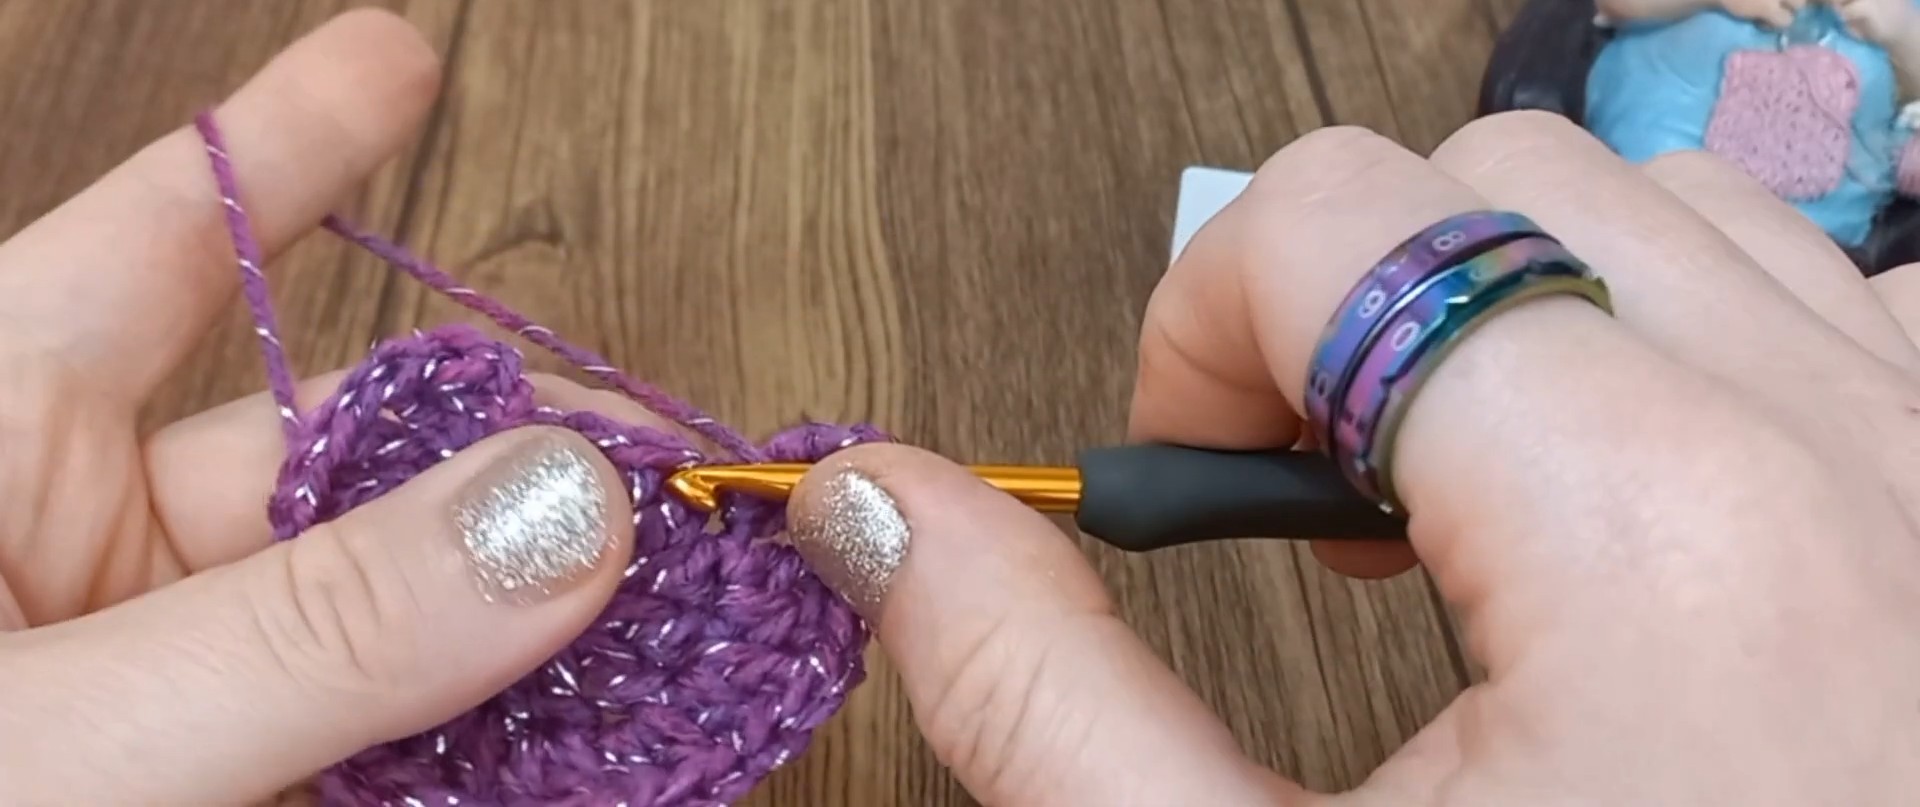
Round 3: Skip the starting ch-2 and sl st into the first dc. Ch 2. Work 1 dc in the first st, 2 dc in the next st, ch 1. Skip the ch-1 space. Work 1 dc in the next dc, 2 dc in the next dc, ch 1, skip the ch-1 space. Repeat from * to * around. Join with a sl st to the first dc. (36 dc, 12 ch-1 spaces)
The sections are beginning to spread outward. After every pair of dc stitches, the ch-1 space separates the next section, so avoid accidentally working into that gap.
Round 4: Sl st to the first dc, ch 2. Work 1 dc in the first st, 1 dc in the second st, 2 dc in the third st, ch 1. Skip the ch-1 space. Work 1 dc in the next 2 sts, 2 dc in the third st, ch 1, skip the ch-1 space. Repeat from * to * around. Join with a sl st to the first dc. (48 dc, 12 ch-1 spaces)
Now each section has become wider again, with the increase moving to the third stitch of the section. Your count should be 48 dc and 12 ch-1 spaces.
Continue the Increase Without Changing the Rhythm
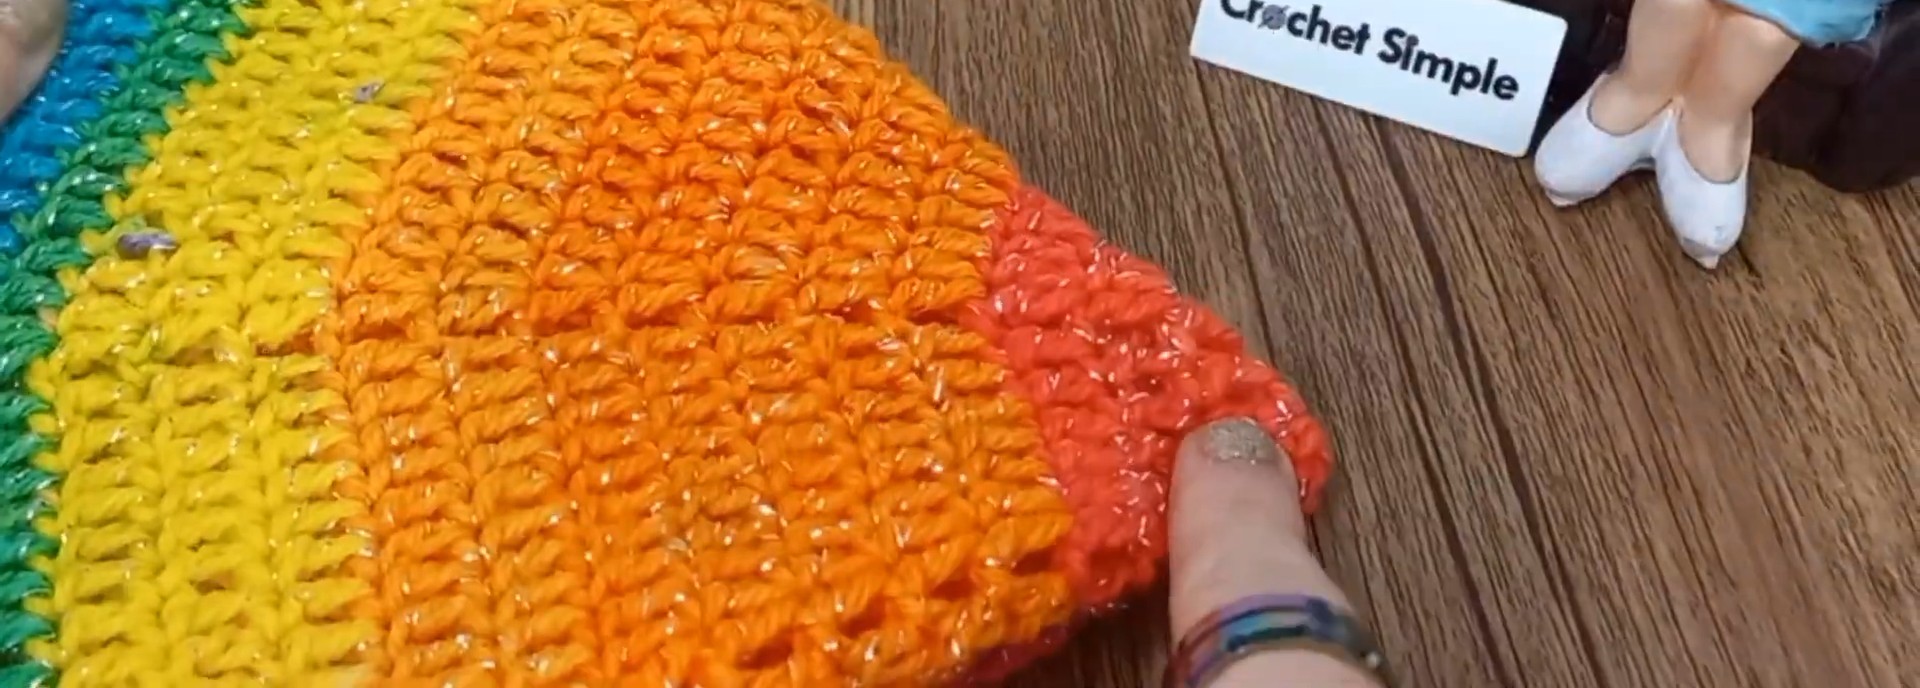
Rounds 5 and beyond (Continuing the Pattern): Follow this established increase diagram. For each subsequent round, you will add 1 dc to each “petal” section. Work 1 dc in each stitch of the cluster, but in the last stitch of the cluster, work 2 dc followed by a ch 1. Skip all chain spaces from the previous round. Continue this expansion round by round until the blanket reaches your desired diameter (90 cm in the tutorial). Fasten off the main color.
The simplest way to keep the later rounds under control is to identify the last stitch of each section before making the increase. The section gets one stitch longer on every new round, but the separation point remains the ch-1 space.
If the circle begins to lose its shape, check the increases before assuming the yarn tension is the problem. An increase placed in the wrong stitch can change the spacing between sections and affect how evenly the blanket spreads.
Once you reach your chosen diameter, fasten off the main color. The floral border will be added to this outer edge.
Give the Edge Its Green Foundation
The green border comes next because the leaves need a defined edge to sit against. The first green round creates ch-2 spaces, and the second fills those spaces with sc stitches.
Green Border
Round 1: Join the Green yarn in any stitch on the outer edge. Ch 1, work 1 sc in the same st. Ch 2, skip 2 stitches, work 1 sc in the 3rd stitch. Repeat from * to * all the way around. Treat the ch-1 spaces from the previous round exactly like regular stitches as you count. Join with a sl st to the first sc.
The important counting detail here is that the ch-1 spaces from the previous round are counted like regular stitches. Keep that in mind while moving around the circumference so the green border stays evenly distributed.
Round 2: Ch 1 (does not count as a st), work 1 sc in the same st. Work 2 sc into the next ch-2 space, work 1 sc into the next sc stitch. Repeat from * to * all the way around. Join with a sl st to the first sc.
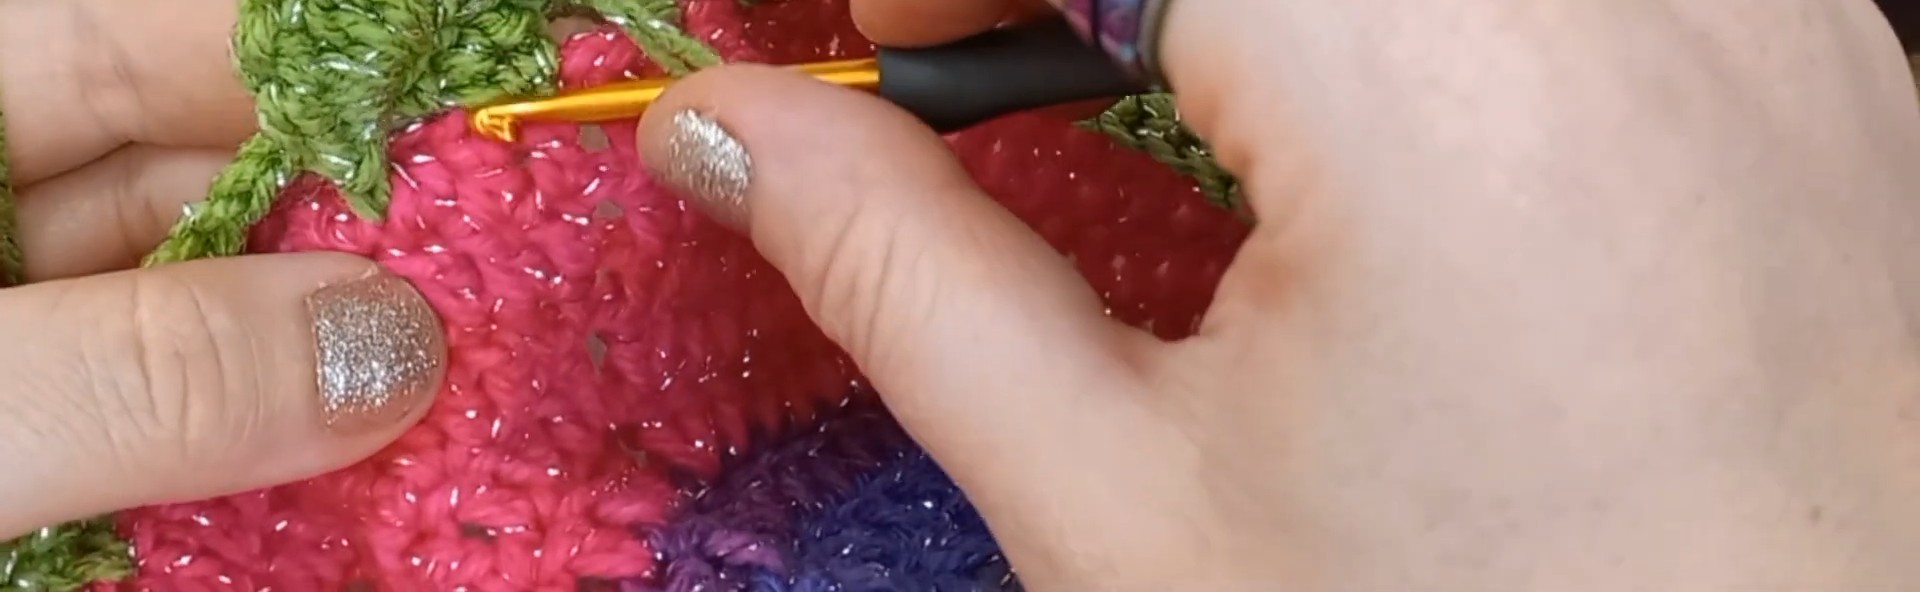
The green edge is now ready to support the raised leaves. From this point, the leaf placement reaches down into the double crochet round directly below the green border, which is an important detail to keep visible as you work.
Shape the Raised Leaf Pairs
The leaves create the three-dimensional part of the border. They are anchored into the older double crochet round rather than simply sitting on top of the green sc border.
For the first pair, concentrate on the anchor positions before worrying about the rest of the blanket. Once the first two leaves are correctly positioned, the spacing sequence becomes much easier to repeat.
First Leaf
Step 1 (First Leaf): Skip the initial ch-1, ch 3. Look at the double crochet round directly below the border. Count 3 stitches backward. Insert your hook from bottom to top between the 2nd and 3rd stitch. Make 1 sc and ch 1 to anchor. Turn your work slightly and work the following stitches around the ch-3 space you just created: 1 sc, 1 hdc, 3 dc, 1 hdc, 1 sc.
The three dc stitches form the fuller middle of the leaf, while the hdc and sc stitches taper the shape toward both ends. The hook direction is part of the placement, so use bottom to top for this first anchor.
Second Leaf
Step 2 (Second Leaf): Ch 3. Look at the double crochet round again. Count 5 stitches forward from your first anchor point. Insert your hook from top to bottom between the 4th and 5th stitch. Make 1 sc and ch 1 to anchor. Work around this new ch-3 space: 1 sc, 1 hdc, 3 dc, 1 hdc, 1 sc.
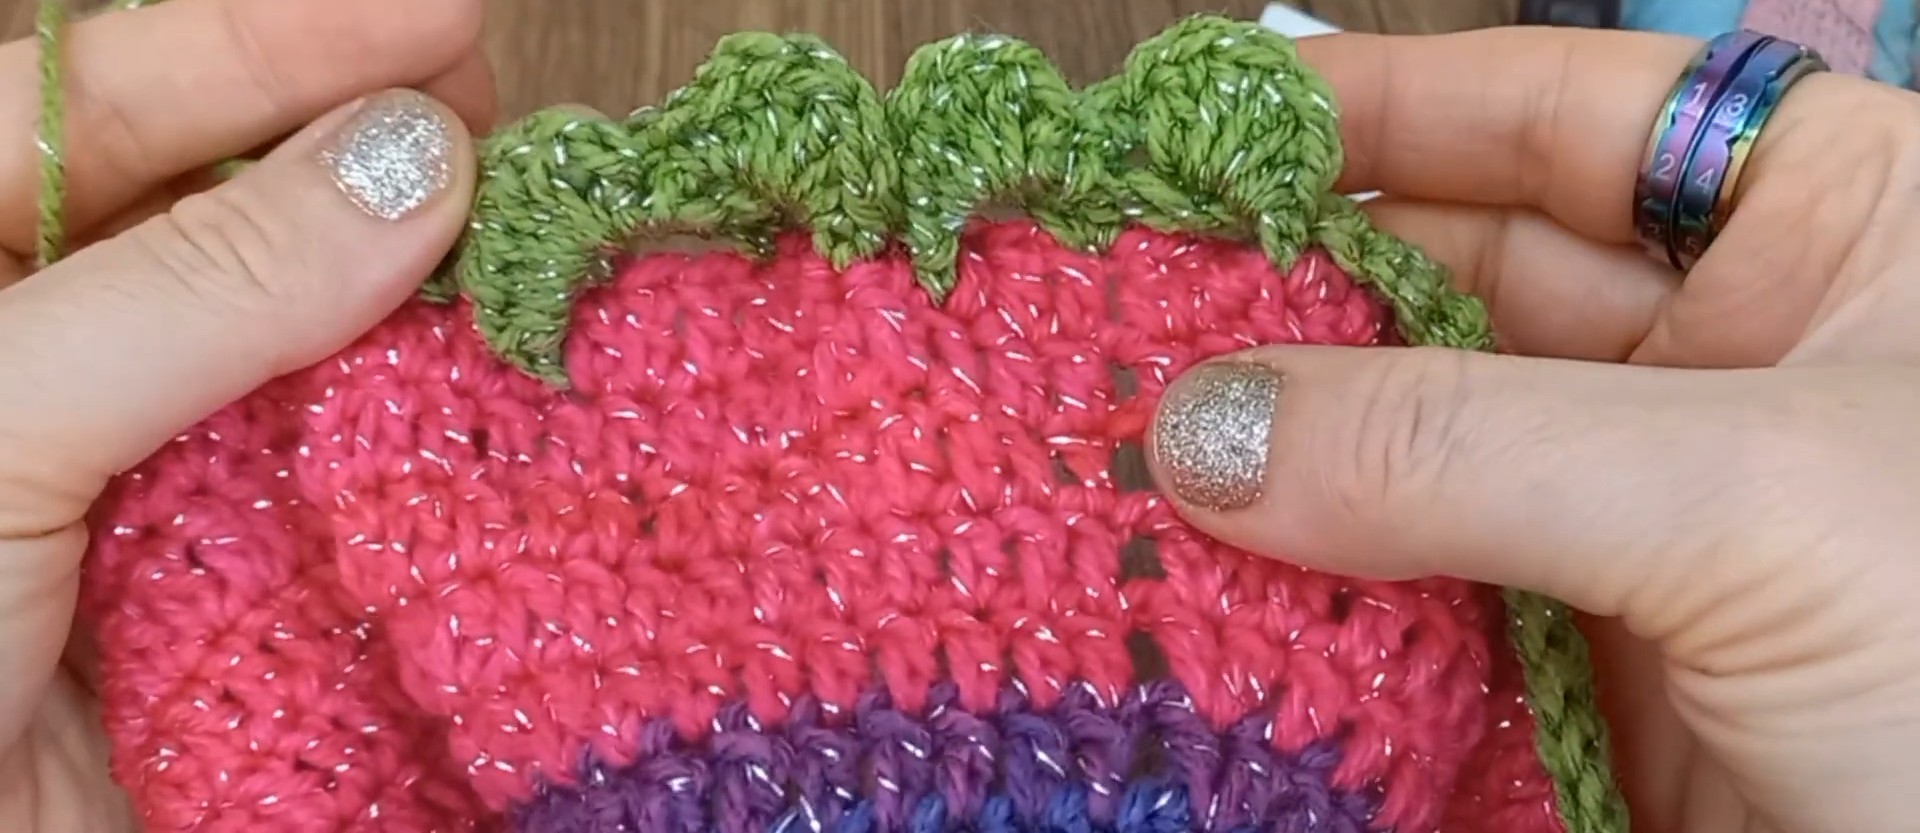
The second leaf mirrors the same stitch sequence but uses a different anchor direction: top to bottom. Check that both leaves sit forward from the green border rather than disappearing into it.
Leave the Correct Gap
Step 3 (Spacing): Fold the leaves forward to expose the green sc border behind them. Skip the stitch where the leaf base started, and work 1 sc into the next stitch. Work 1 sc into each of the next 7 stitches. (You will have 8 sc total between leaf pairings).
This eight-sc section is the spacing that separates one leaf pairing from the next. Folding the leaves forward gives you a clear view of the green stitches you need to work into.
Continue Around the Edge
Step 4: Repeat Steps 1-3 all the way around the blanket border to create paired leaves. Fasten off the green yarn and weave in the ends.
As you repeat the pairings, use the previous leaves as your visual reference. Each group should have the same basic relationship: two raised leaves followed by the 8-sc spacing before the next pairing.
Add a Rose Between Each Leaf Pair
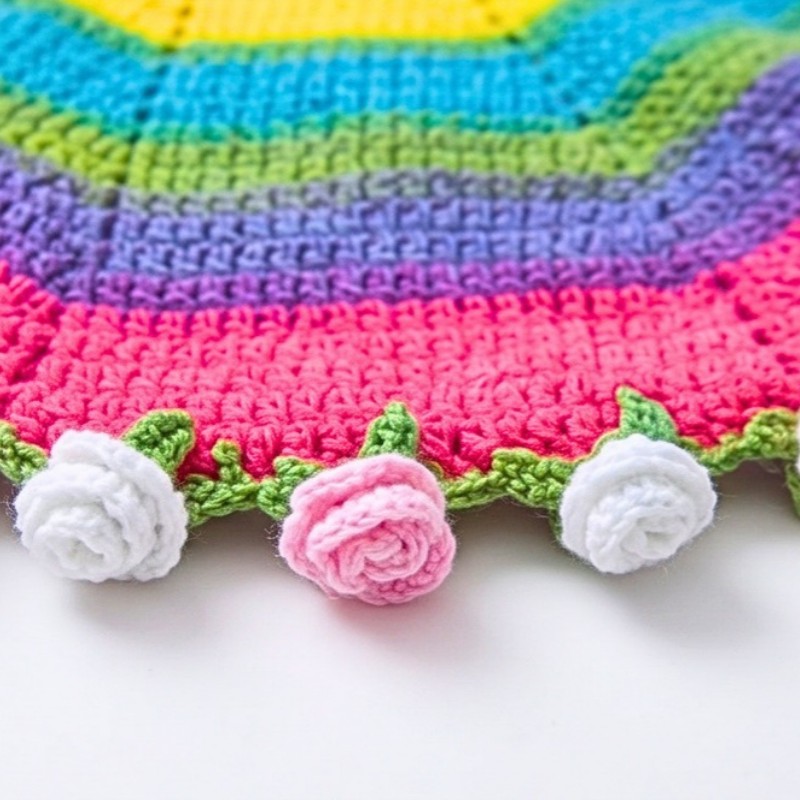
The roses are worked directly onto the blanket in the spaces between the leaf pairings. Each one starts as a ruffled strip, so the flower is not shaped into a spiral until after the crochet portion is complete.
Create the Rose Strip
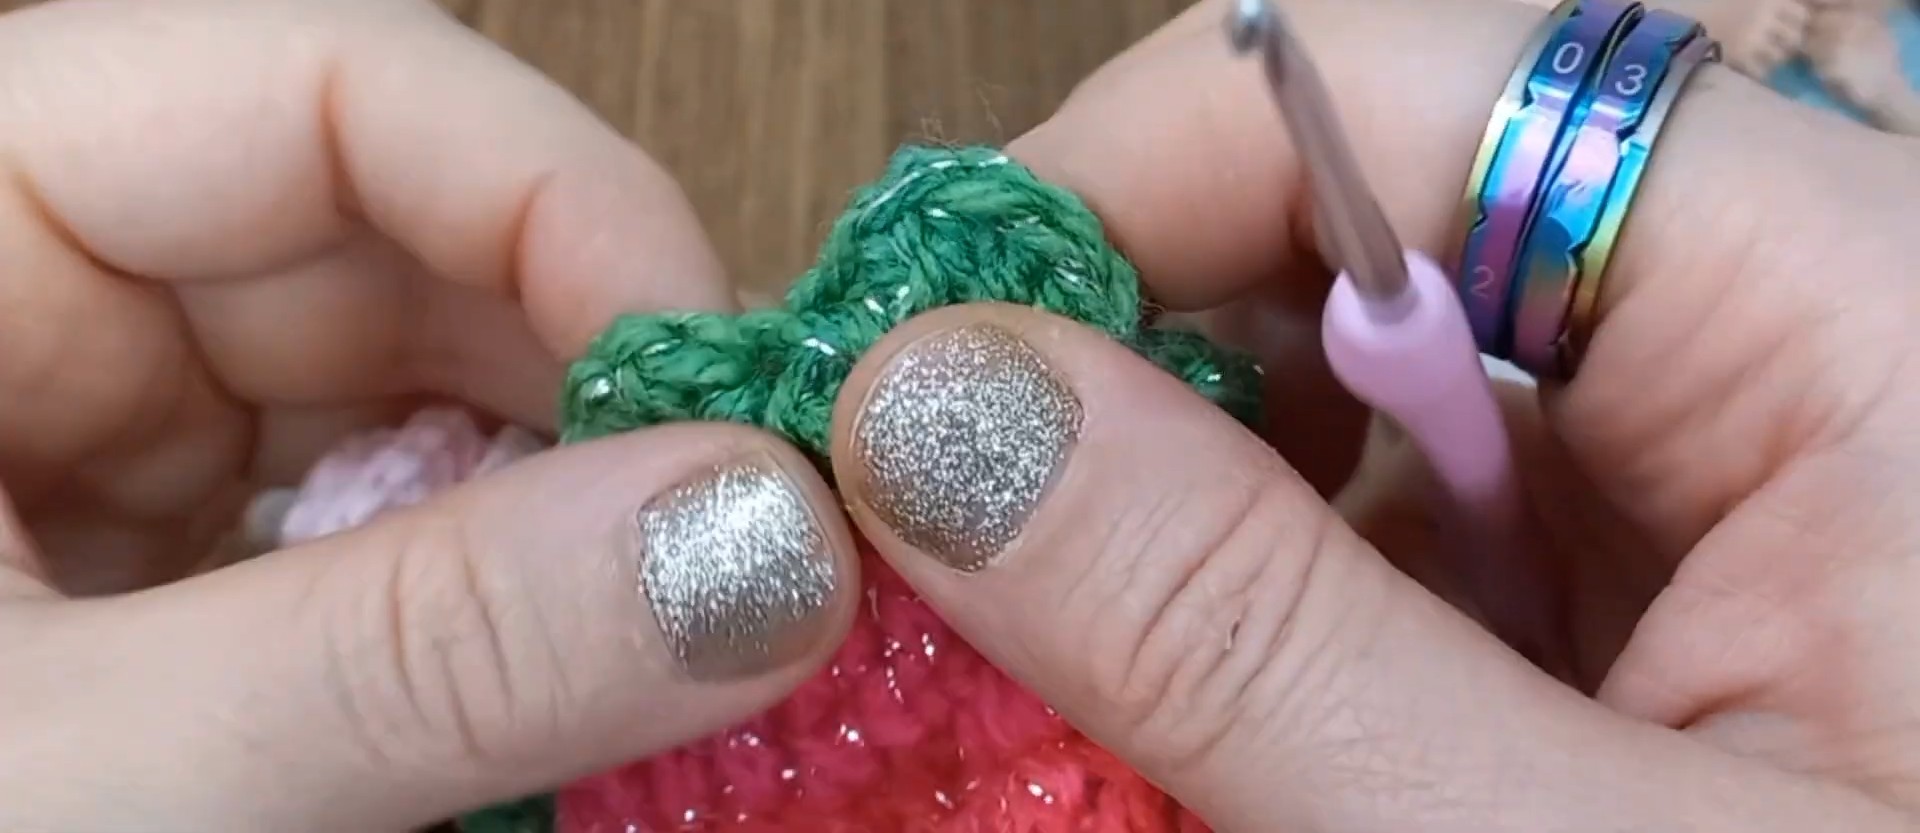
Step 1 (Base Chain): Attach your rose-colored yarn in the space exactly between two leaves (insert your hook through the green stitches at the base). Pull up a loop and ch 23. (Note: Chain more or fewer depending on how large you want your rose).
The ch-23 version is the supplied size, while changing the chain length gives you a way to alter the eventual rose size.
Build the Ruffles
Step 2 (Petals): Work 3 dc into the 4th chain from the hook. Work 3 dc into every remaining chain stitch down the row. (For a ch-23, this will give you 60 dc stitches).
The repeated groups of three dc create the fullness that will later curl into petals. Keep the strip intact as you reach the end; it is meant to be rolled rather than flattened onto the blanket.
Anchor the Strip
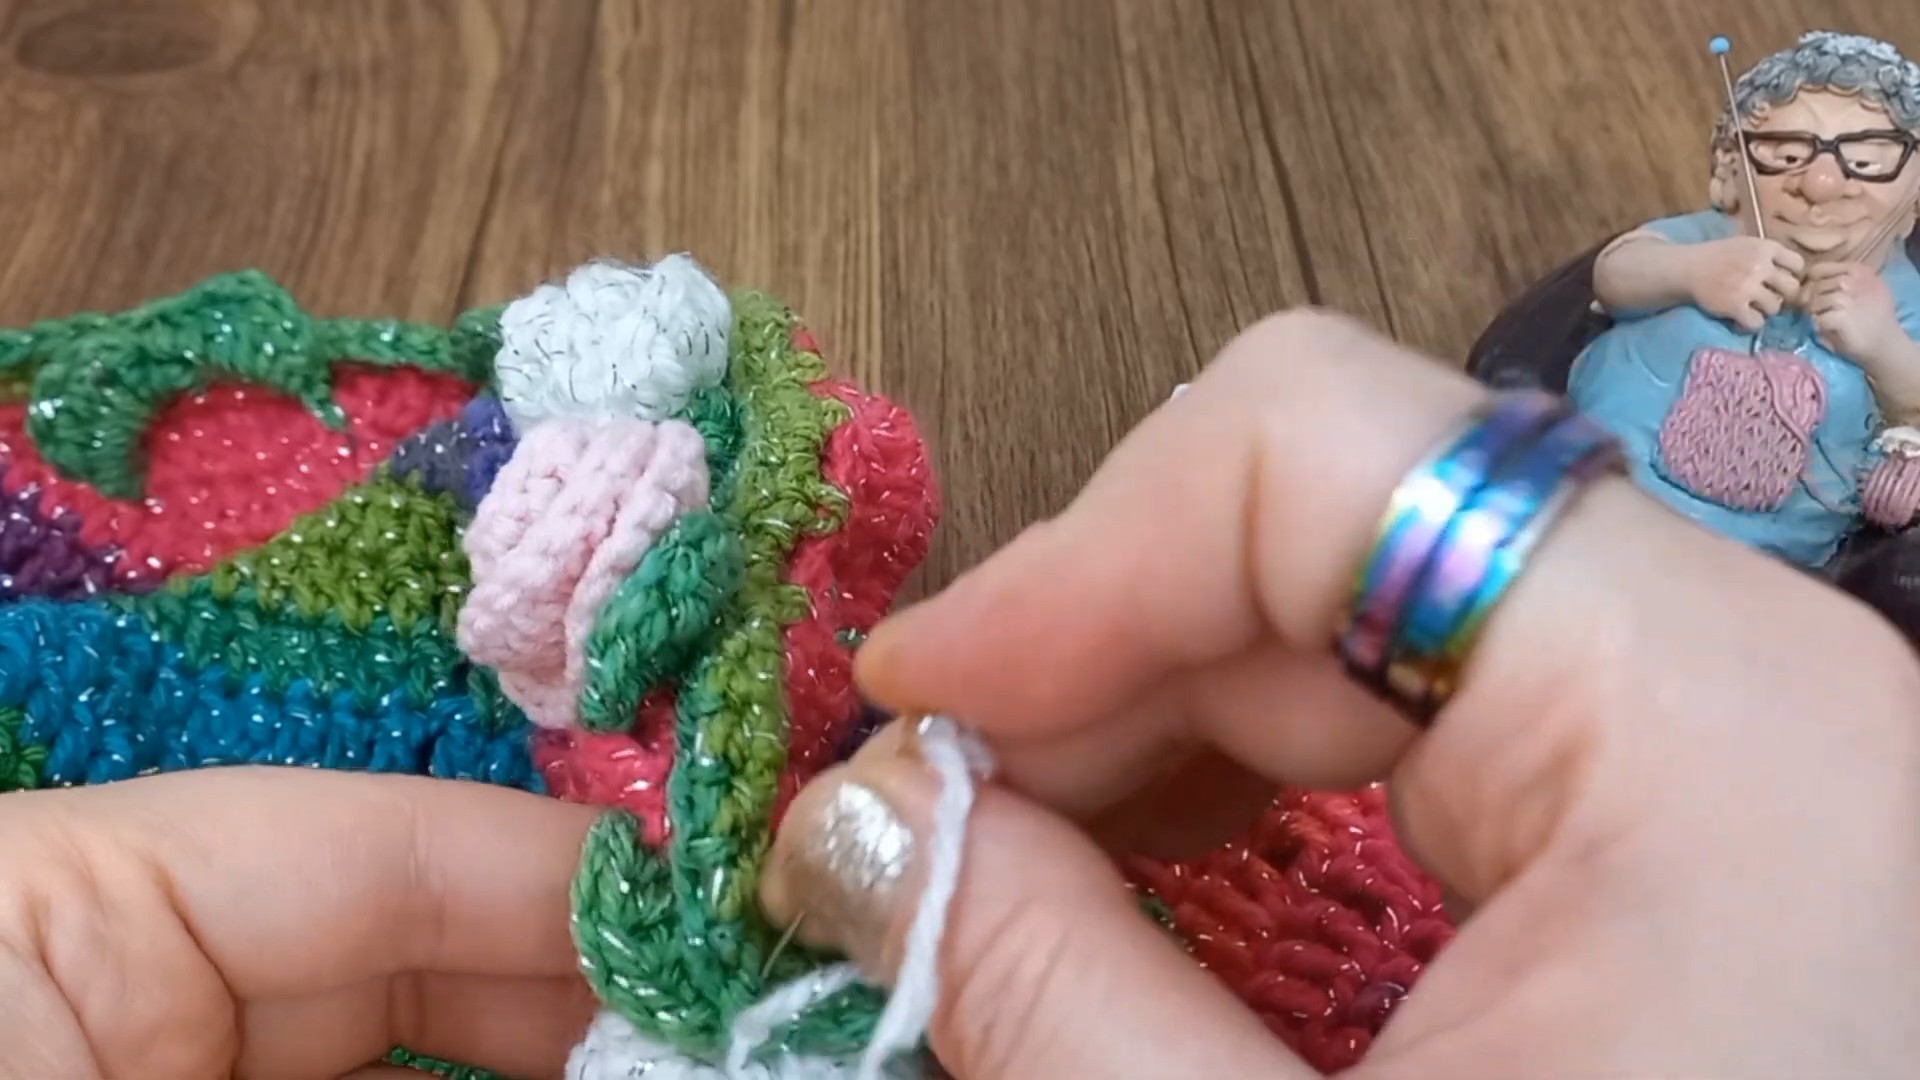
Step 3 (Securing the Strip): Once you reach the bottom of the chain, sl st back into the first chain/base stitch to anchor it to the blanket. Ch 1 and cut the yarn, leaving a long tail for sewing.
Do not cut the tail short. It is needed for the next stage, where the entire ruffled strip is secured into its rose shape.
Roll and Secure the Roses
Take the curled strip and slowly roll it inward into a tight spiral. The sewing determines whether the flower stays together, so the needle needs to travel through all layers, not just the outermost petals.
1. Roll: Take the curled, ruffled strip you just crocheted and slowly roll it up tightly in a spiral to shape it into a rose.
2. Thread: Thread the long yarn tail onto your tapestry needle.
3. Sew & Secure: Insert the needle from the bottom of the rose, making sure to pass completely through all layers and petals, and bring it out through the top center. Push it back down from the center through all layers to the bottom. Repeat this a few times from different angles to ensure the rose is solid and safe.
4. Knot: Tie a tight, secure knot at the base using your starting and ending yarn tails. Cut the excess yarn close to the knot.
5. Repeat: Repeat Part 4 and the assembly steps to create a sewn rose between every single pair of leaves around the entire perimeter of the blanket.
As you secure each flower, check its position before tightening the final stitches. The rose should occupy the space between the two leaves, allowing the raised green foliage to remain visible around it.
Once all the roses are attached, weave in any remaining loose ends securely between the stitches. Your round blanket now has its complete 3D rose bouquet border.



One Comment