Easy 4 Square Baby Blanket Pattern With Knitting Tips
The “4 Square Baby Blanket Pattern” tutorial, hosted by Shelly from Koala Knits and Knacks, introduces a timeless and versatile design perfect for crafting a charming gift for little ones. This easy-to-follow project uses modular knitting techniques to create a blanket that’s customizable in size and color choices, allowing you to tailor it to your preferences. Its visually striking appearance and practical approach ensure an enjoyable experience, even for less experienced crafters seeking meaningful projects.
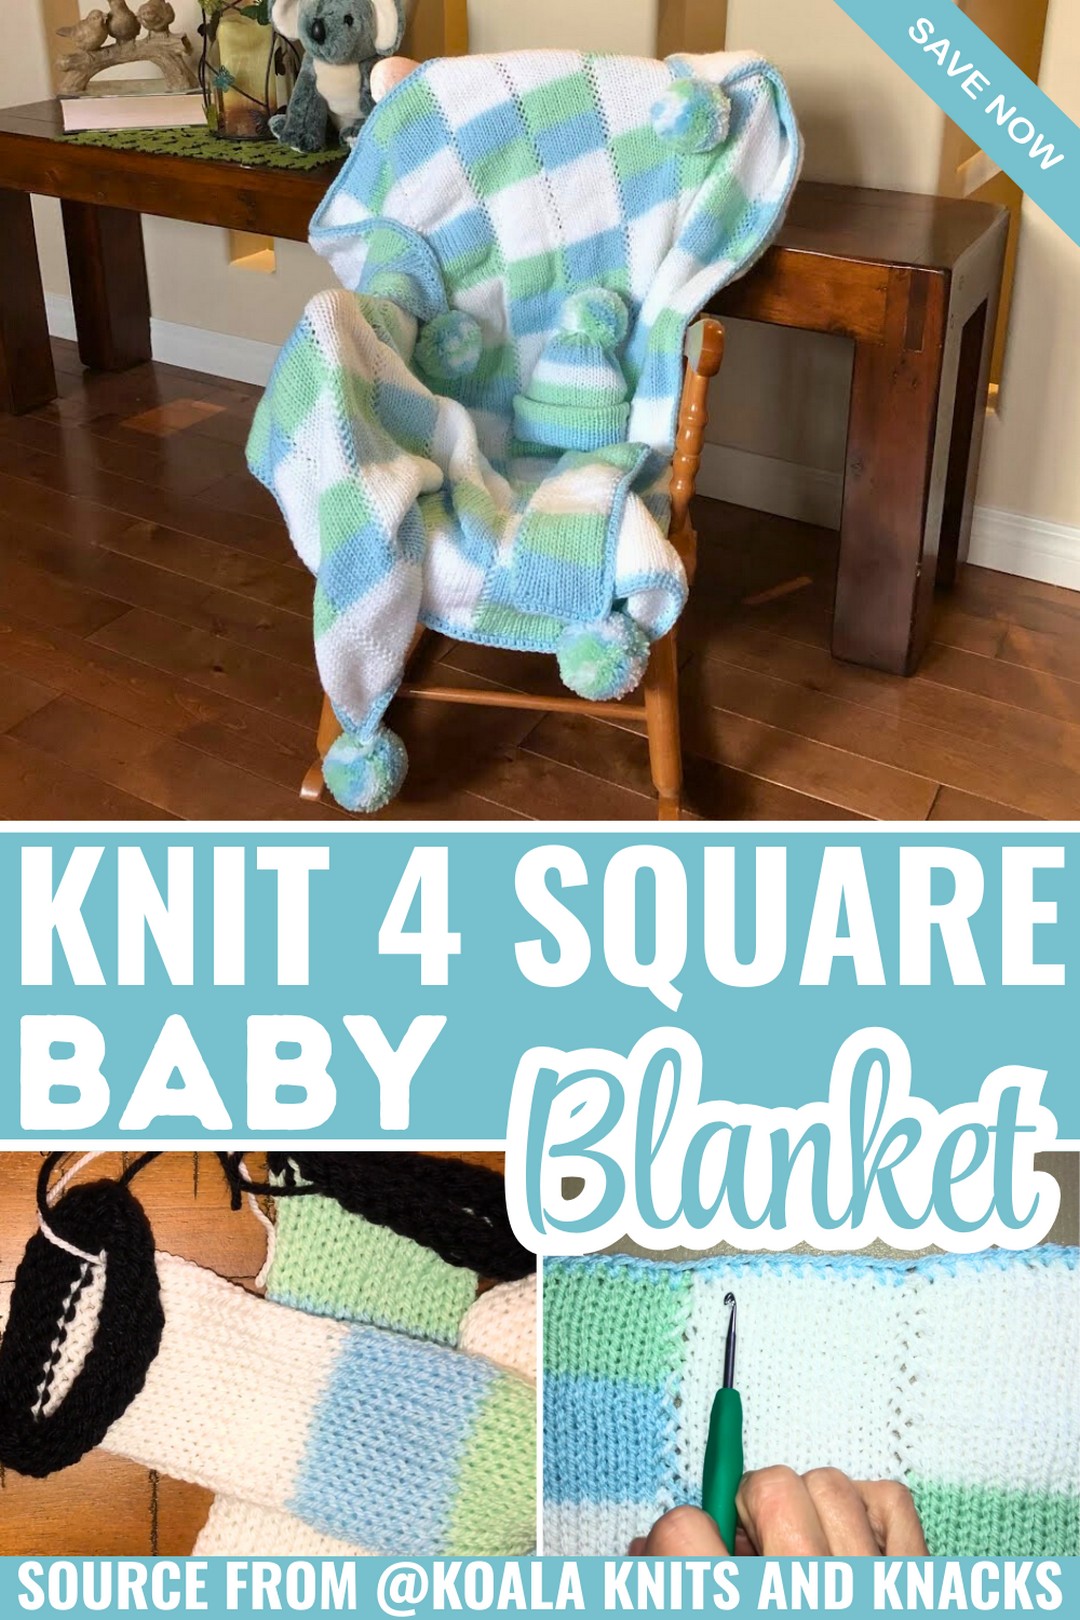
A standout feature of this tutorial is Shelly’s creative process, from the design she sketched in her graph book to the seamless combination of colors and textures that yield stunning results. The blanket tutorial explains how to rotate between blue, green, and white panels and highlights clever techniques, such as the braided join, for connecting pieces with professional polish. Shelly’s use of waste yarn and clear explanations helps keep the process smooth, making the blanket both functional and beautiful.
- Yarn Tip: While the original yarn is no longer available, Shelly recommends versatile substitutes in 3 or 4-weight yarns for the best results.
- Joining Technique: Learn how to apply the braided join for seamless edges, adding softness and elegance to the finished blanket.
Credit Koala Knits and Knacks
Step-by-Step Pattern
Materials
To make the 4 Square Baby Blanket, you’ll need the following materials:
- Yarn: Loops & Threads Baby Delight. Substitutes can include any 3-weight or 4-weight yarn, such as Lion Brand Mandala Yarn or a worsted-weight yarn if you prefer a larger, thicker blanket.
- Knitting Machine: Addi 22 knitting machine or Centro 22. Choose your preference.
- Waste Yarn: Contrasting-color yarn for the waste yarn setup.
- Crochet Hook: 4.5 mm hook for finishing edges and crochet border.
- Tapestry Needle: For weaving in ends and sewing panels together.
- Scissors: For cutting yarn.
- Permanent Black Marker: To mark your knitting machine’s starting position for cleaner rows.
- Stitch Markers/Bobby Pins: To help manage alignment during assembly.
Stitch Guide
Basic Techniques Used
Long Tail Cast-On:
A simple method for starting rows using waste yarn, as described in the tutorial (hook the yarn behind and in front of each needle before cranking).
Knitting with the Addi/Centro Machine:
Each crank of the machine forms a loop, allowing knit rounds to be created quickly.
Crochet Finish Techniques:
- Single Crochet: Insert your hook, yarn over, pull through the stitch, then yarn over and pull through both loops on the hook.
- Half Double Crochet: Yarn over, insert the hook into the stitch, pull up a loop (3 loops on hook), yarn over, and pull through all three loops.

Notes & Helpful Tips
- Custom Sizes: This blanket is easily customizable; adjust the number of panels or rows to change the size. You can use a 3-weight yarn for a lighter blanket or a 4-weight yarn for a warmer, chunkier version. A worsted-weight yarn will result in slightly larger panels.
- Gauge and Length: If using a different yarn weight, your blanket dimensions may vary. For reference:
- Using 3-weight yarn with this pattern creates a finished blanket of ~37×37 inches.
- Using 4-weight yarn will likely create a blanket closer to 40×40 inches.
- Prevent Yarn Unraveling: When starting and ending panels, leave at least 12 inches of tail yarn. These tails will help secure the edges and assist in assembling the panels.
- Organization: Lay your completed panels out on a bed or flat surface in the correct order before stitching. Flip and rotate panels as necessary to ensure the checkerboard pattern aligns properly.
Pattern Instructions
Follow these steps to recreate the Four Square Baby Blanket. You’ll make 12 panels total (6 panels of pattern 1 and 6 panels of pattern 2), which will later be stitched together into a checkerboard pattern.
Step 1: Panel 1 Instructions
- Set up your knitting machine:
- Place the last white needle and first black needle in line with the yarn guide.
- Mark the divider between these needles with a permanent marker for tracking.
- Cast on waste yarn:
- Hook your waste yarn behind the first black needle and alternate between “behind” and “in front” of each needle until the last white needle is reached. Crank 7-8 rows of waste yarn.
- Start your main color sequence:
- Insert the first yarn color (e.g., blue) into the yarn guide. Crank 10 rows, keeping tension consistent by pulling slightly on both ends.
- Switch to your second color (e.g., green) and crank 10 rows.
- Switch to your third color (e.g., white) and crank 20 rows.
- Complete the sequence:
- Repeat, alternating 10 rows of the second and first colors (green, then blue), and end with 20 rows of white. This completes your first panel.
- Finish off with waste yarn:
- Add waste yarn and crank seven rows. Remove the panel from the machine.

Step 2: Panel 2 Instructions
Panel 2 will follow the same pattern but begin with the second color (e.g., green).
Sequence for Panel 2:
- Start with green (10 rows).
- Blue (10 rows).
- Solid white (20 rows).
- Blue (10 rows).
- Green (10 rows).
- Solid white (20 rows).
Repeat until all 200 rows are completed, finishing with waste yarn as in Step 1.
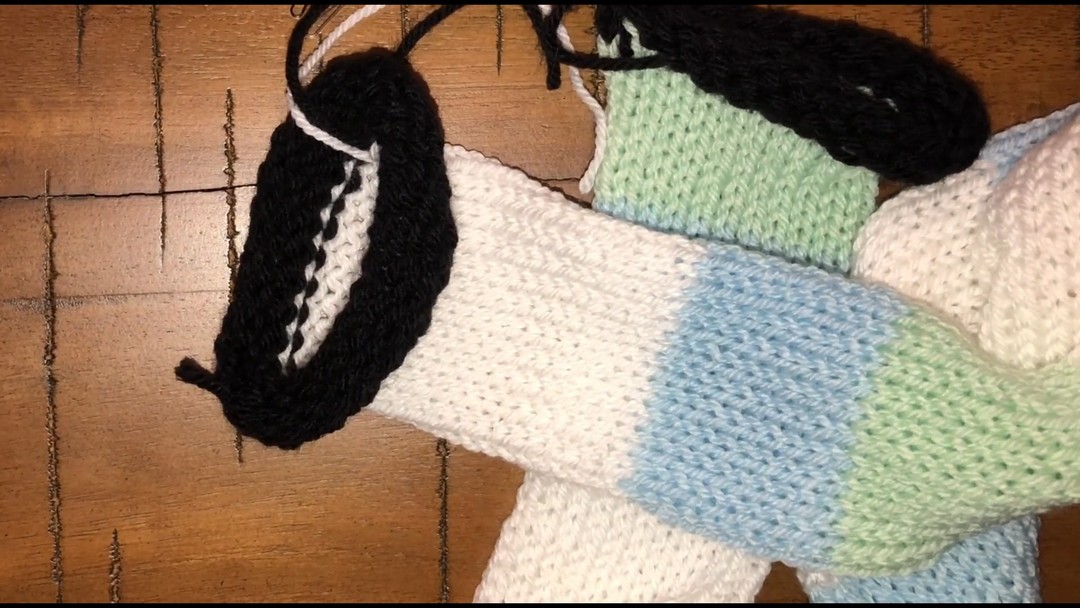
Step 3: Assemble Your Panels
- Prepare your layout:
- Lay out panels flat in three rows—rotate panels to form a checkerboard pattern (Panel 1, Panel 2, Panel 1, etc.). Ensure seams and colors align correctly.
- Use the braided join:
- Place the edges of two panels together, ensuring the wide part of the “V” stitches face the same side.
- Insert your hook into the bars of corresponding stitches on both panels. Yarn over and pull through; repeat this process to join the edges neatly. Align color changes carefully for consistent rows.
- Finish ends:
- Tie off the ends securely and weave them in with a tapestry needle. Make sure every corner is adequately joined for a smooth transition between panels.

Step 4: Add Crochet Border
- First row—single crochet:
- Using a crochet hook and border yarn color (e.g., blue), join yarn to any corner.
- Work single crochets along all edges, going into every second stitch along sides and every stitch along top/bottom rows.
- In corner spaces, work one single crochet, chain 1, and another single crochet.
- Second row—half double crochet:
- Chain 1, then begin half-double crochets into each stitch around.
- At corners, work five half-double crochets into the chain space for rounded edges.
- Finish off:
- After completing the second row, slip stitch into the first stitch to join. Cut yarn and weave in ends.
Finished Blanket
Congratulations! Your 4 Square Baby Blanket is complete. The final dimensions will vary based on yarn weight and tension. This timeless pattern makes a versatile gift, perfect for babies and toddlers, and can be adapted to larger throw blankets with more panels.

Pattern Question
Q: Can I use a different weight or type of yarn for this blanket?
A: Absolutely! While the original project uses a three-weight yarn, you can use a four-weight yarn for a larger blanket. Adjust the panel counts as needed to achieve the desired size.